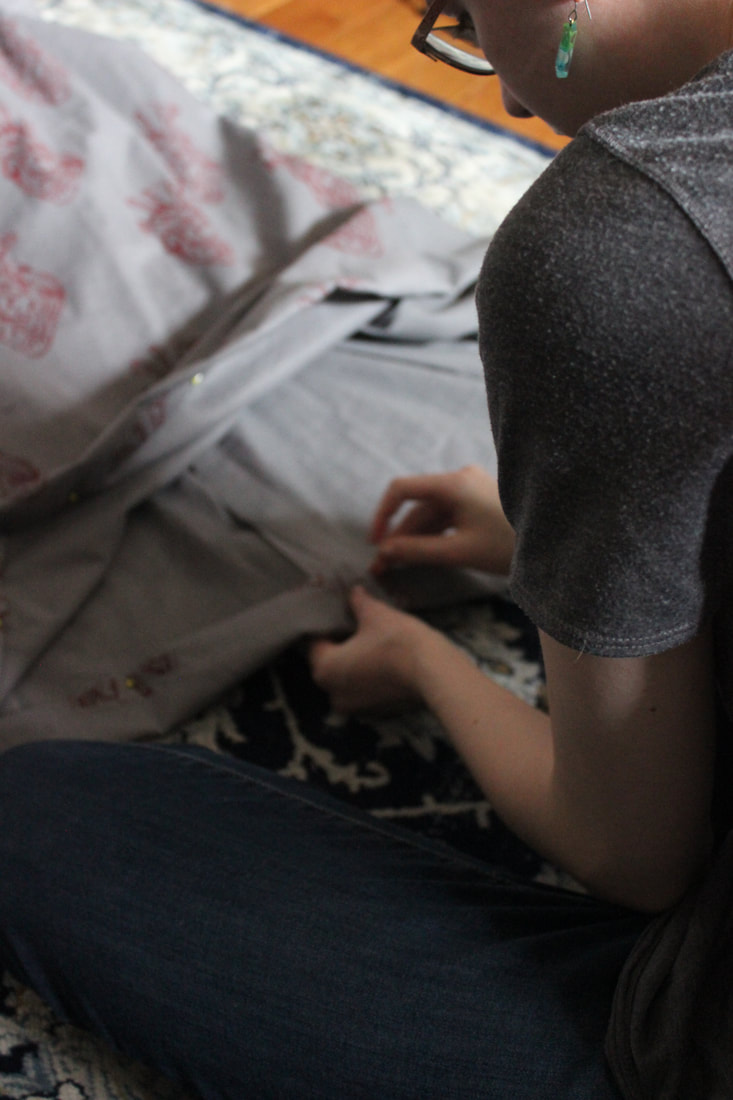
 I just had a very exciting opportunity, and I will tell you all about it as soon as I can! But for now, here are a few photos of me working on my bustle dress- this was just when I was hemming it a few days ago. All that is left now are button holes, although that project has been put to the side for a few days. I will get back to it very soon, and I do have a location for photos now, which is very exciting! 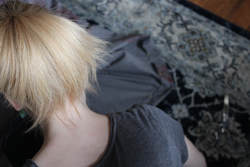 Also, if you haven't noticed already, I added another page to my website! I added a Self Care section, which is another blog page. Since I have been doing so much training about cosmetics and skin care with my job, I thought that I would share another one of my passions with you, and some of the information that you may not be hearing from others. I also have an instagram for the self care side of my interests, and you can see that here if you are interested. 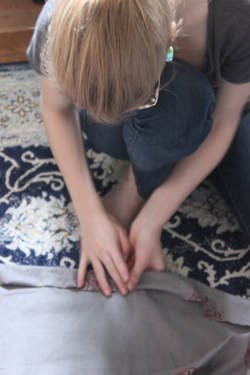 I also have some more exciting news that I found out a week or so ago- I got accepted into Olds College for Costume Cutting and Construction, starting next fall.
I can't wait for all of these new opportunities, and I am very excited for when I am able to show you what I have been working on this week! ~K
0 Comments
I have been hard at work on my bustle dress lately, I promise! Instead of taking more photos of each stage of the process, I have been filming it so I haven't had much progress to post online. 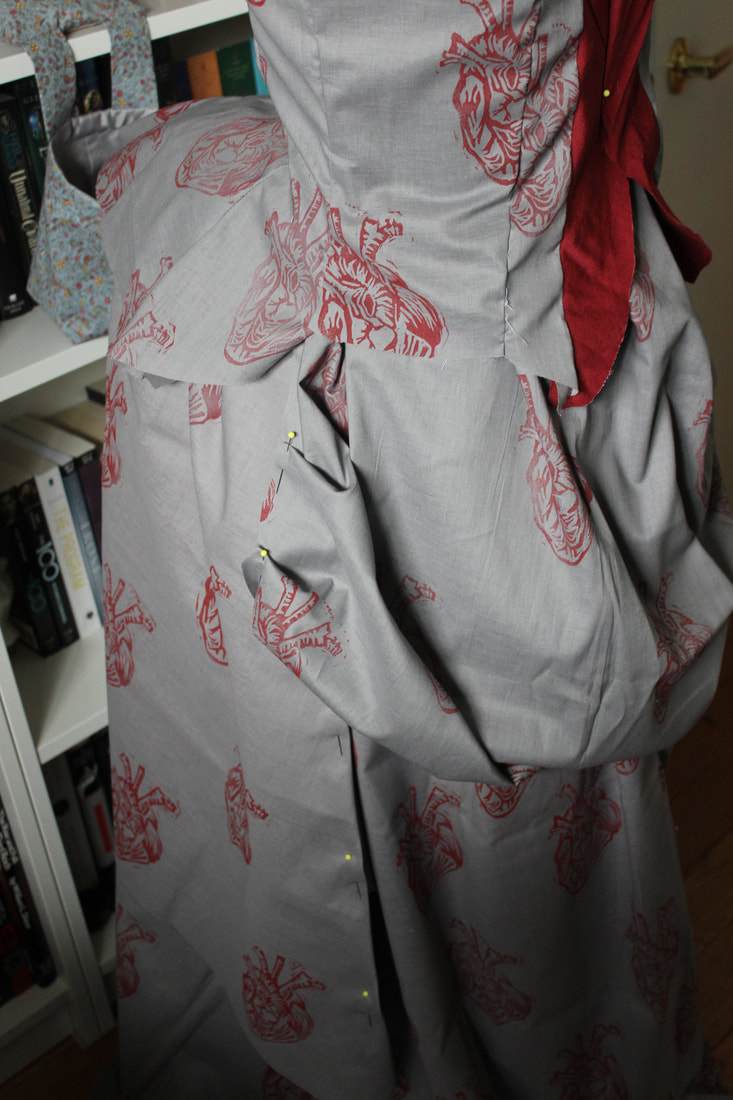 I am hoping to finish this gown in September, however I do have a pretty busy schedule at the moment, and it has been difficult to balance work, drivers ed, and my sewing. However, I still have made quite a bit of progress, so there is a slim chance that I will finish it this month! Fingers crossed... 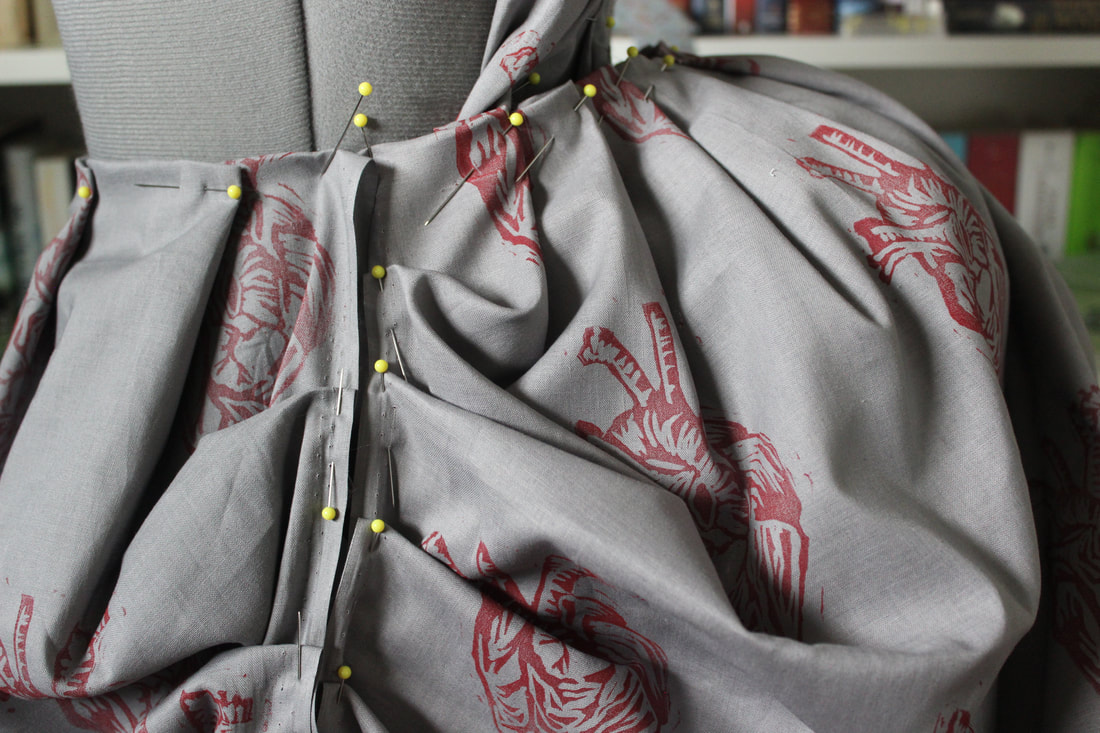 I also have a talk at a school next week about Cosplay. I am not a cosplayer, as my costumes are my own designs, but since they are inspired often by movies and such, it is a good fit! I am very excited to share some tips for making more unusual garments and for starting sewing. 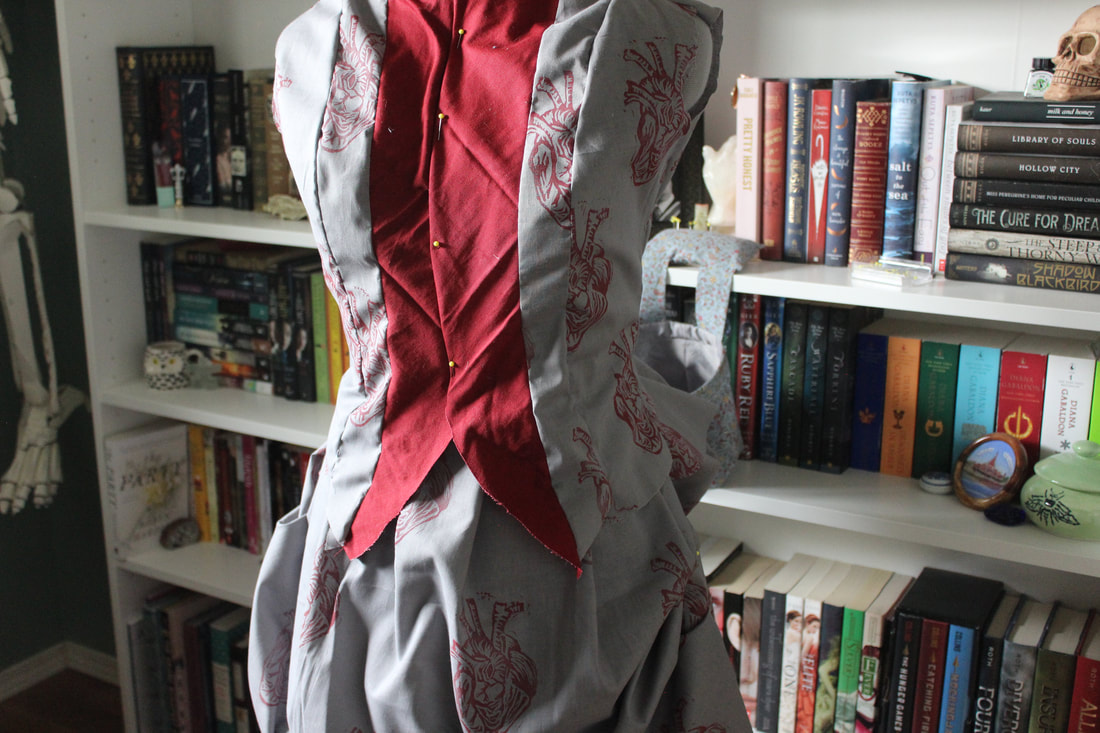 For my bustle gown, I so far am very close to finishing the bodice, and I have draped the skirt and apron. The apron is just the draped part at the front and back of the dress that is the trademark of the 1880s. 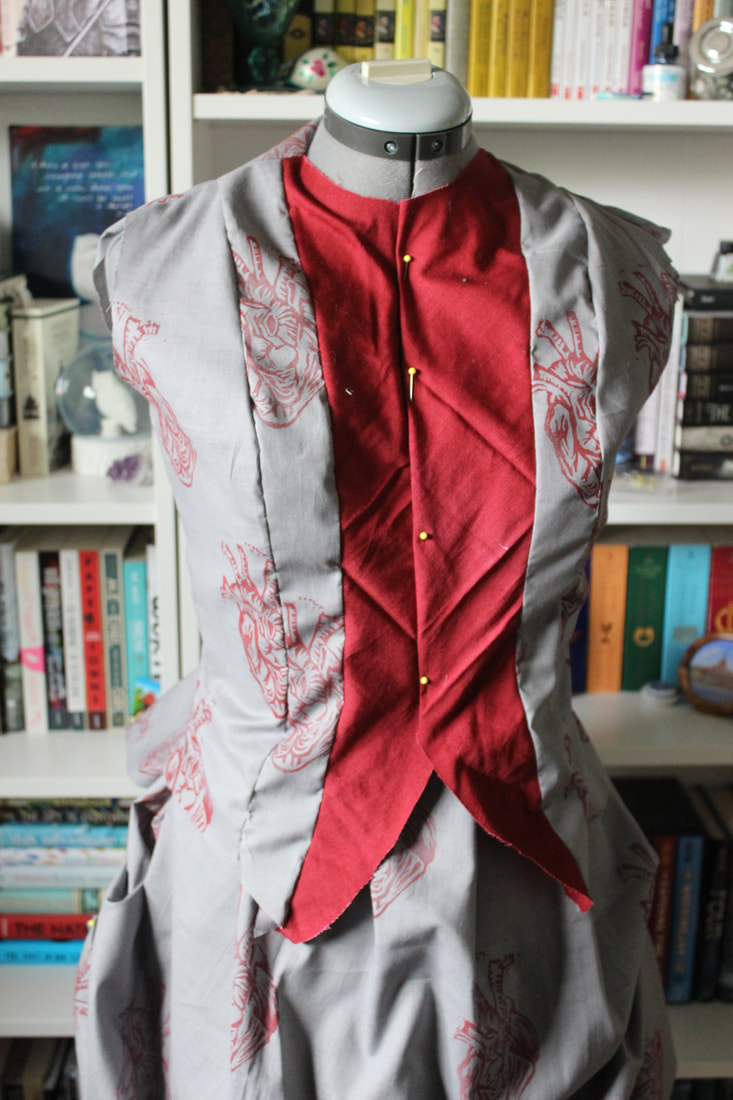 All I have left to do for the bodice is put some boning in the lower half to keep the bodice as wrinkle free as possible, and to put on the sleeves. For the skirts I need to sew the sides and add the waistband. Other than that, I just have a few other things to do to finish of the ensemble! ~K
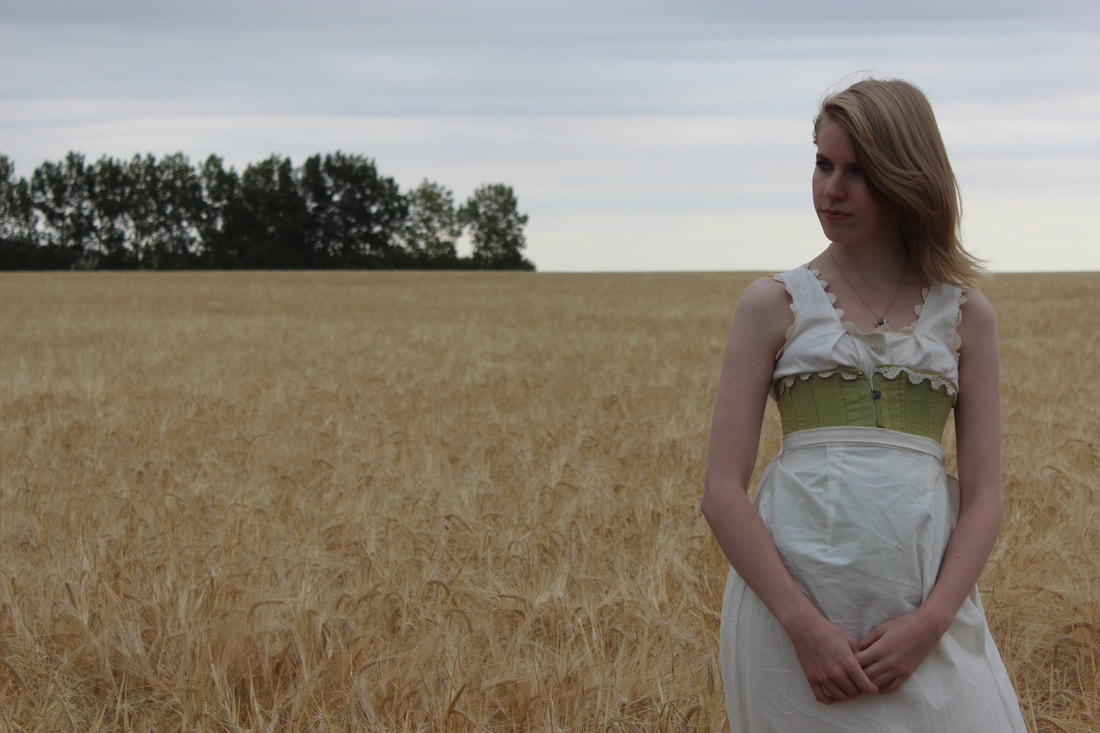 I finished the undergarments for my bustle era dress, so now I can start the main dress! Before that, I went out and took some photos of the undergarments, which include the combinations, corset, a bum-pad, and a petticoat. 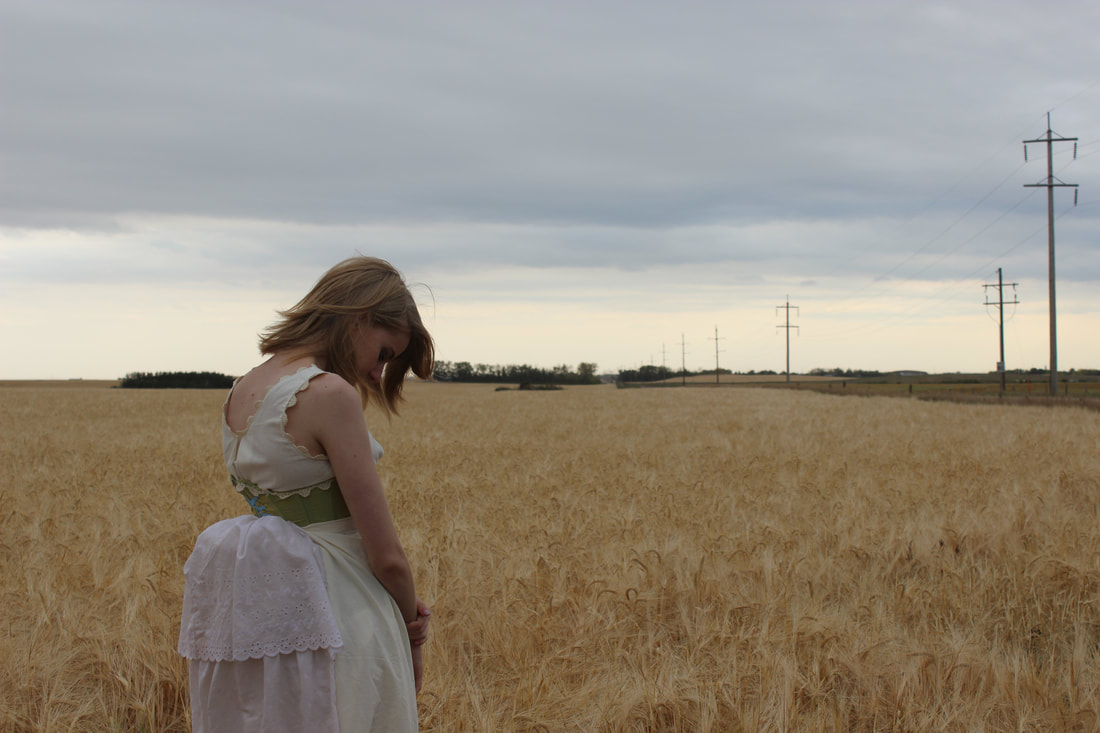 The bum-pad goes up more than out unfortunately, but I think it will look nicer once the dress weighs it down a bit. It is made of two stuffed crescent shapes, one smaller one stacked on top of a larger one. I made sure that it didn't go past my hips, since the style of the era is all volume in the back with none in the front and side. 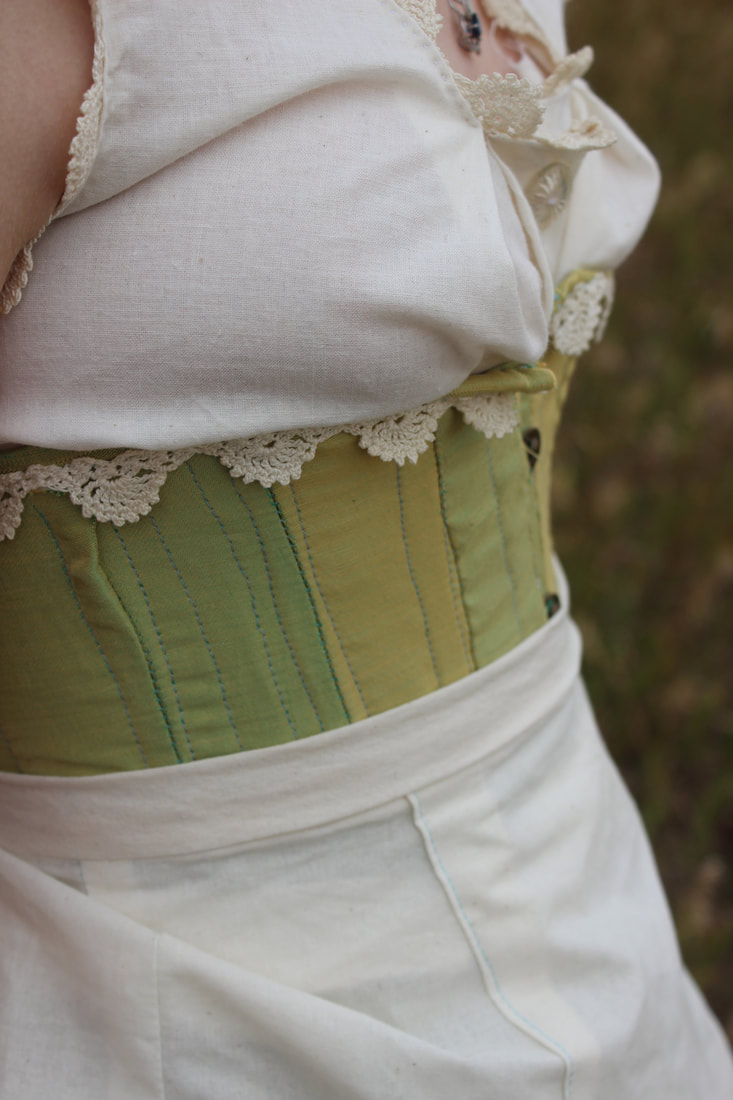 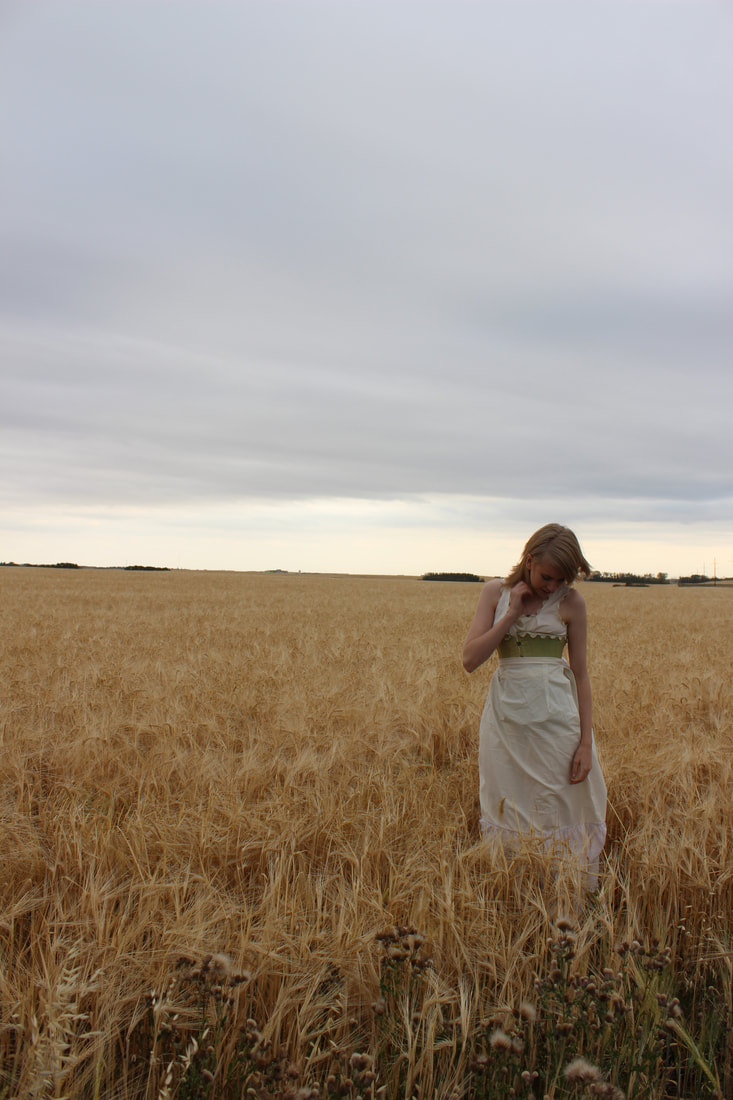 On top of the bum-pad is the petticoat. It is made of muslin (like all of the other parts, other than the corset) and eyelet lace. The lace is from an old dust ruffle that we had. I cut the lace off of the dust ruffle and tea-stained it to match the fabric as much as it could. 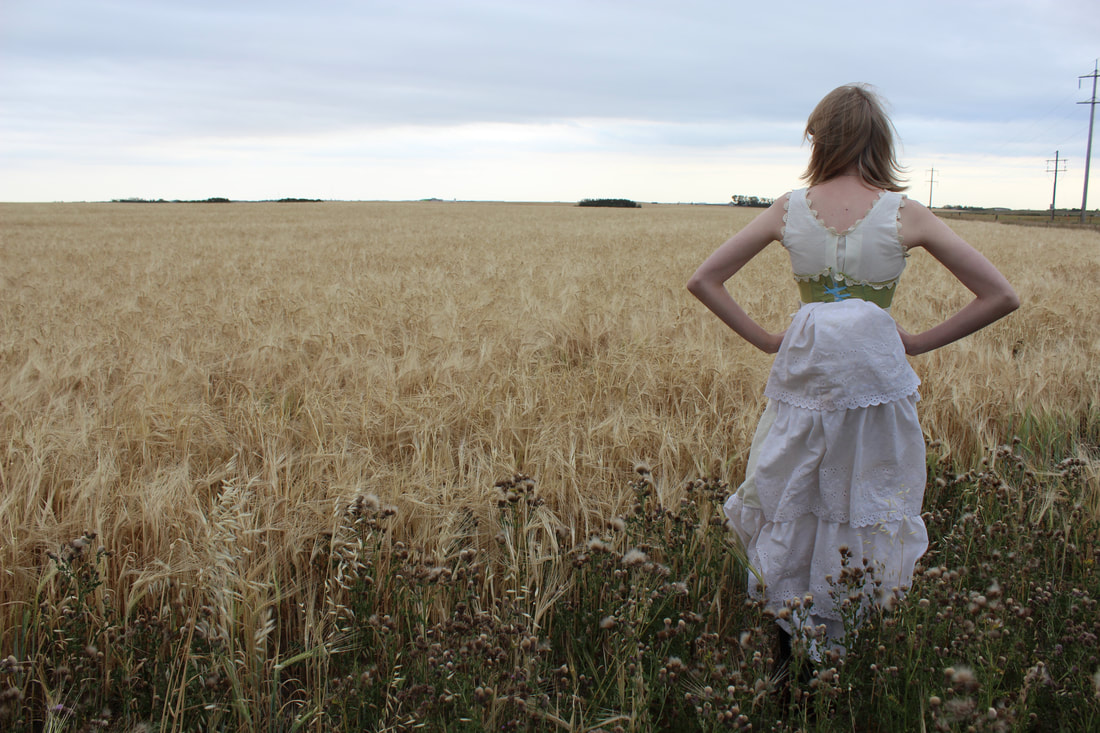 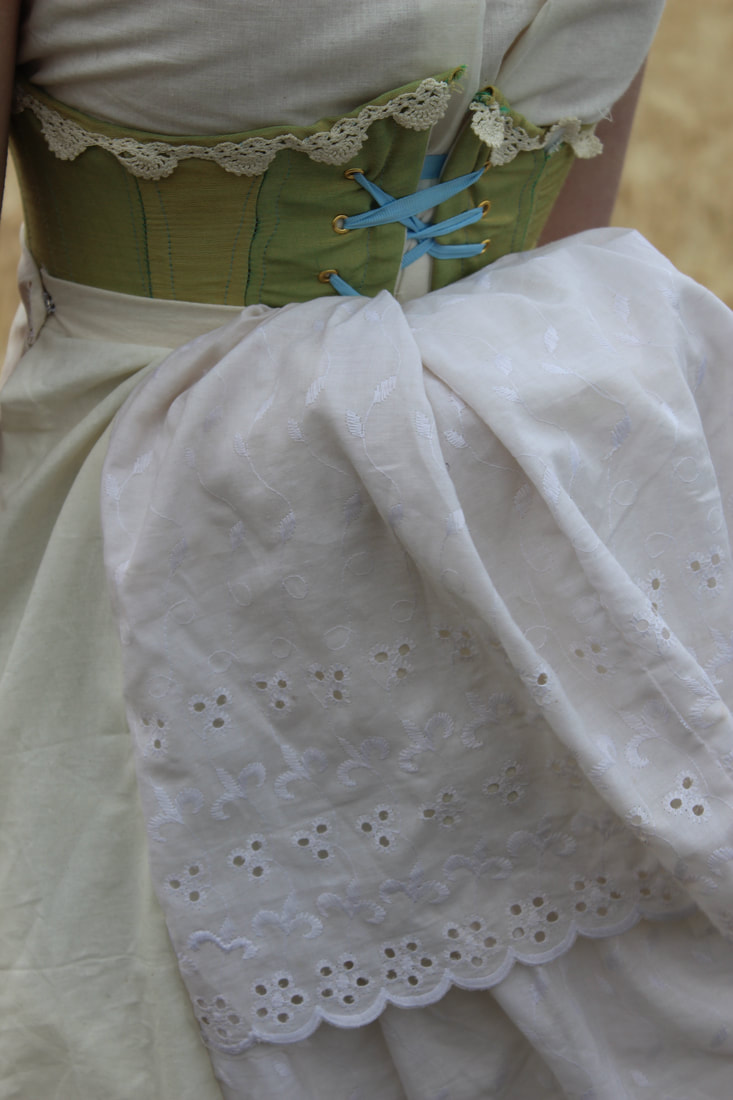 The shoes that I am wearing with this are, as always, from DSign Step, a Canadian company. I also wore a pair of knee-high black stockings to finish off the ensemble. 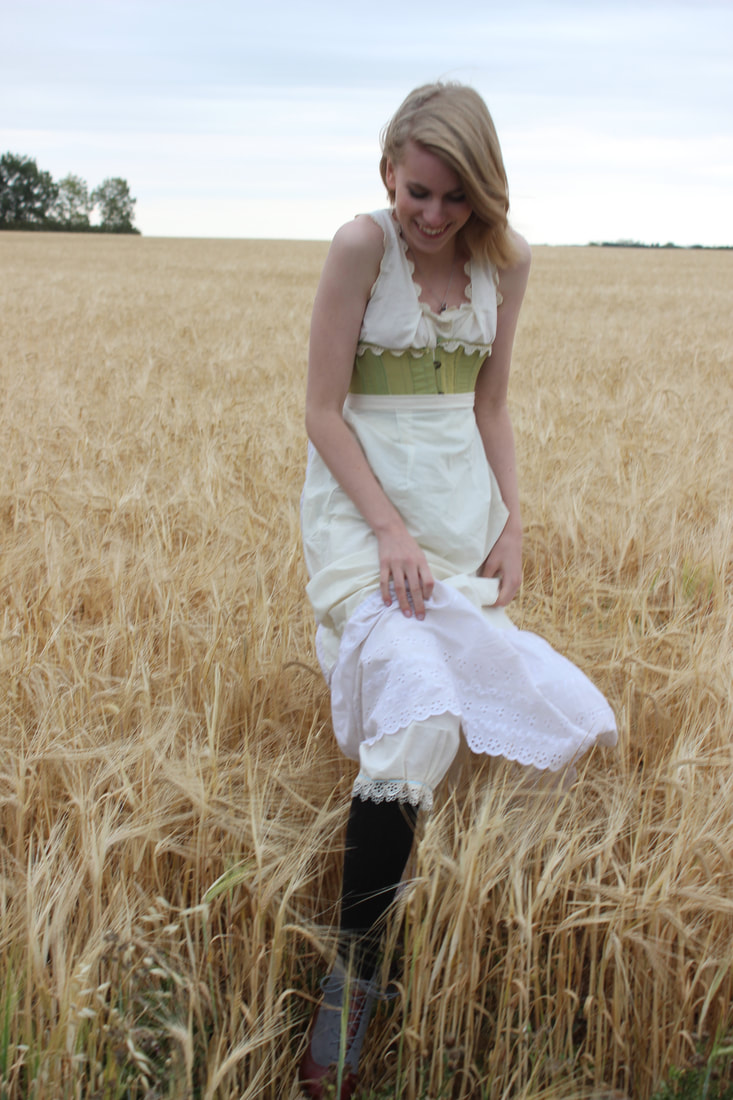 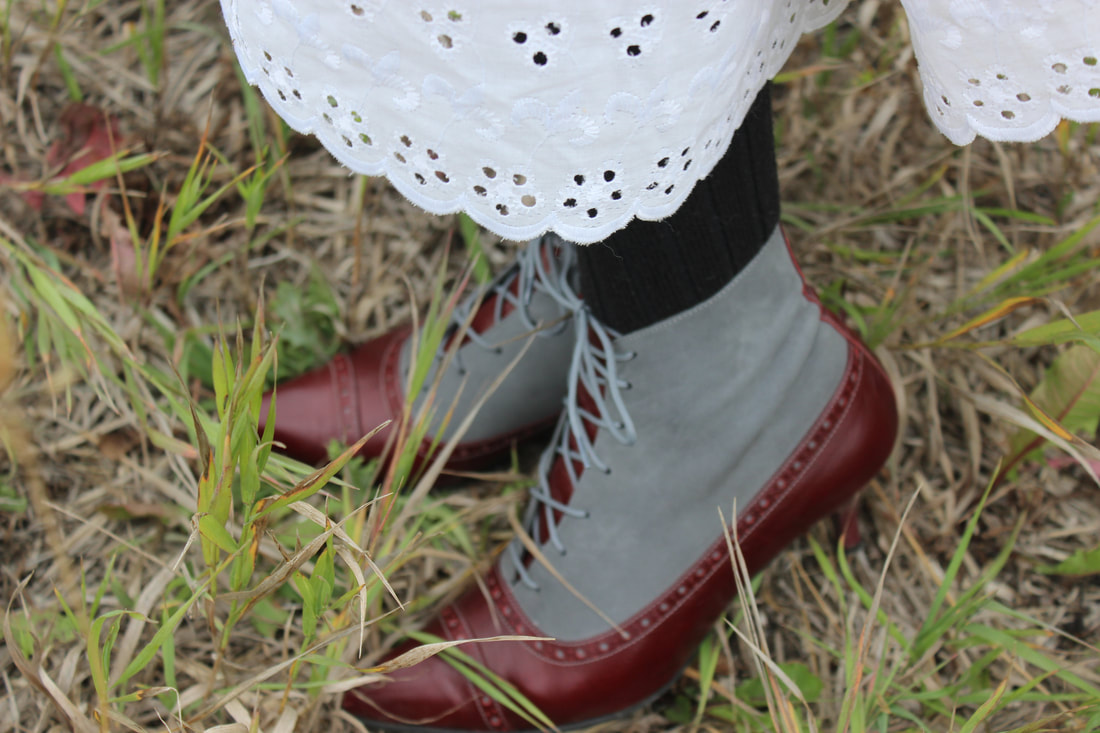 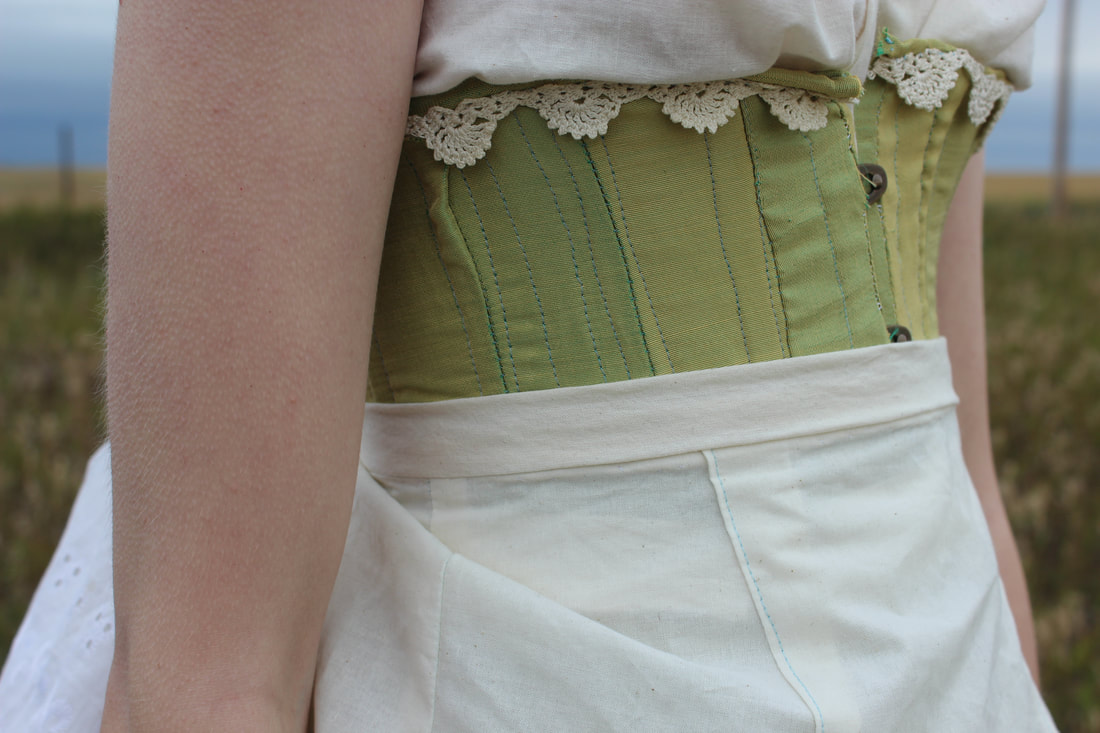 Here are a few photos of it on my dress form, when I was still working on the petticoat. 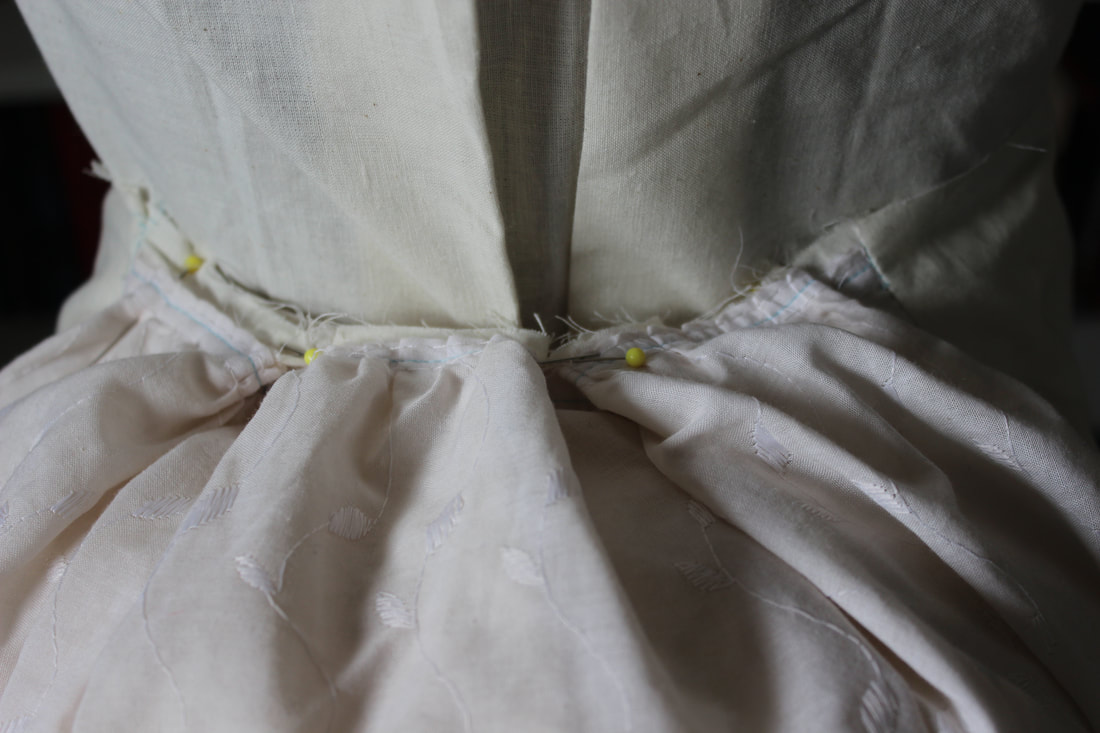 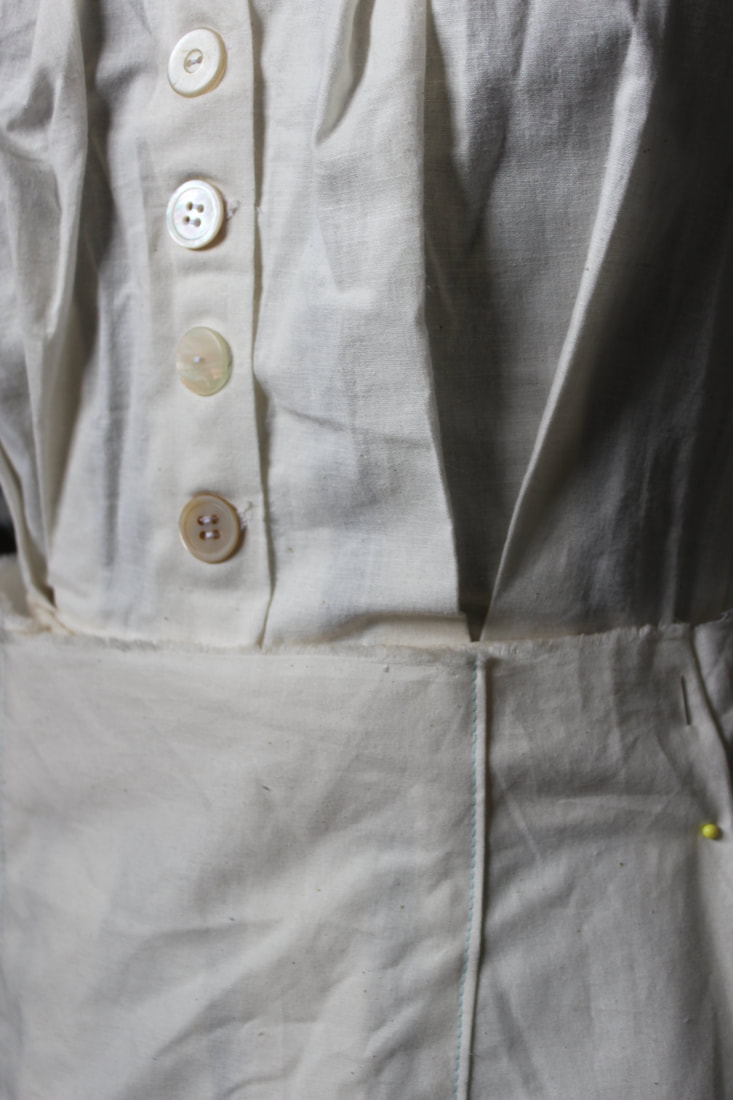 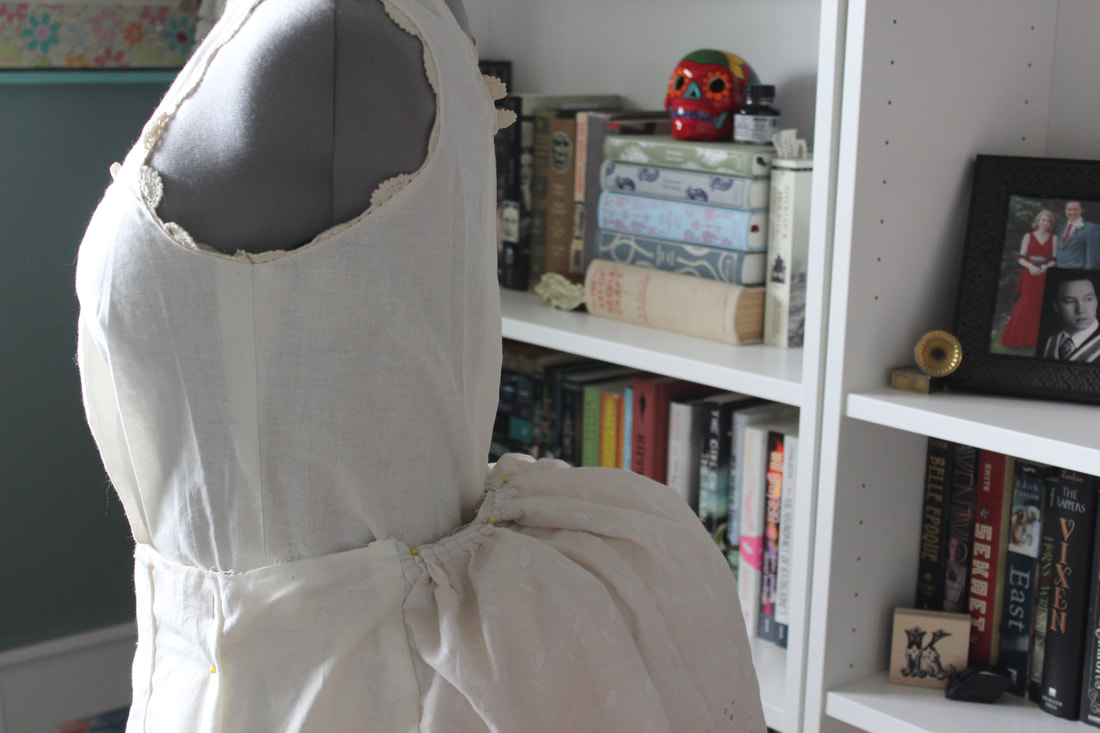 I can't wait to get started on the dress now! ~K 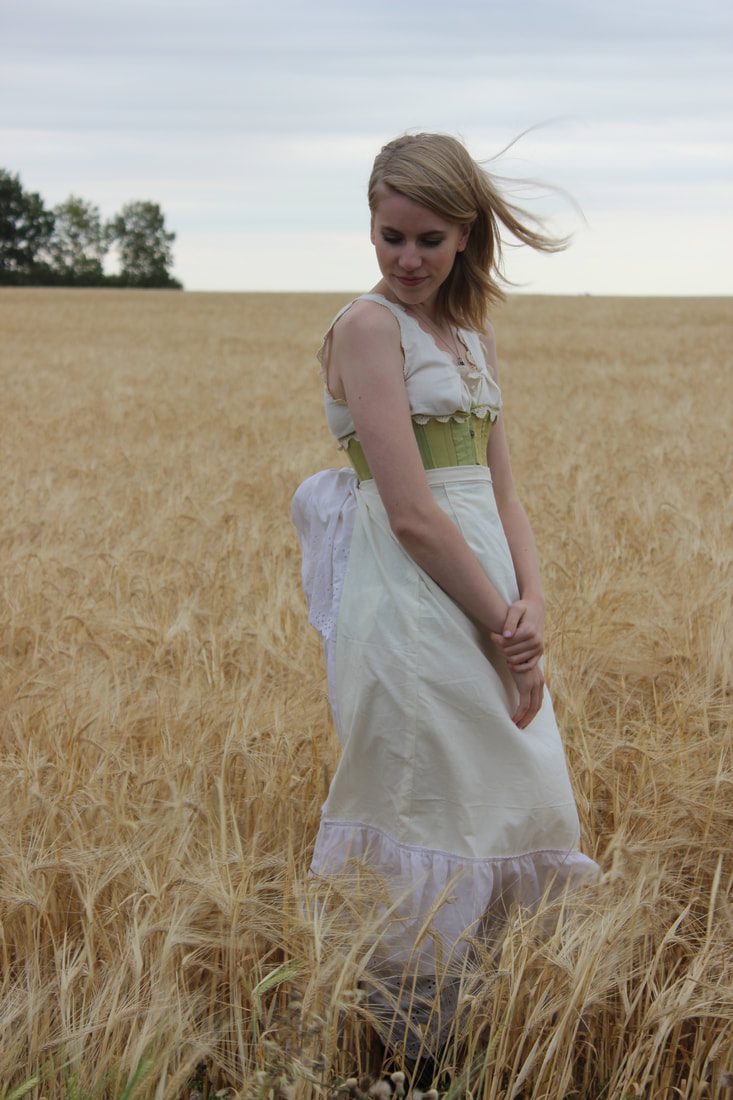 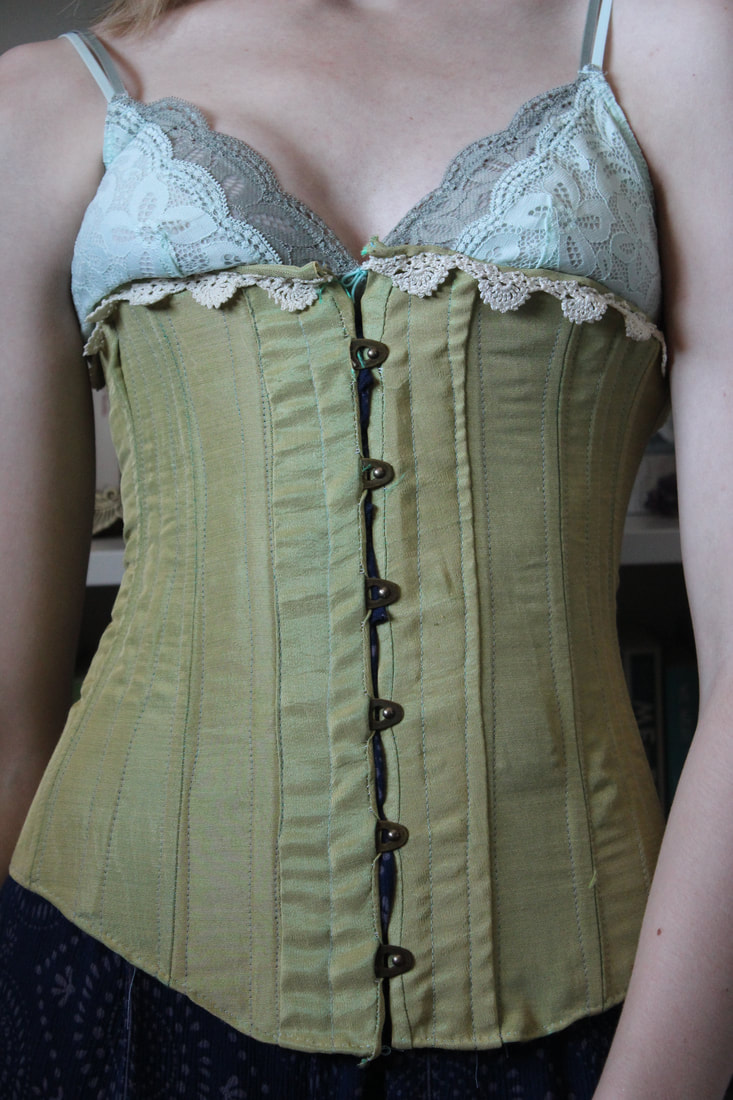 I am so thrilled because I have finished a second piece to the puzzle that is my bustle-era dress! I have been working on each section of the ensemble from closest to the skin to the outer layer- first were my combinations, now the corset, and I am currently working on the bustle and petticoat. 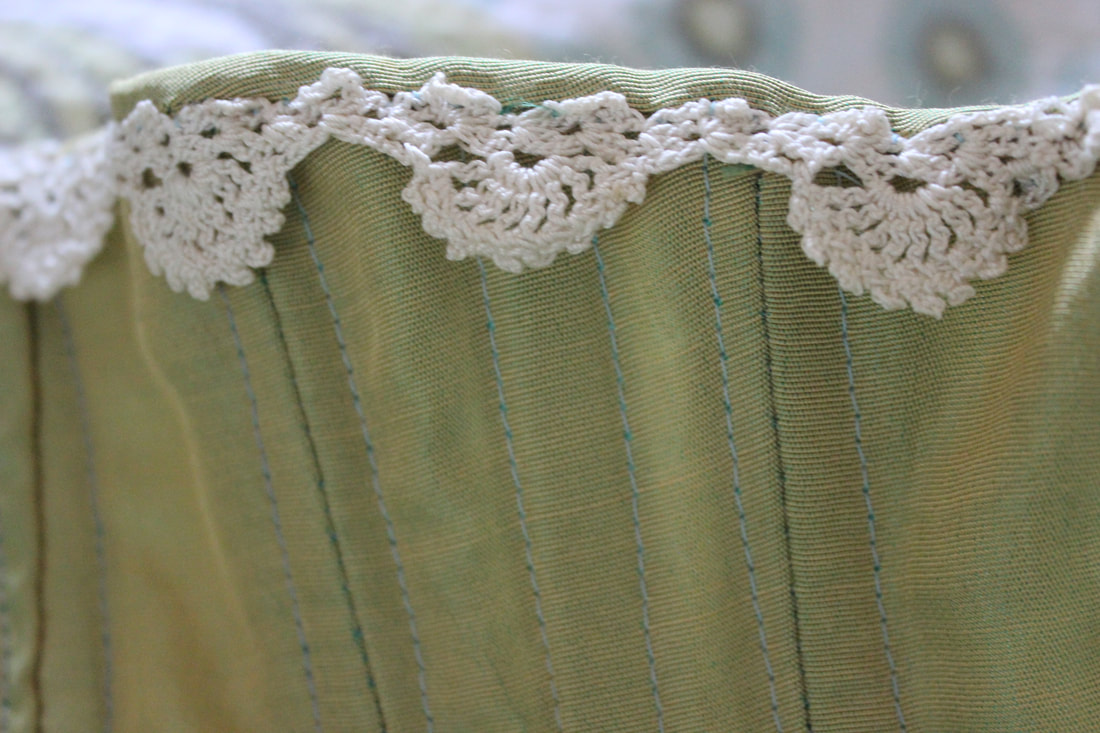 The corset was made entirely of scrap fabric. I was gifted the fabric that I used as the outer layer, and I thought it was stunning! Unfortunately there wasn't very much of it, but there was the perfect amount for this corset. The lace that I used is the same vintage lace that I used at the neckline of my combinations. 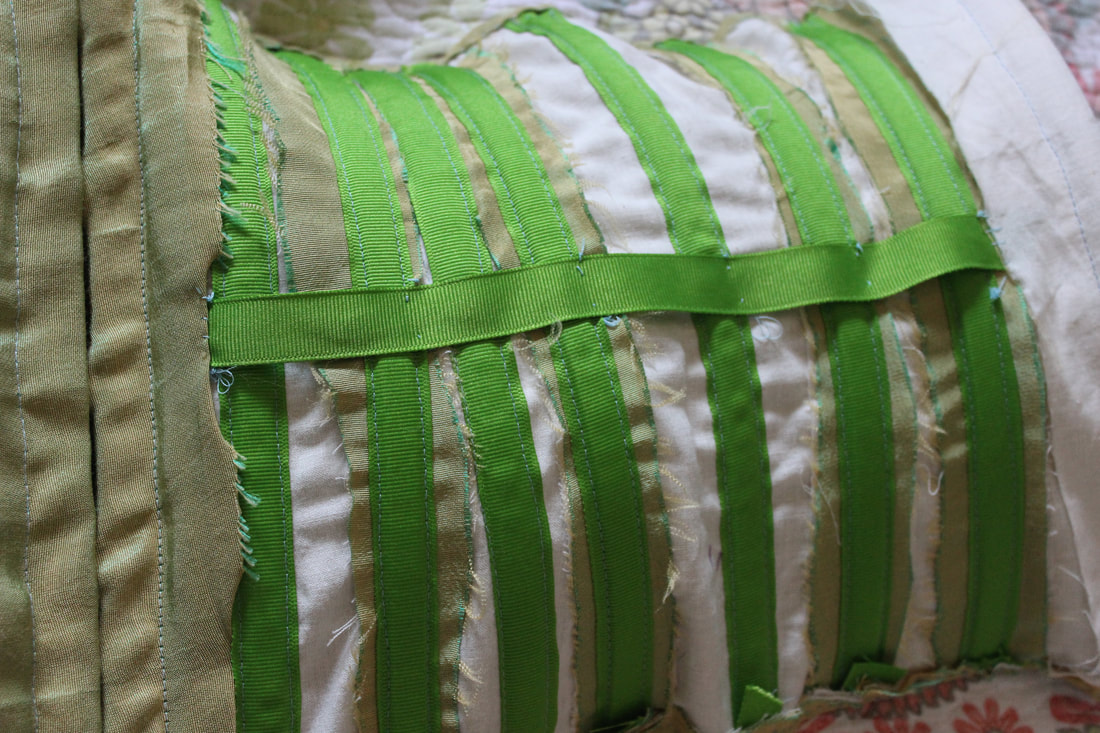 This is fully boned with heavy-duty cable ties, and I used grosgrain ribbon for the boning channels. I also used the same grosgrain ribbon as a waist stay, which is basically just a strip of tightly woven fabric that goes at the place with the most stress- the waist. It keeps the corset from stretching out too much. 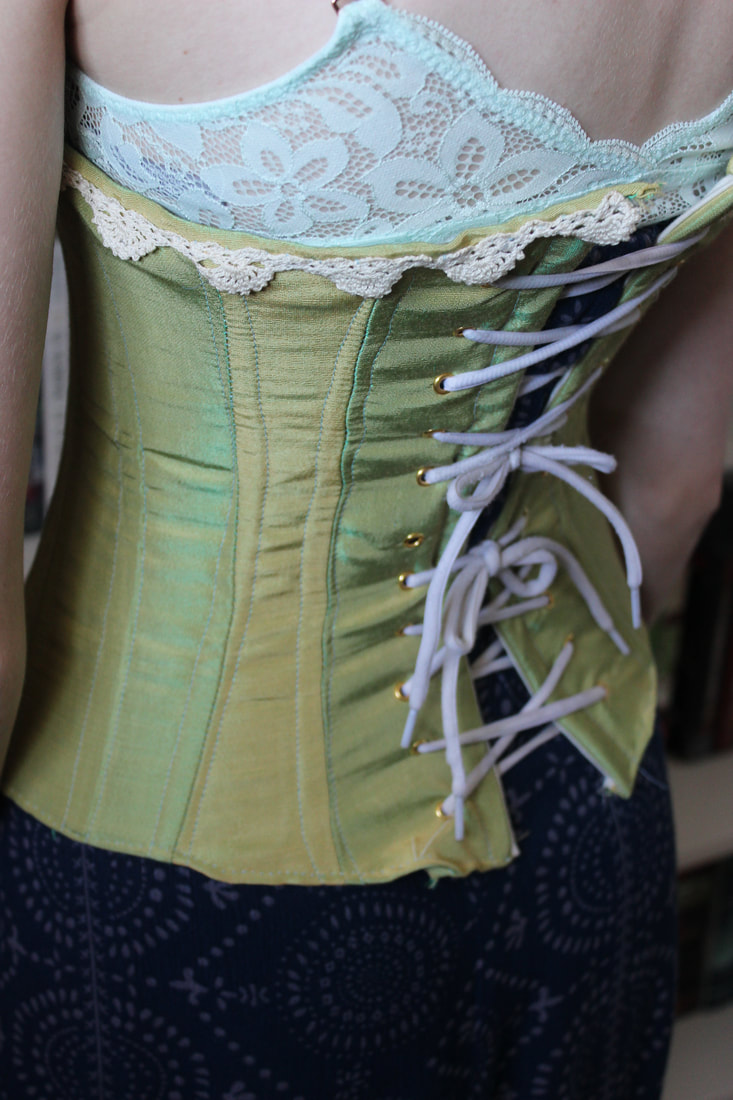 Please forgive both the terrible lacing job as well as the old laces... I was so excited about finishing the corset that I used running shoe laces while I wait to get some nicer ones Although it is not historically accurate at all, I used grommets for the laces in the back of the corset instead of hand-sewn eyelets. This was partly for strength, and partly to save some time since I am very excited to get started on the actual dress. Even though they aren't accurate to the time, I think it looks quite nice. 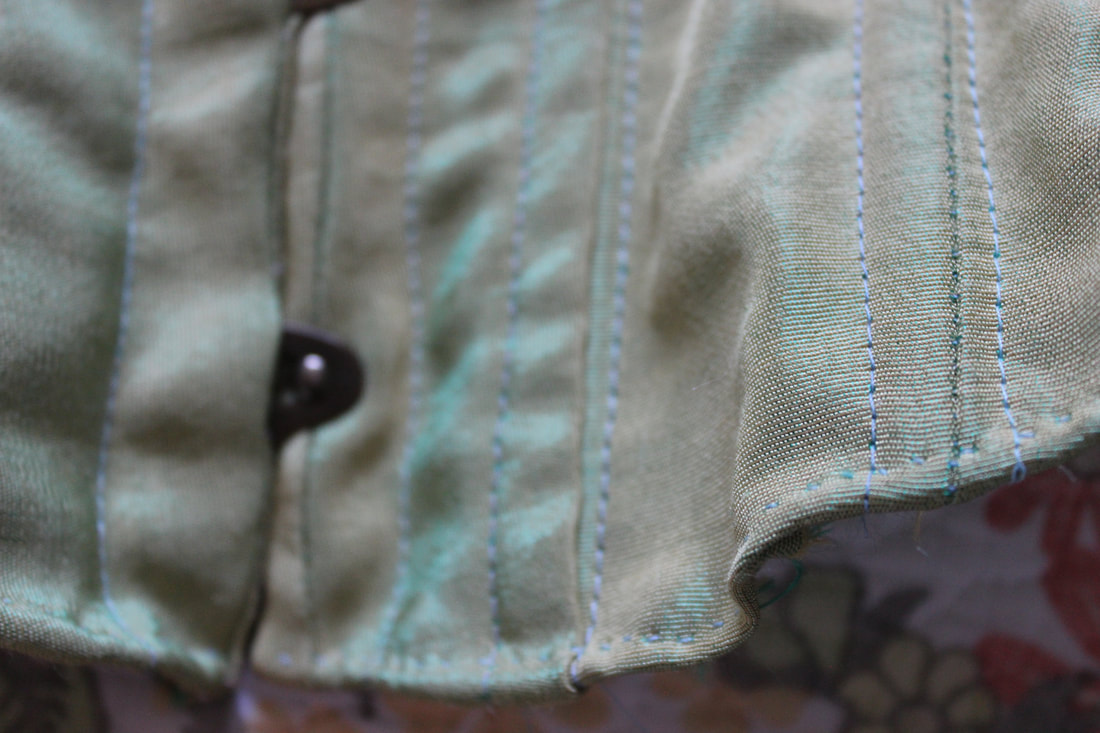 Since I had so little of the fabric left, I only bound the top of the corset. The bottom just has a narrow hem instead. 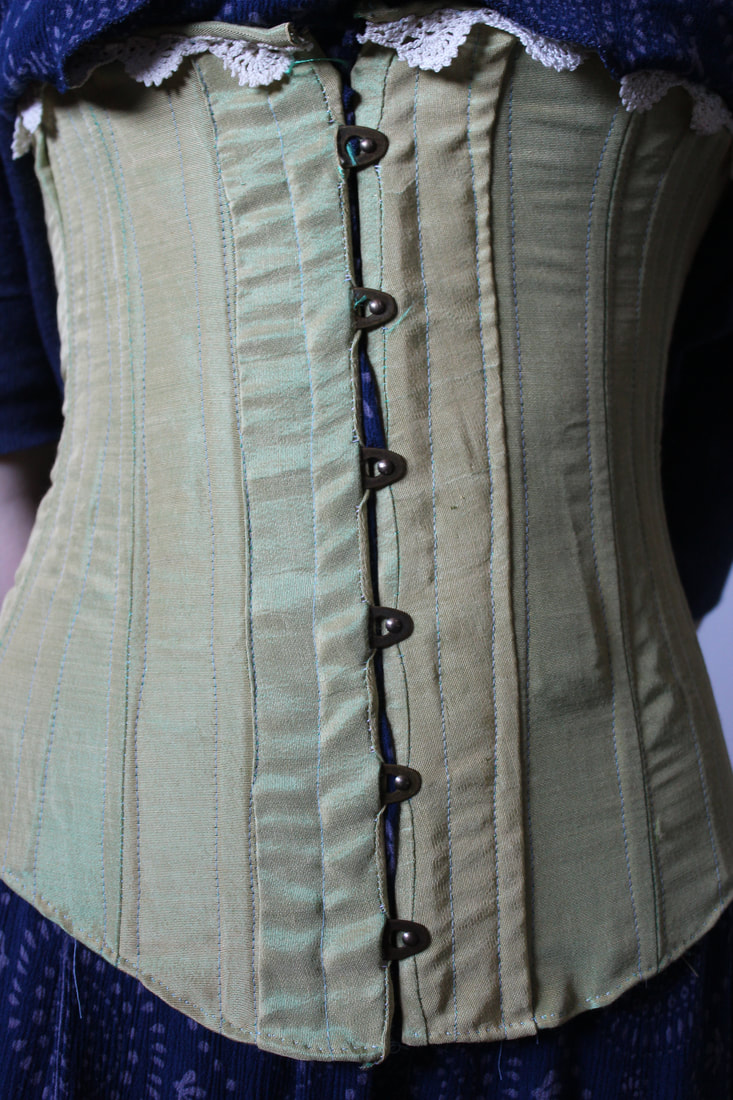 The busk is from a Canadian company called Farthingales. They sell corset and historical undergarment making supplies, as well as other things. They were so easy to work with, and my busk came very quickly! I am so pleased with the colour that I chose as well. 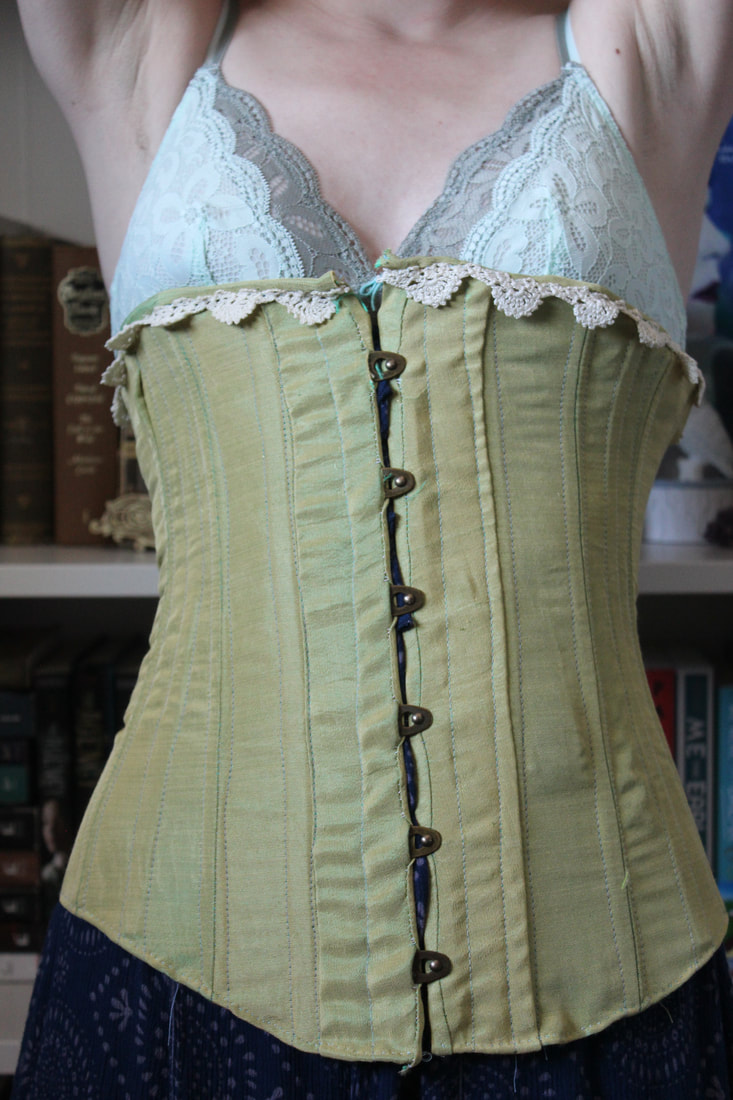 ~K
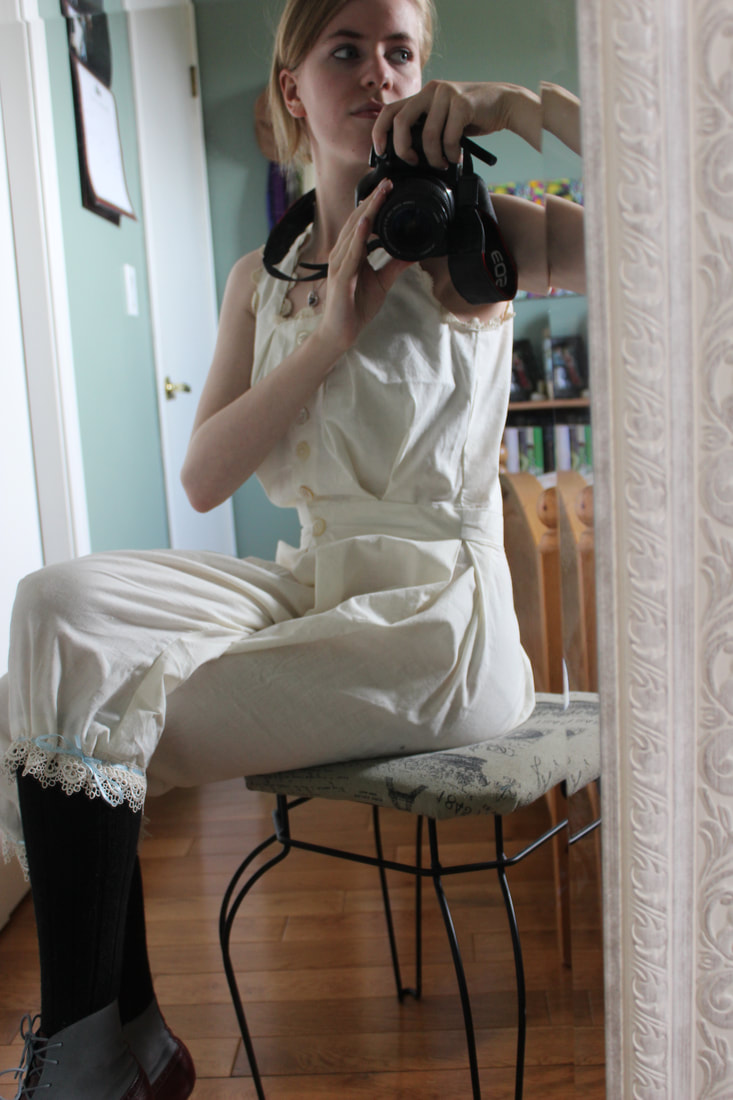 I have been hard at work on my newest project, and the first thing that I have had to make is the undergarments! I decided to make an 1880's bustle gown out of my anatomical heart printed fabric, so I have been working on the proper undergarments. The first thing that I have finished are a pair of combinations! 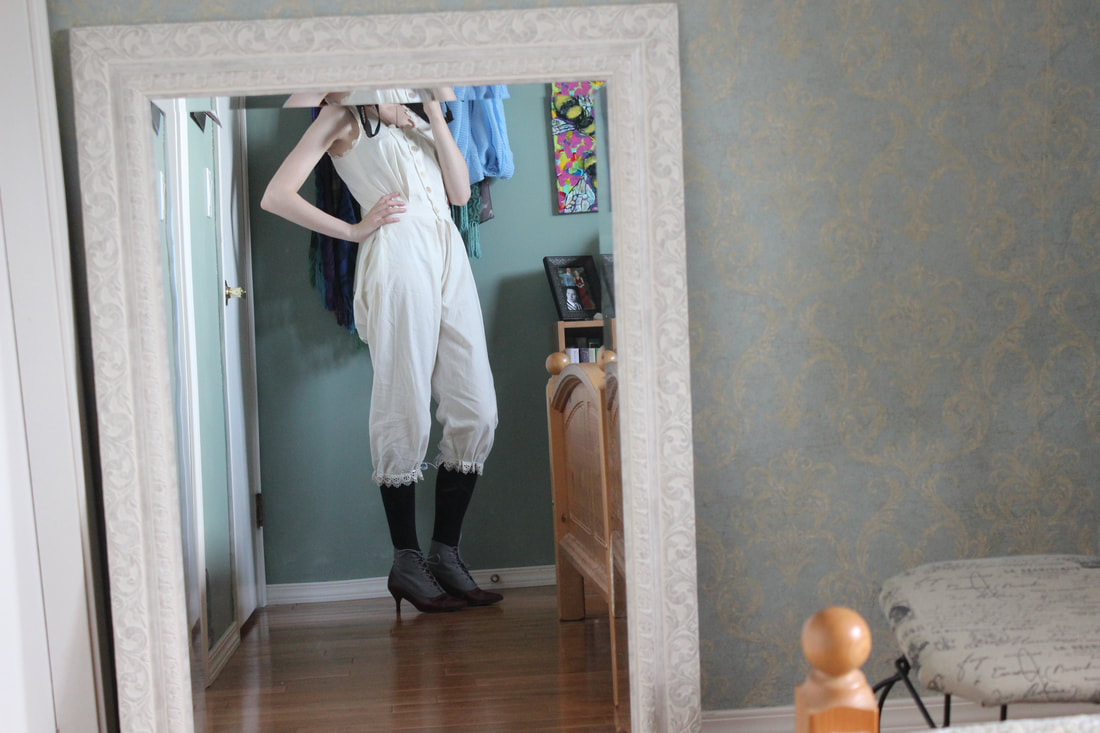 I am quite thrilled with how these turned out! I used Simplicity pattern 1139 as a base pattern (just for the bloomer part of it), and changed it quite a bit to make a pair of combinations that were inspired by ones from the 1880's. 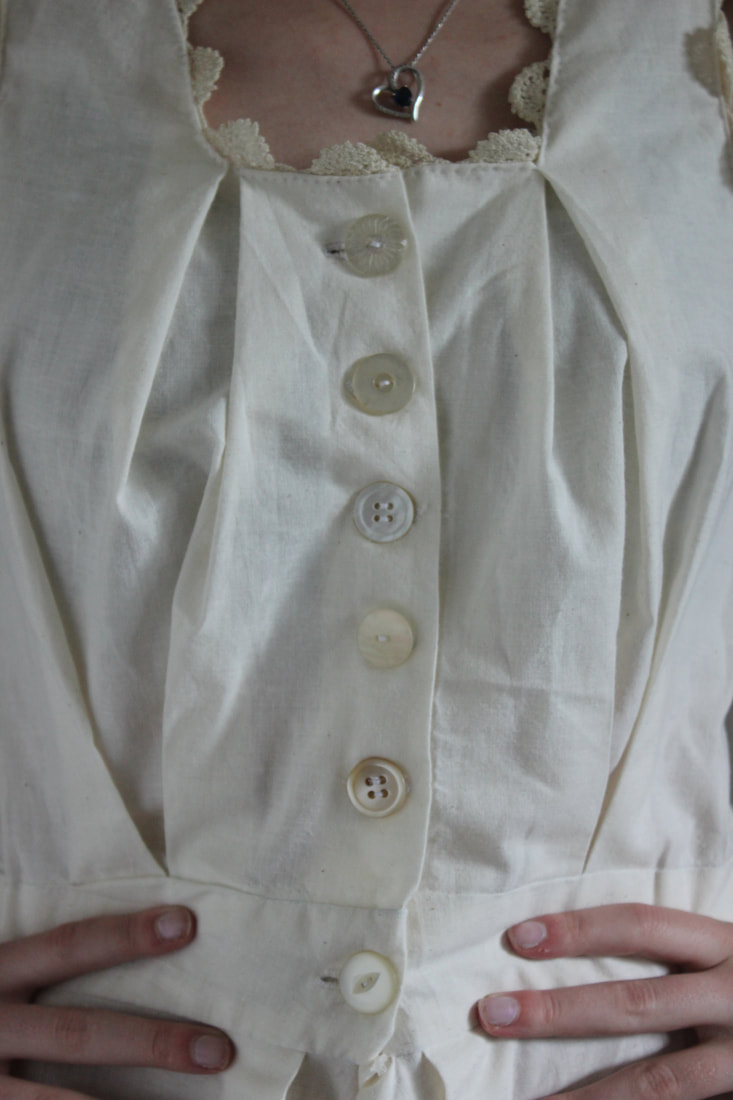 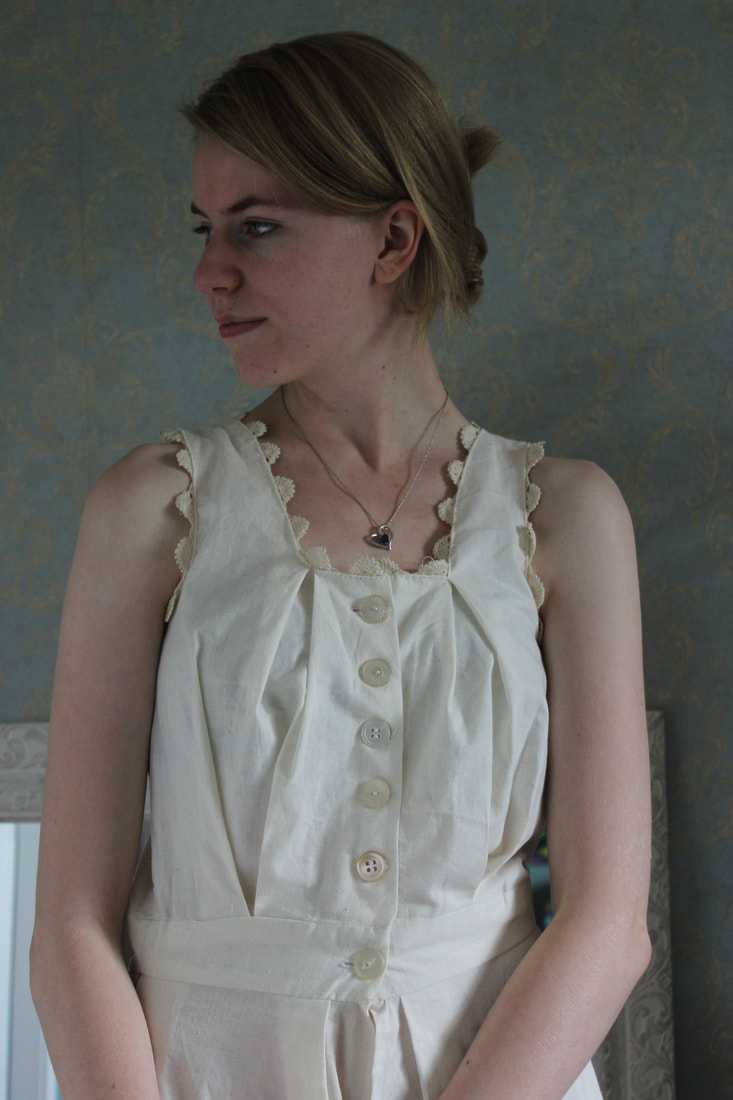 I used some muslin to create the combinations, and trimmed them with some vintage lace that I was very generously gifted a while ago. The buttons on the front are all vintage as well. I thought that it looked cute with the unmatched buttons, so I didn't even try to find matching ones. 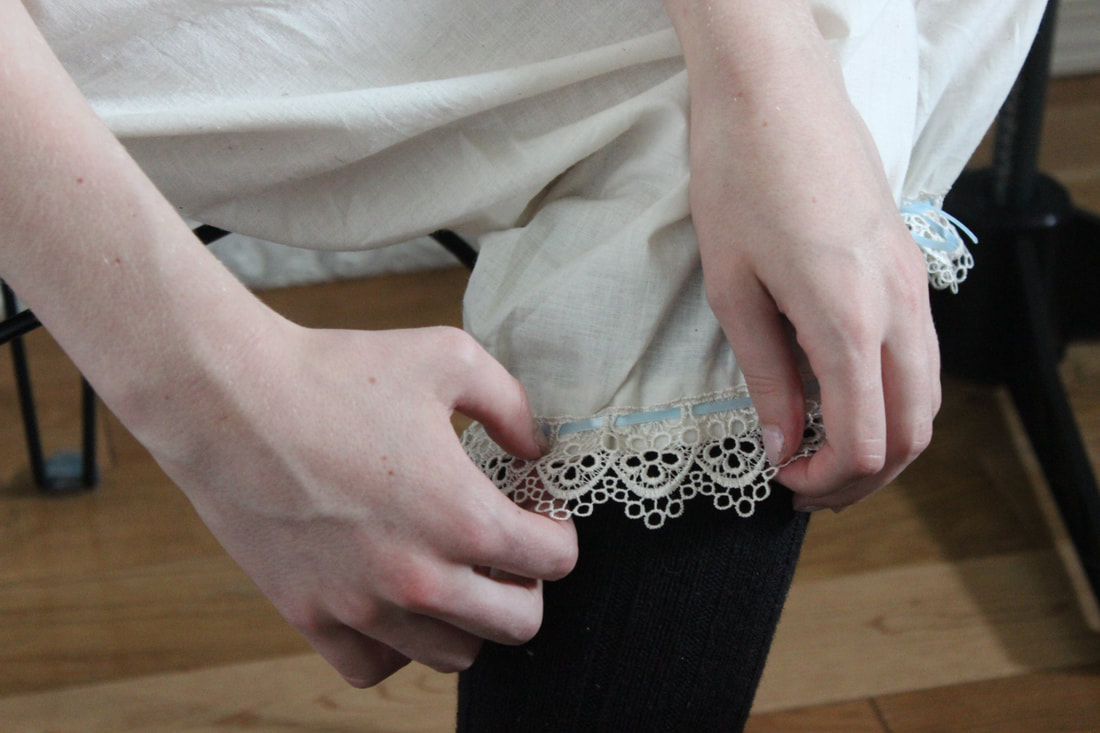 On the bottom I have a different lace that I bought at Michaels and then tea-stained for it to match the fabric. I used a light blue ribbon, also from Michaels, to tie the bottom. 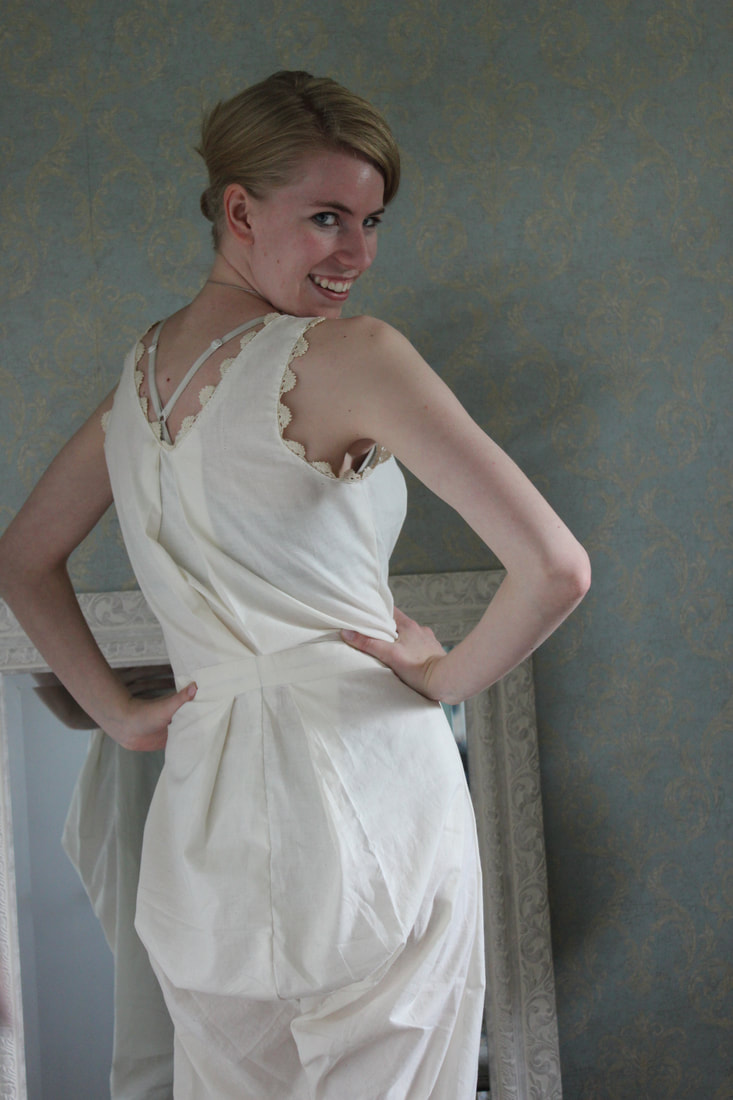 I think the extra space in the bum is hilarious- and very accurate to the time! These are split-drawers, meaning that the front seam is not sewn together. This was done through the 1800's so that the women could use the bathroom without having to take off their bloomers, and once combinations were created, this feature was especially important since the only other way to get the bloomers off would be to take off everything else on top of it! 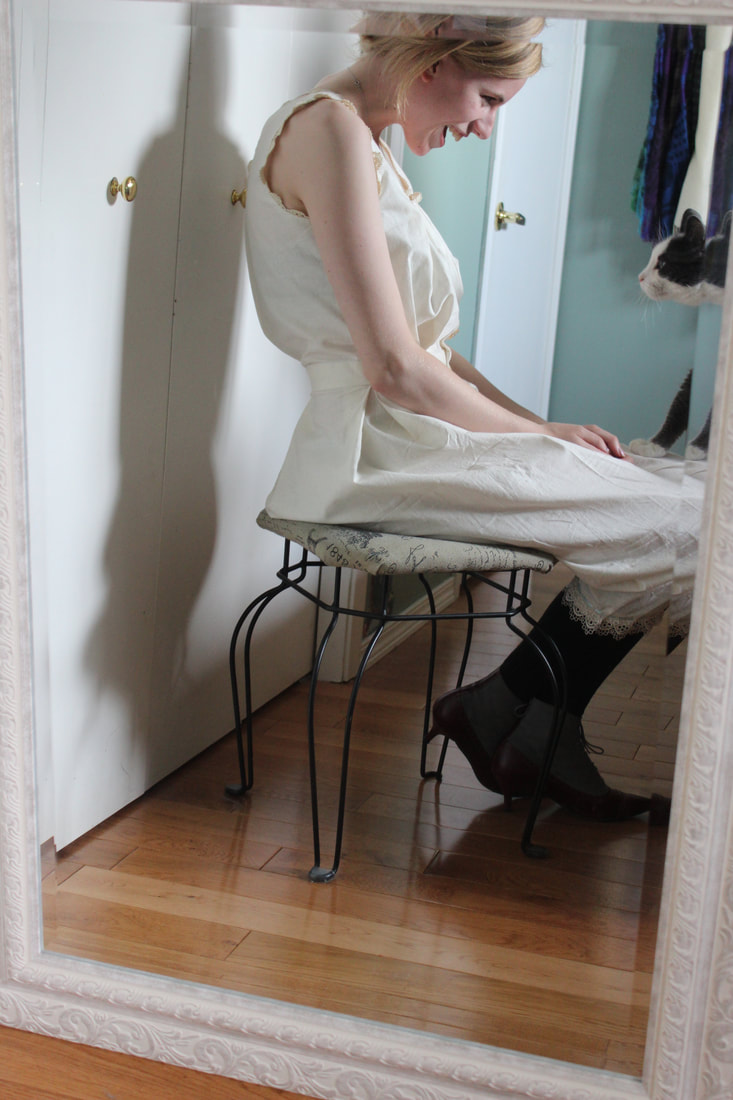 As always, the kitten came over to check out what we were doing Since finishing this, I have been working on the other undergarments that will go under my bustle dress- a corset, a bustle, as well as a petticoat. I will blog about those as soon as I finish them! I am so pleased with how this came out, and I am so excited to keep working on the other pieces of this project! To see more pictures of this and other things that I have been working on, check out my instagram 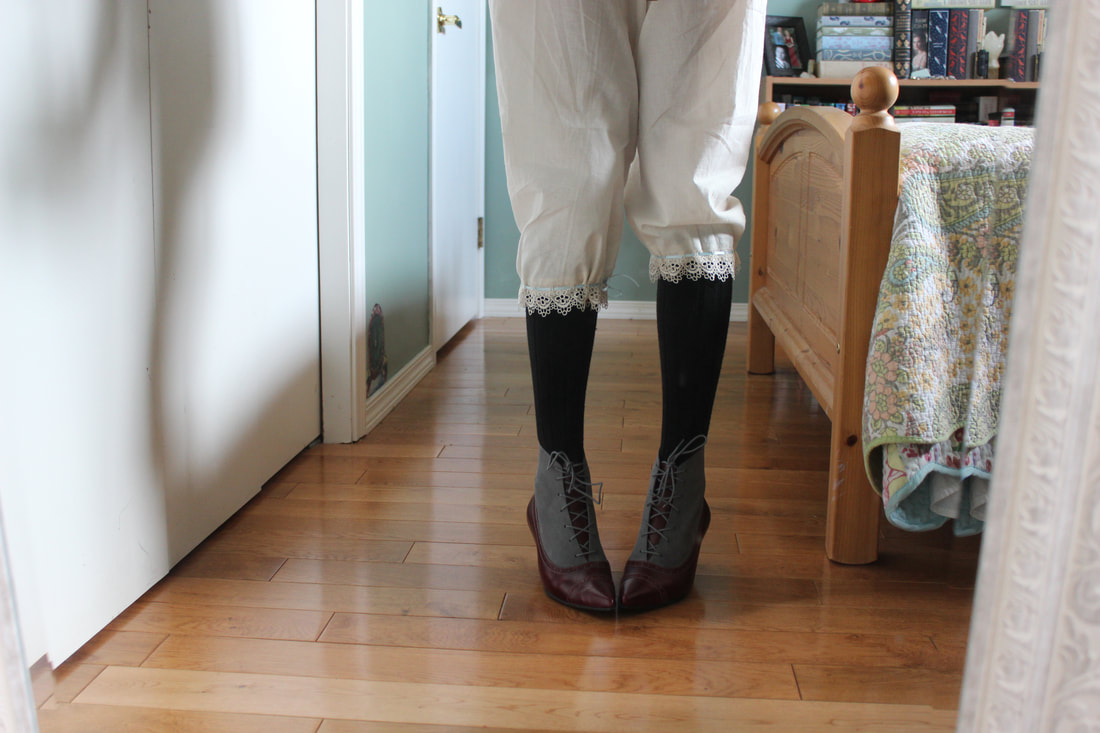 ~K
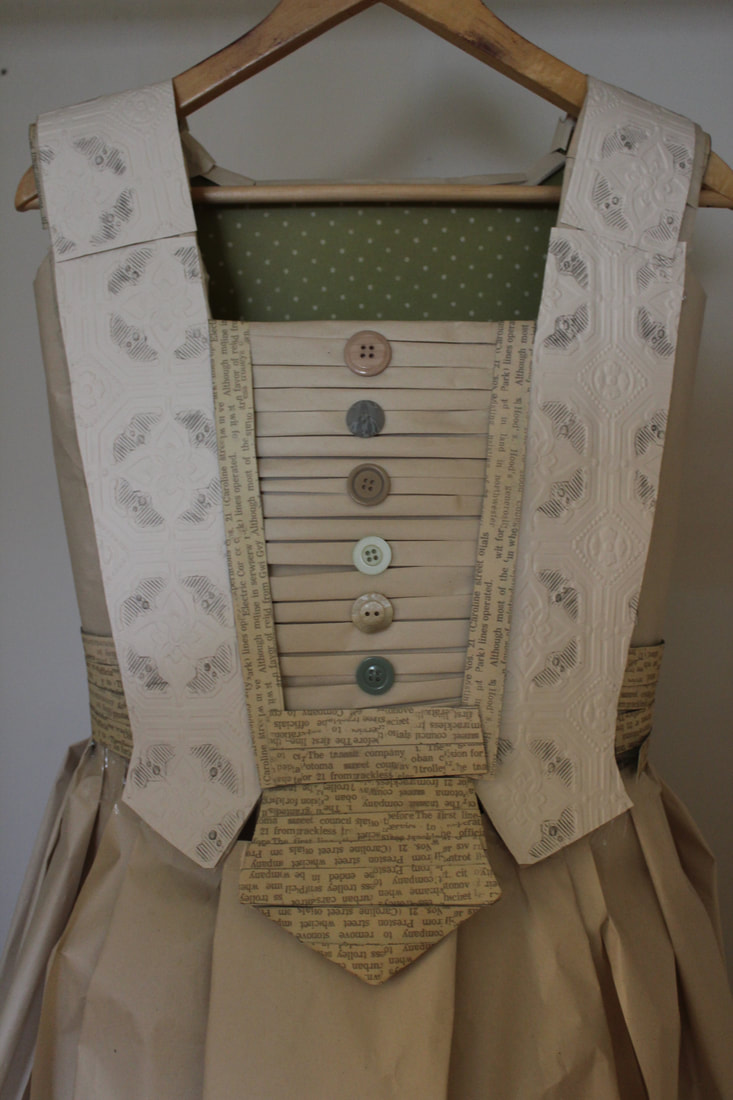 Last year in Art Class I created a paper dress, and I made another one this year. They were quite fun to do, but at the time I was a bit disappointed with how they came out, specifically the first one. After putting it away for a year, I am less critical about how I look at it. 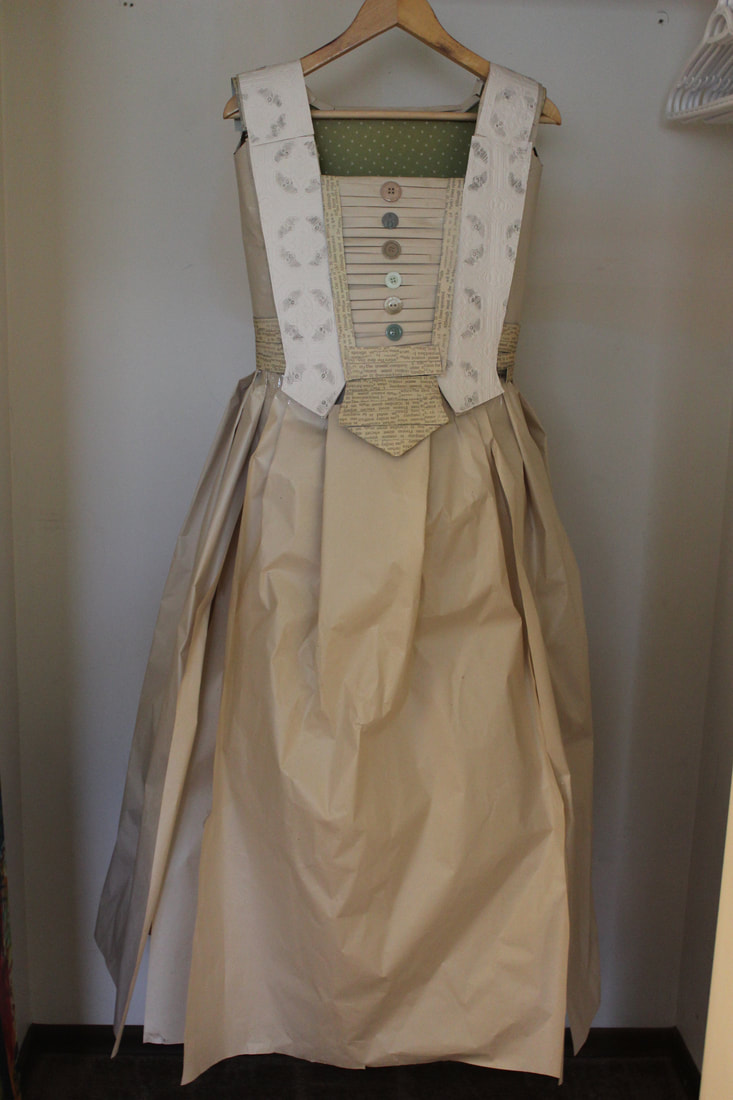 My apologies for the plastic hangers on the right... the pictures were taken in the closet where the dress lives at the moment. The second one that I made this year still needs some repairs before I can take pictures of it, but I will post photos of that as well. 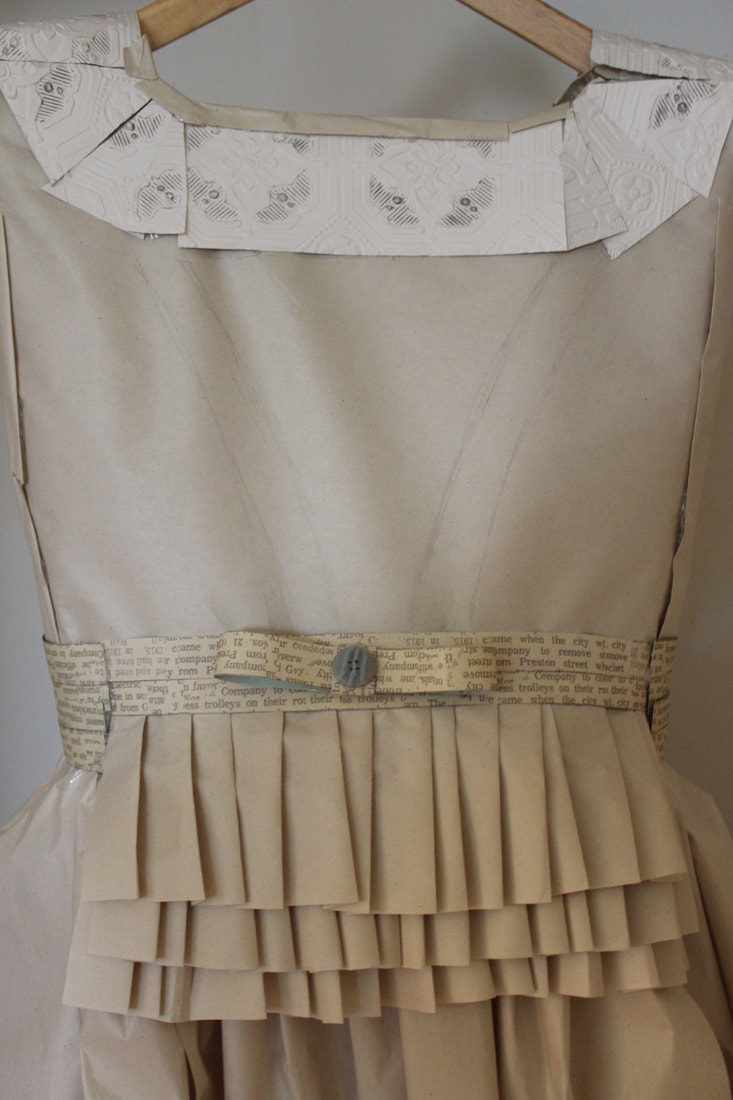 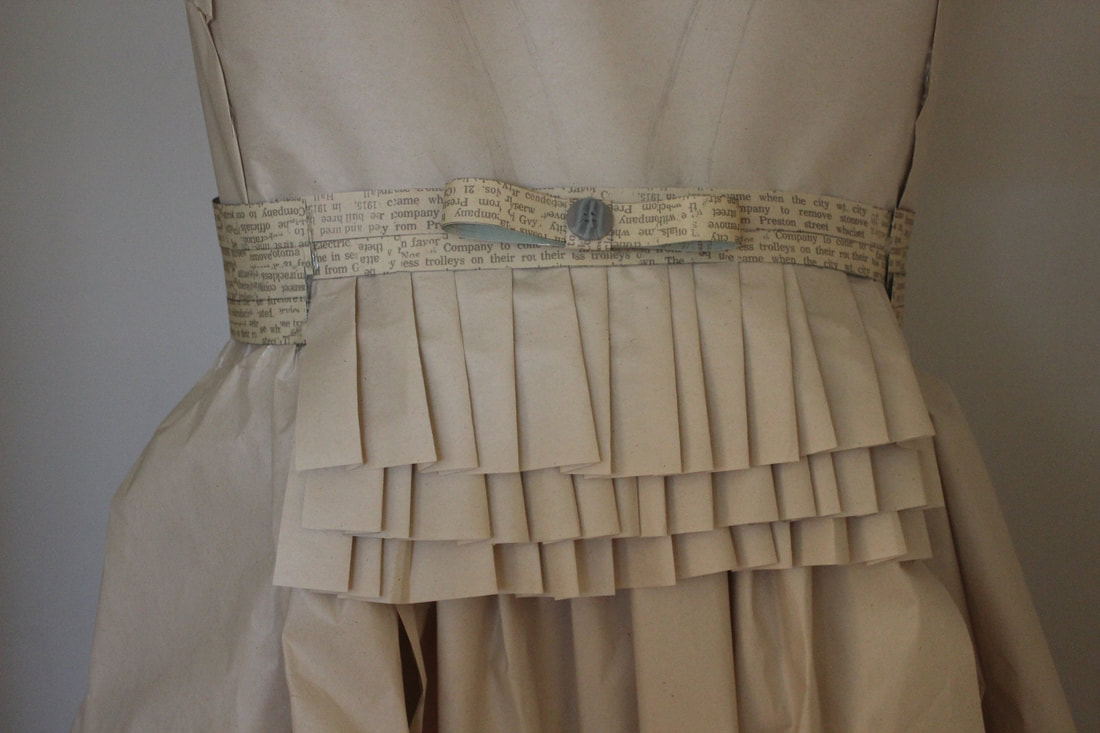 The dress was made out of newspaper, anaglypta (a 3D wallpaper), and scrapbook paper. The shape was inspired by 1880s bustle dresses, and it was made in about a week of classes. There were a few things that I also had wanted to do to the dress, but I had run out of time in class to do them, so the dress stayed like this. After not seeing it for a while, I felt better about how it turned out, but I still wanted to try out a few new techniques, so I made another dress this year. Once I have fixed it up and taken photos, I will post about that one too. ~K
|
EtsyArchives
April 2020
Categories
All
|
 RSS Feed
