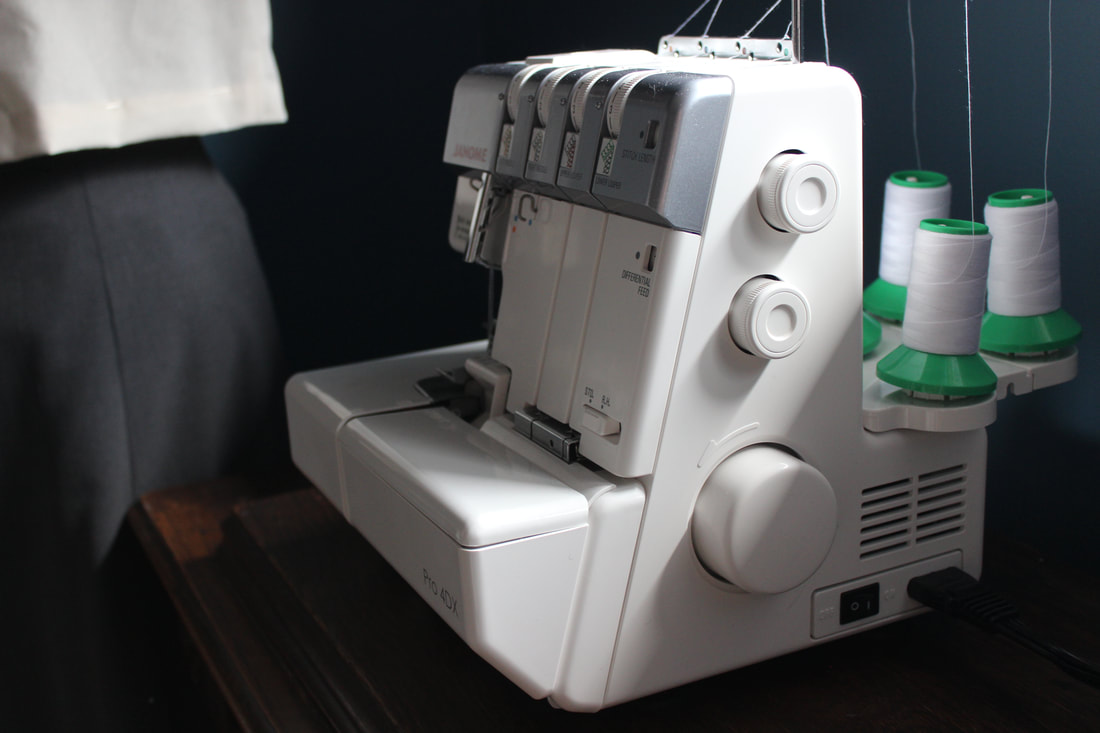
 The more that I have been working on my sewing, and the more opportunities that I have had meant that I needed a little more help in the studio. After lots of research (mostly done by my mom), we decided on a Janome. My sewing machine is also a Janome, and I love it- I find it very easy to thread and work, and it can sew through almost anything. The sewing machine I have has also last for years- it was my moms before I started sewing. When we went into the shop, I was looking for a smaller machine (I don't want all of the extra details, or a computer panel, just the basics). There was another machine that was a little smaller, and cheaper, but it was a manual threader which is much more difficult and takes more time. This machine (which is the Pro 4DX), is a model that they have been making for years, is very easy to thread, and has fantastic reviews. I am so excited to have this extra piece in my sewing room, I know that it will help me so much! 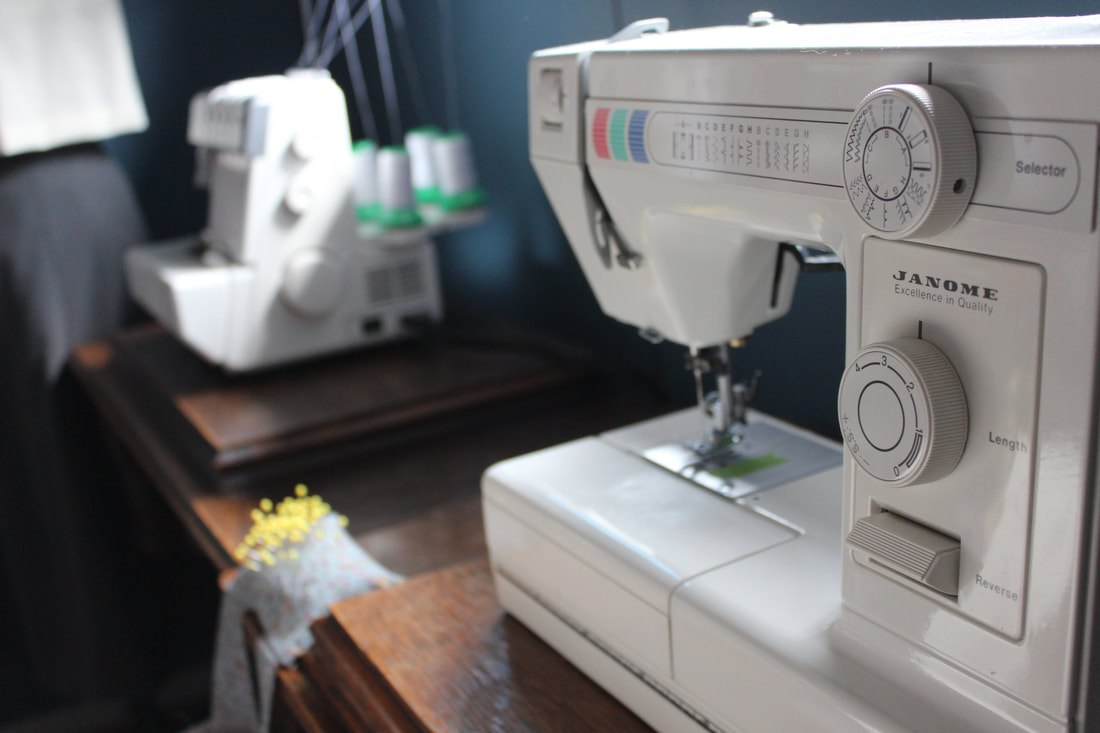 Because I got this extra piece, I needed a place to put it. My sewing machine sits on top of a beautiful old sewing machine given to me by a family friend. It is an old Singer machine that I am hoping to get it to work so I can sew some things on this machine (which is from the early 1900s). Unfortunately, I didn't have the table space on it to fit another machine. Luckily enough, we just happen to have another old Singer machine in the house. Ours is a slightly different make, but just as beautiful, and I am so excited to have it in my sewing room (I used to pretend to be sewing on it all the time when I was a little girl, so dreams are coming true here). 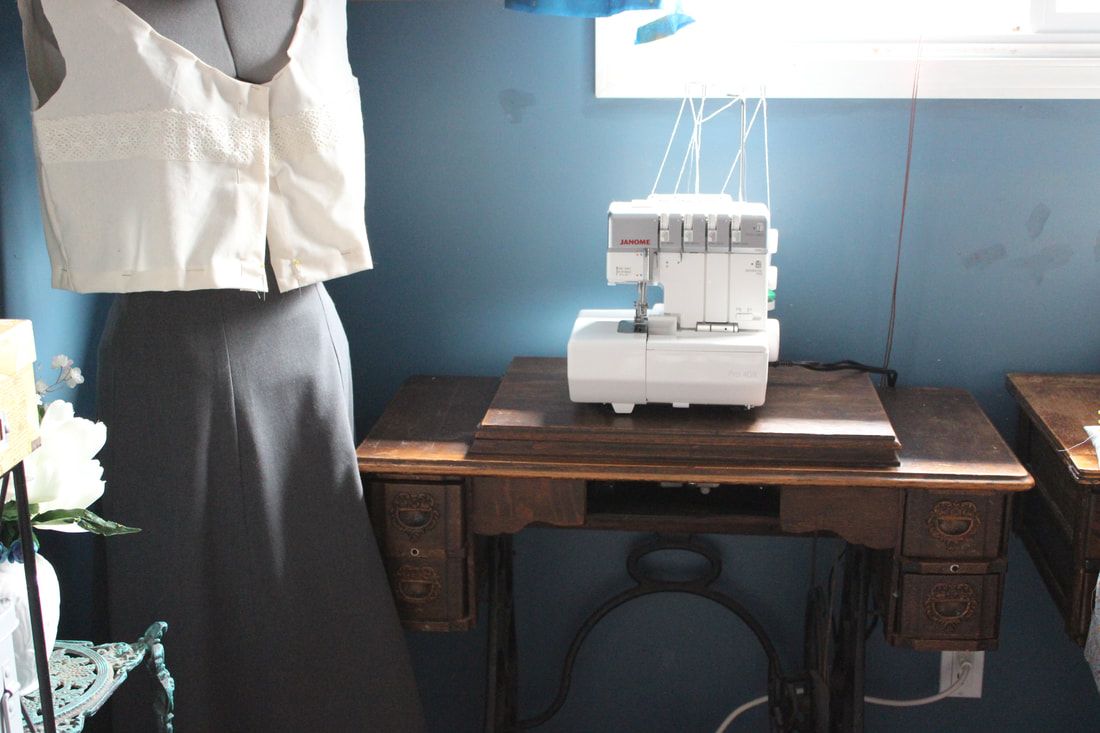 While we were in the city, I also picked up a few patterns. I am so excited about these, as I will be using all of them to build up my wardrobe (I have the hope that my whole wardrobe will be made by me except for sweaters, shoes, and such). I even have the fabric for pretty much all of the projects that I have planned, so hopefully they will be quick to finish! 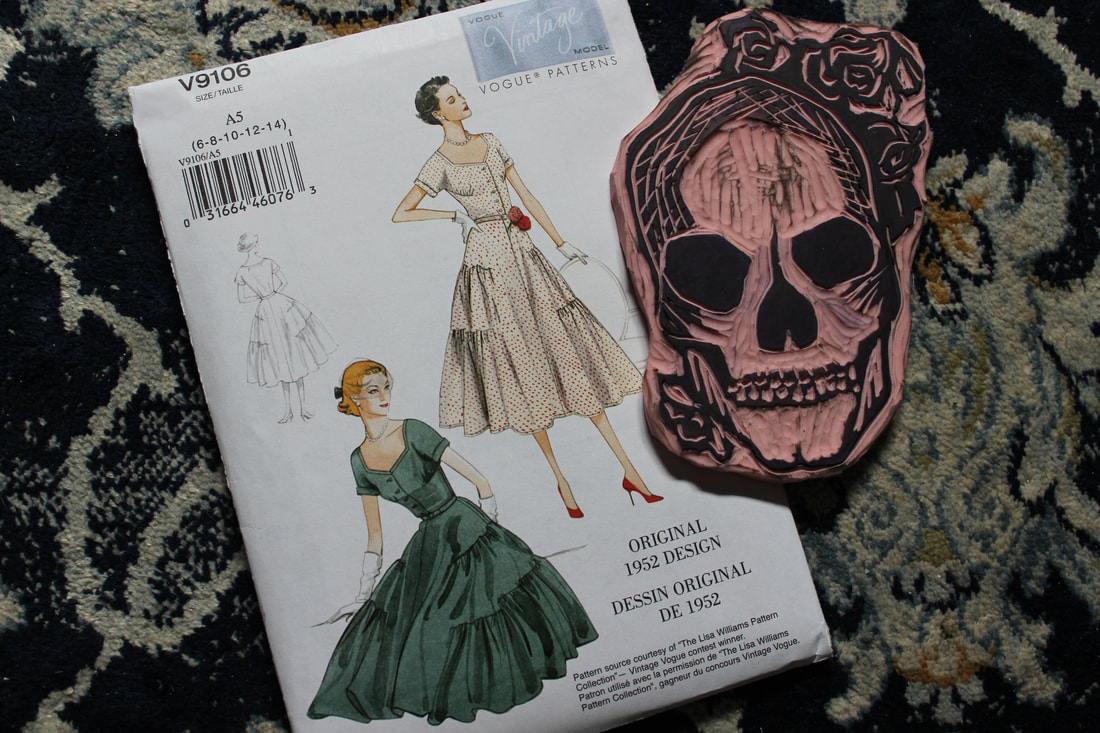 I have been planning a Mexico dress for a long time, and I finally have a set plan for it! I originally was going to do a tiered skirt with a white blouse (similar to an outfit that my grandmother has a picture in when she lived in South America). When I found this pattern from Vintage Vogue, I thought it was perfect. It has the tiered skirt look that I wanted, but with a twist. I am planning on printing my own cotton to make this with, with the skull (like a sugar skull), and a rose in bright colours. 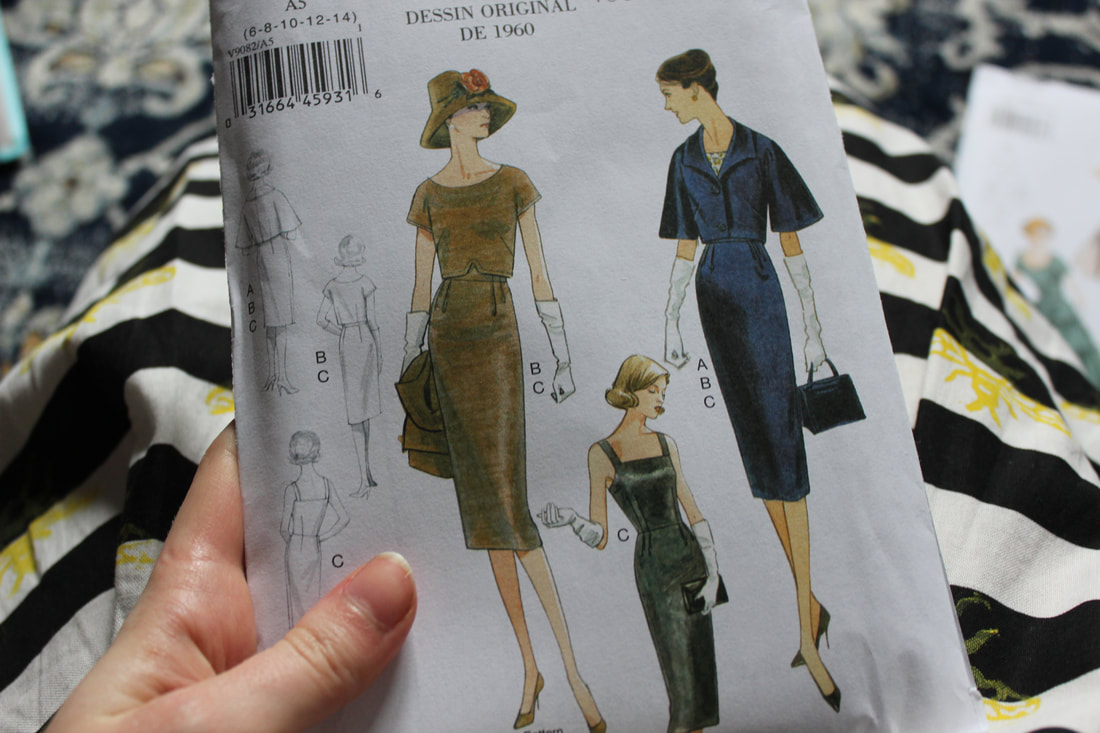 The next pattern that I got I have been admiring for years. I actually had planned to make this for graduation last year, but I ended up buying something and altering it instead. When I saw the Vogue sale at the fabric store (which is why all of these patterns pictured are Vogue), I thought that it was the perfect time to get this one. I haven't decided what fabric to use for it yet (silk to make it fancier? Or wool suiting for more of a winter style? Or perhaps muslin for a summer suit?), but I am very excited to make it, and I am hoping to make a few different versions of it. 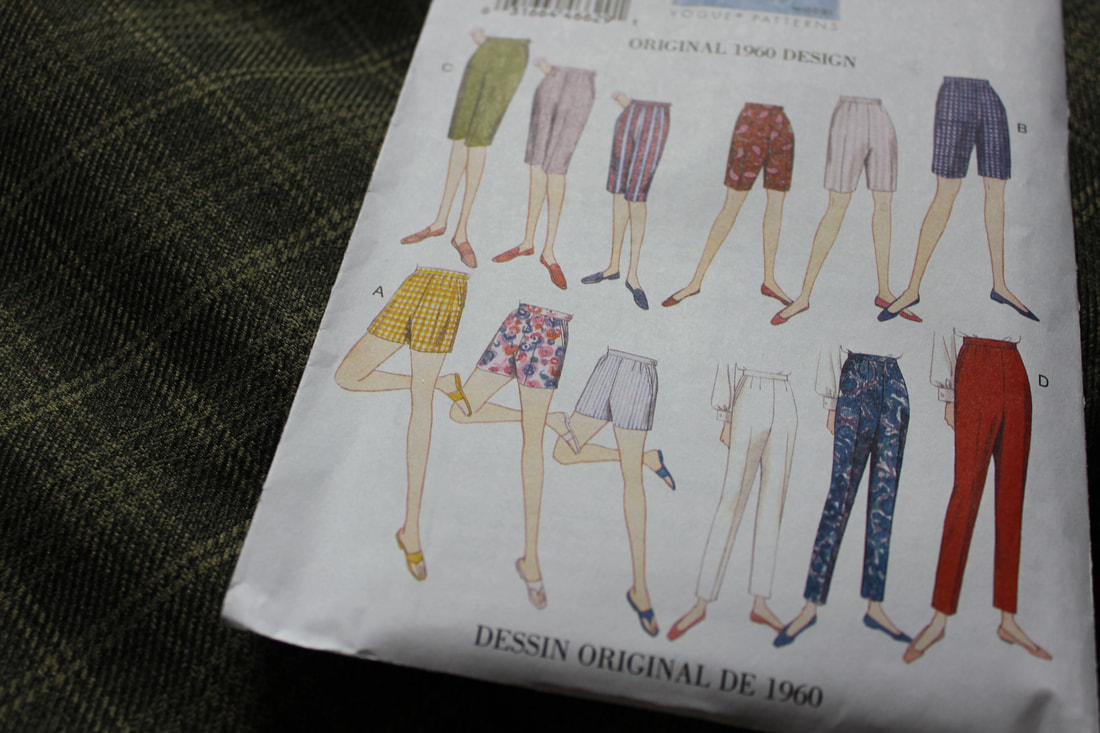 This is another one that I have been planning for a long time, however I had not chosen out a specific pattern for it yet. When I saw this, I thought that it would be perfect! I have been wanting a nice pair of cigarette style trousers for years, and when I picked out this wool suiting from Bhatia, I thought it would make an adorable pair. I had originally planned to use the wool for a cocoon coat, but I decided that I would use these more often. I also would like to make a linen version of the shorts for this summer. 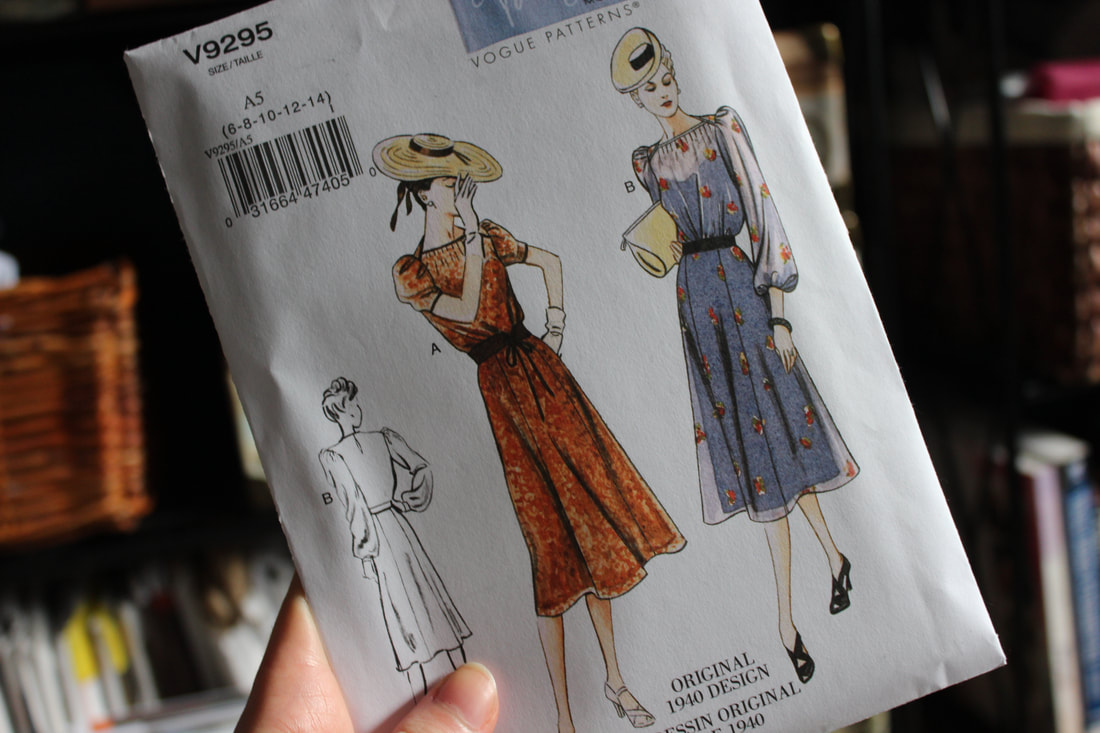  I want to make the pattern styled like this Fendi ad This pattern was a little bit of an impulse buy. 1940's patterns are a bit of a soft spot for me (I love the interested details, and how they managed to use as little fabric as possible while still using interested seam lines and such), plus the dress with the full sleeves reminded me of the Fendi ad that I think is stunning. 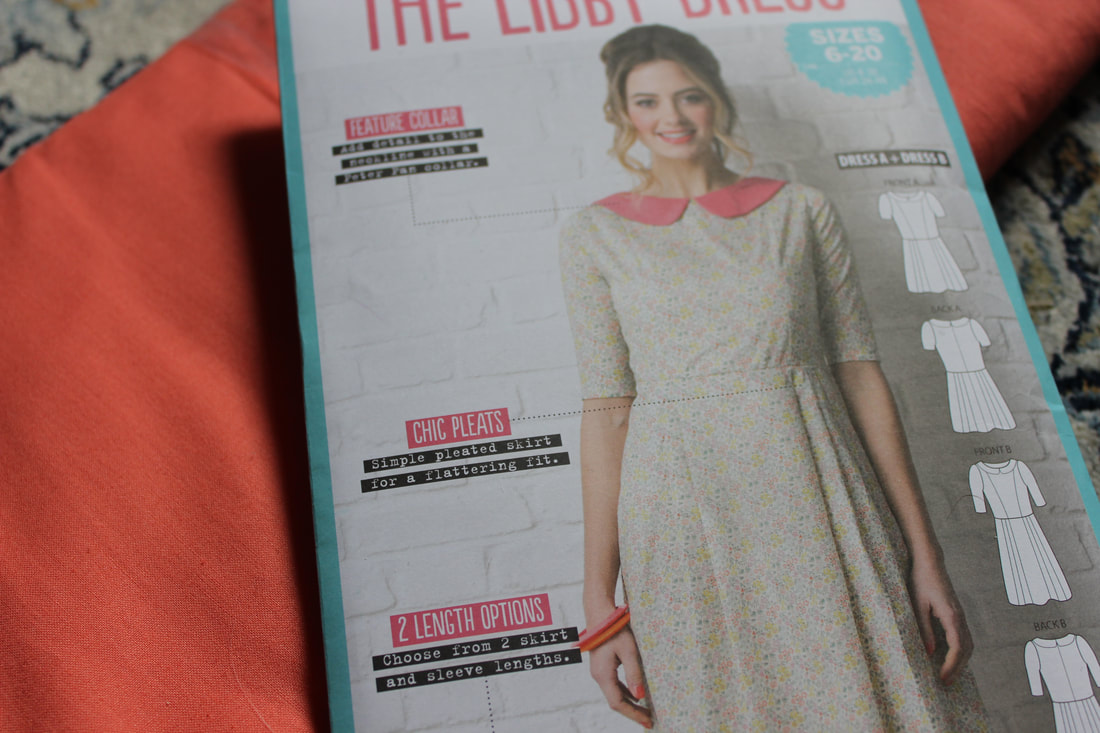  The inspiration: Suzy Bishop from Moonrise Kingdom The last pattern that I got a few days ago came free with a sewing magazine. This one comes in a few lengths and sleeve lengths, and I thought that it would be perfect for a Wes Anderson styled dress. I chose a coral cotton to make it out of, and was inspired by Suzy from Moonrise Kingdom. I also have a few patterns coming in the mail- the dirndl dress from Patterns by Gertie, as well as a few Vintage Simplicity patterns. Two of those are 1960's mod styled dresses, one is a 1940's skirt suit, and the last is a pattern for 1930's tap pants and bralette. 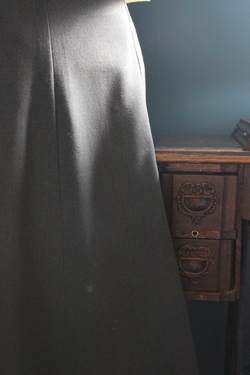 Other than shopping, I have been getting lots done. I won't share the majority of what I have been doing yet until I get photos, but I will give you a sneak peak. I also altered my 1930's wool skirt, since it was large at the waist. It was a quick fix, but I have been putting it off for months since alterations aren't my favourite. There are a few more things I need to alter, so I am hoping to do that soon. 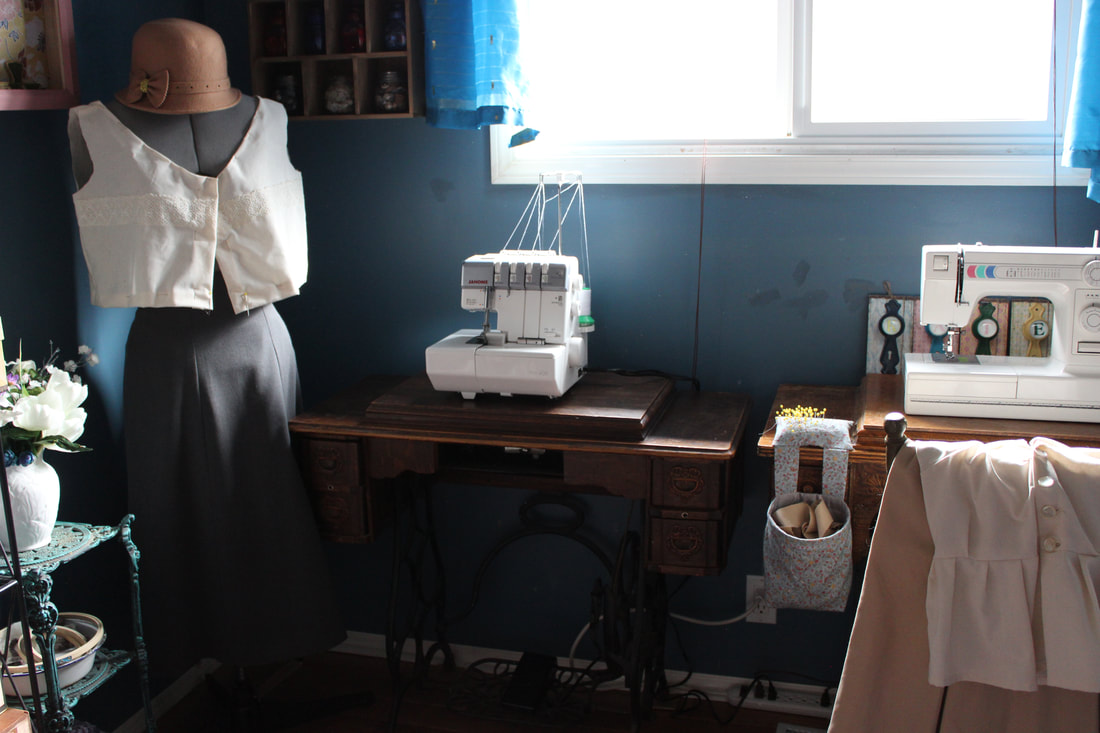 All of my sewing machines under the window, my altered skirt on the dress form, with some of the things that I've been working on on the dress form and chair ~K
0 Comments
After seeing Angela Claytons hilarious video that she posted a while ago about cooking recipes from the early 1900s while wearing clothes from that era, I decided to do something inspired by that. Unfortunately I am not as brave as she is, so I decided to use only one recipe, and it is one that I knew would work from Julia Child. I love reading through her cook book, and I love all the tips that are for women in the 1950's, so I decided to wear my newest 1950's styled dress and make a dinner using her cook book.  I made the Vanilla Sponge Butter Cake with the Butter Cream Recipe from Julia Childs Mastering the Art of French Cooking. The recipe is very simple, and nice and light! 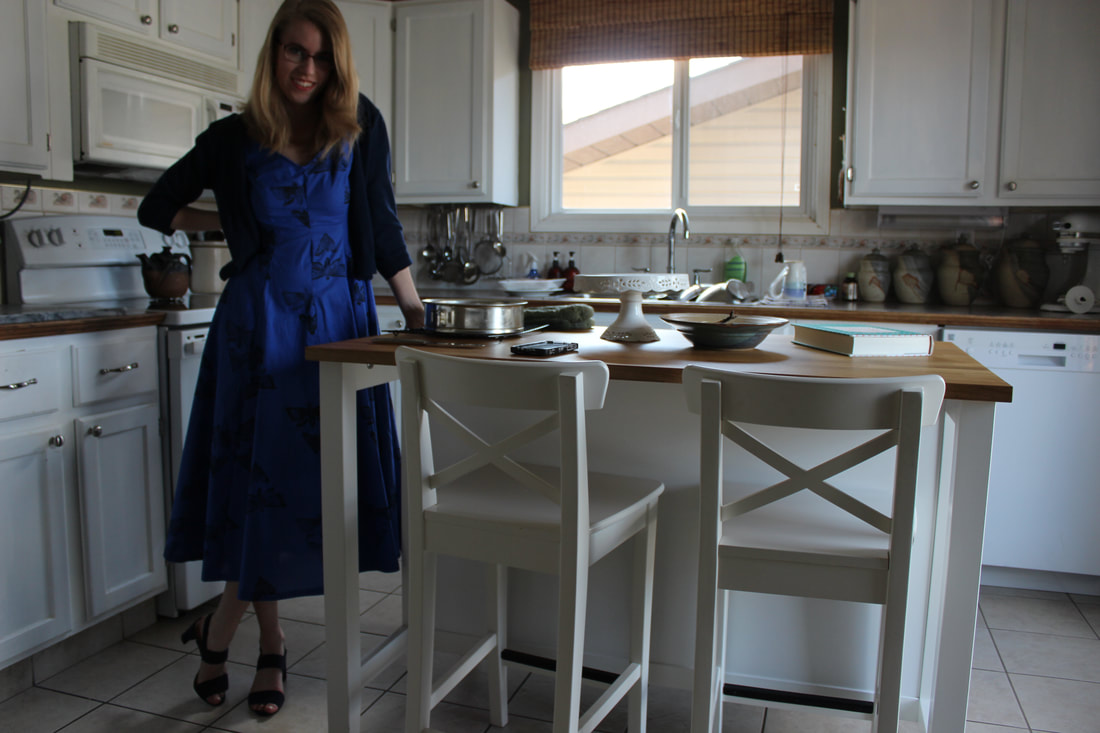 The recipe asks for a 10 inch pan to be buttered and floured (if you want to make cupcakes it makes 12), and for a 350 degree oven. First melt 4 tablespoons of butter and set aside to cool. Then gradually beat in 2/3 cups of sugar into 4 egg yolks, and add 2 teaspoons of vanilla. I also added some lemon zest and juice at this point to make it a lemon cake, but that is not necessary. In a separate bowl, whip up 4 egg whites and a pinch of salt until soft peaks are formed. Slowly add 2 tablespoons of sugar and mix until stiff peaks are formed. Scoop a third of the egg whites and 1/3 cup of flour into the egg yolk mixture and fold together gently. Continue with another third of the egg white, 1/3 cup of flour, and half of the melted butter. Finish with the last of the melted butter, the last of the egg whites, and another 1/3 cup of flour. Bake for 30 to 35 minutes, or 20 minutes for cupcakes. For the Butter Cream Icing, start by rinsing a bowl in hot water. Then place 2 egg yolks, 2/3 cups of powdered sugar, 2 tablespoons of flavouring (I did strong lavender tea with some lemon, but you could do vanilla, melted chocolate, strong coffee, or pretty much anything else instead), and 6 ounces of unsalted butter. Mix these together until creamy, and place in the fridge until it is firm but still easy to spread. I don't have very much footage of me making the icing in the video because I was only doing half the recipe and math is really not my strong suit... it took a lot of confusion and vague measurements for a butter cream to come out at the end! 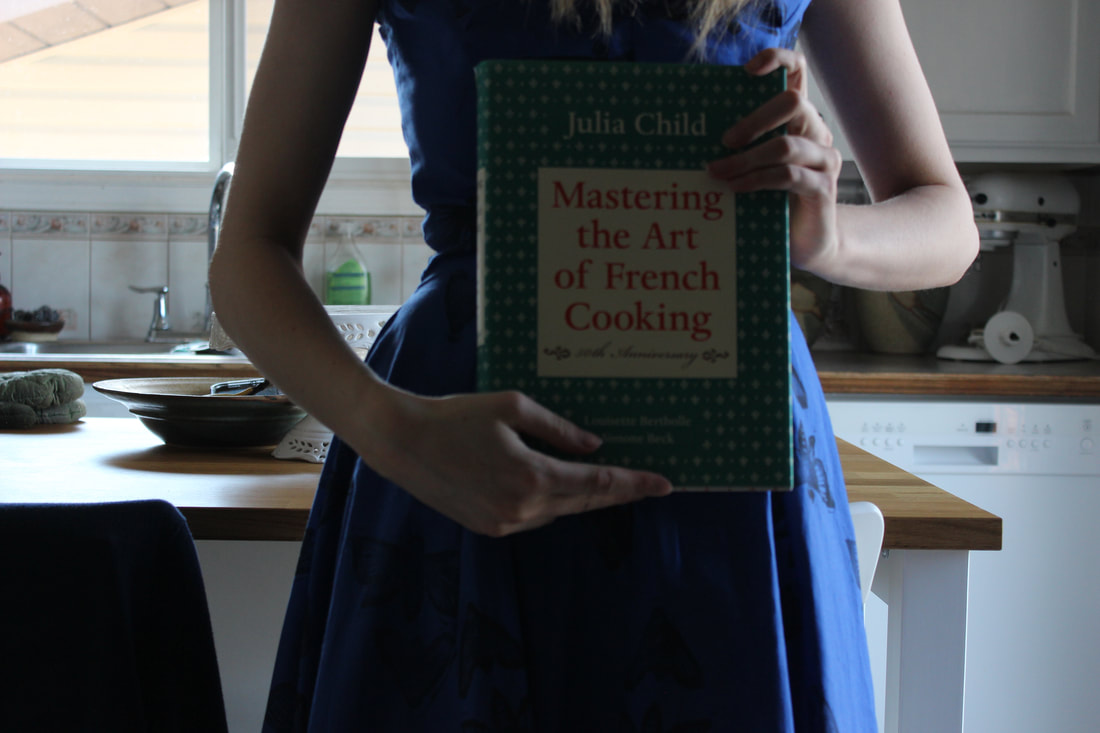 Let me know how you enjoyed this type of video!
I also filmed a Get Ready With Me before I filmed this video, so I will put that up next week. It shows how I did my hair and makeup for the video. Thanks for watching, ~K I do have a few Germany posts in the making, but for now I thought I would share a short video of the weaving process. As a talked about in my post a few weeks ago, I have been enjoying learning some different skills. I just have a small wooden loom that I have been using for a few months, but I enjoy the size. I was thinking of making small wall hangings once I have practiced a little more by adding embroidery to the finished weavings. Any thoughts about what type of wall hangings I should make? Travel posts are coming soon, I promise!
~K After finishing my Through the Looking Glass dress, I wanted a bit of a break from sewing. When I was younger, I always was working on different crafts, and many of them included some sort of fabric or fiber. Over the past week or so, I have been experimenting with some things that I used to do, and other things that I haven't tried but have been intrigued with.  The first thing that I have been playing around with is something that I rediscovered this summer- embroidery. I had dabbled with embroidery quite a few years ago, and lately I have been enjoying it again. I did a piece for my Frankenstein dress in October, and a tree during the summer for a collaboration with a writer, so I decided to make something for my Curiosities collection. I have been making a pair of moths to go on shoes for one of the dresses, and lungs for a different dress, and I have plans for other pieces as well! 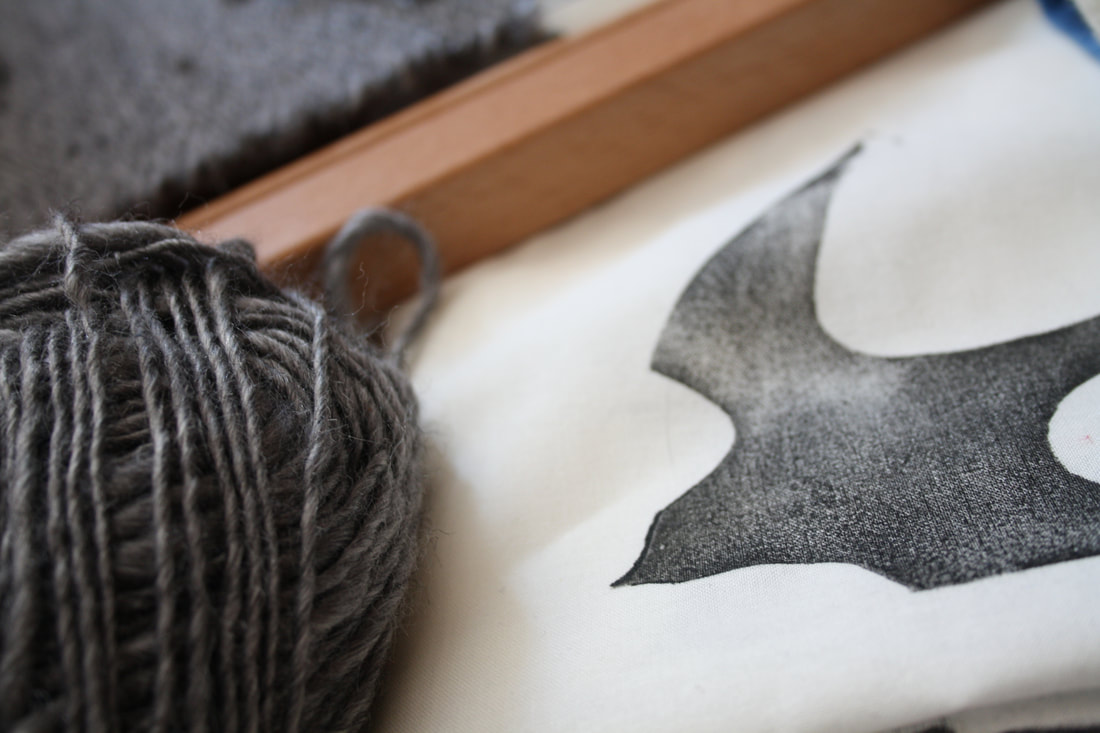 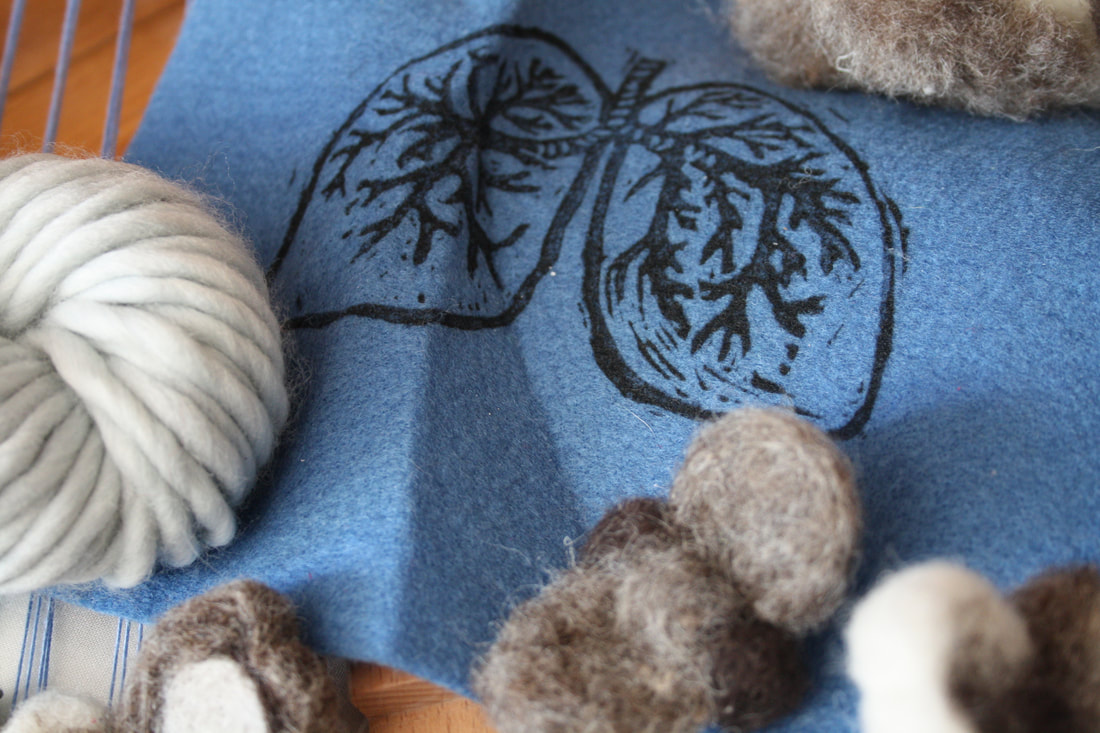 One of my other crafts is fabric stamping. I have done it twice before, once for my Frankenstein dress and once for my Bee skirt, and both times I loved how they turned out. I decided to try it again for one of the dresses in my collection, and I am so pleased with how it turned out. 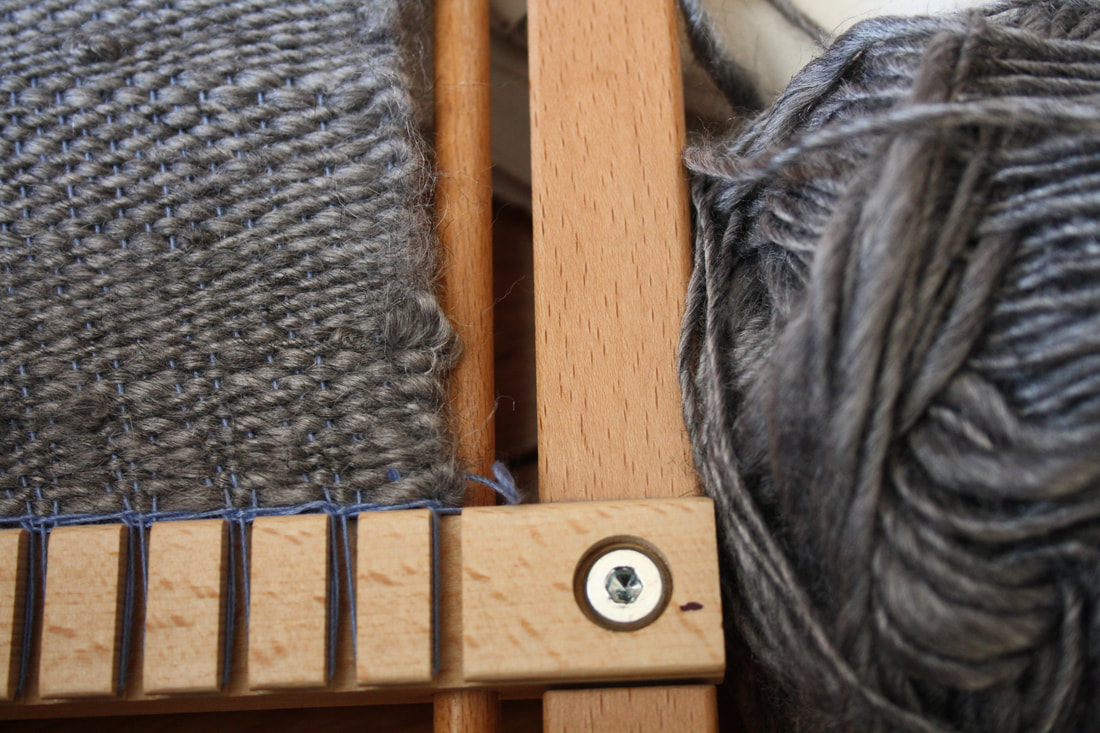 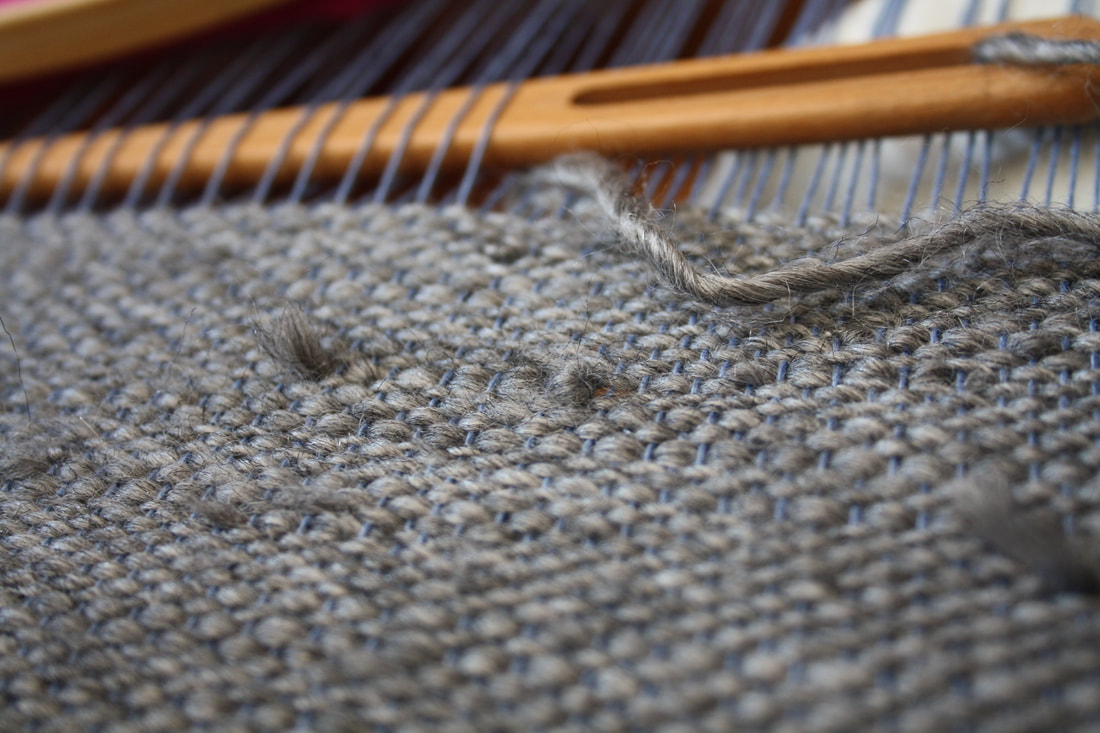 I also rediscovered my fascination with weaving. I got a small frame for Christmas a year or two ago, and after making a square and a half of fabric on it, both of which had terrible tension (that's why I don't knit...), I decided to play around with it again. So far I am loving how meditative the whole exercise is, and I am hoping that my tension improves! 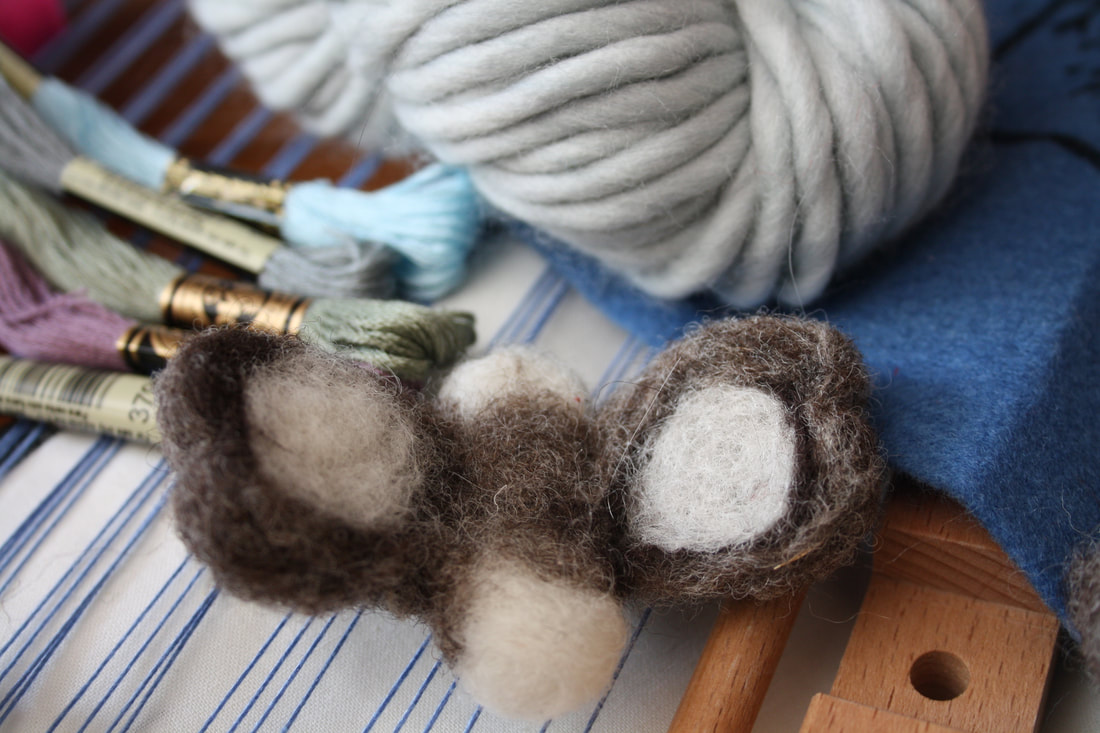 The last thing that I have been playing around with over the past bit is felting. I have never done felting before, but it has always interested me. I got a pack from Michaels that included a needle, mat, and wool to try it out, and so far have made three moths and am planning to make many other things. This is another very calming hobby, and I am so glad that I have tried it out. Keep your eyes peeled for felted broaches and critters on my costumes- I don't think I will be able to keep myself from adding bugs to all of my projects now that I have discovered that I can! 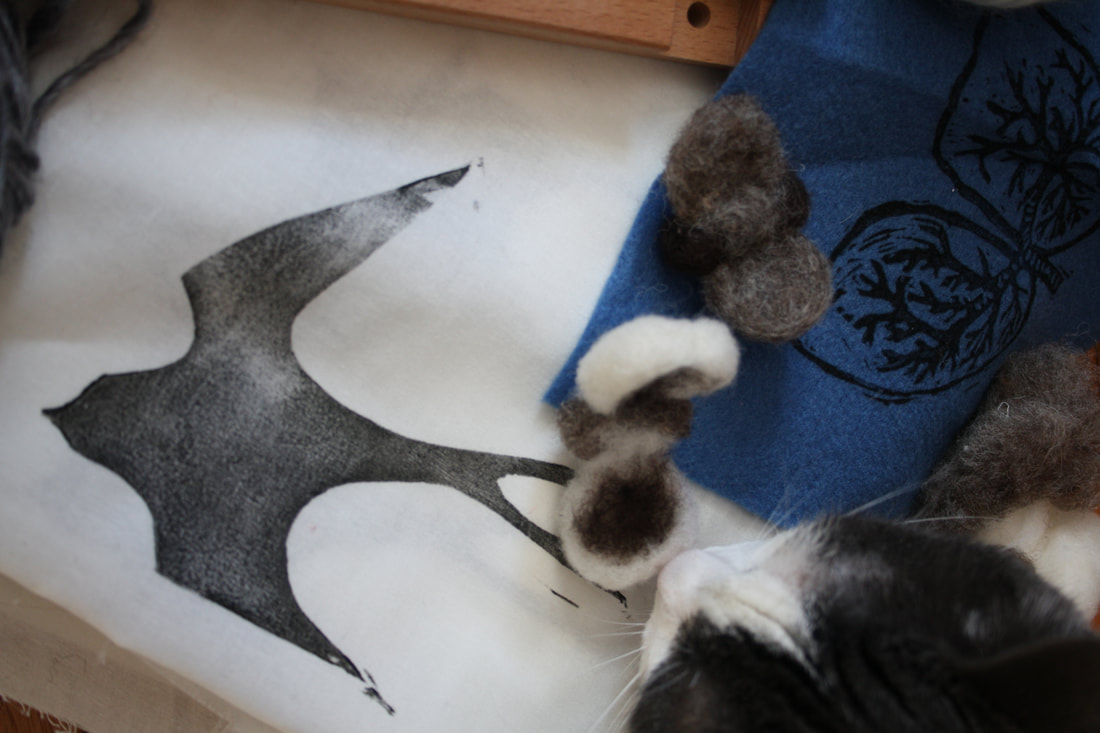 Over the next few weeks, my blog will be a bit quiet since I am leaving for Germany on March 9. I will be sure to write up a post or two of my travels, but while I am gone, be sure to check out my instagram, where I will be posting much more regularly. 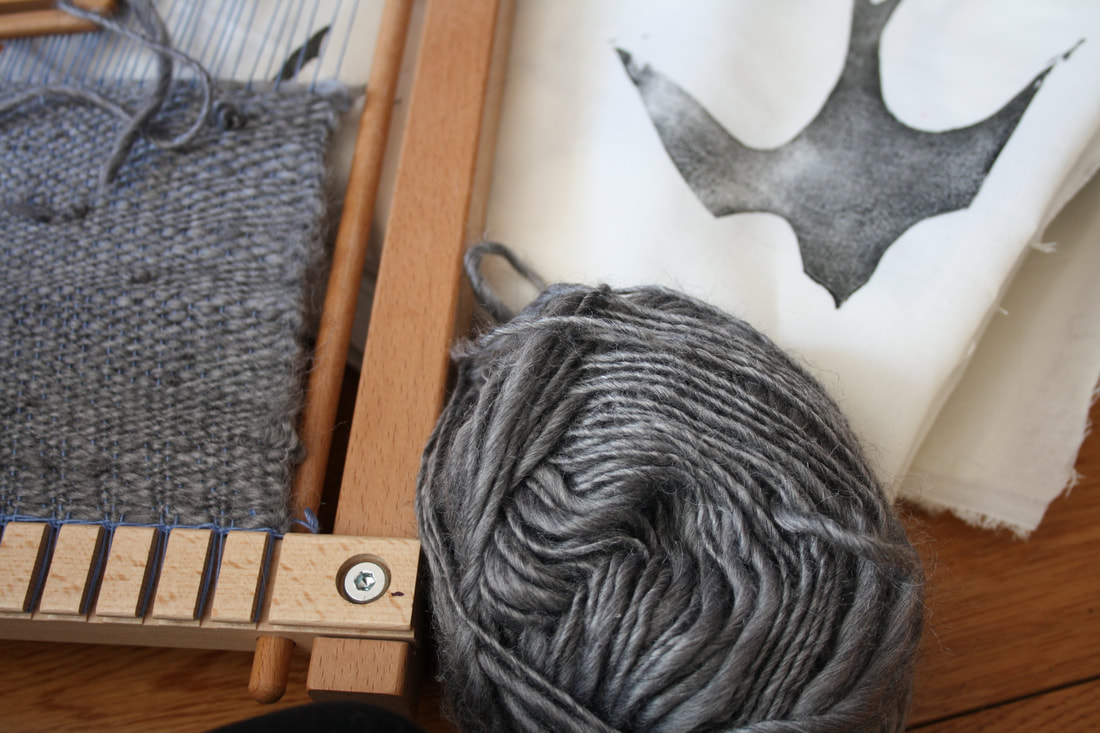 ~K
A bit of my process for the making of the Through the Looking Glass dress. I will be posting a video of each piece of the Curiosities collection, so keep your eyes peeled! My Youtube channel is here if you want to see more of my videos. ~K
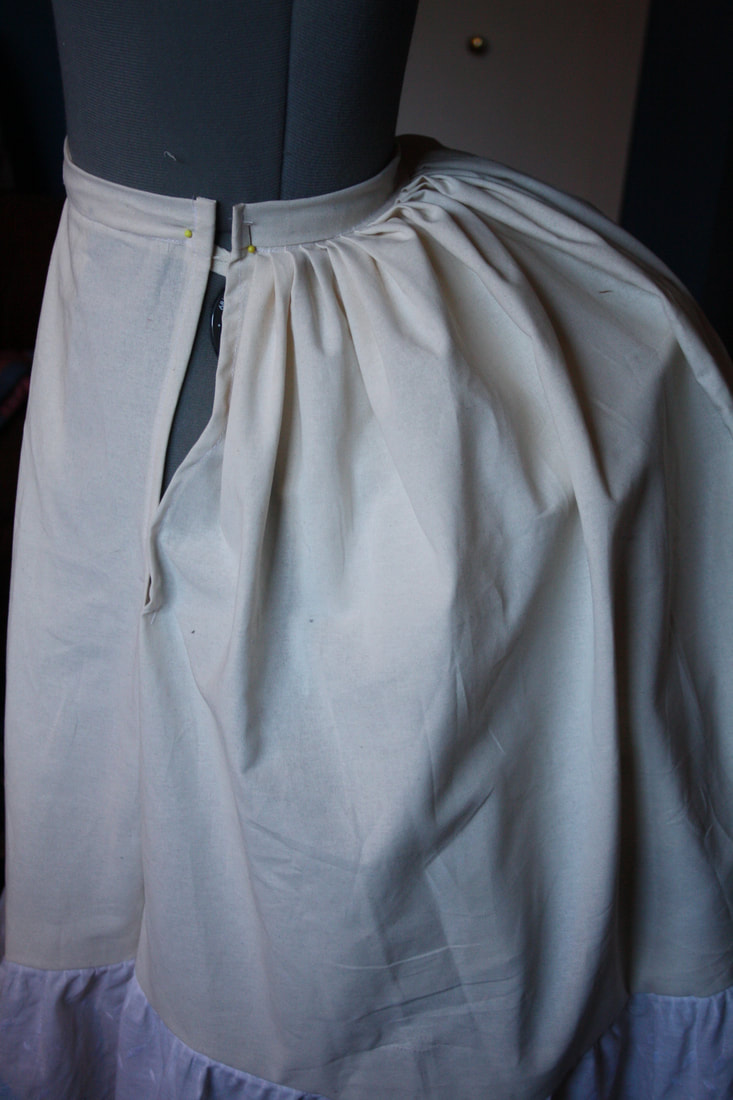 Since my Curiosities collection is based on the 1880s, I have most of my undergarments for them from my Frankenstein dress. The only things that I have had to make to go under these dresses were a bustle cage and petticoat. I could have used the bum pad that I made for my Frankenstein dress, but I wanted a more dramatic silhouette, and I have always wanted to make one. I talked about making the bustle cage in the last post, and once that was done I draped a petticoat over it. It is just muslin pleated onto a waistband with a lace bottom. 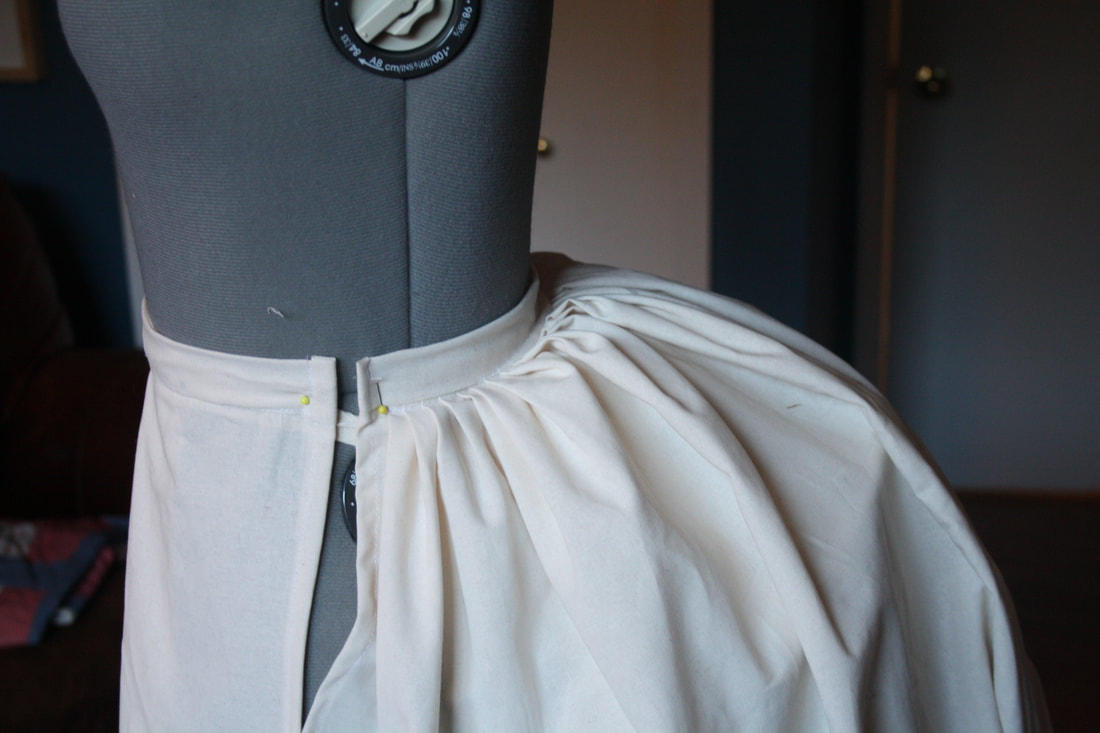 So far I have made two of the skirts, both of them are very simple. They are draped in the same way as the petticoat, I just draped them over the bustle and sewed them to a waistband. 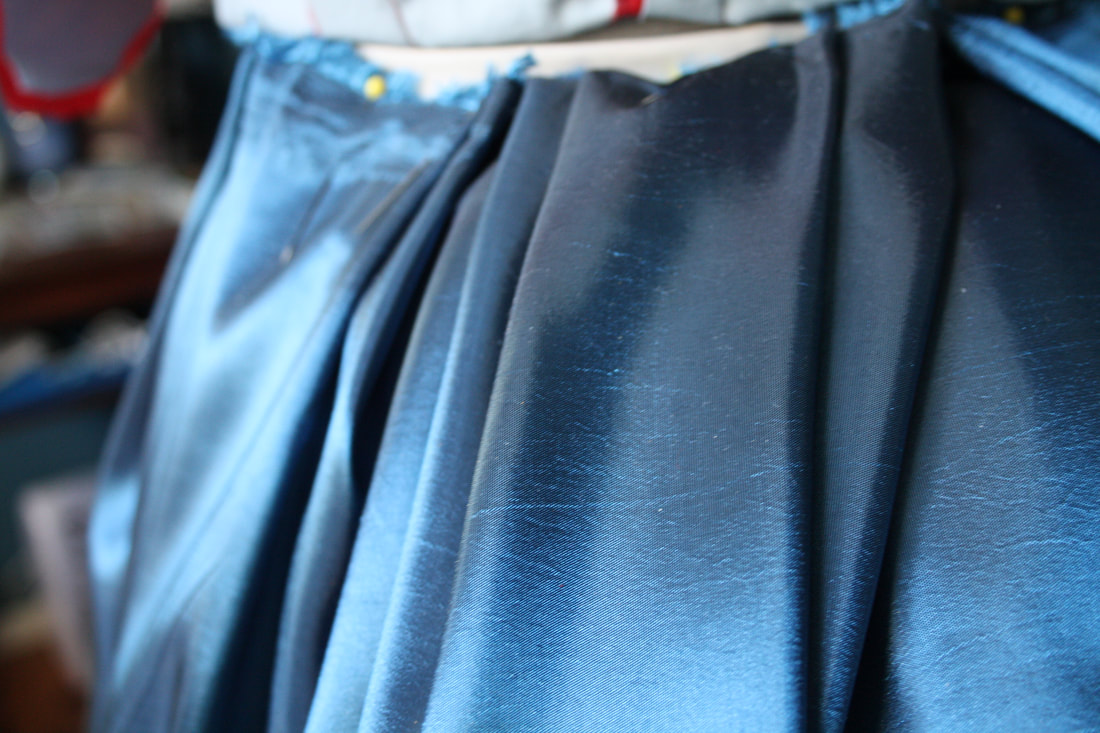 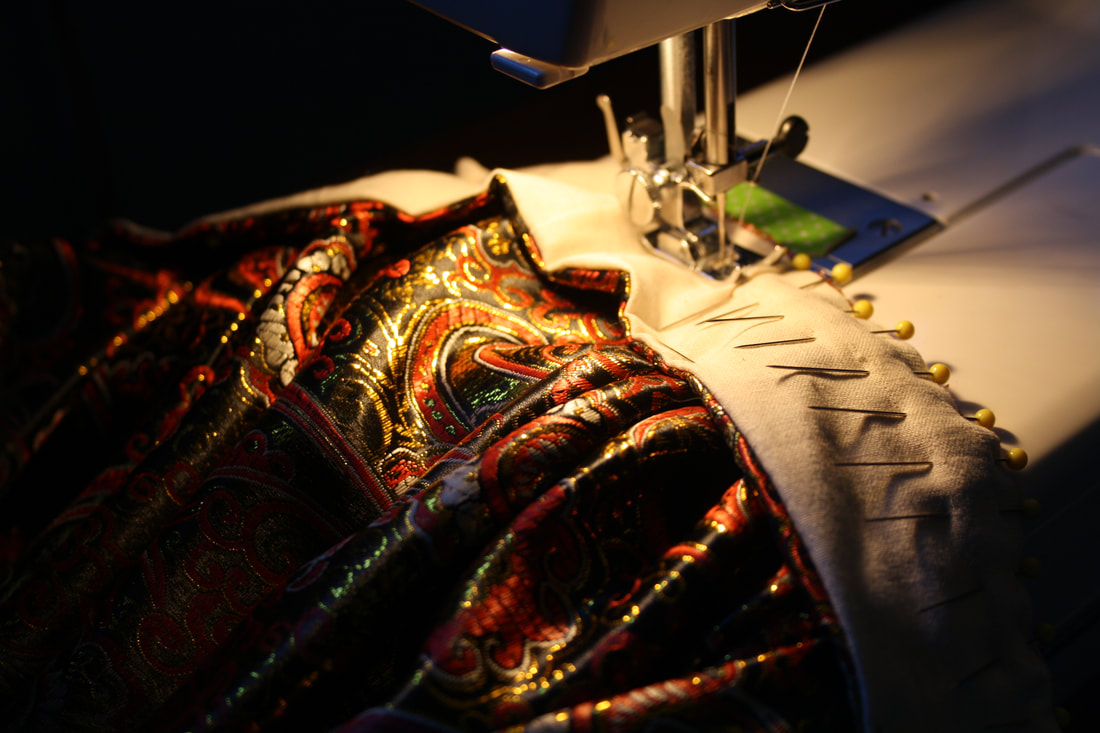 I have been filming the progress of each of the pieces so far, so I don't have many pictures. I will put out the video once I have pictures of the final products.
~K  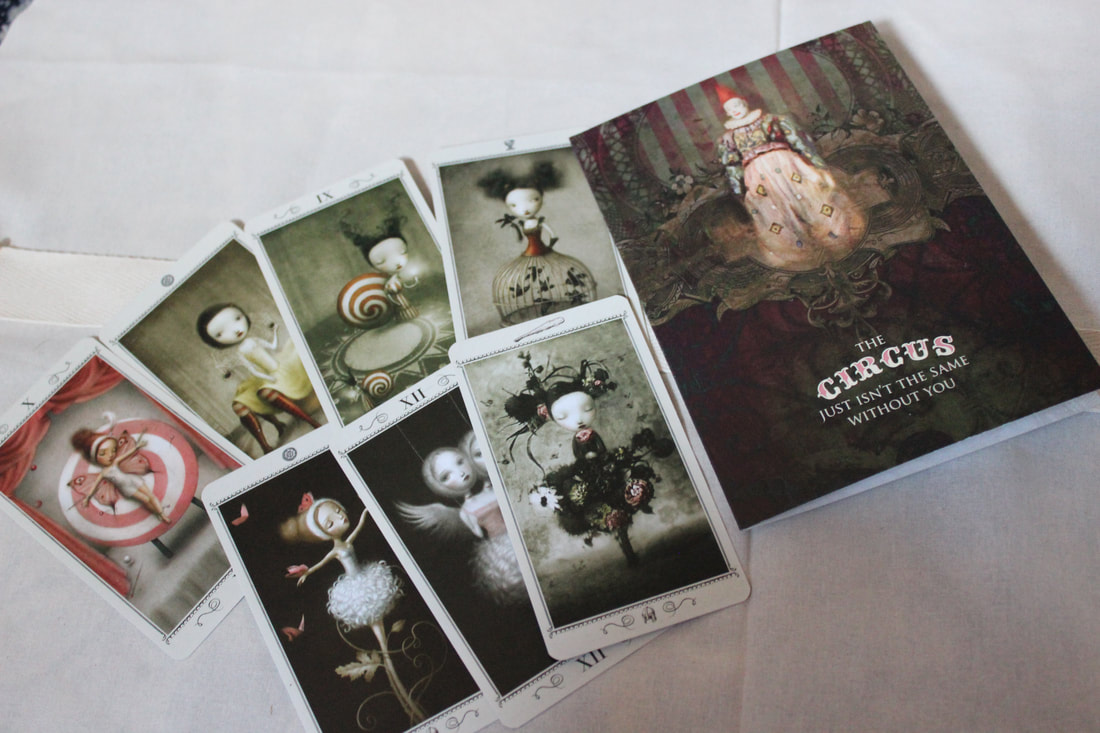 I finally started on my newest project- a collection of bustle dresses! I was inspired by many things for this little collection of (hopefully) four dresses, the largest inspiration being photos from the circus throughout the ages, especially the 1880s. I also have been inspired by my tarot cards (by the artist Nicoletta Ceccoli), as well as the show Ripper Street, and some of the strange vintage photos found online. I have talked about this collection before, in my Plans and Fabric Haul video, and have finally decided on a name for the collection- Curiosities. 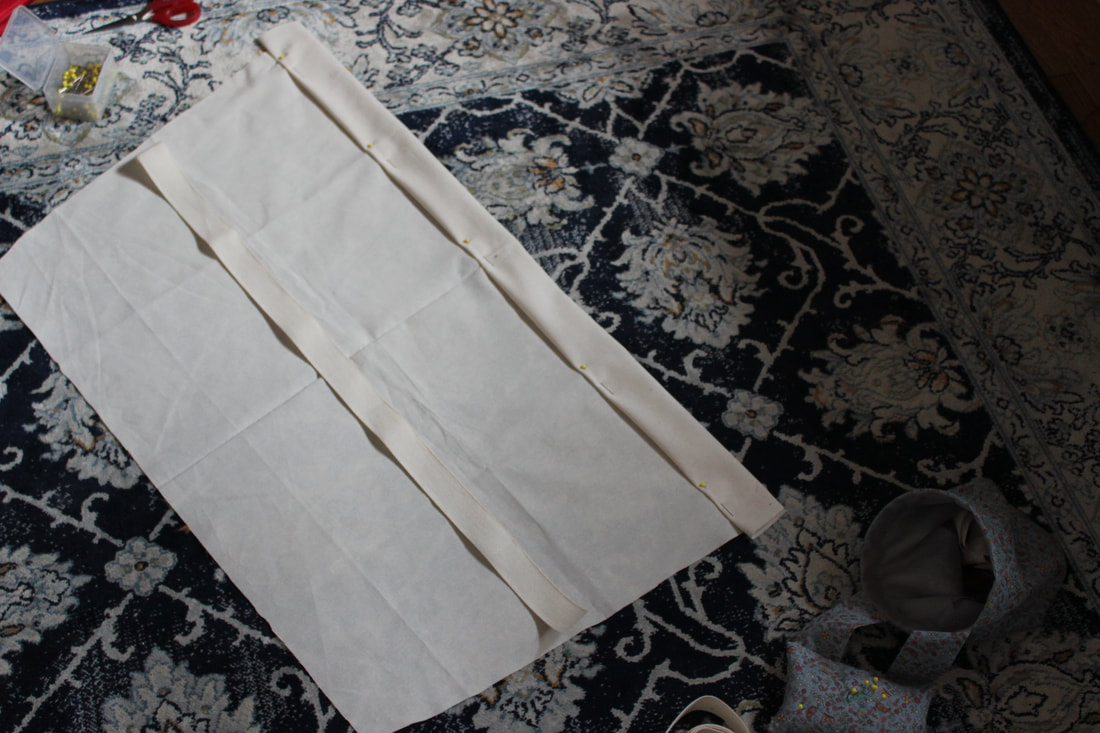  The first thing that I needed to make to before I started the dresses was a bustle cage. I made a bum pad for the last bustle dress that I did, but I really wanted to make an actual bustle cage, so I decided to use the American Duchess pattern for panniers, but I just made one instead of two. I also made the pattern about 4 inches smaller since my panniers are quite large. 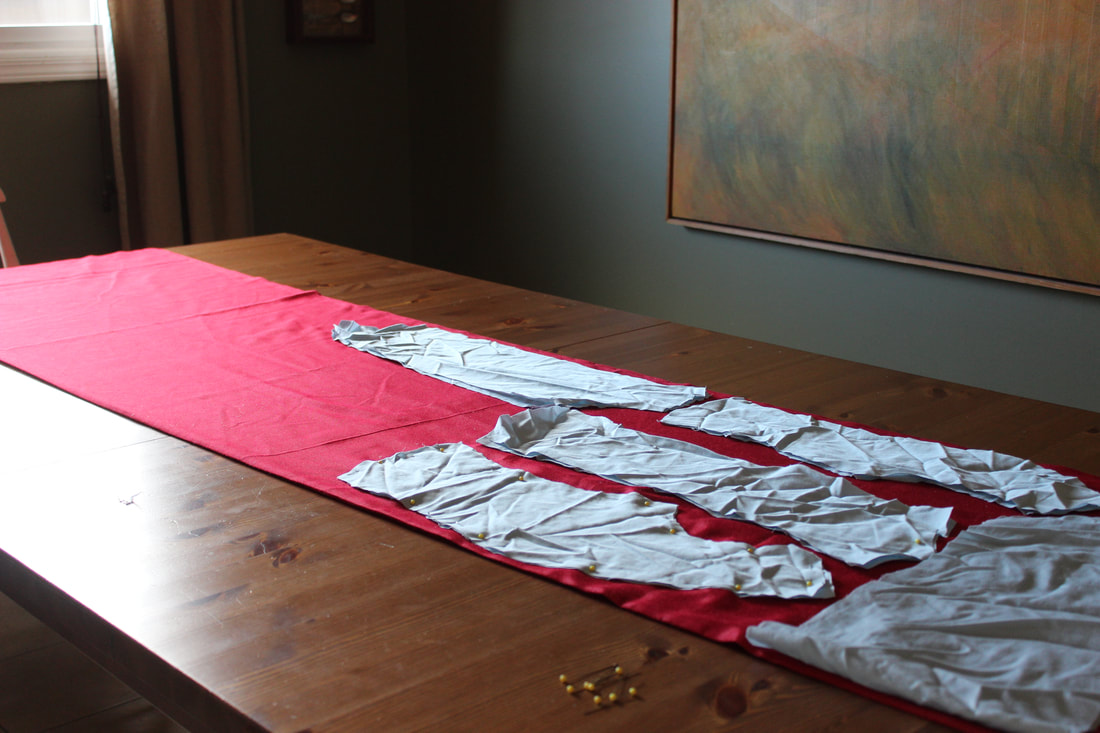 Next up- the dresses! I've decided to start with one that is based off of Alice in Wonderland.
~K I finally finished editing my video on the In the Mood for Love Dress. I filmed pretty much the whole process of me making it, from cutting it out (using a pattern from Patterns by Gertie) to the fnished product. The music is La Valse d'Amelie by Yann Tiersen and Chris Snelling. If you want to see more of my youtube videos, my channel is here Thanks for watching! I will put up more photos of the finished dress in a post next week
~K 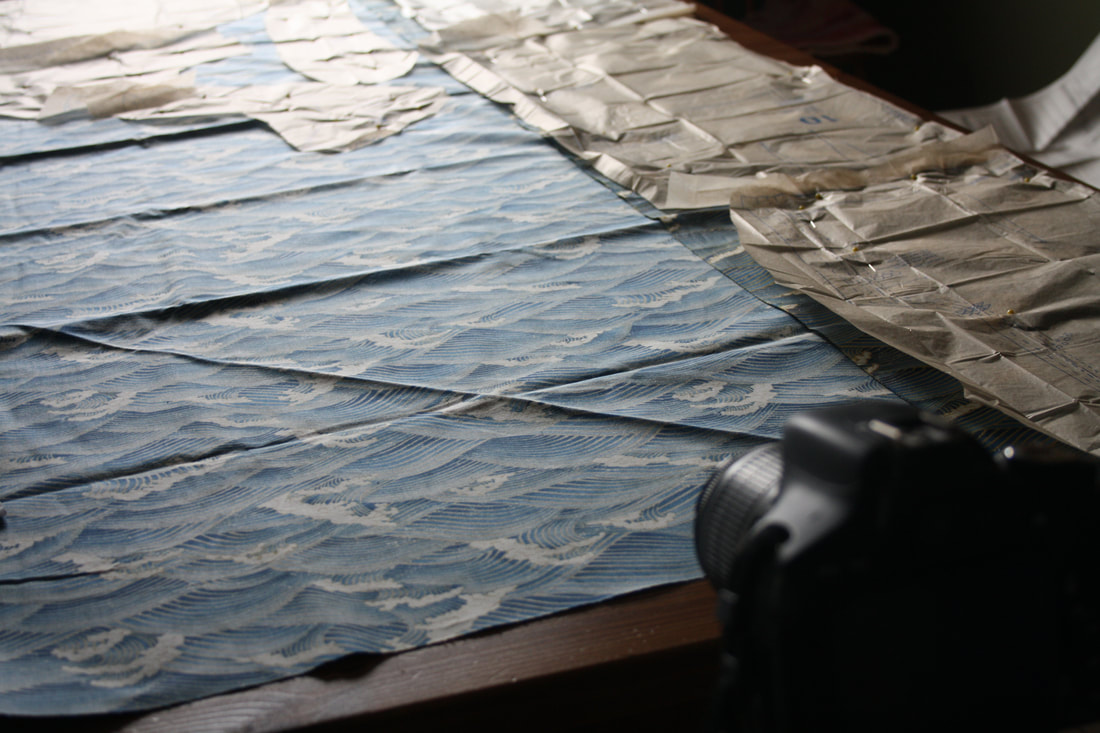 I have been filming the current project that I am working on, which is a cotton dress inspired by the movie In the Mood for Love (I talked about this movie in my Movie Recommendations post). The pattern that I am using for it is one from Patterns by Gertie. 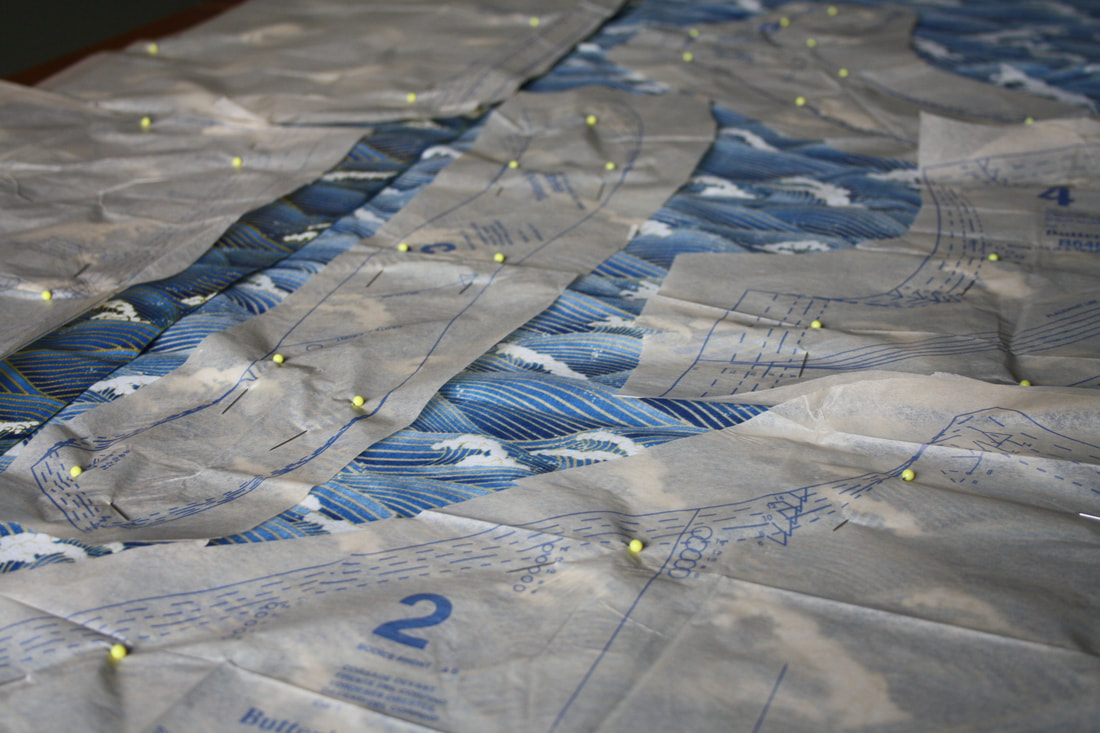 Because I am filming the process, I do not have tons of pictures of the dress as I make it, but I do have a few behind the scenes pictures while I film myself cutting the pieces out. I will post my video up here once I'm done, and as always, I will have the pictures up here as well. 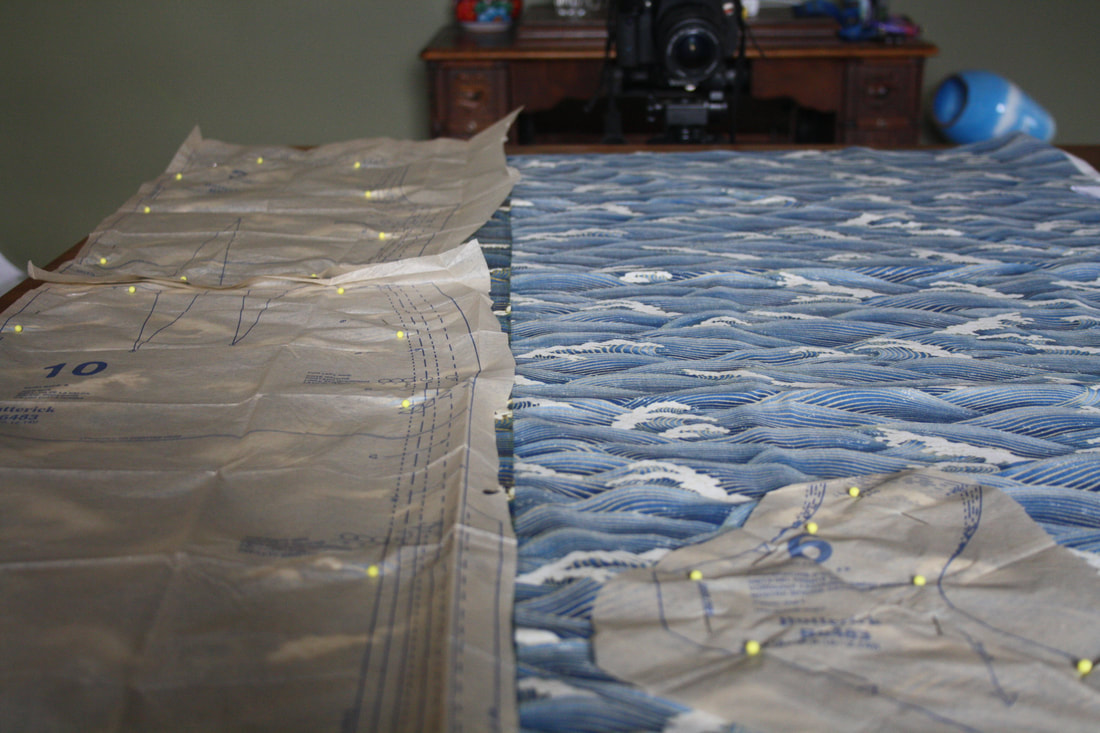 I can't wait to show you the finished dress!
~K I have finished editing the making of video for my bustle dress! I am thinking of doing more videos like this, so let me know if you like it!
~K 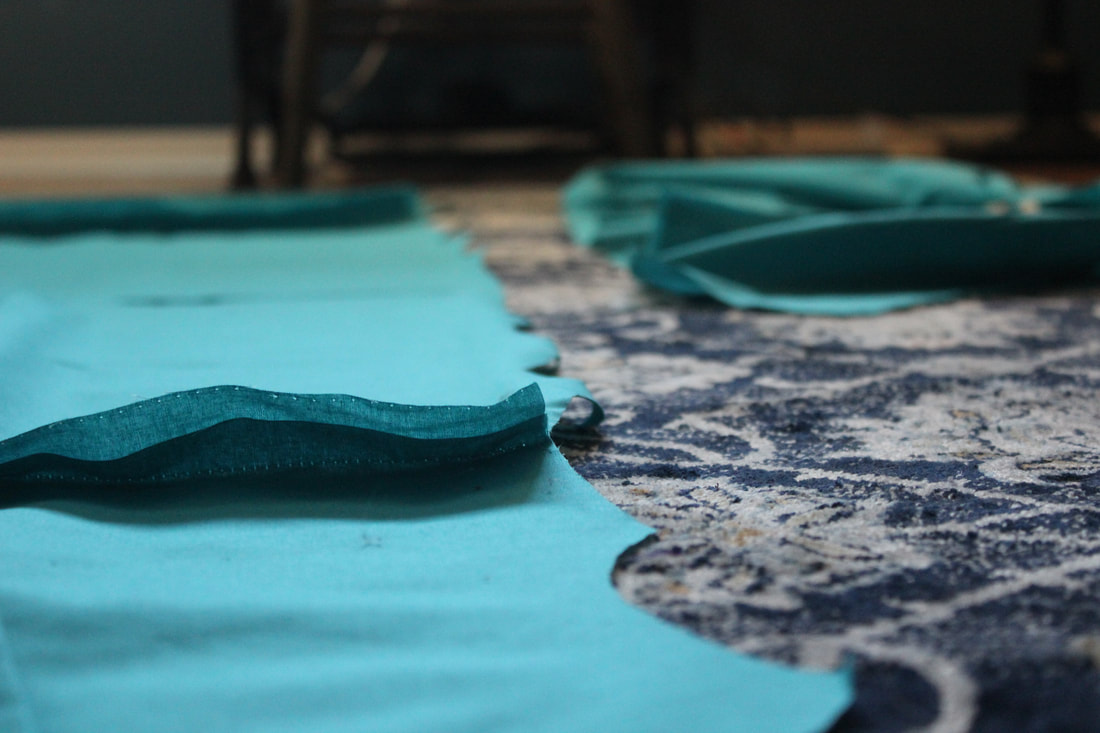 I had the most incredible opportunity recently to make a costume for a film made by an Albertan director. I worked with Mitchell George from Crooked Cinema to make one costume for their new film Highway Patrolman. I was so thrilled to be able to be a part of this, especially since my goal is to be a movie costumer! You can check out their website here. 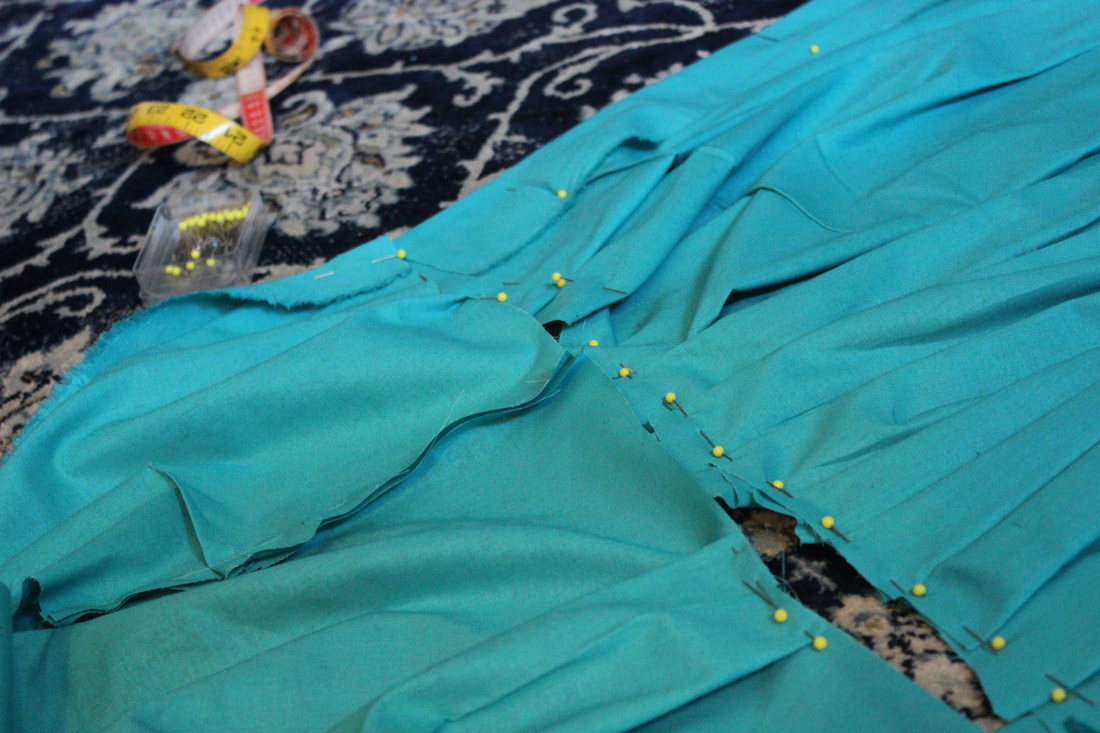 I made a 1950's styled diner dress for the film, which was great to do since I love the 1950's and have had a bit of an obsession recently with the era. I used the same Burda pattern as I did for my 1950's Blue Dress with a few alterations to it. I made the dress in about 3 and a half days, while working on the side a bit. It was a bit of a tight schedule, but luckily enough this was an easy style to make, and I was able to find the right colour of fabric very quickly. 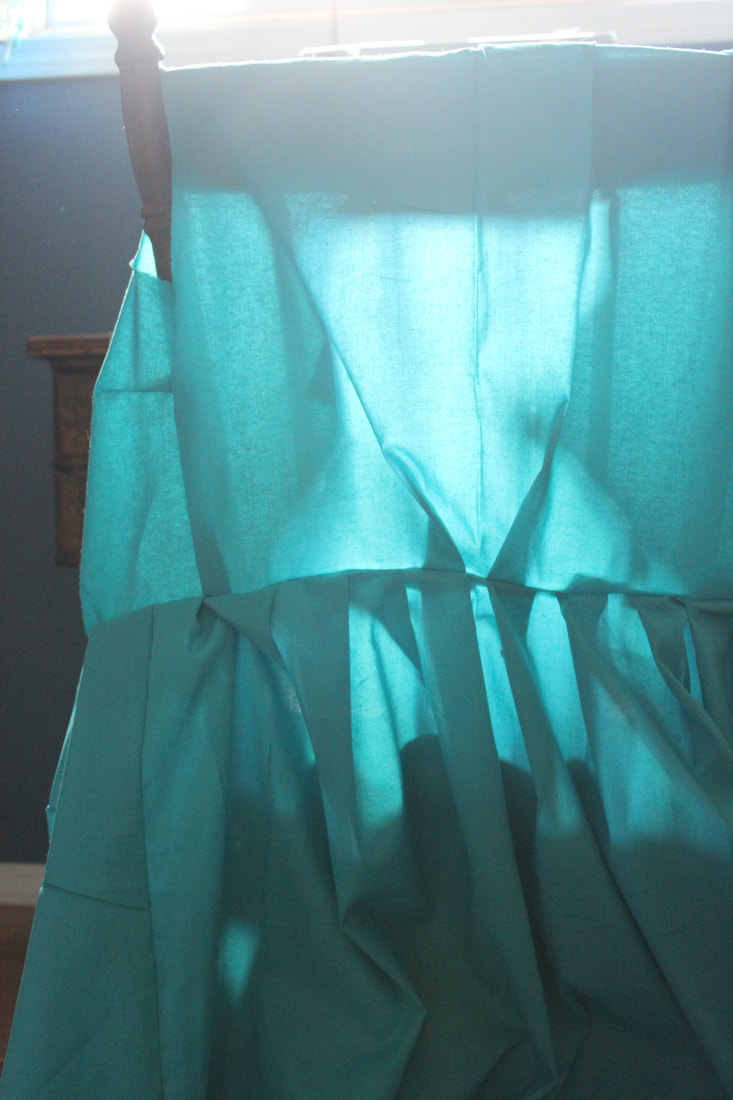 The collar, cuffs, and apron were self drafted, and the dress was based on the Burda pattern. The dress was done mostly on the machine to save time, and finished by hand (button holes, cuffs, and collar were all done by hand). 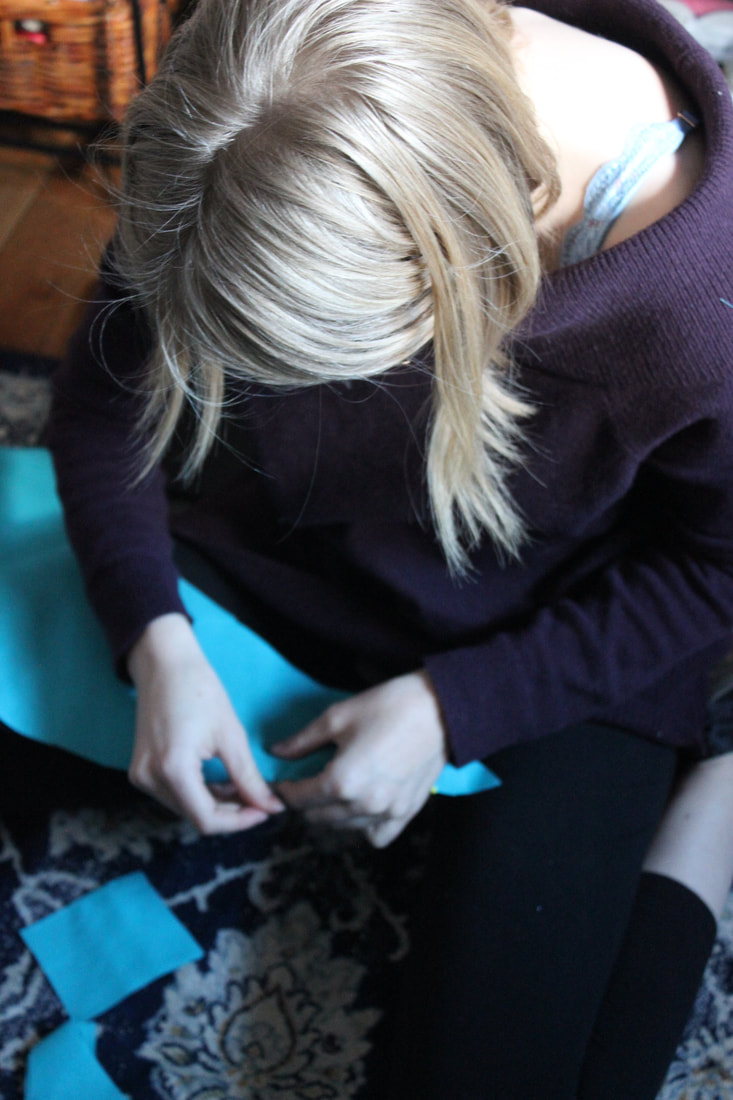 I got quite of few progress pictures of this dress, so this will be a very photo heavy post! 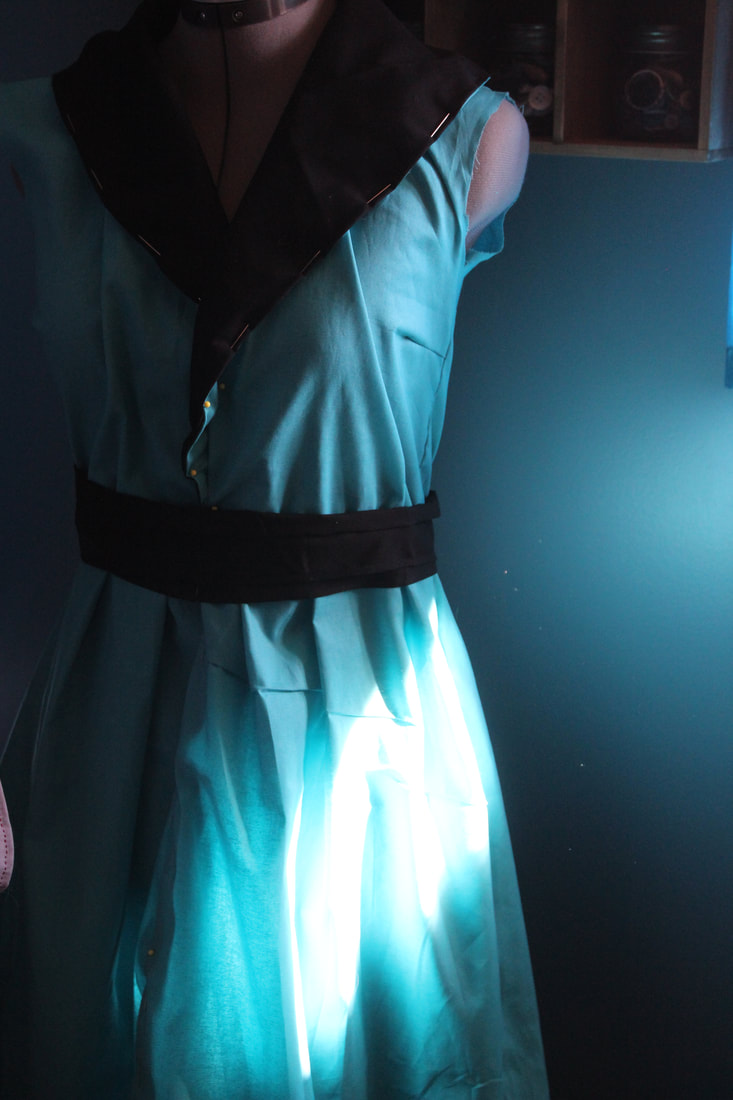 The dress pinned on to my mannequin. Here I was checking for size and where to put the buttons so the skirt would lay nicely. 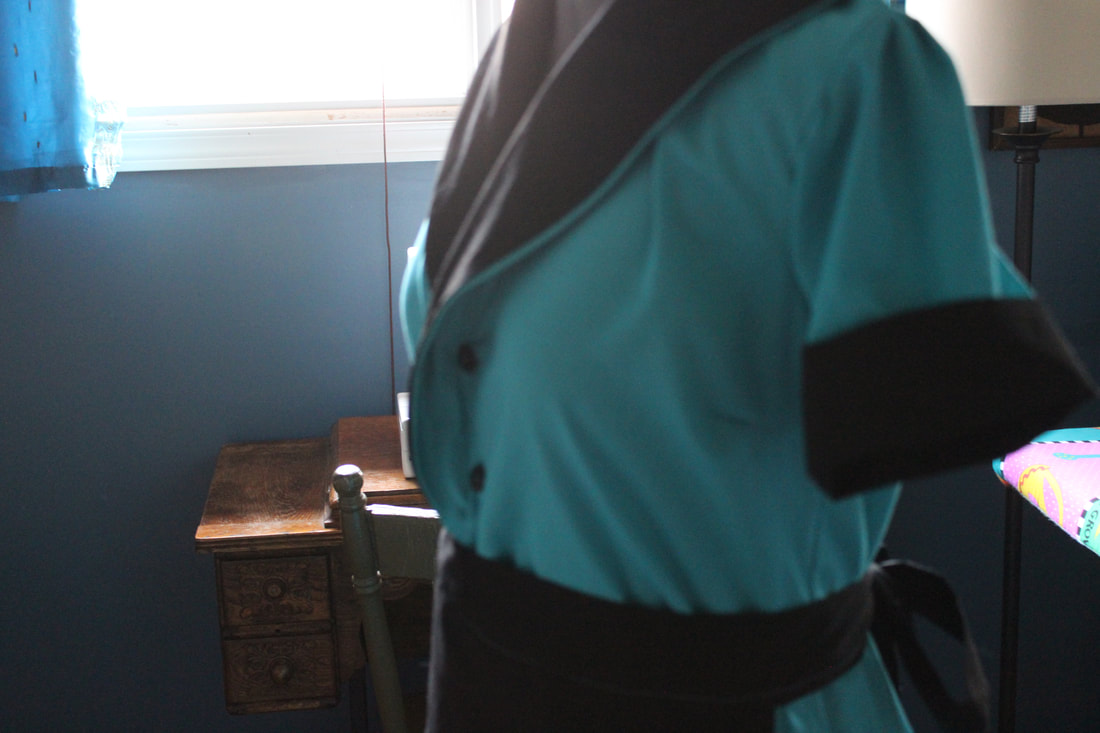 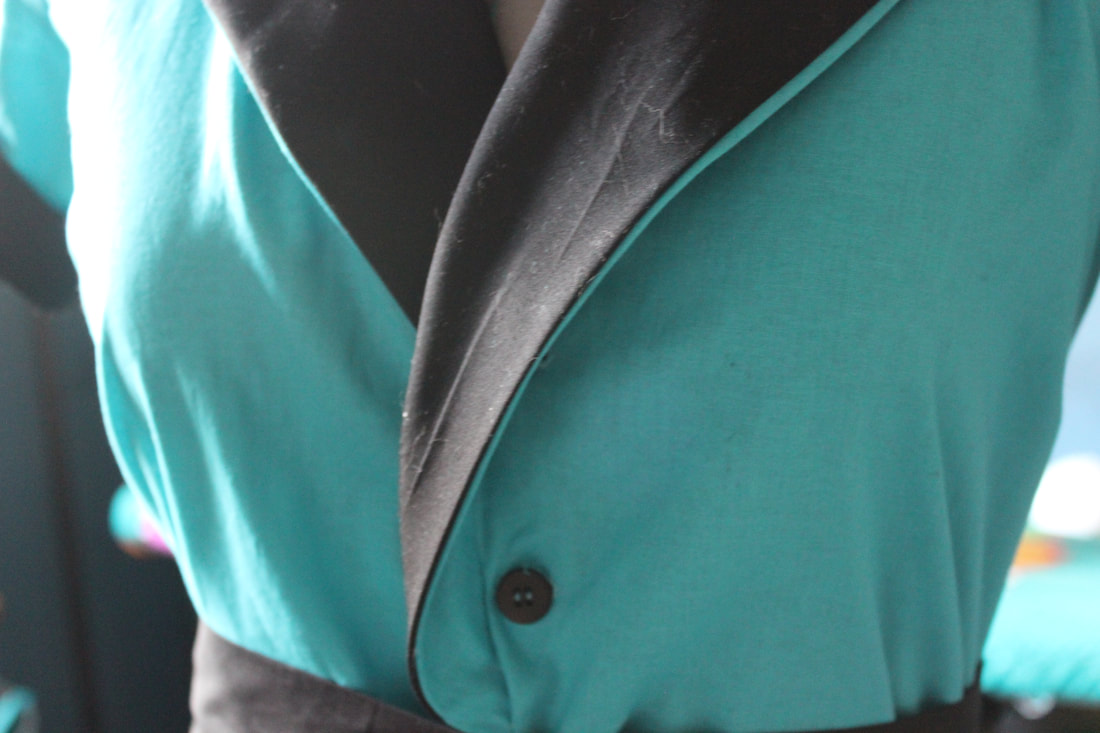 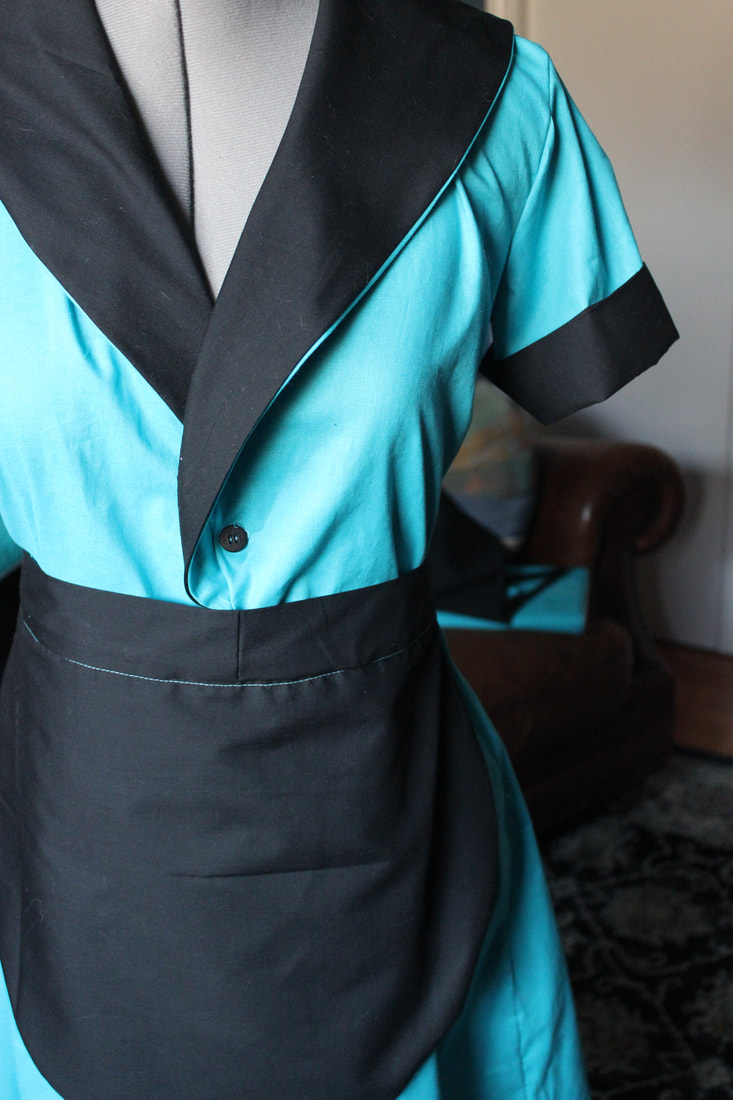 I did end up adding a turquoise pocket on the apron, but I don't have photos of it with the addition 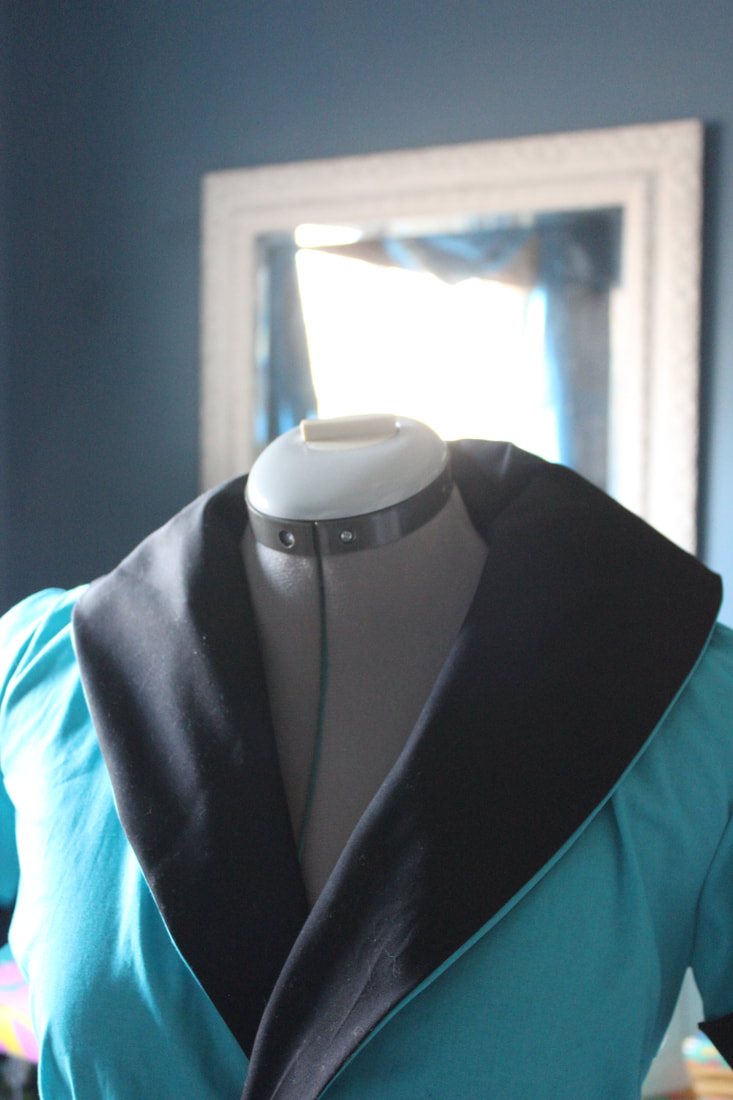 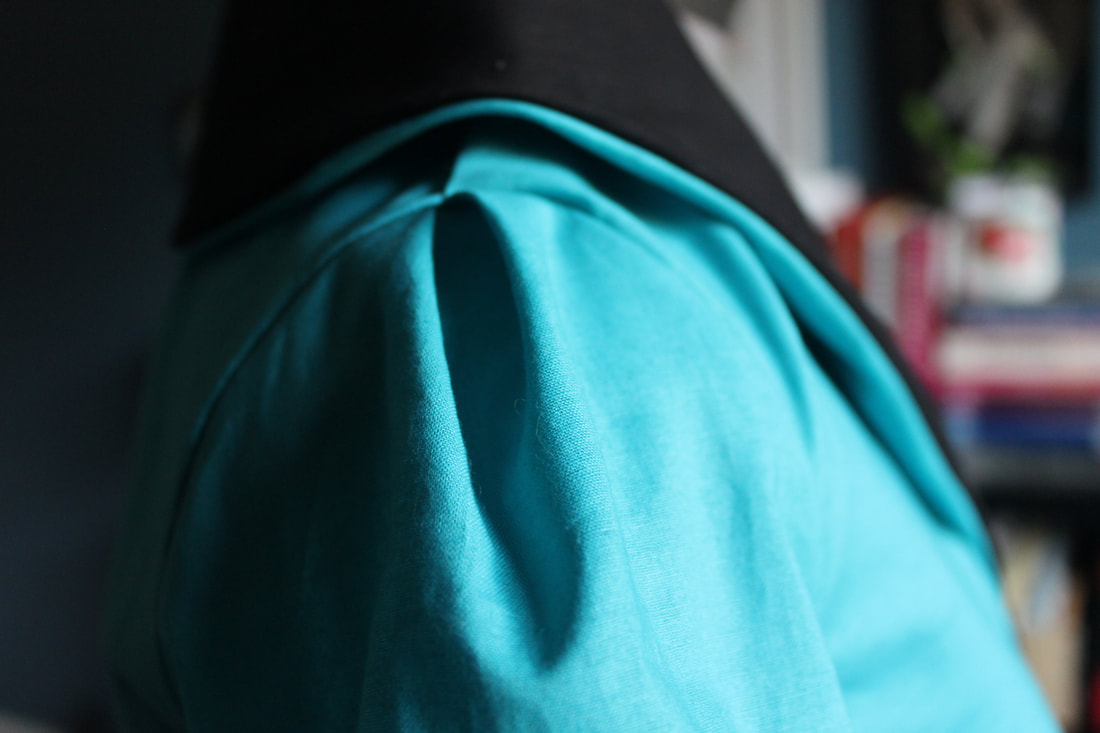 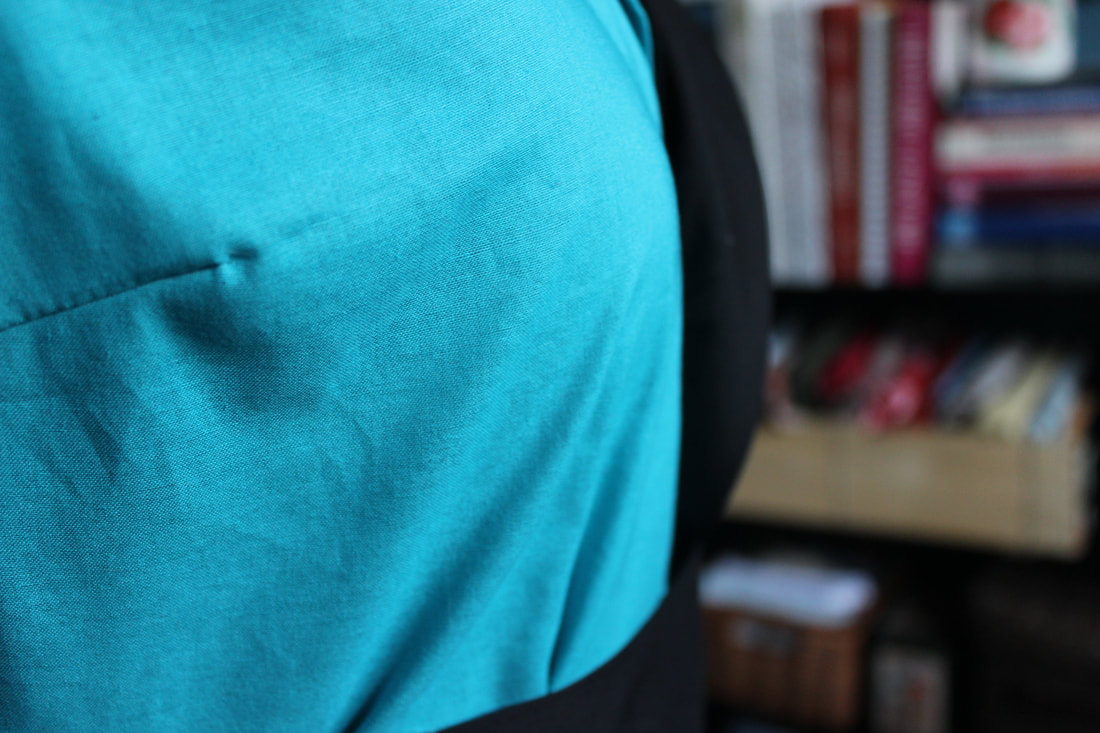  I am so thrilled with how this turned out, and with the fact that I got this opportunity! Be sure to keep an eye out on Crooked Cinema, and for when Highway Patrolman comes out!
~K 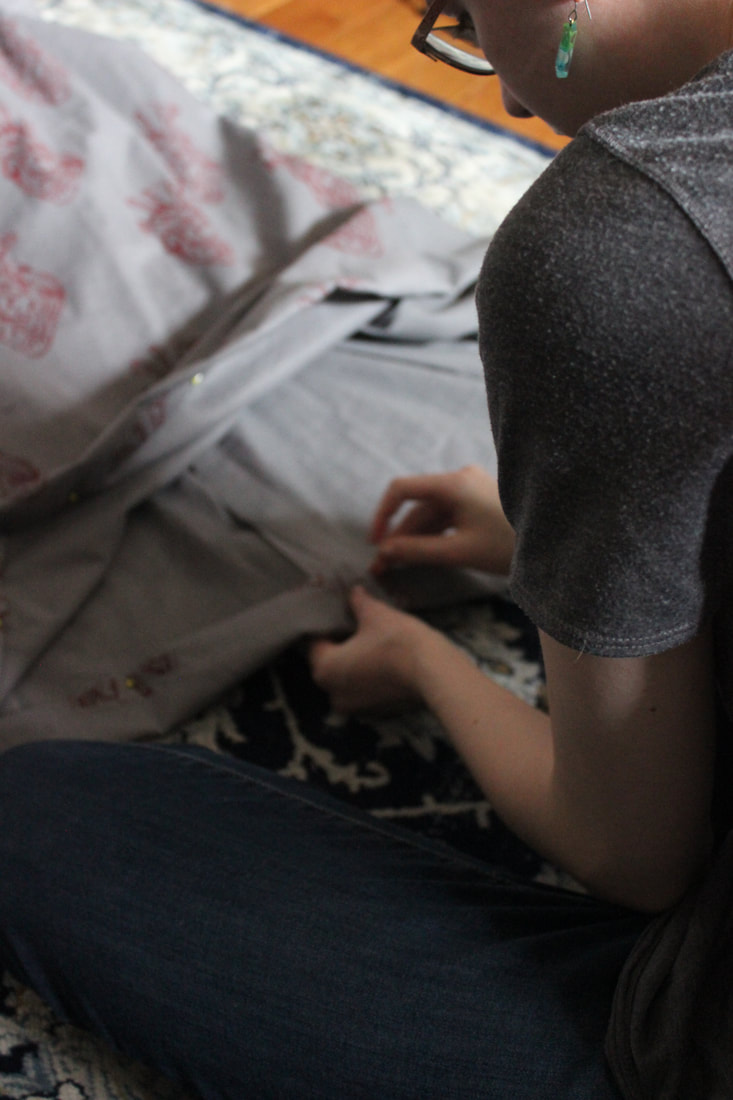 I just had a very exciting opportunity, and I will tell you all about it as soon as I can! But for now, here are a few photos of me working on my bustle dress- this was just when I was hemming it a few days ago. All that is left now are button holes, although that project has been put to the side for a few days. I will get back to it very soon, and I do have a location for photos now, which is very exciting! 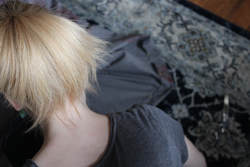 Also, if you haven't noticed already, I added another page to my website! I added a Self Care section, which is another blog page. Since I have been doing so much training about cosmetics and skin care with my job, I thought that I would share another one of my passions with you, and some of the information that you may not be hearing from others. I also have an instagram for the self care side of my interests, and you can see that here if you are interested. 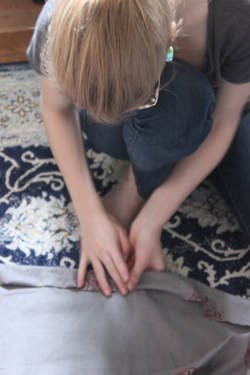 I also have some more exciting news that I found out a week or so ago- I got accepted into Olds College for Costume Cutting and Construction, starting next fall.
I can't wait for all of these new opportunities, and I am very excited for when I am able to show you what I have been working on this week! ~K I have been hard at work on my bustle dress lately, I promise! Instead of taking more photos of each stage of the process, I have been filming it so I haven't had much progress to post online. 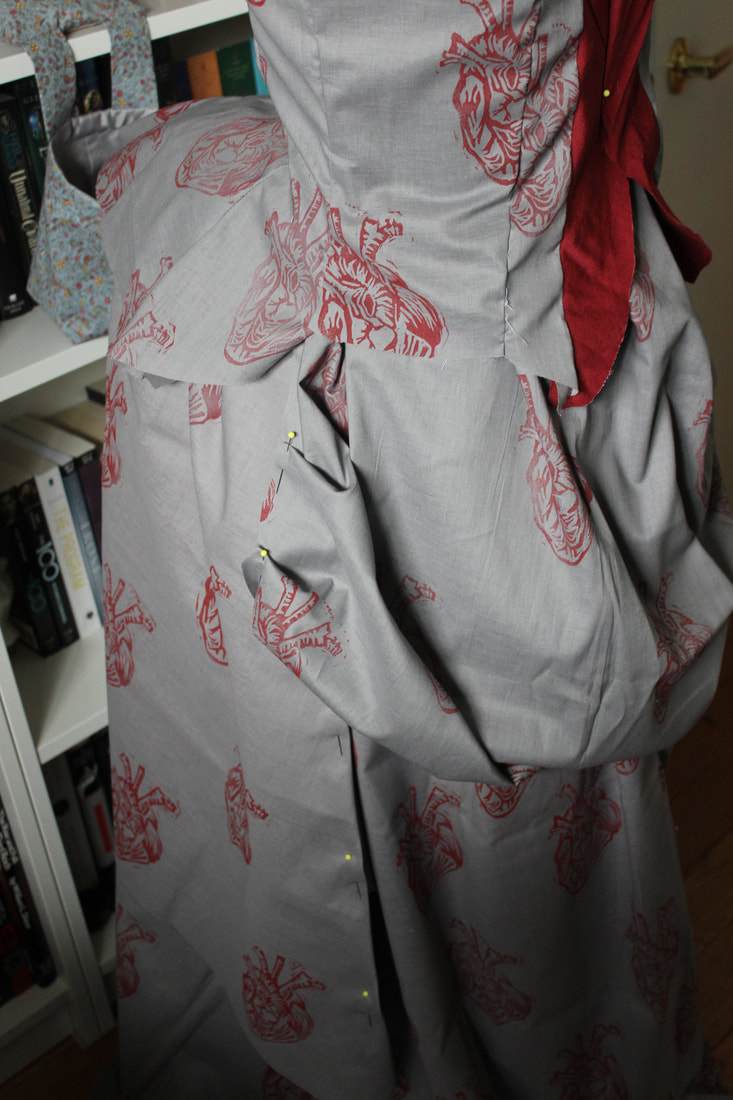 I am hoping to finish this gown in September, however I do have a pretty busy schedule at the moment, and it has been difficult to balance work, drivers ed, and my sewing. However, I still have made quite a bit of progress, so there is a slim chance that I will finish it this month! Fingers crossed... 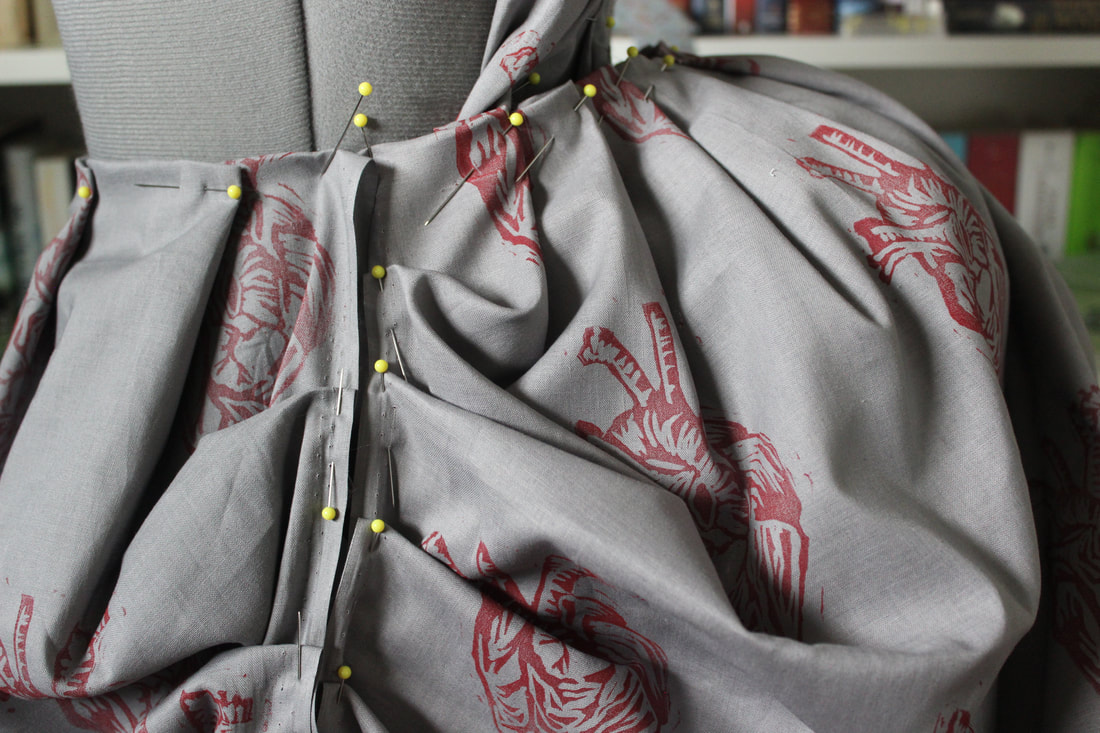 I also have a talk at a school next week about Cosplay. I am not a cosplayer, as my costumes are my own designs, but since they are inspired often by movies and such, it is a good fit! I am very excited to share some tips for making more unusual garments and for starting sewing. 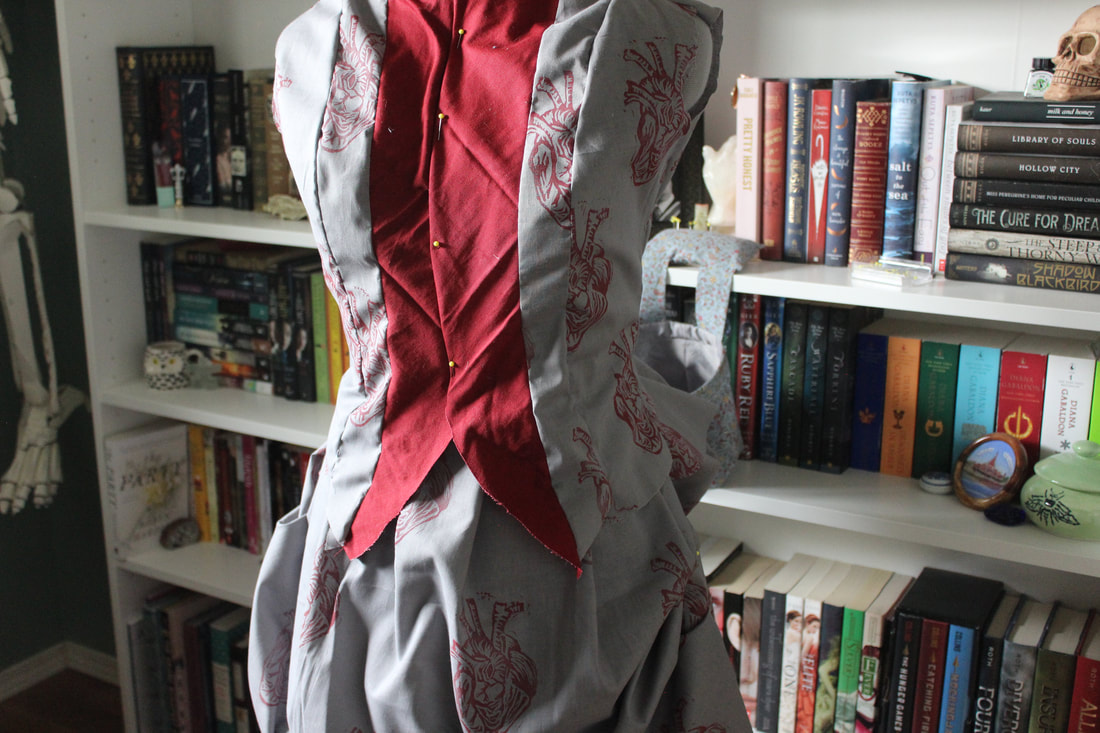 For my bustle gown, I so far am very close to finishing the bodice, and I have draped the skirt and apron. The apron is just the draped part at the front and back of the dress that is the trademark of the 1880s. 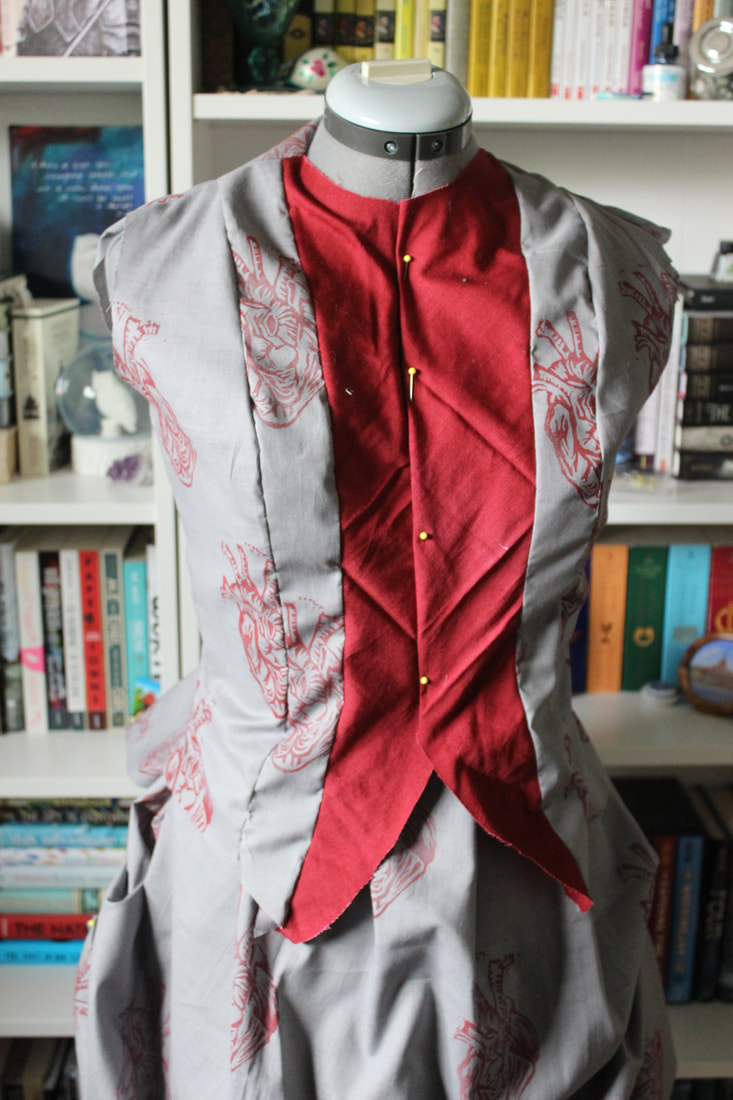 All I have left to do for the bodice is put some boning in the lower half to keep the bodice as wrinkle free as possible, and to put on the sleeves. For the skirts I need to sew the sides and add the waistband. Other than that, I just have a few other things to do to finish of the ensemble! ~K
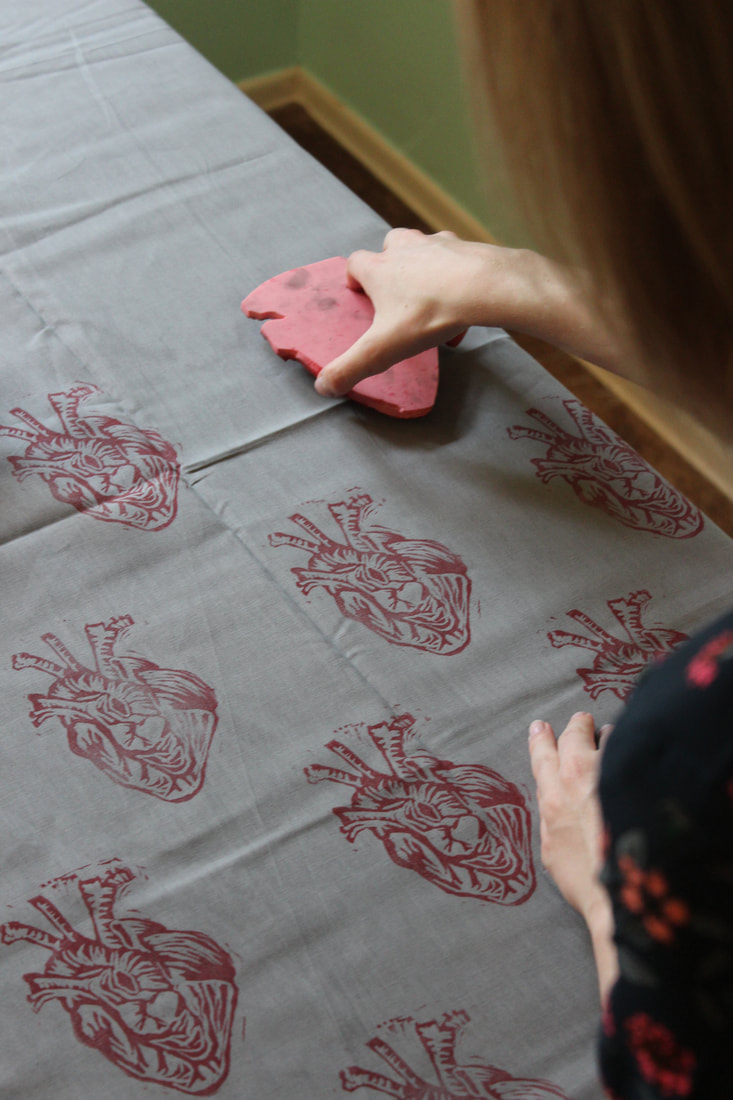 For my newest project, I have decided to print my own fabric!My mom (her blog is here) carved a stamp for me, and I printed it onto a grey cotton with fabric ink. I had a very clear idea of what I wanted, and I knew that it would be very unlikely that I would find a fabric like it so I decided to print it myself. I am thrilled with how it turned out! 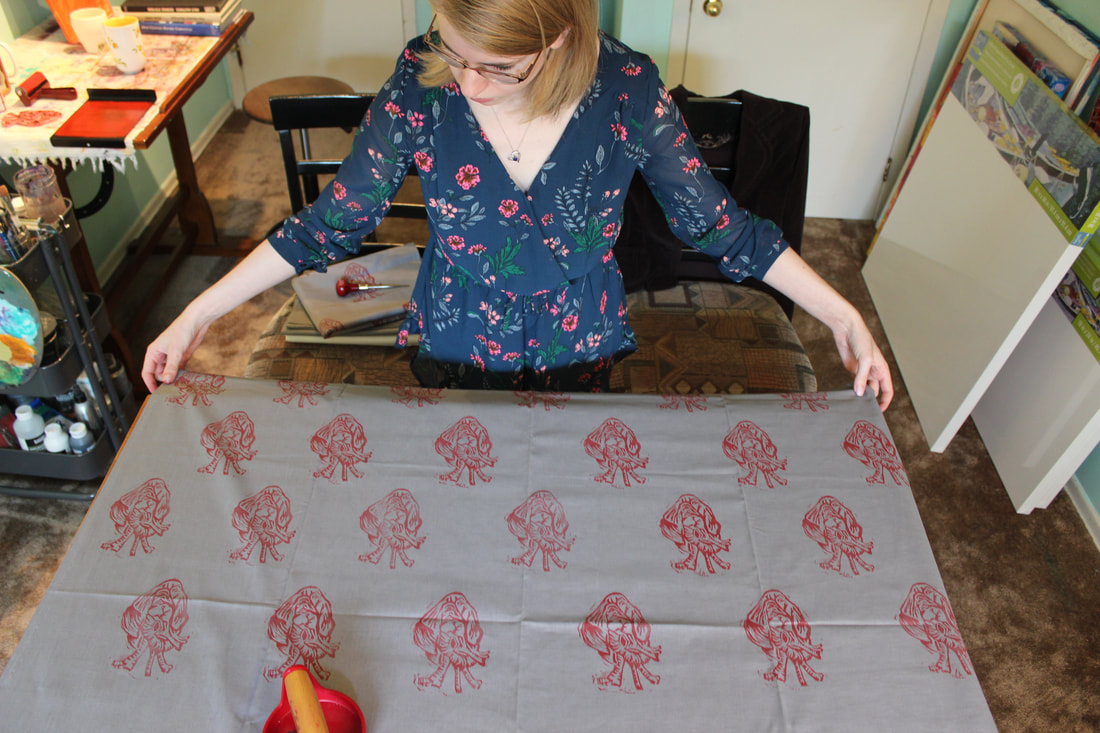 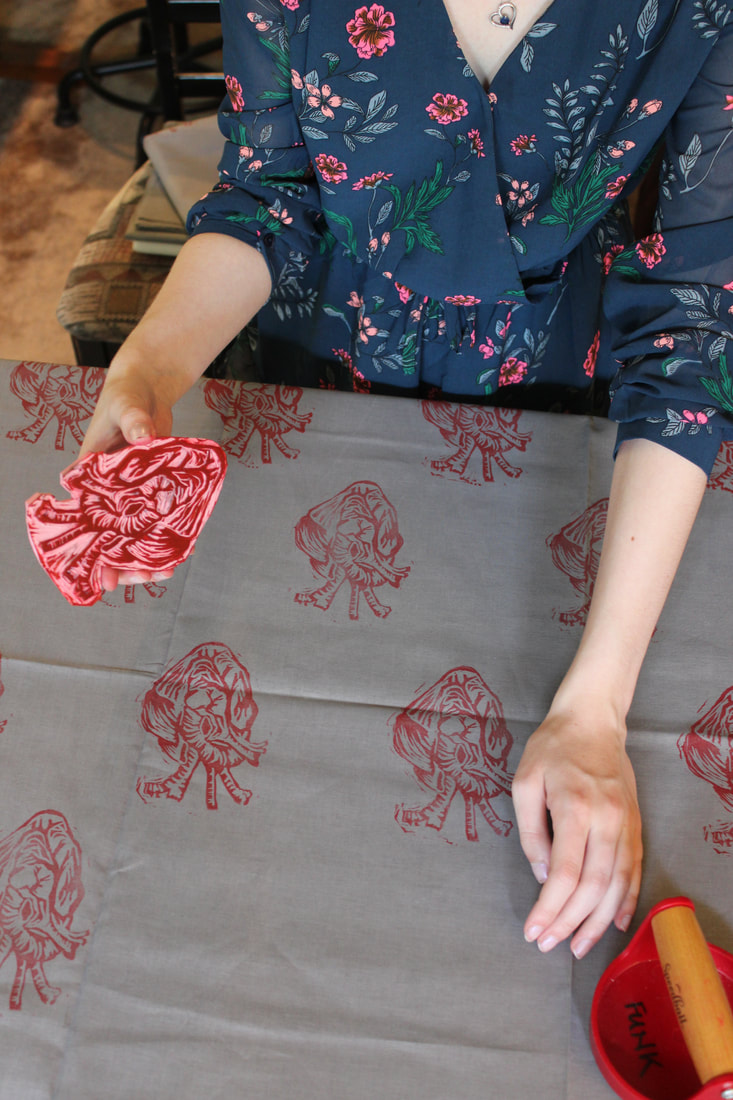 It took me between an hour and an hour and a half to print each chunk of fabric, which was 2 yards long. I printed 3 of those, and I am sure that it will be enough fabric for what I want to make with it.  You can also see for the first time in these photos our combined studio space! I am still in my little storage closet, but this table is perfect for cutting out pattern pieces and such, so it's really great to have this second space.  I have been busy over the past few weeks, so stay tuned to see all of the projects that I have been working on. I will also let you know what this fabric is for in my next post!
~K It only took me more than half a year, but I finally have everything to show you some of the behind scenes when it came to making the Dream Dress for MakeFashion!  All of these pictures were taken by me, once the dress was done before the electronics were put in The reason that this post took so long to become reality is that I actually lost the photos of the dress in progress. Thankfully, I found them so I can give you a bit of an idea of what the inside of the dress looks like, since it actually has more detail on the inside than it does on the outside!  The skirt has gores in the bottom to give it some more volume 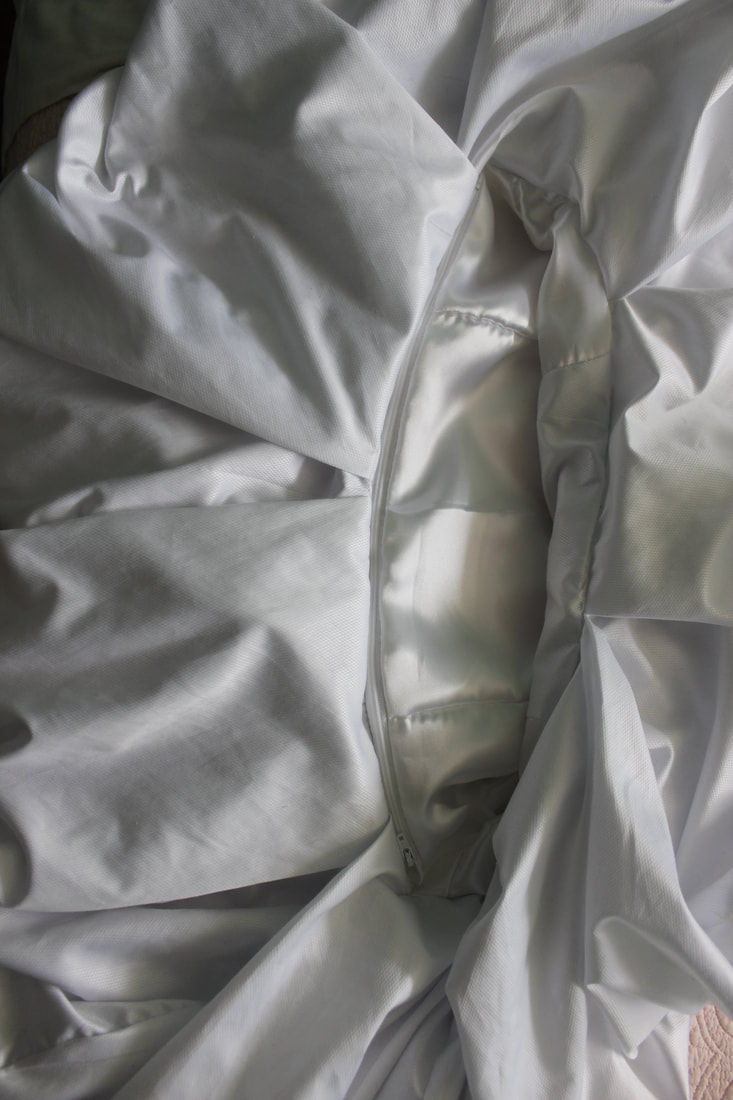 This is on the inside of the skirt. You can see how the outside is sewn onto the lining to make it into a bubble skirt, and there is a zipper between the lining and outside fabric. The zipper was sewn in to ensure that we could access the wiring on the inside and remove it for cleaning 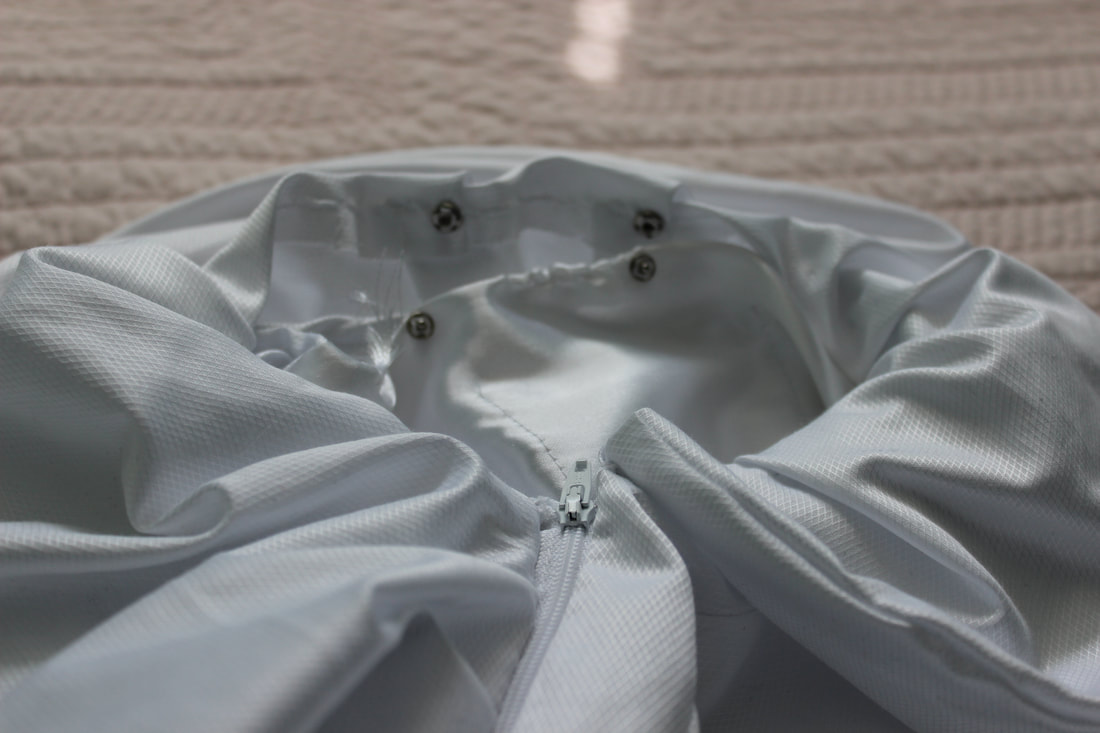 The collar also has an opening in it for wiring, but this time I put in snaps, just since I thought a zipper might make the neckline too stiff. Unfortunately, the collar did not end up working for the show, but the option is there to add in other lights if needed 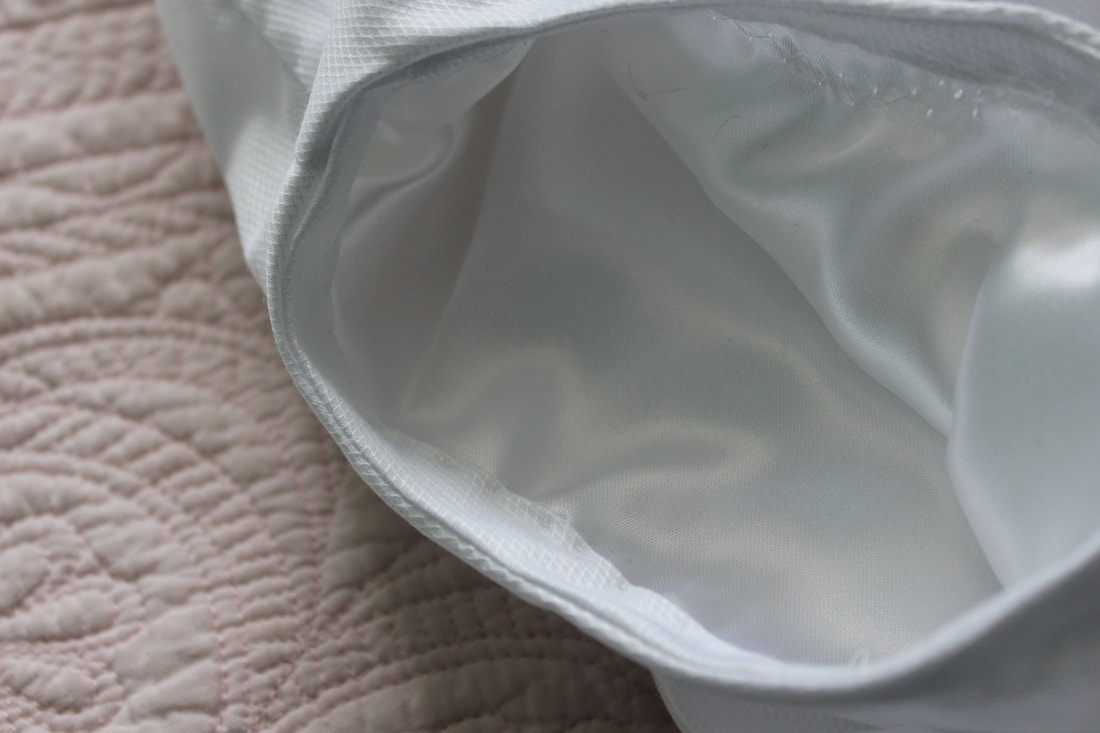 The armholes were very nicely finished with bias binding... for about three days. At the rehearsal we discovered that the arms were too small, and we had to cut into them and re-hem it. It did end up working though! 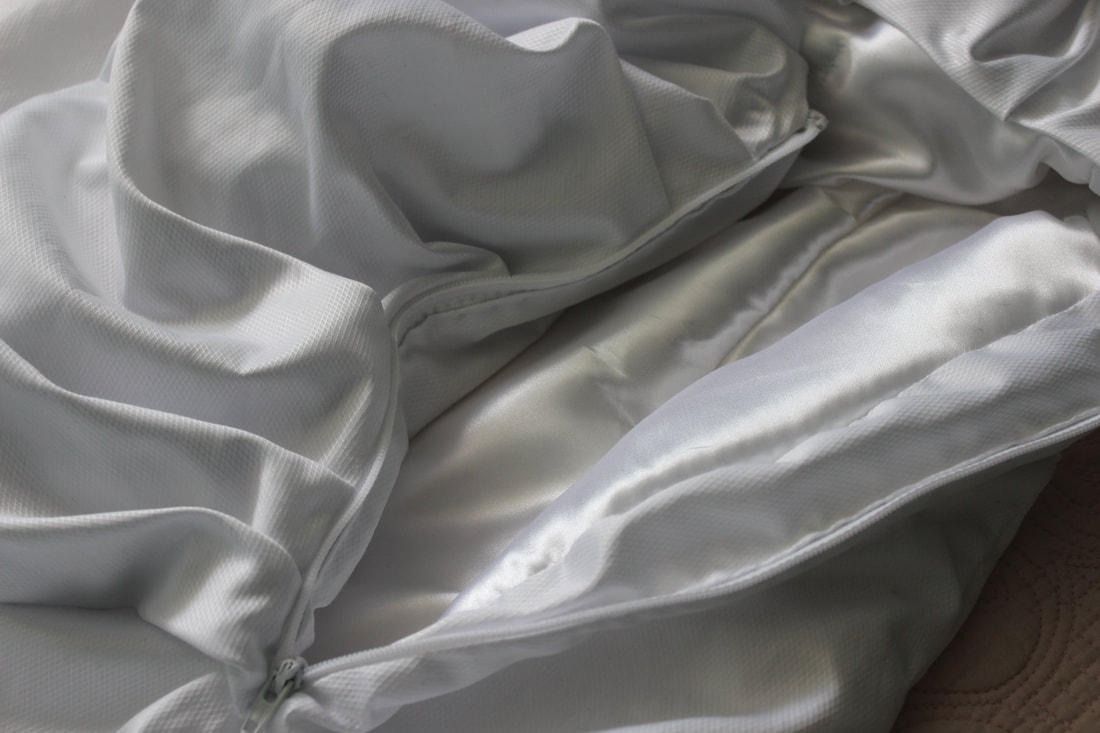 And here is the opening at the neckline! This dress had a bit of an unusual opening, with the zipper at the front instead of the back or side. It works really well though, since it ends up being hidden by the collar 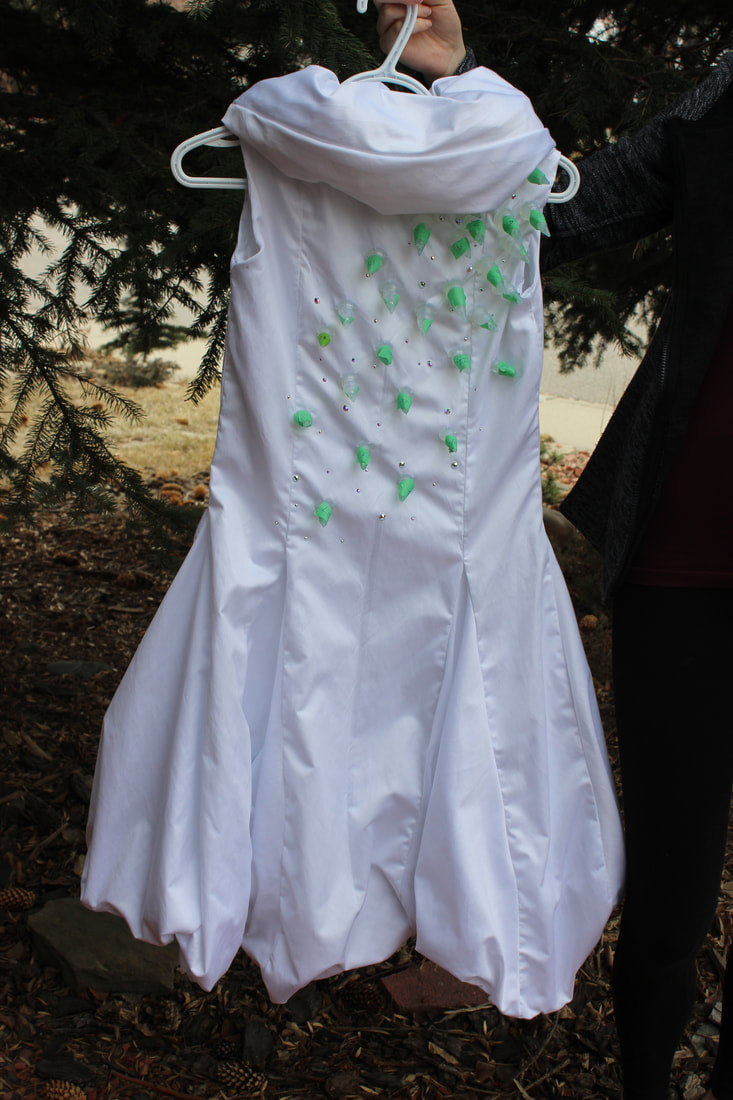 Not long after finishing up the actual construction, I put on the 3D spikes as well as the sparkles The whole process of making this dress for MakeFashion was such a great experience, and I learned so many new techniques! I am very excited to hopefully be able to work with them again.
~K If you would like to see pictures of the final project, here is a link. |
EtsyArchives
April 2020
Categories
All
|
 RSS Feed
