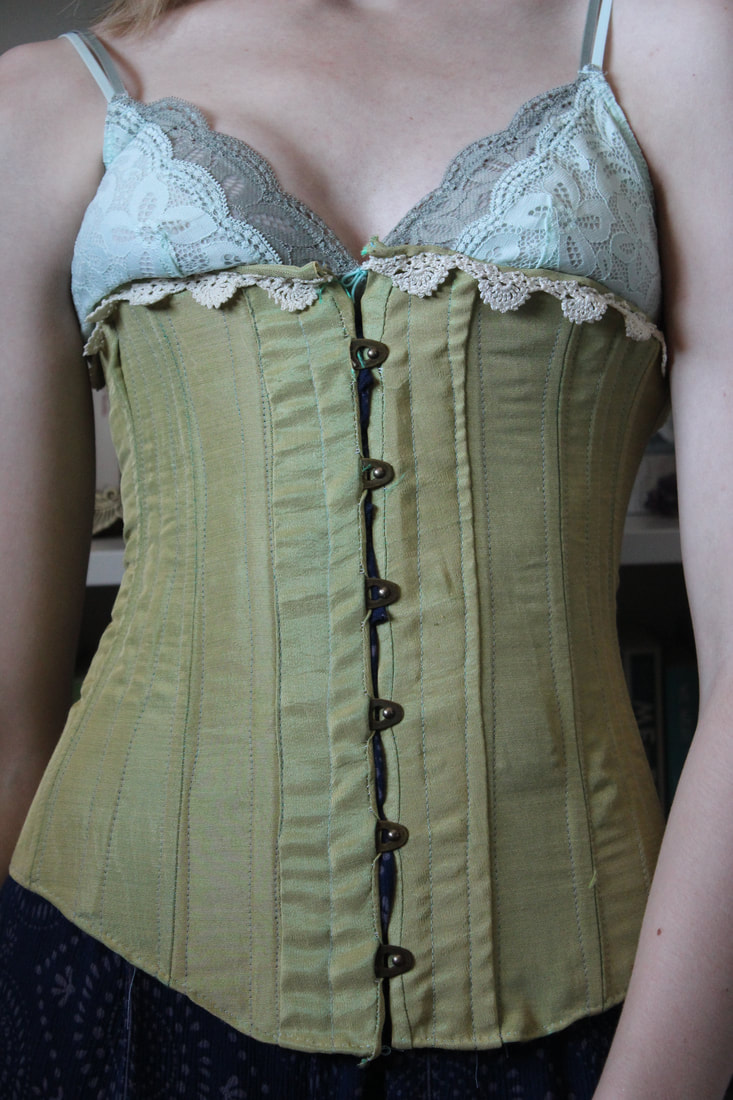
 I am so thrilled because I have finished a second piece to the puzzle that is my bustle-era dress! I have been working on each section of the ensemble from closest to the skin to the outer layer- first were my combinations, now the corset, and I am currently working on the bustle and petticoat. 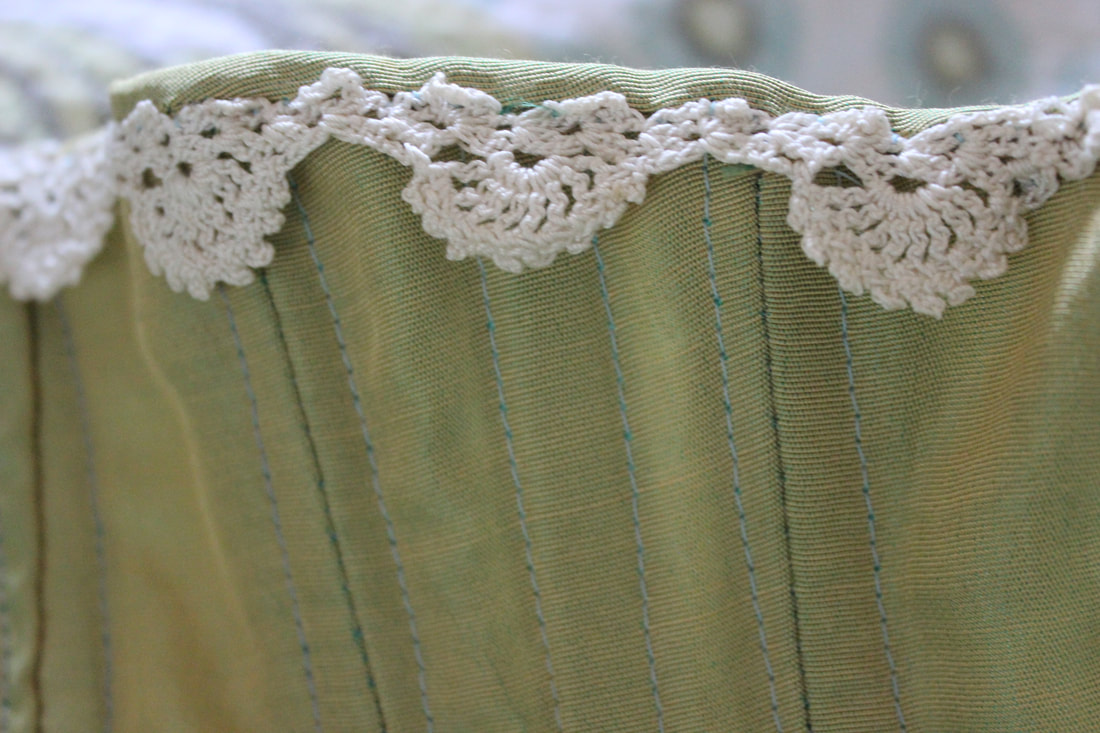 The corset was made entirely of scrap fabric. I was gifted the fabric that I used as the outer layer, and I thought it was stunning! Unfortunately there wasn't very much of it, but there was the perfect amount for this corset. The lace that I used is the same vintage lace that I used at the neckline of my combinations. 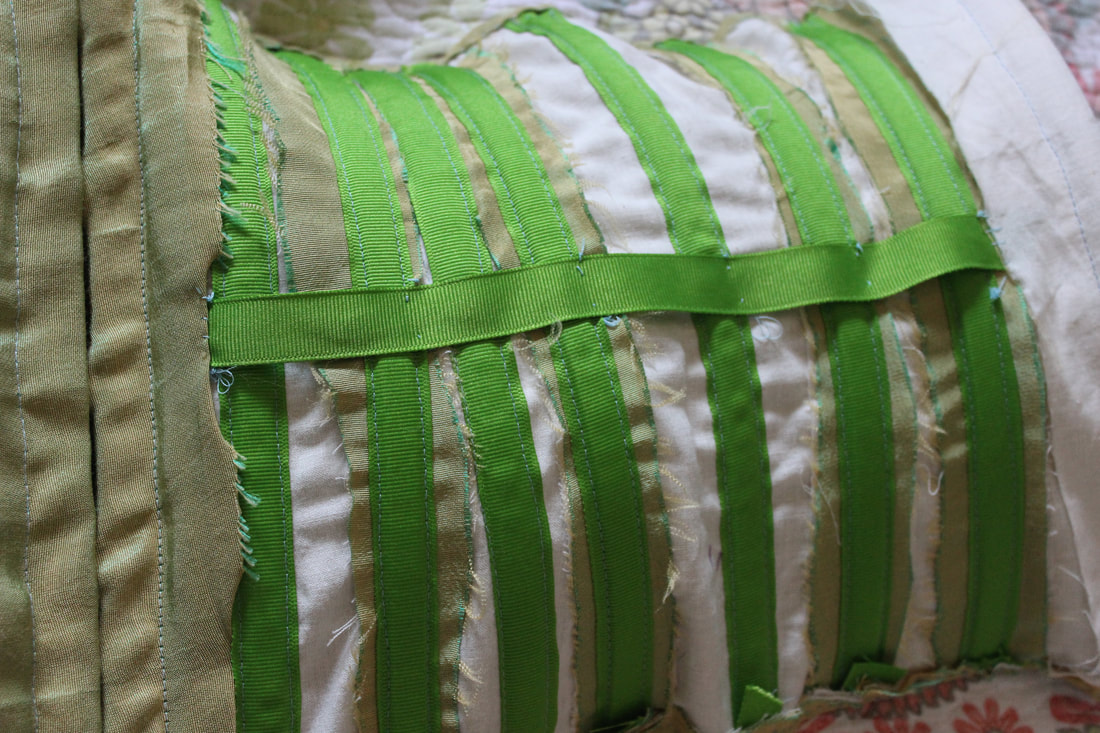 This is fully boned with heavy-duty cable ties, and I used grosgrain ribbon for the boning channels. I also used the same grosgrain ribbon as a waist stay, which is basically just a strip of tightly woven fabric that goes at the place with the most stress- the waist. It keeps the corset from stretching out too much. 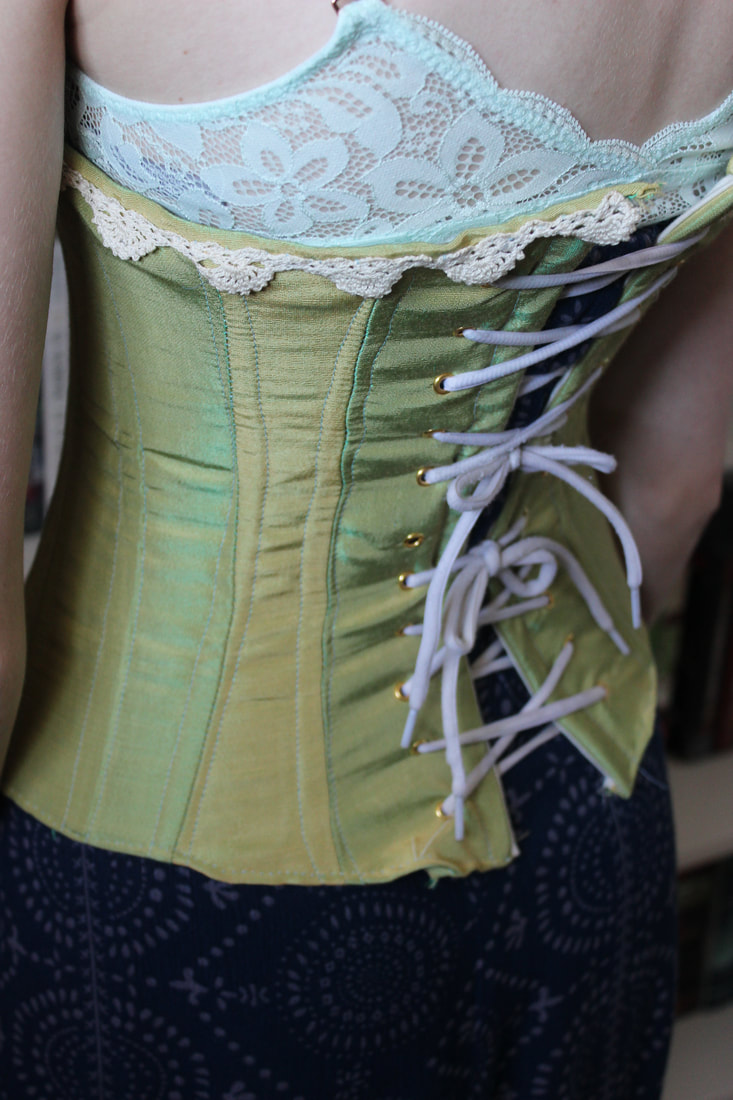 Please forgive both the terrible lacing job as well as the old laces... I was so excited about finishing the corset that I used running shoe laces while I wait to get some nicer ones Although it is not historically accurate at all, I used grommets for the laces in the back of the corset instead of hand-sewn eyelets. This was partly for strength, and partly to save some time since I am very excited to get started on the actual dress. Even though they aren't accurate to the time, I think it looks quite nice. 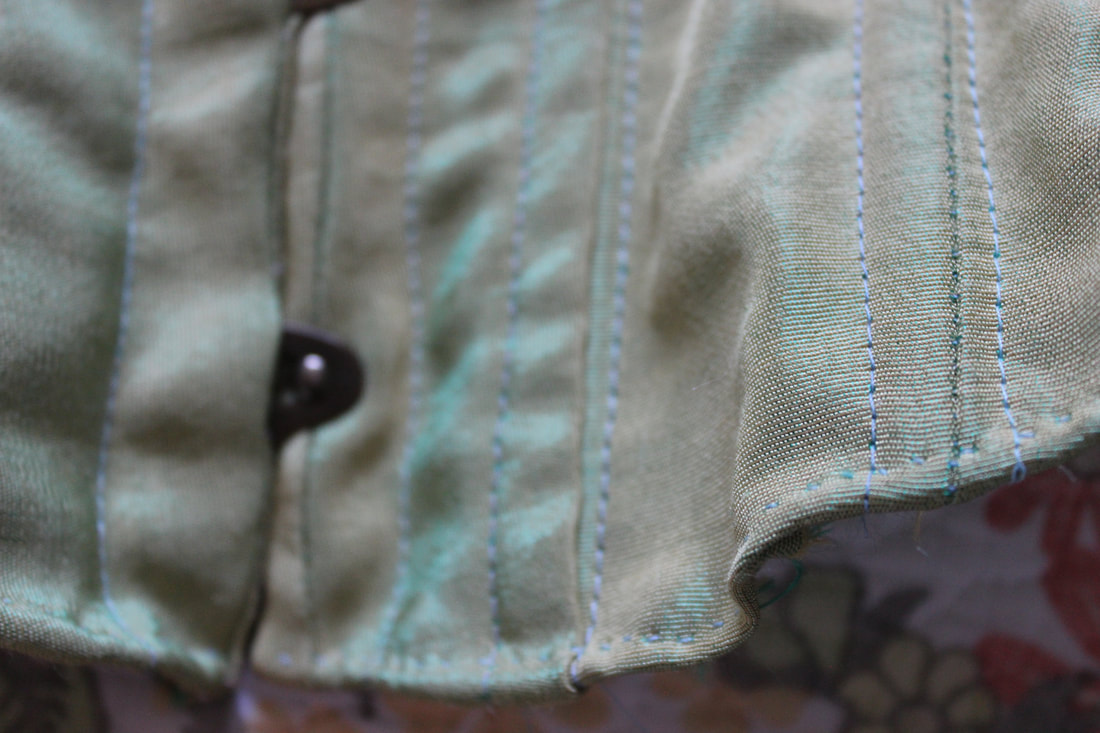 Since I had so little of the fabric left, I only bound the top of the corset. The bottom just has a narrow hem instead. 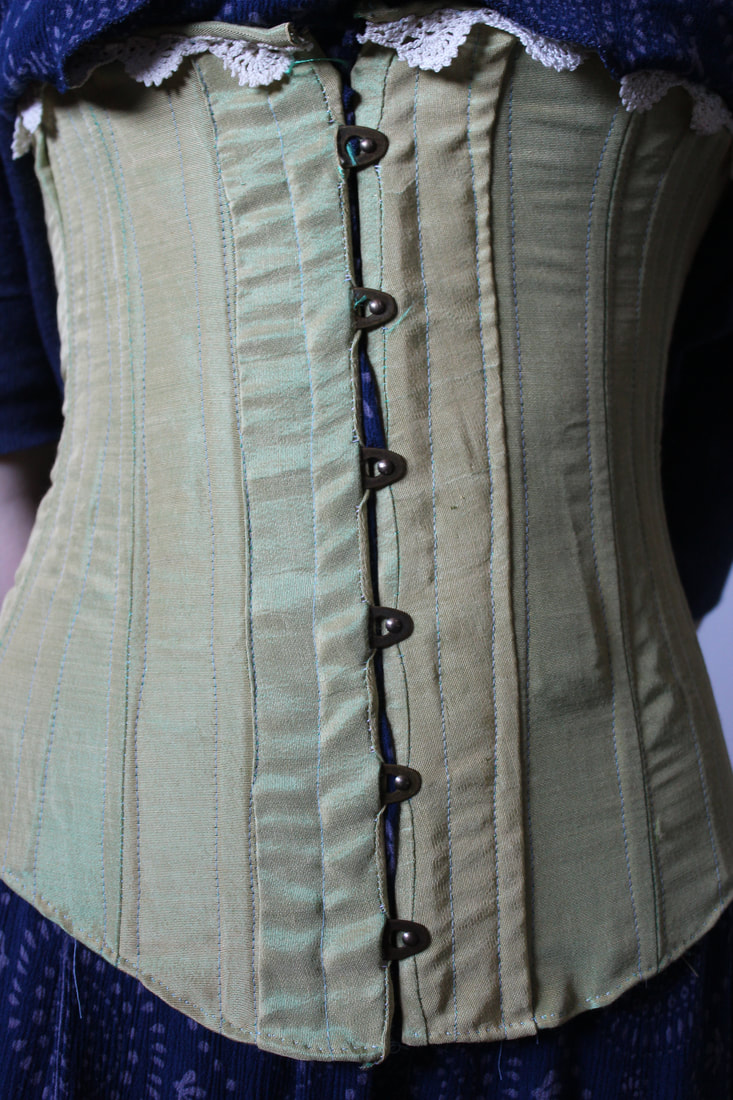 The busk is from a Canadian company called Farthingales. They sell corset and historical undergarment making supplies, as well as other things. They were so easy to work with, and my busk came very quickly! I am so pleased with the colour that I chose as well. 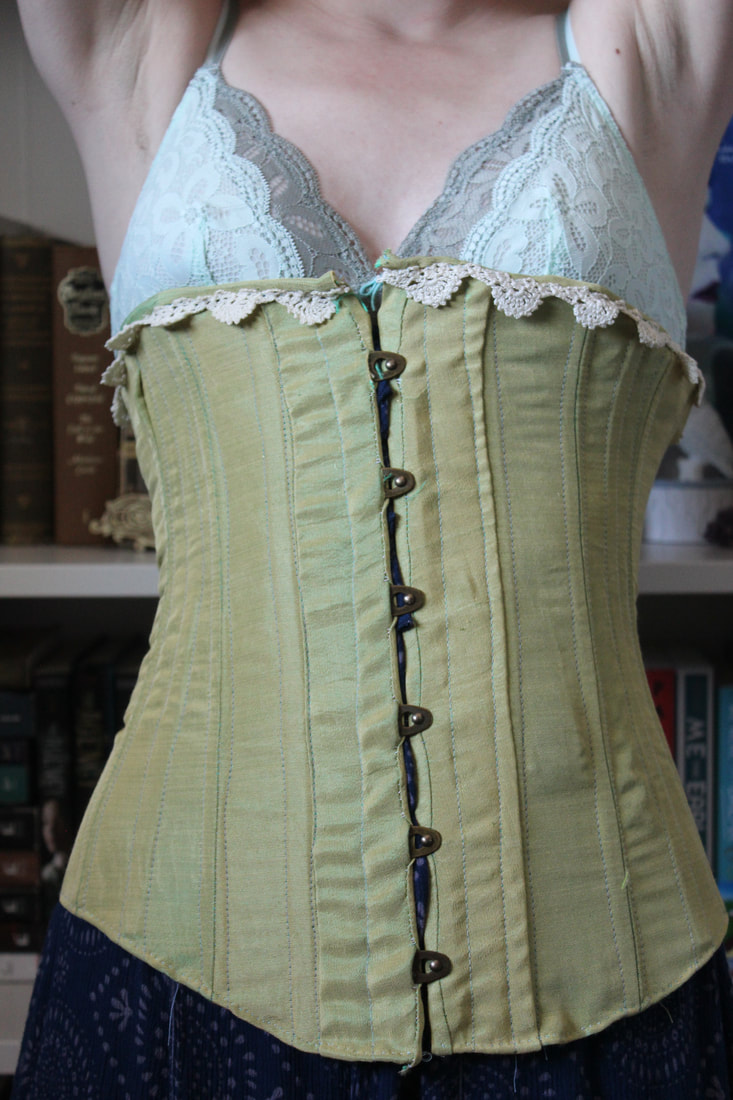 ~K
0 Comments
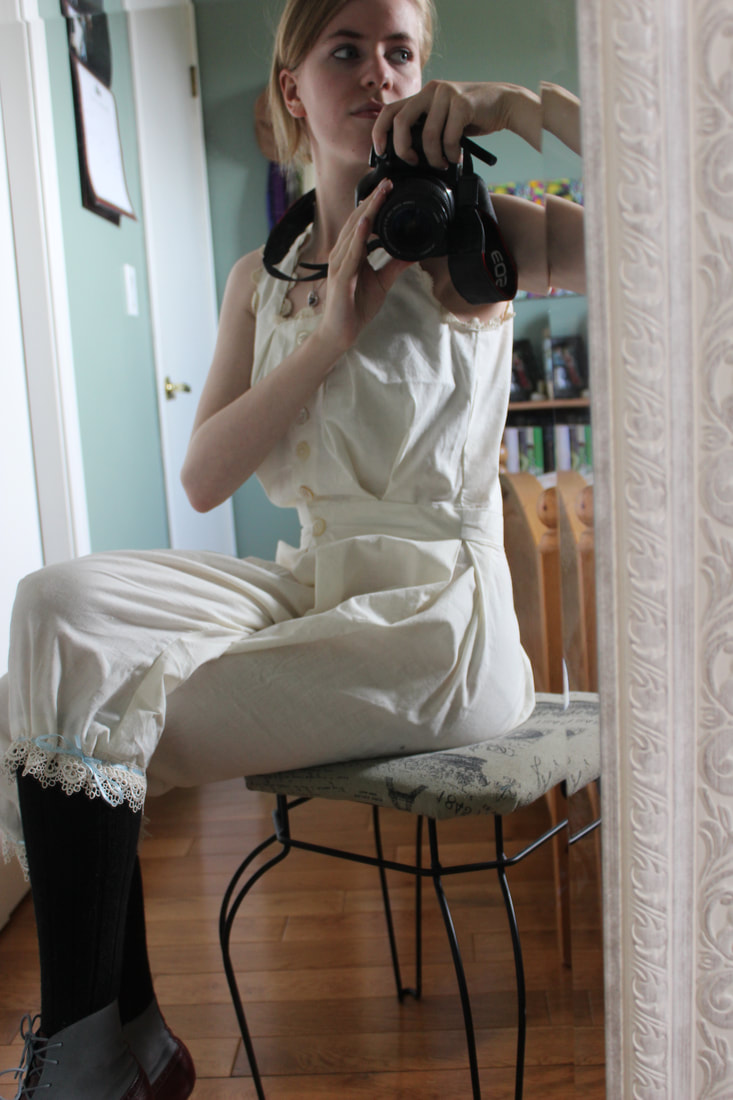 I have been hard at work on my newest project, and the first thing that I have had to make is the undergarments! I decided to make an 1880's bustle gown out of my anatomical heart printed fabric, so I have been working on the proper undergarments. The first thing that I have finished are a pair of combinations! 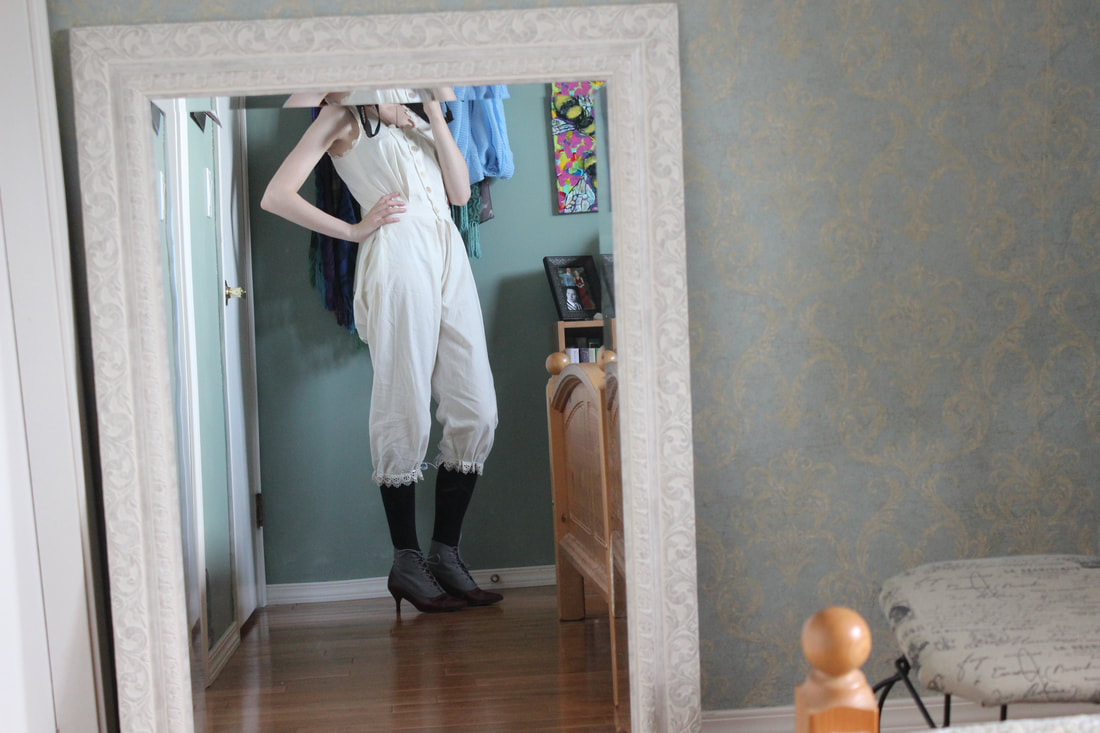 I am quite thrilled with how these turned out! I used Simplicity pattern 1139 as a base pattern (just for the bloomer part of it), and changed it quite a bit to make a pair of combinations that were inspired by ones from the 1880's. 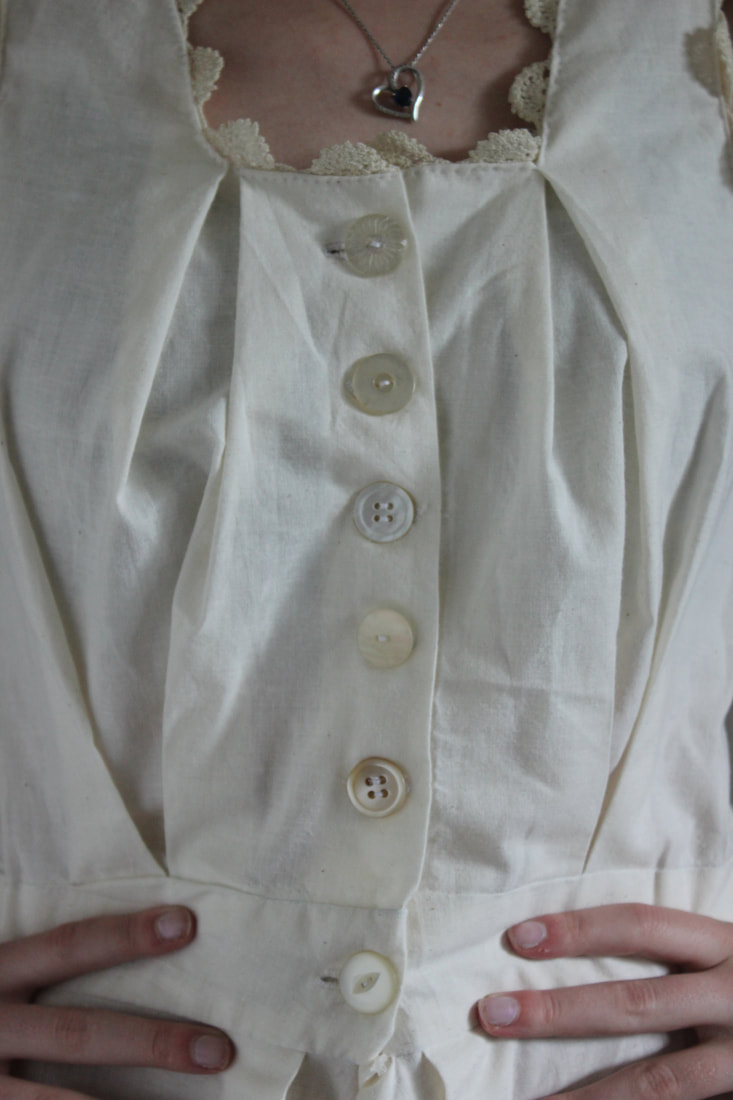 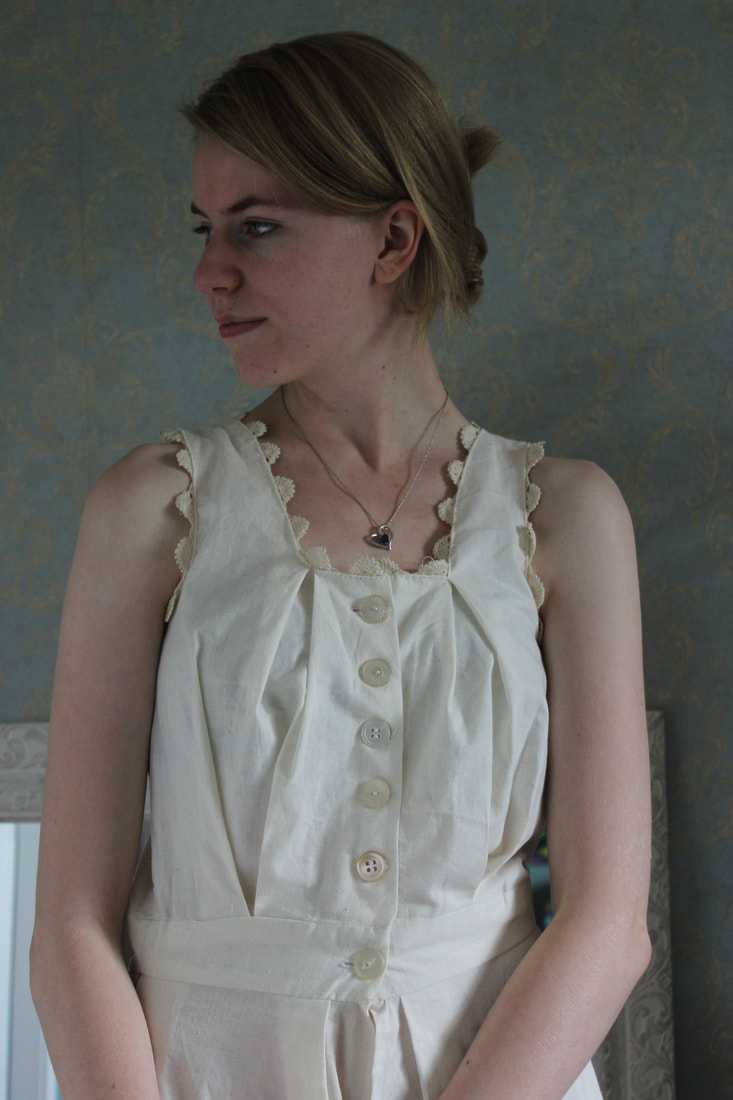 I used some muslin to create the combinations, and trimmed them with some vintage lace that I was very generously gifted a while ago. The buttons on the front are all vintage as well. I thought that it looked cute with the unmatched buttons, so I didn't even try to find matching ones. 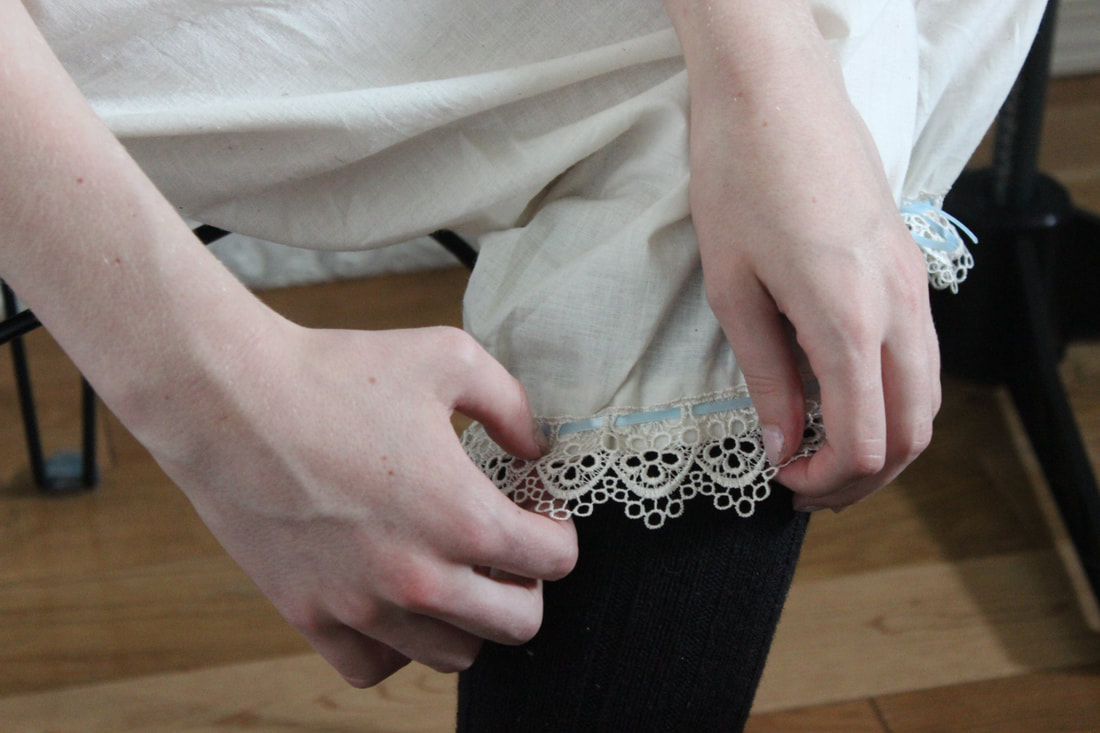 On the bottom I have a different lace that I bought at Michaels and then tea-stained for it to match the fabric. I used a light blue ribbon, also from Michaels, to tie the bottom. 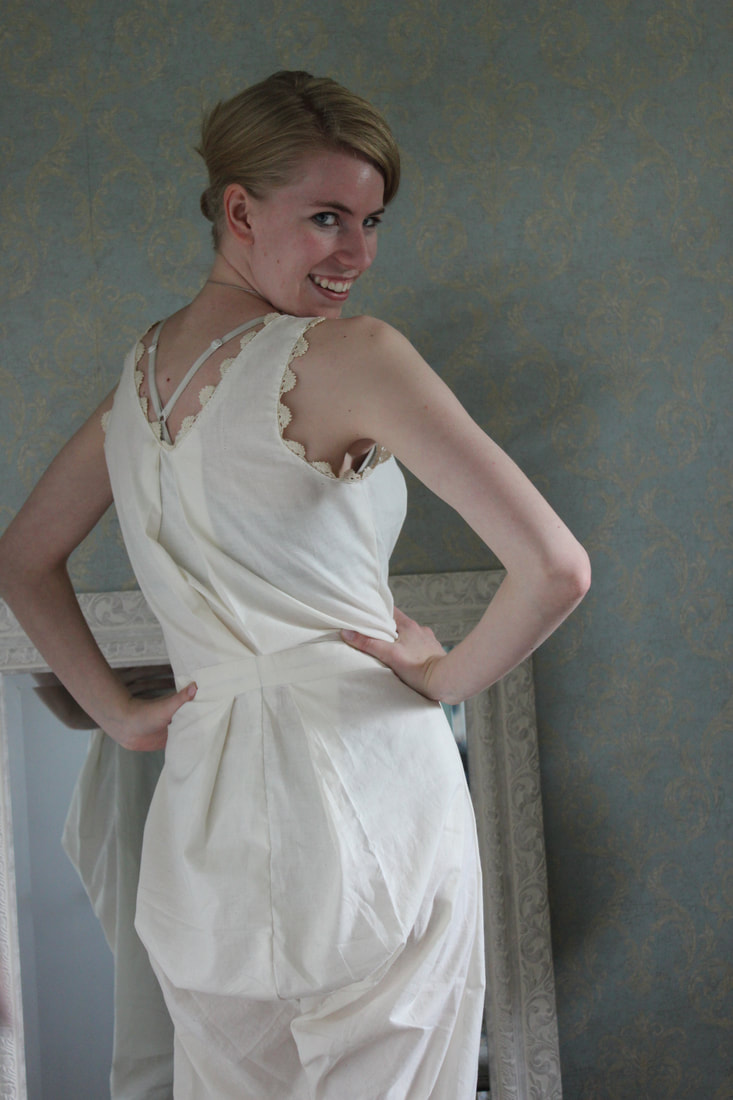 I think the extra space in the bum is hilarious- and very accurate to the time! These are split-drawers, meaning that the front seam is not sewn together. This was done through the 1800's so that the women could use the bathroom without having to take off their bloomers, and once combinations were created, this feature was especially important since the only other way to get the bloomers off would be to take off everything else on top of it! 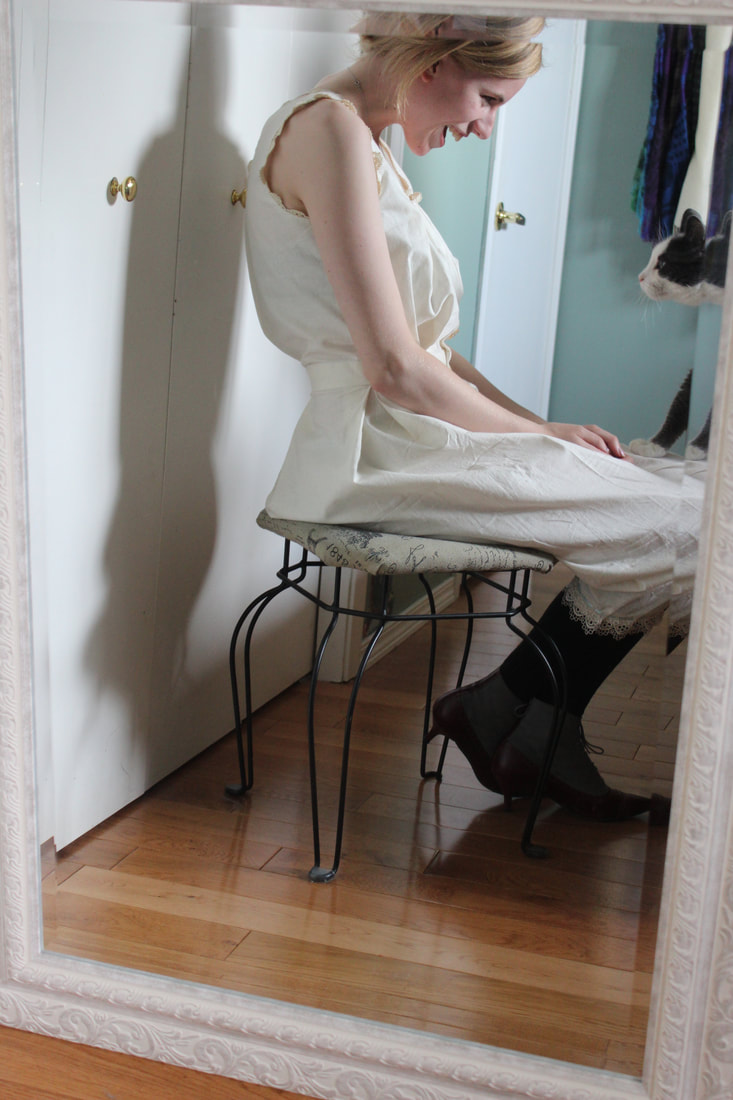 As always, the kitten came over to check out what we were doing Since finishing this, I have been working on the other undergarments that will go under my bustle dress- a corset, a bustle, as well as a petticoat. I will blog about those as soon as I finish them! I am so pleased with how this came out, and I am so excited to keep working on the other pieces of this project! To see more pictures of this and other things that I have been working on, check out my instagram 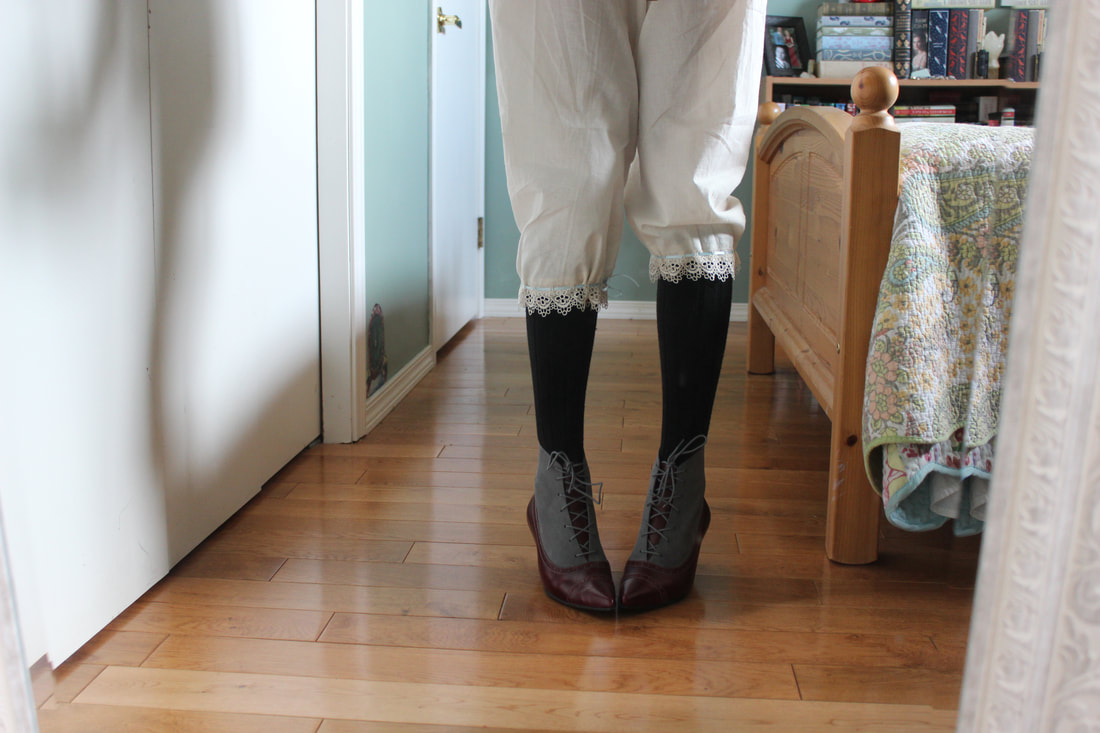 ~K
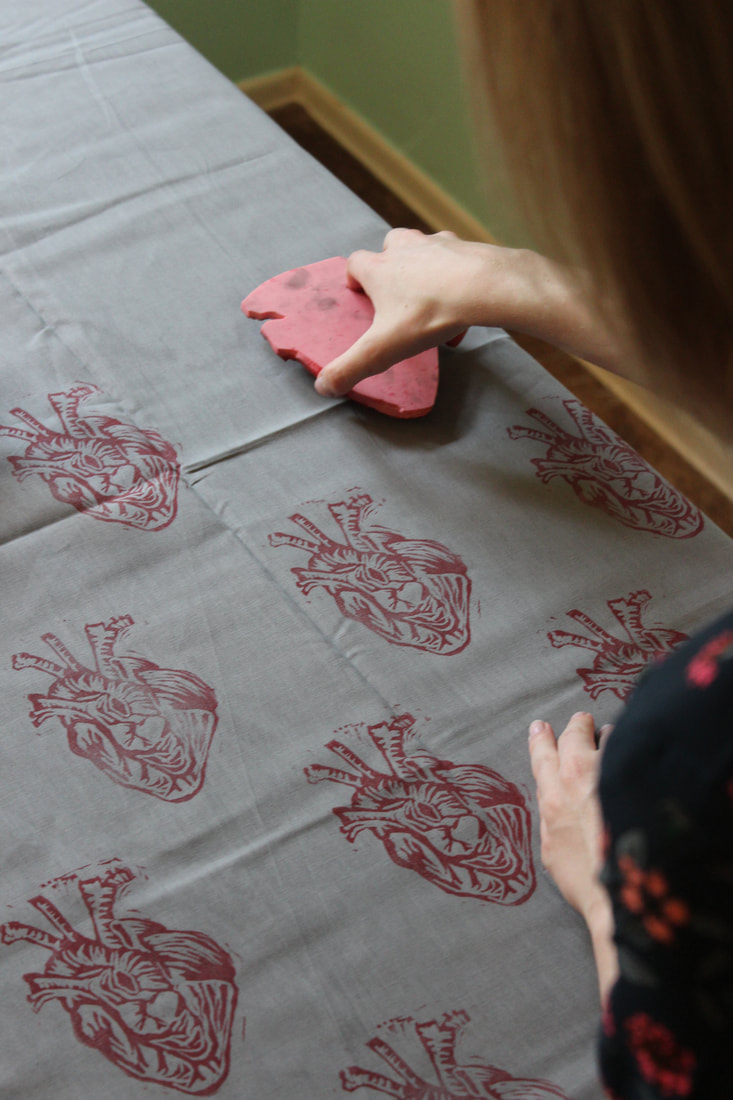 For my newest project, I have decided to print my own fabric!My mom (her blog is here) carved a stamp for me, and I printed it onto a grey cotton with fabric ink. I had a very clear idea of what I wanted, and I knew that it would be very unlikely that I would find a fabric like it so I decided to print it myself. I am thrilled with how it turned out! 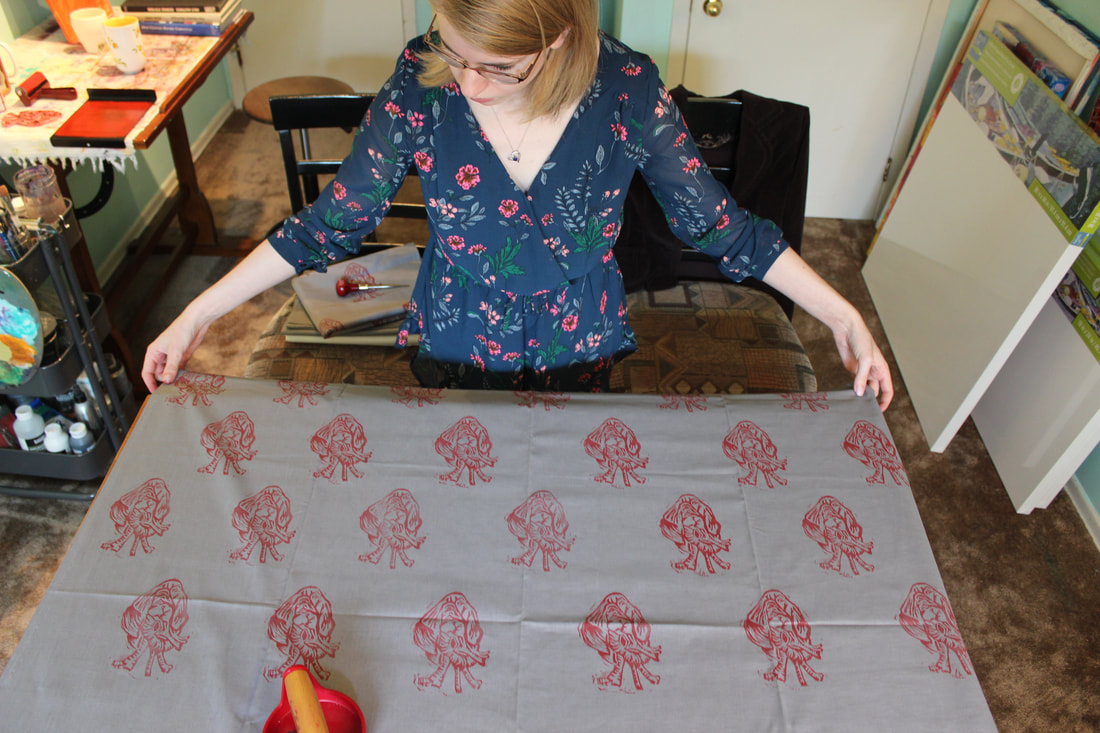 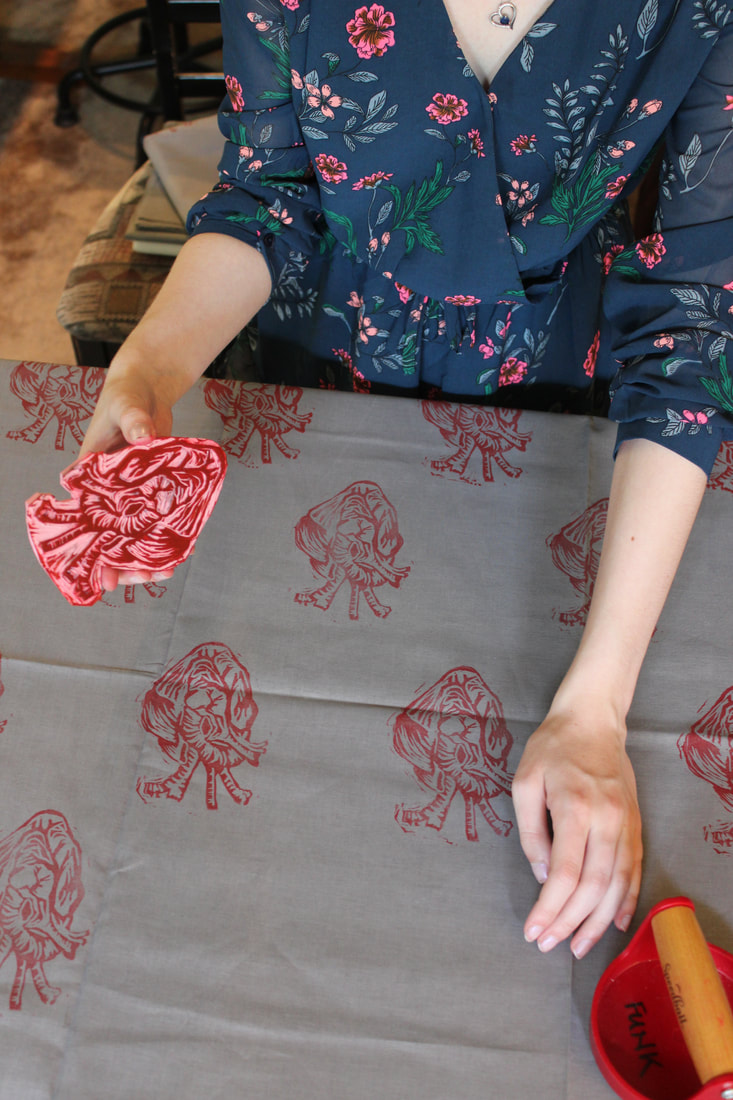 It took me between an hour and an hour and a half to print each chunk of fabric, which was 2 yards long. I printed 3 of those, and I am sure that it will be enough fabric for what I want to make with it.  You can also see for the first time in these photos our combined studio space! I am still in my little storage closet, but this table is perfect for cutting out pattern pieces and such, so it's really great to have this second space.  I have been busy over the past few weeks, so stay tuned to see all of the projects that I have been working on. I will also let you know what this fabric is for in my next post!
~K  I just recently finished an embroidery project for Voice and Vision, which is a program through my local library. The idea is that there are an equal number of writers and visual artists, and they exchange their work. Each writer will then have a piece of visual art to inspire some writing, and each artist will have some writing to inspire a piece of art. Our deadline was the beginning of August. 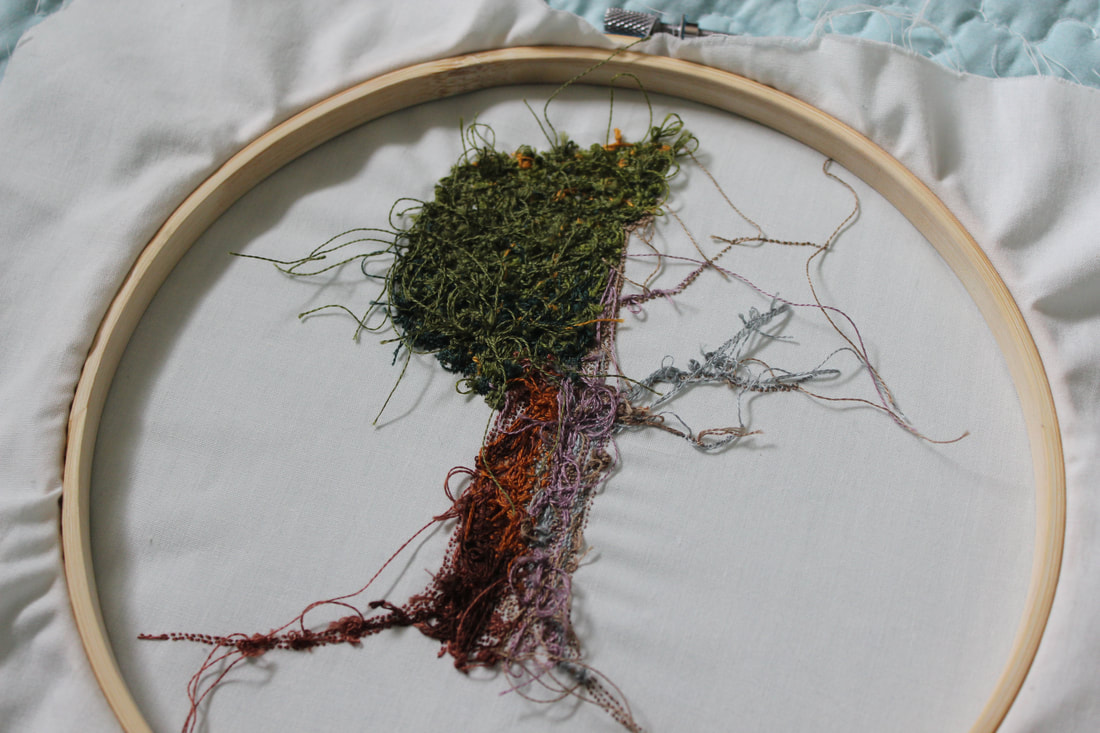 The back started off looking very neat and tidy... This is only the second time that I have done a piece of embroidery- the first time was for a school project. So this project was mostly experiments with different stitches and such. 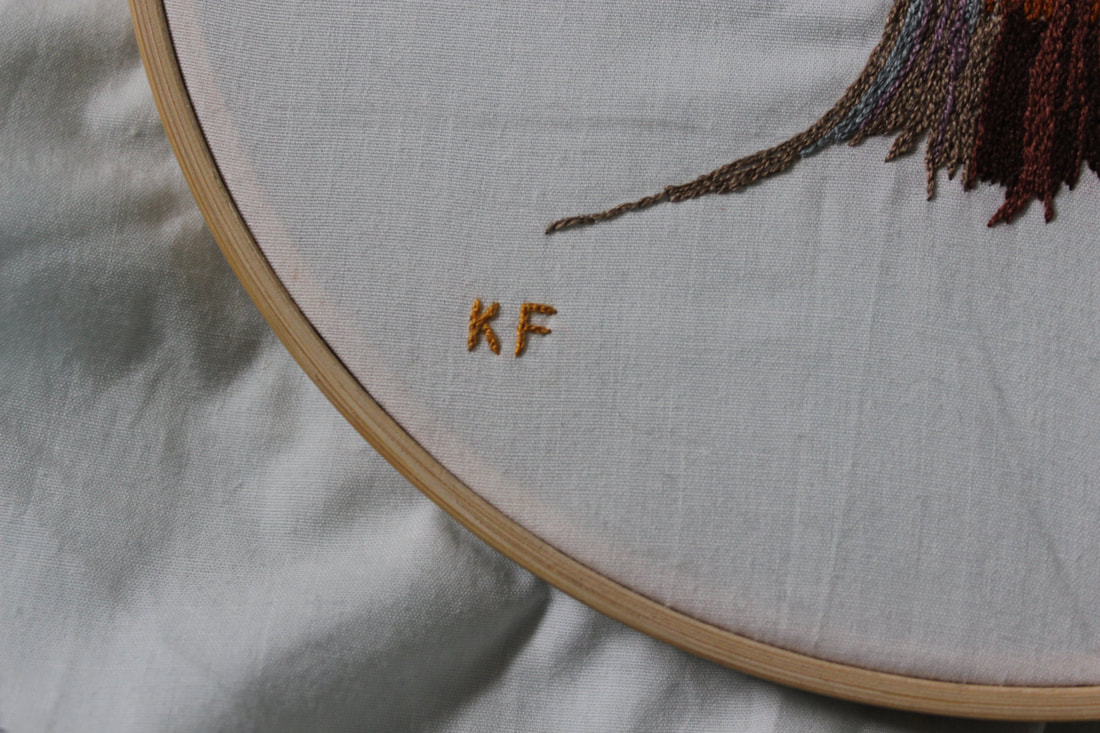 I am very pleased with how this turned out, especially since I haven't had much practice before making this. It took me about a month to do, mostly just working on it while I was watching tv (Indian Summers is amazing by the way, and a really great show to stitch to because the costumes are stunning).   I have been busy with other things as well over the past few weeks- I have been planning and researching for new projects, getting my proposal ready for MakeFashion, and I just recently got a job as a cosmetician at a drugstore. I have also been sewing, and I am almost finished a section of my newest project. 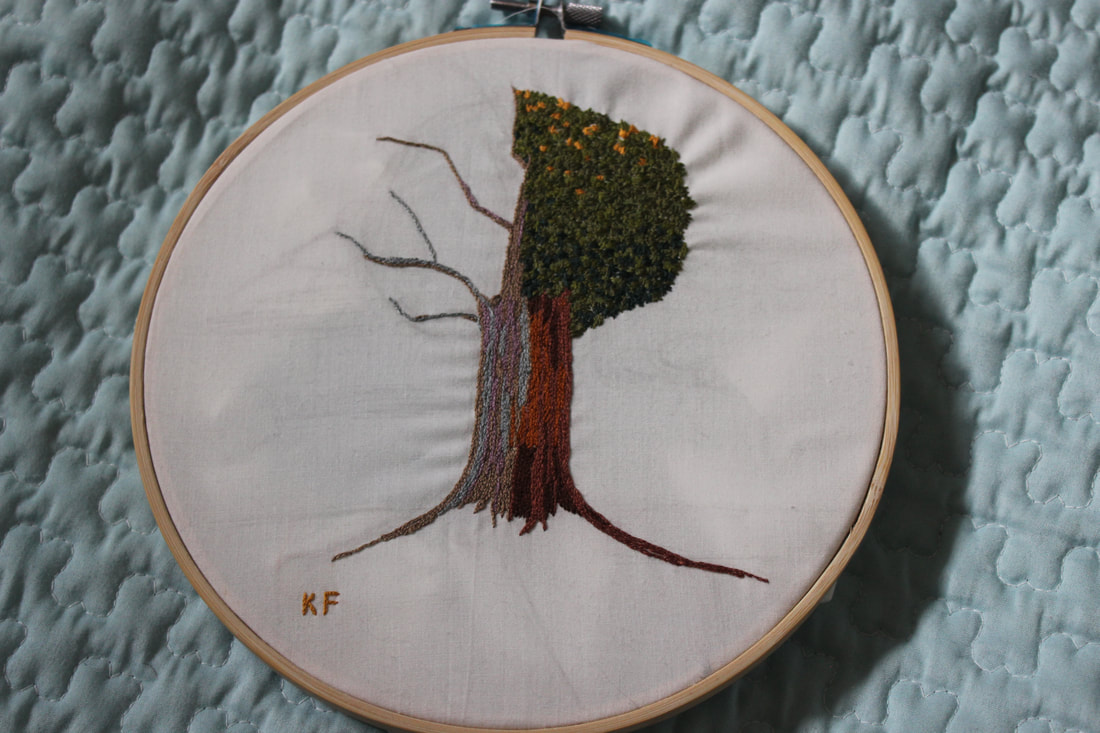 ~K
|
EtsyArchives
April 2020
Categories
All
|
 RSS Feed
