|
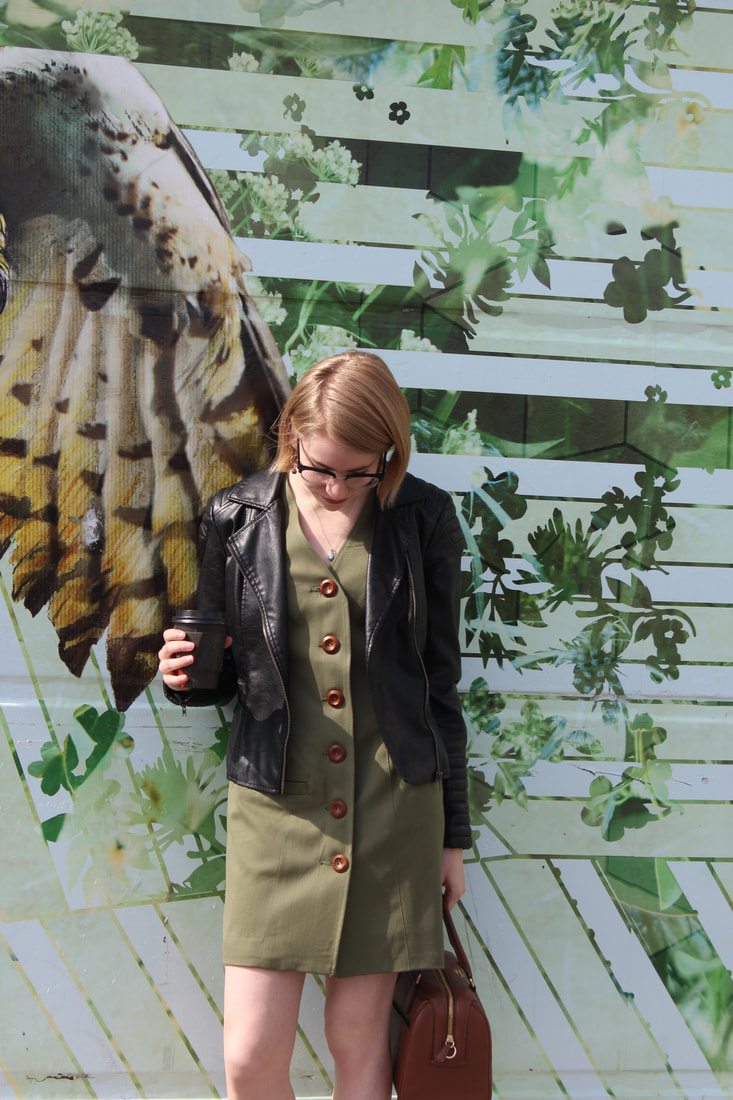
The past week or so has been stressful and strange for everyone. My university classes have been moved online, which means that I have a great deal of time in my room that can be used for sewing! It has been a bit difficult getting used to the new format of living, but I am very lucky to have lots of hobbies that can be done inside. About a month ago, I decided to start a new collection, so I have been hard at work on that. Thankfully, I have almost all of the fabric that I need! 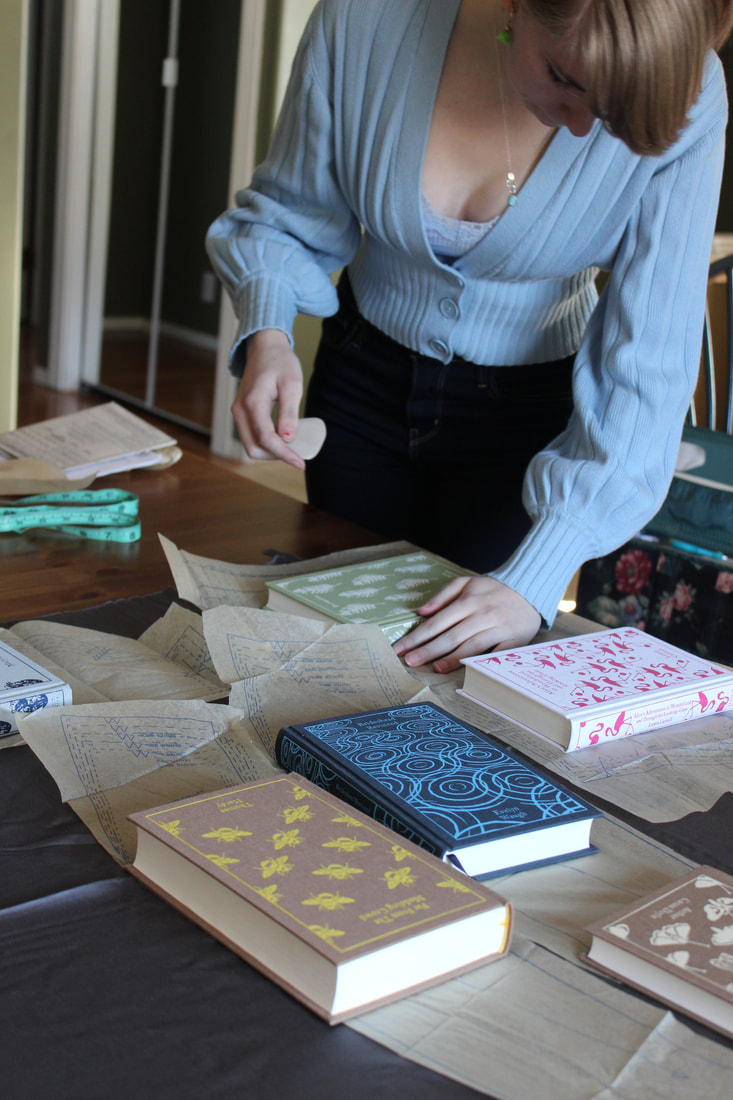 Cutting out from a stunning charcoal bamboo rayon 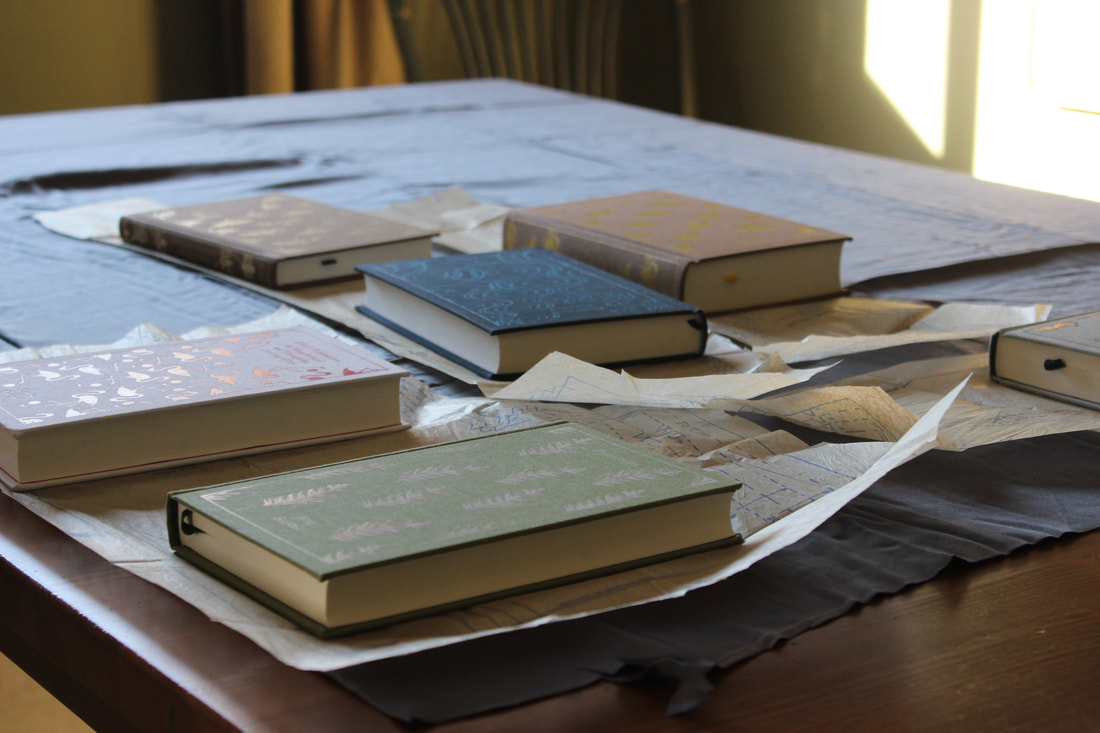 Using books as pattern weights Creating a collection needs a lot of time and work, starting with the designing. I want somewhere between 15 and 20 looks, which can be up to 40 pieces depending on how many pieces each look needs (piece=one piece of clothing, such as a shirt or skirt. Look=multiple pieces put together to create a whole outfit. Can be one piece, can be multiple). I am focusing more on dresses, for two reasons: one) because I love dresses, and two) because that cuts down on how many garments I will be drafting and sewing. I have firmly decided on 10 of my designs so far, and am currently searching for inspiration for the remaining ones. I have had people ask me how I come up with designs, and honestly I don't have a great answer for that. The inspiration comes from absolutely everywhere - Pinterest, people on the streets, beautiful buildings, movies, music, quilts, books, and everything else that I come in contact with. Most of the process is daydreaming, with bits of frantic drawing and writing to ensure that I won't forget the idea. Drawing isn't my strongest suit, and it isn't my favourite thing to do. Half of my designs are drawn out, and half of them are just written down with lots of description so that I know exactly what I was thinking about. Writing down design ideas is actually helpful when I don't have a pen and paper with me as well, since I am just able to write it down in my phone. 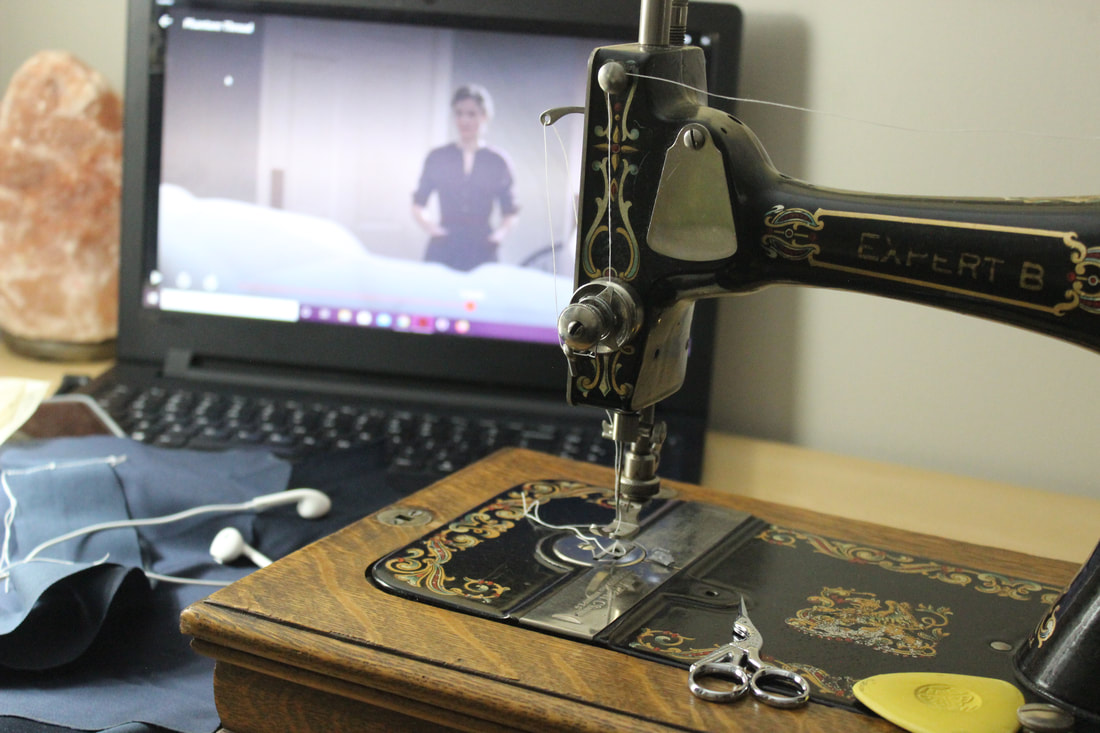 This entire collection is being sewn on this beautiful antique, hand-crank sewing machine. It takes a bit longer, but it makes the dresses feel so special! 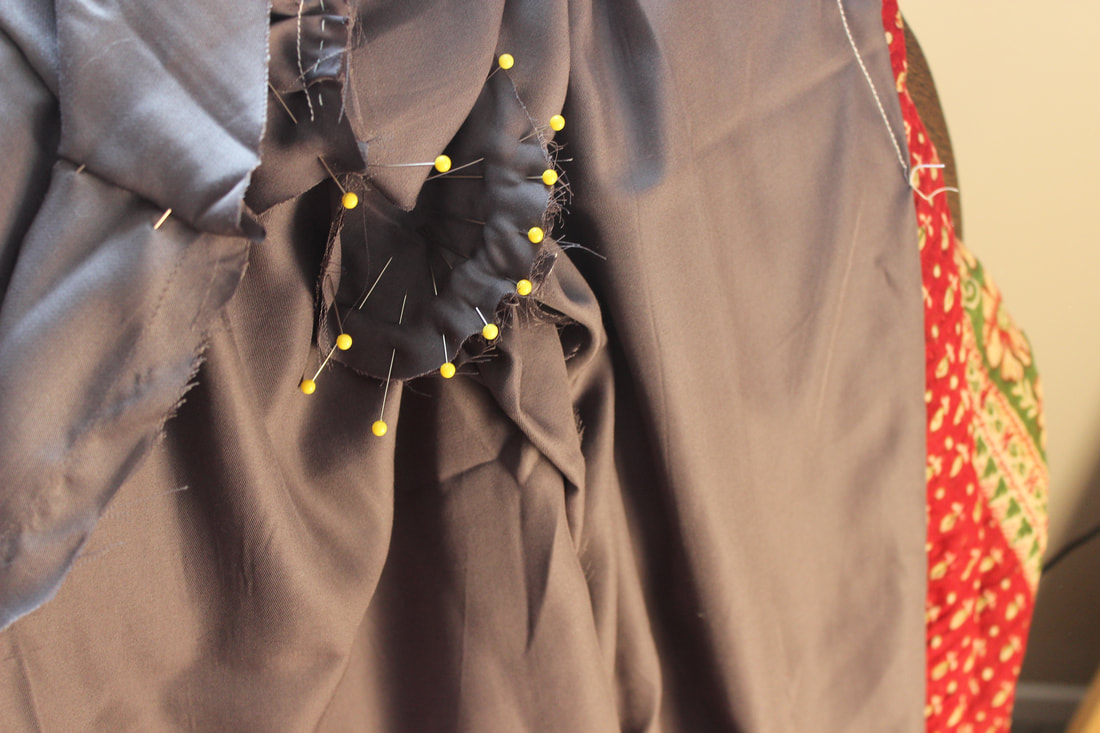 A peak at one of the garments for the collection. The next step is drafting. One of the best skills that I learnt last year at fashion school was pattern drafting! I have so much fun with it, and it is so satisfying to make something completely, utterly from scratch. I often alter the patterns that I use when they are pre-made, but I have so much more freedom just being able to make my own. Pattern drafting includes lots of math and rulers, so it can be a bit tiring on the brain. I try to spread out my pattern drafting so that I don't get sick of it, so I often have a pattern on the go while I am cutting out a different garment and sewing another one. This also makes the process more fun for me, since I can choose what I feel like working on for the day depending on my mood. However, not every part of the pattern can be drafted. I love being able to drape parts of patterns, since it gives me a lot more creative freedom (and lets me do a little less math). Draping is also fun to get videos of, since the garment changes so quickly when it is draped. 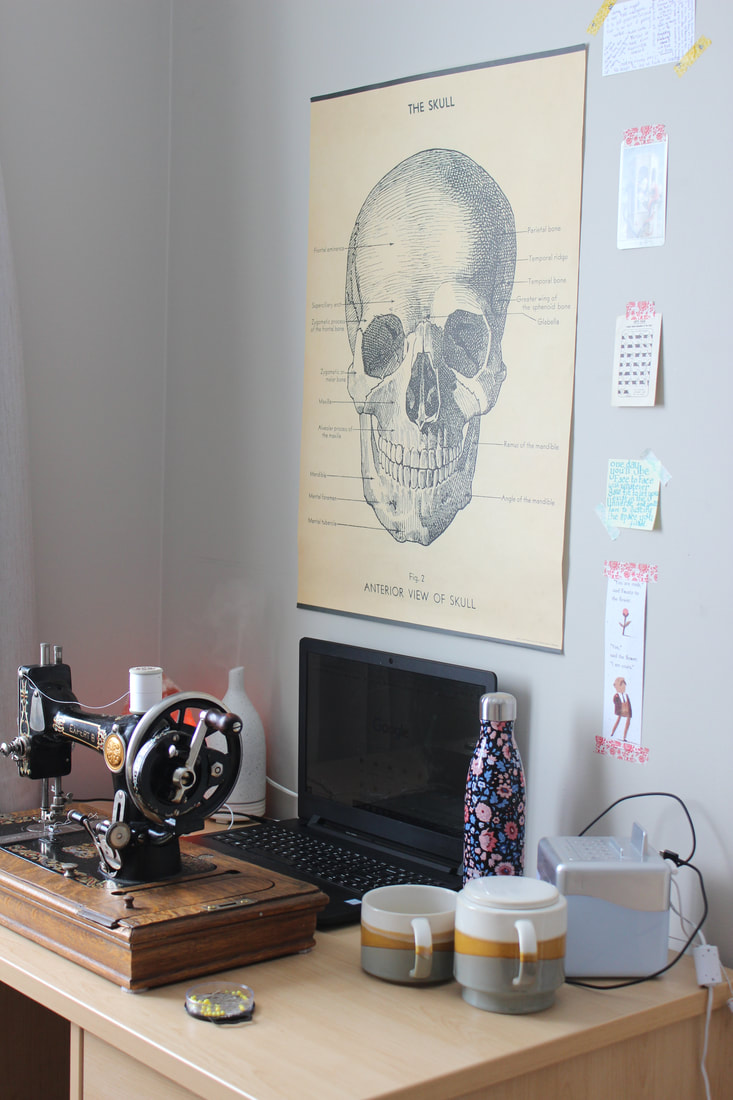 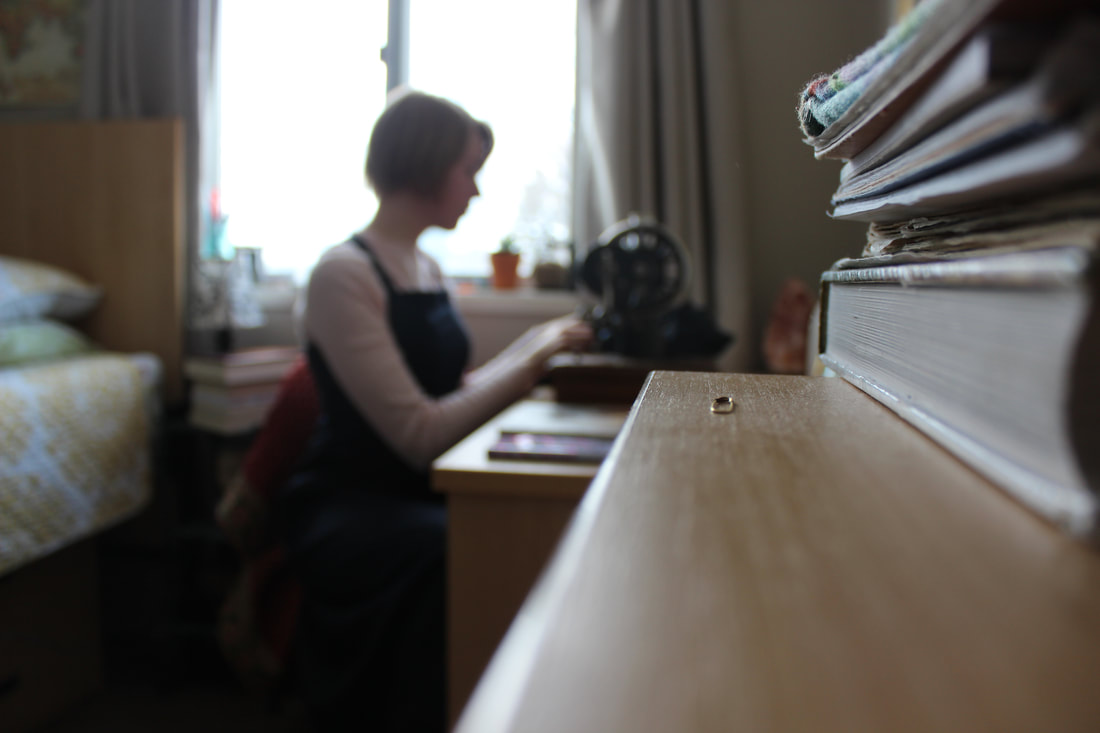 There are many other steps that are included in the process of making a collection (loads of planning for various things, organizing, fittings, adjustments, constant ironing, etc.), but one of the most important ones is the actual sewing! All of the sewing for this collection will be done on my lovely, antique White sewing machine. She is a hand-crank machine, so my right arm is getting very muscular... Obviously this makes the sewing take longer, but I feel like I have fantastic control on it to do some picky work, and the stitches are beautiful. It also makes the collection feel just a little more special to me:) 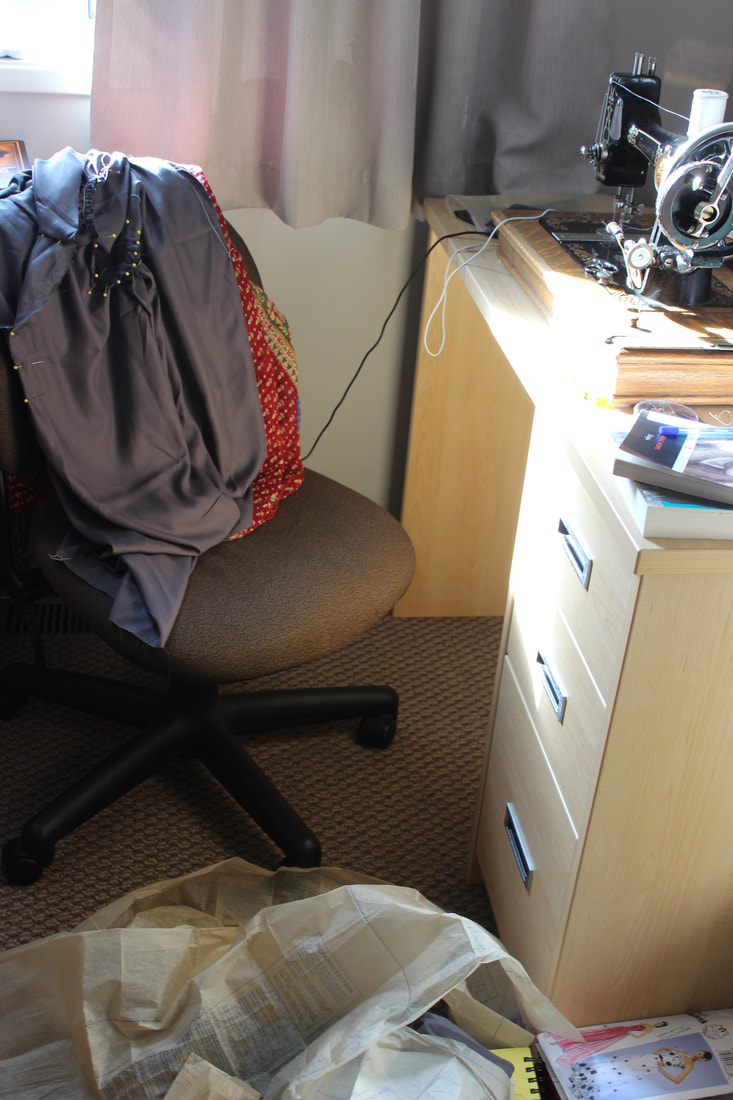 Every surface gets used when I'm sewing... So here is a sneak peak at the new collection! I will be putting up more information about it as soon as I have more ready to go, and I am video-taping the entire process so you can see it all come together once I'm done!
The collection is made mostly of eco-friendly materials, and using couture methods. What are you doing to keep your spirits up during self isolation? Any good movies I should watch? ~K
1 Comment
Over the past few days I have been spending all of my time working on a new pair of 18th century stays to go underneath the Robe a la Francaise. I used the American Duchess stays pattern as a tentative base, then altered it with the help of extant garments, other historical costumers advice, and a little imagination. Since this project is going to be entirely hand sewn and will take quite a while to complete, I thought that I would make a bit of a step-by-step of how I created them. Please don't take this as a guide to sew your own though, since I'm not focusing on historical accuracy. I just want a mostly accurate shape and a pretty garment at the end of this. 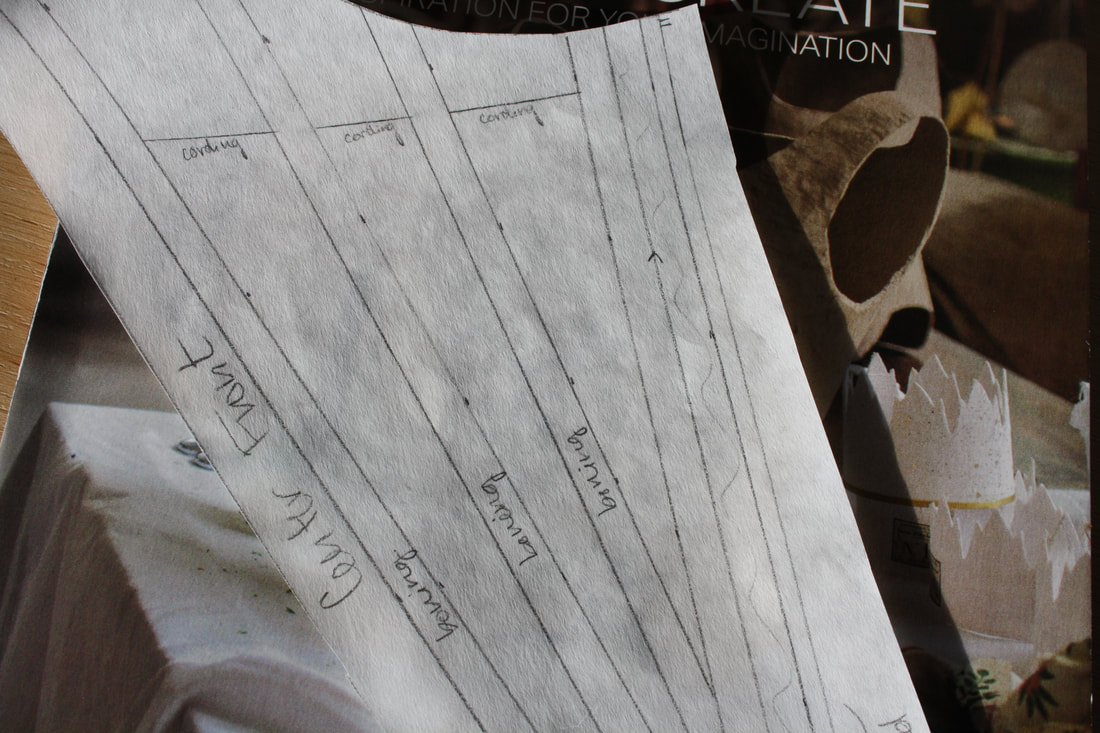 A look at the paper pattern piece of the center front panel  The two back panels of the stays After drafting the pattern on paper and adjusting it a million times to get a better fit (okay, it wasn't a million, but it sure felt like it), I cut out each section for three layers: two inside layers (where the boning will be sandwiched between) and the top silk layer. I then copied my boning pattern onto the inside layer so that I can follow that with my stitching. The boning pattern took me nearly as long as actually drafting the shape of the stays, just because I wanted to make sure that it was both comfortable and efficient. I also wanted to follow a historical example, since seamstresses through history always knew best. It can be pretty difficult to find clear photos of extant stays, but I used this one from the V&A as inspiration, since it doesn't have a front and back lacing. I cut out my front panel as just one piece, so it won't have the option of front lacing. 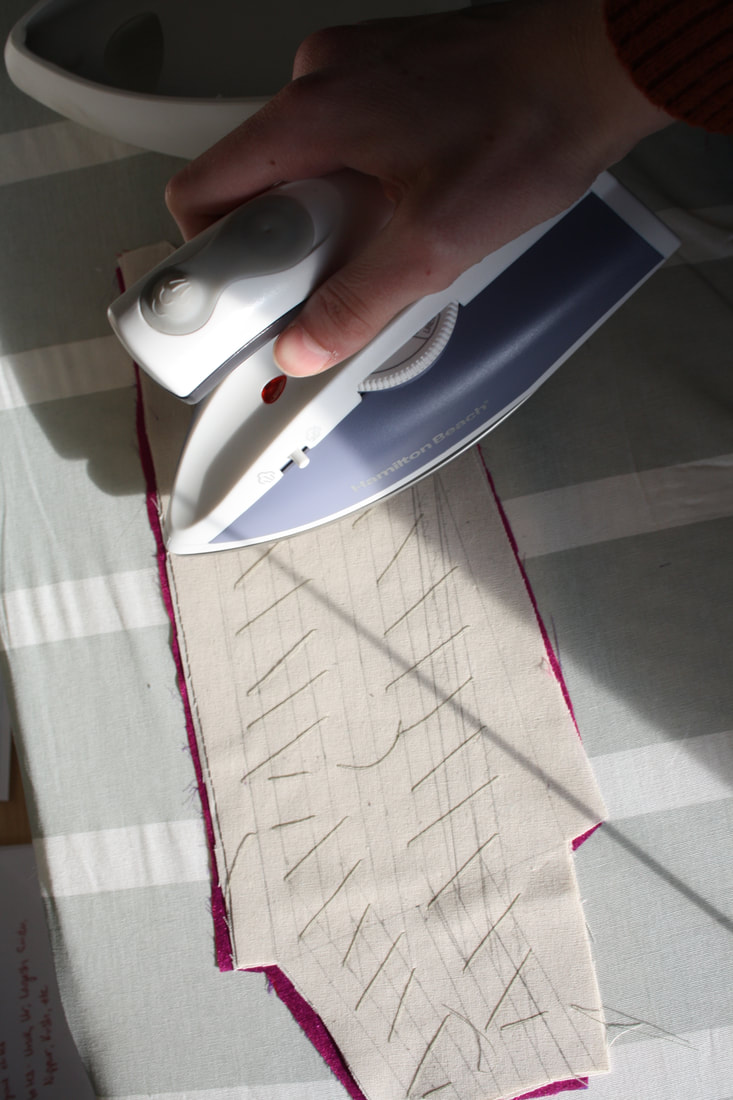 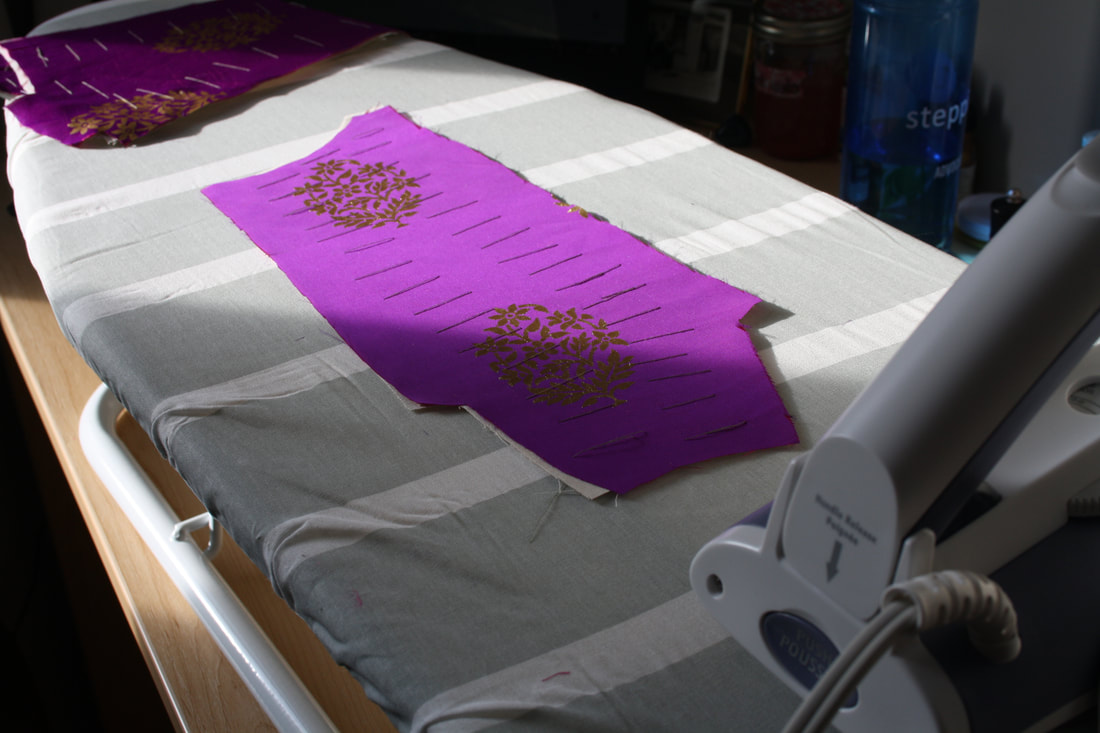 After all of the boning channels are drawn onto one of the inside layers, I pad stitched the layers together. Pad stitching is a type of tailors stitch that bastes two layers together (this is how you attach a non-fusible interfacing). I did this quickly and a bit sloppily, since I just need it to make sure that the layers don't slip while I'm stitching the channels. The sections especially needed it because of how slippery the silk is. I then ironed everything before I started any of the real stitching. 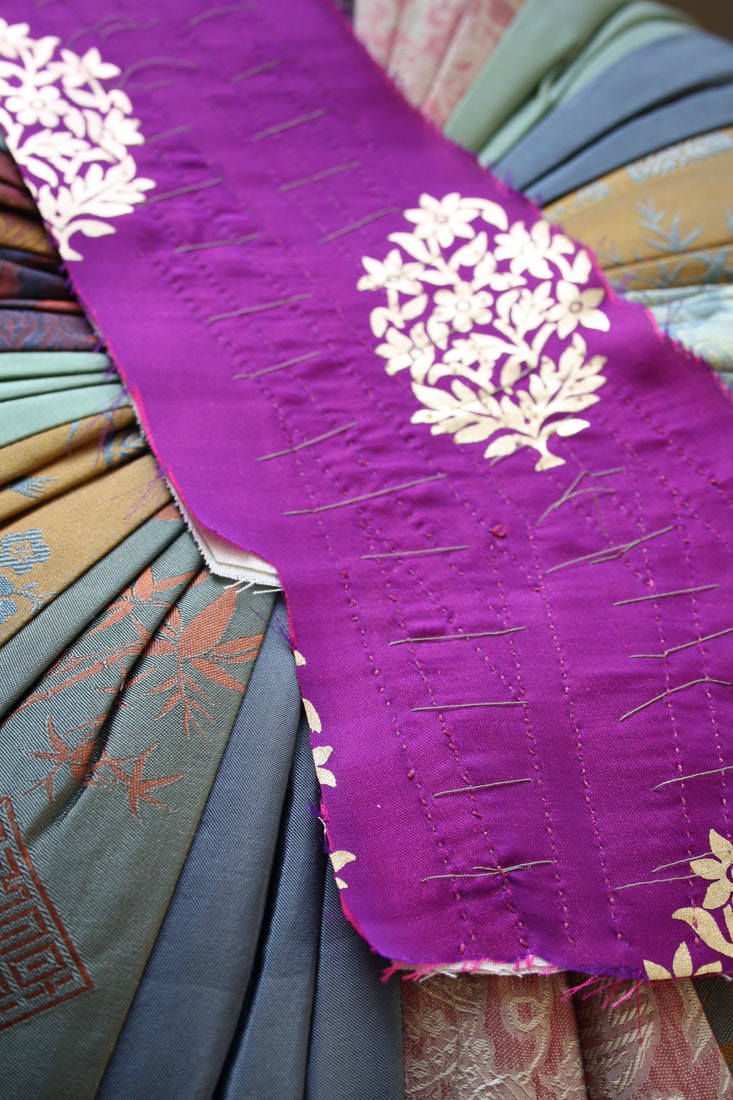 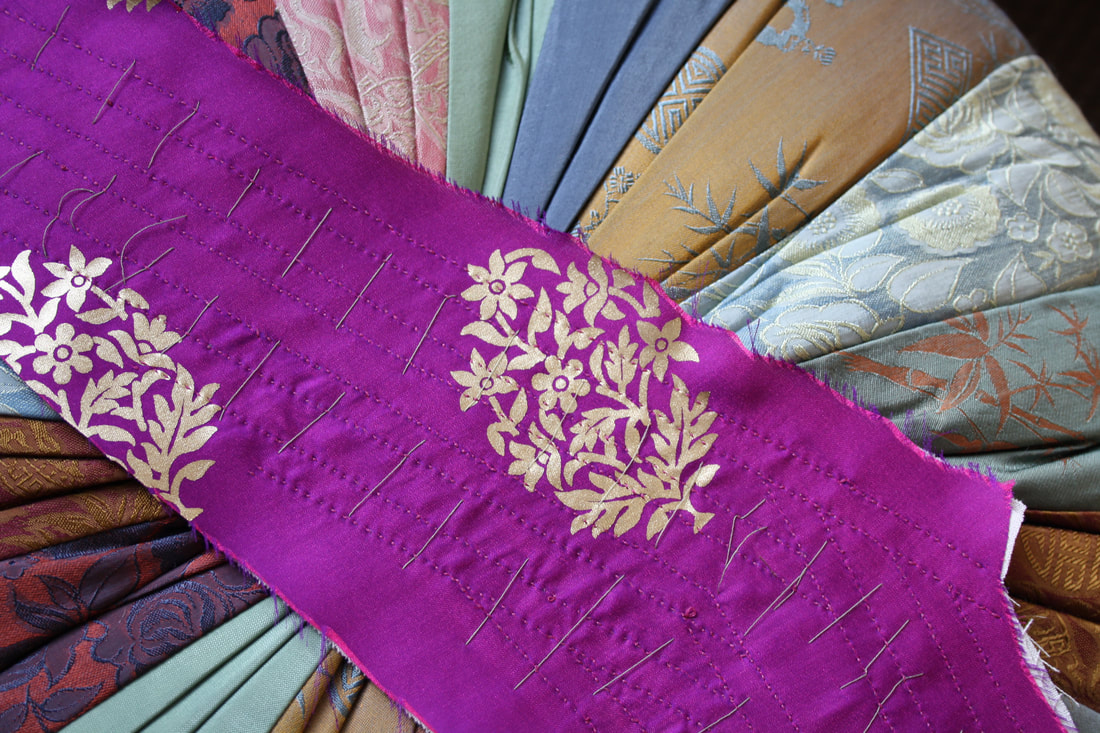 The boning channels in one panel entirely sewn up, but with the pad stitching still in. I will be removing that in a while. Now it is finally time to start on the boning channels! This could be a very tedious process since it is just a running stitch down all of the lines you drew for your boning channels, but I actually really enjoy the process. So far I've watched Crimson Peak, some Ripper Street, and Marie Antoinette while working on my sewing! 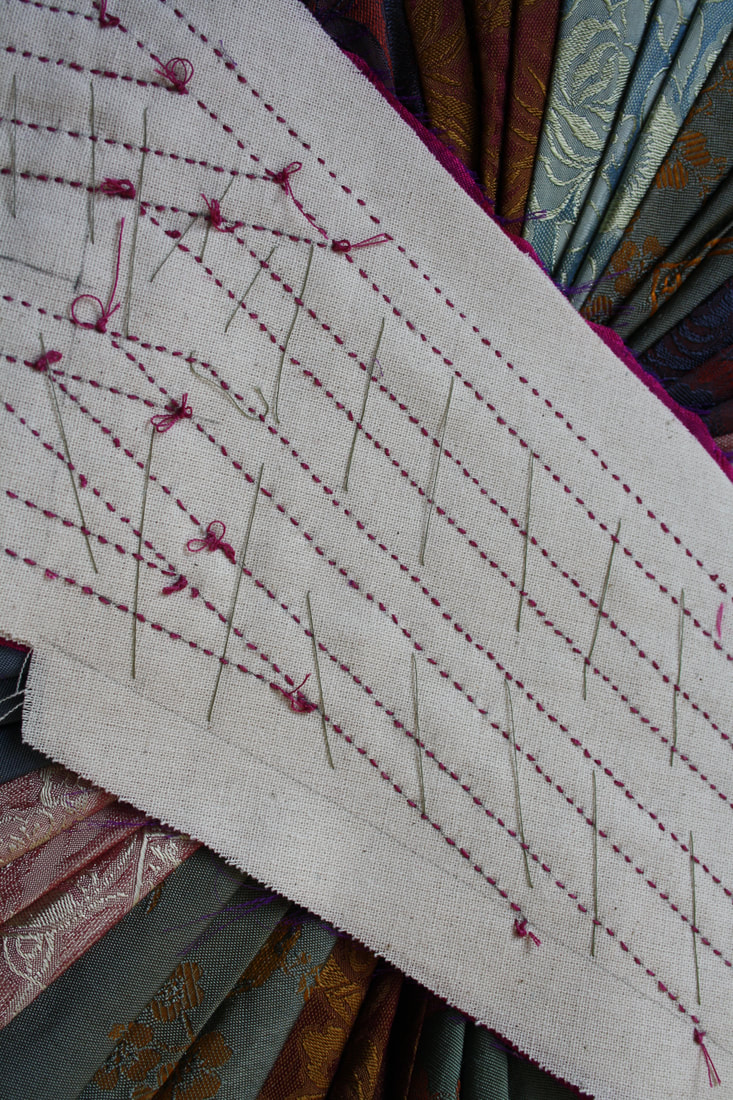 The finished panel from the inside (this will be covered with lining near the end of construction) Before I sign off, I thought that I would talk through a bit of my thought process behind the decisions I've made so far in the process. To begin with, I am including the top layer while sewing the boning channels because I want to see the stitching from the front. I have seen some more decorative stays where the top layer was sewn separately and then attached after the bones were put in, but I love the texture of the stitches and want to be able to see that once the stays are done. Another thing that I would like to mention is my choice of silk that makes up the top layer. I am very aware that it isn't historically accurate (though it does have a vintage flair to it). I decided on this one for a few reasons: one is that I only had a meter of it, so it was the perfect amount for a project like this. Second, I want the final piece to have a bit of a modern Marie Antoinette style, and I thought that this would be a great way to achieve that. Thirdly, I just really like the colour and how it looks! ~K
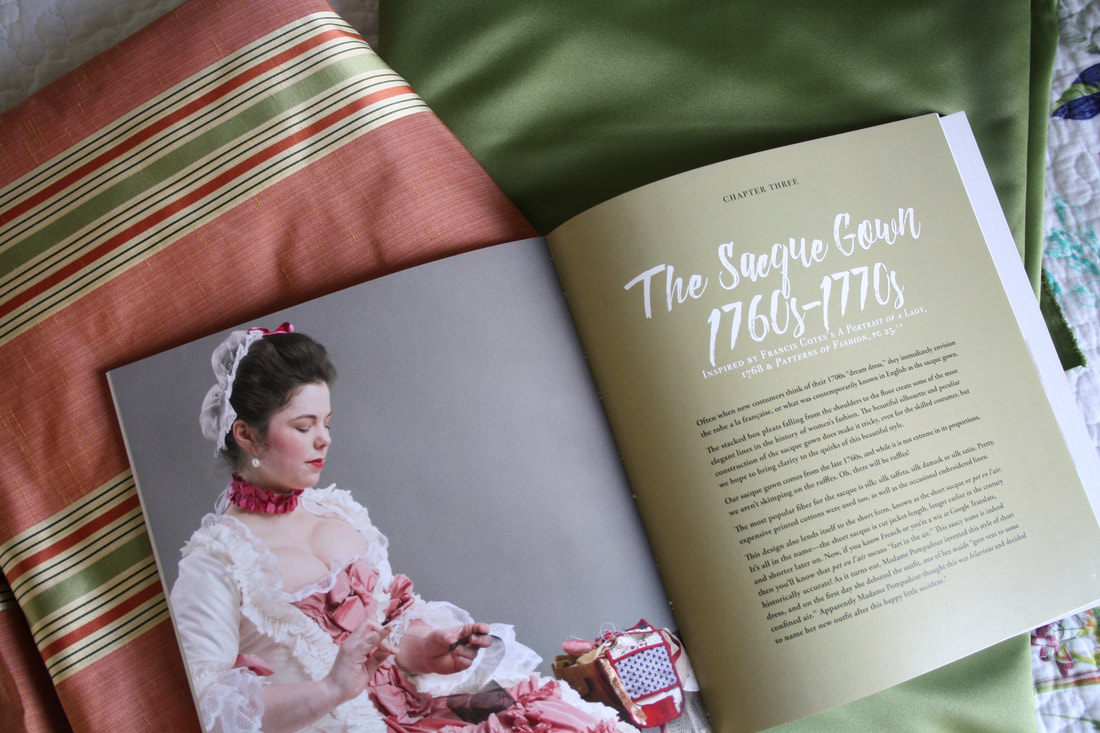 Figuring out a way to sew at school while still having time to do other things that don't involve sitting around has been difficult, but I have found that my passion and desire to make things has been revived! This is fantastic... other than the fact that I still need to do my school work. I have, however, found a way to get both done. Basically, it means that my future projects will include a great deal of hand sewing. Hand sewing has always been something that I enjoyed doing. When I first learnt to sew, it was not on a machine, and I've always found it a bit meditative. There is also the added benefit that I can watch something while doing it, which makes the task go much faster. The greatest draw back is pretty much only how time consuming it is, which is why I haven't had any new projects to post about lately. But do not fear! I have been hard at work both sewing and coming up with new ideas (as I mentioned in my last post), and I am hoping to have new photos coming up somewhat soon. While we wait, I thought that I would share my fabric haul for the projects that I spoke about in my last post. 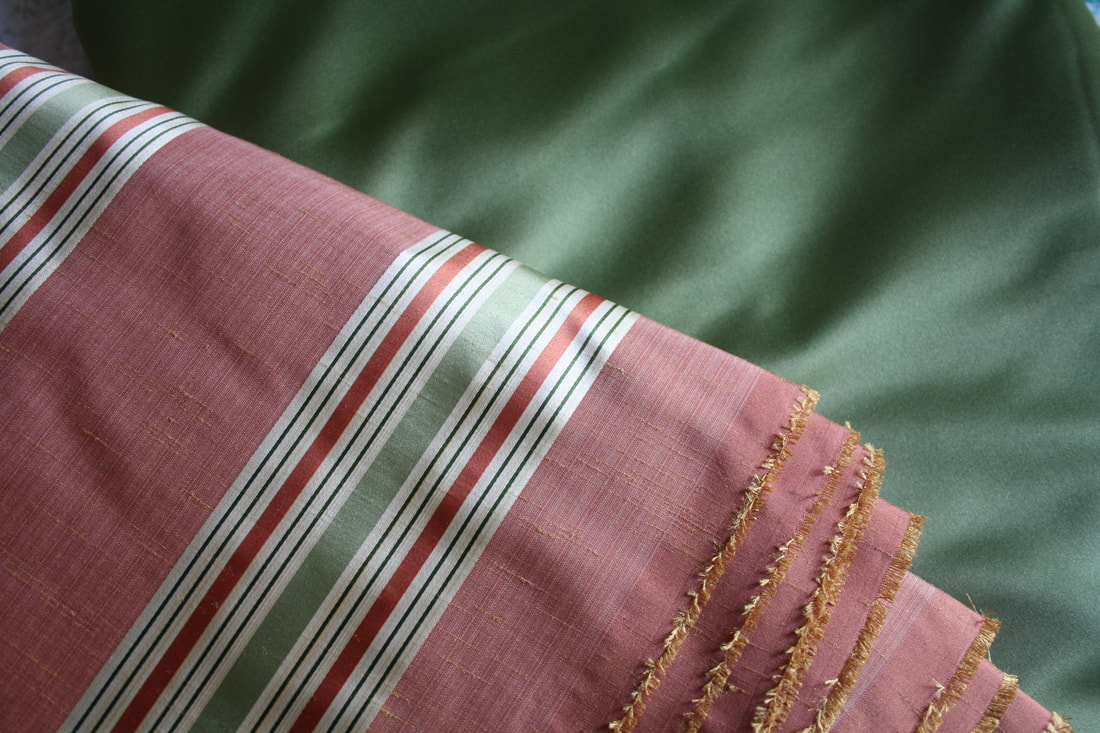 To start off with: the fabrics for my Robe a la Francaise. I have been wanting to make one of these since I first started sewing, and my love for these ridiculous, poofy dresses has not abated in all this time. Although having a fabric with a pattern makes this already difficult to construct gown even worse to drape, I couldn't help myself but pick up this lovely coral, cream, and green striped silk. I thought that these colours looked perfect for the era, and the coral is different from what I usually pick. Plus, I have seen so many stunning striped Robe a la Francaise's that I thought if I could be patient enough, it could turn out to be really beautiful. The green silk is for the petticoat that will go underneath the gown, which will be seen in the split at the front. If I have enough, I would also like to make some ruffles from the plain green to go on the gown and the stomacher. I am so excited to make this ensemble, but before I even start on it I will have to make myself a new pair of stays (the precursor to the corset which gives the wearer a sort of conical shape). My last ones, which I made for my school project a few years ago do not fit properly, and I would like to make a prettier pair this time. I also feel like I have learnt enough in the past few years about both fitting and construction methods that I could really improve the shape. 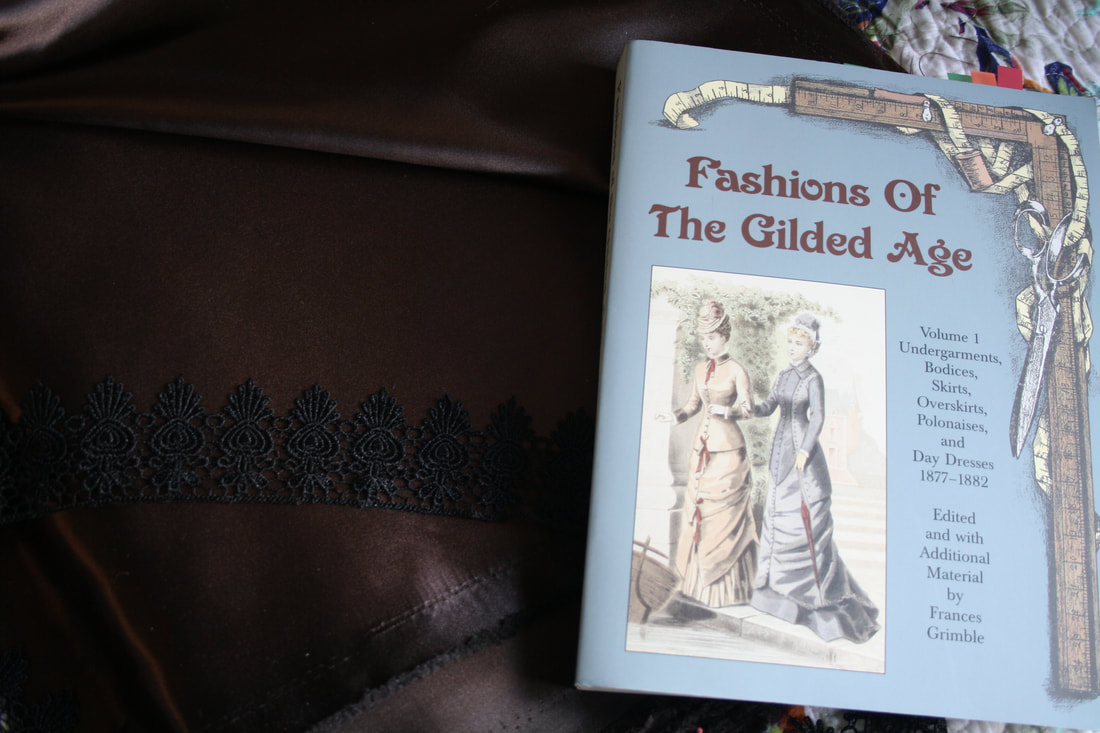 It took me quite a long time to decide on the colour for the Crimson Peak inspired gown, but I finally settled on this chocolate brown silk. I knew that I wanted a rich jewel tone, but I also didn't want to copy exactly one of the dresses from the movie. This isn't a cosplay, it's just inspired by the lovely natural form era styles and slightly morbid undertones. I also found a black lace to go with it, though I haven't decided where that lace will go yet since I haven't fully figured out the design. I would like something that comes across like an evening gown, but I also want long sleeves (like Lucille wears in the movie). During that era, evening gowns would not have long sleeves, so I either have to play with history or change the main idea. 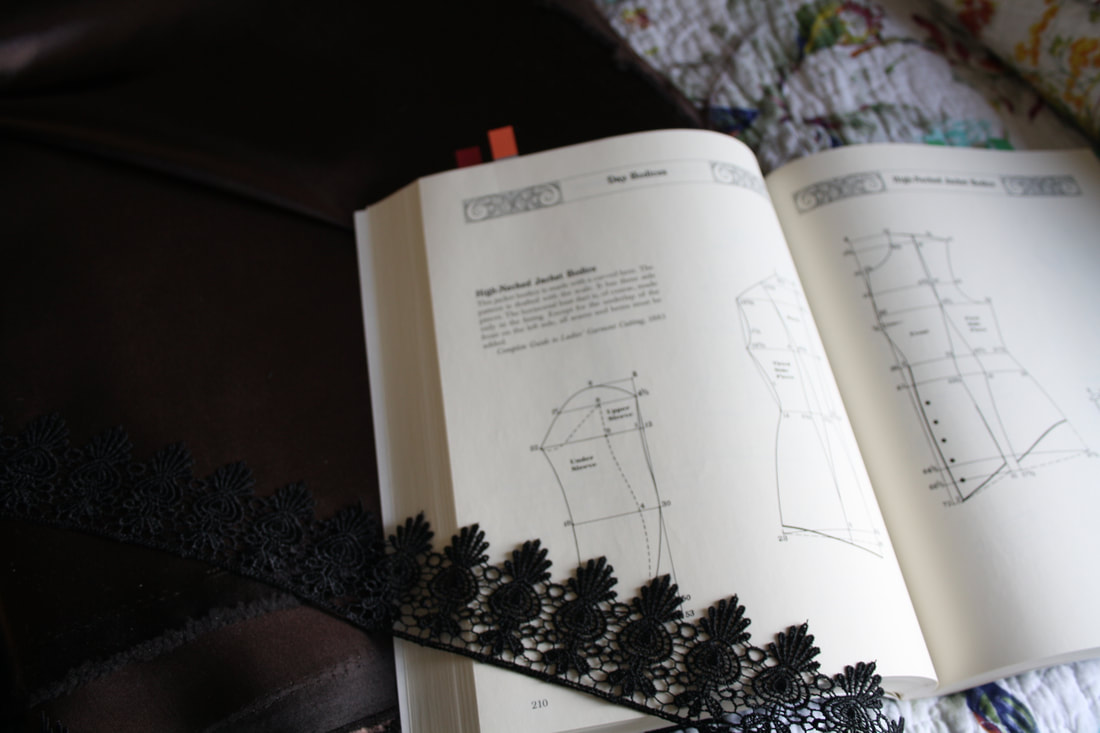 I am also very excited for this project because I finally get to use a book that I have been drooling over for months now. I will be using patterns (with some alterations, like I always do) from the book Fashions of the Guilded Age: Volume One by Frances Grimble. This book is filled with patterns from the late 1870s and excerpts from fashion magazines of the era. Since I can't seem to make it easy for myself, I will need new undergarments for this dress as well. Along with a petticoat (with a train, to keep the train of the dress clean), I will need to make another corset. I haven't really touched this era yet, so I can't wait to play around with it. 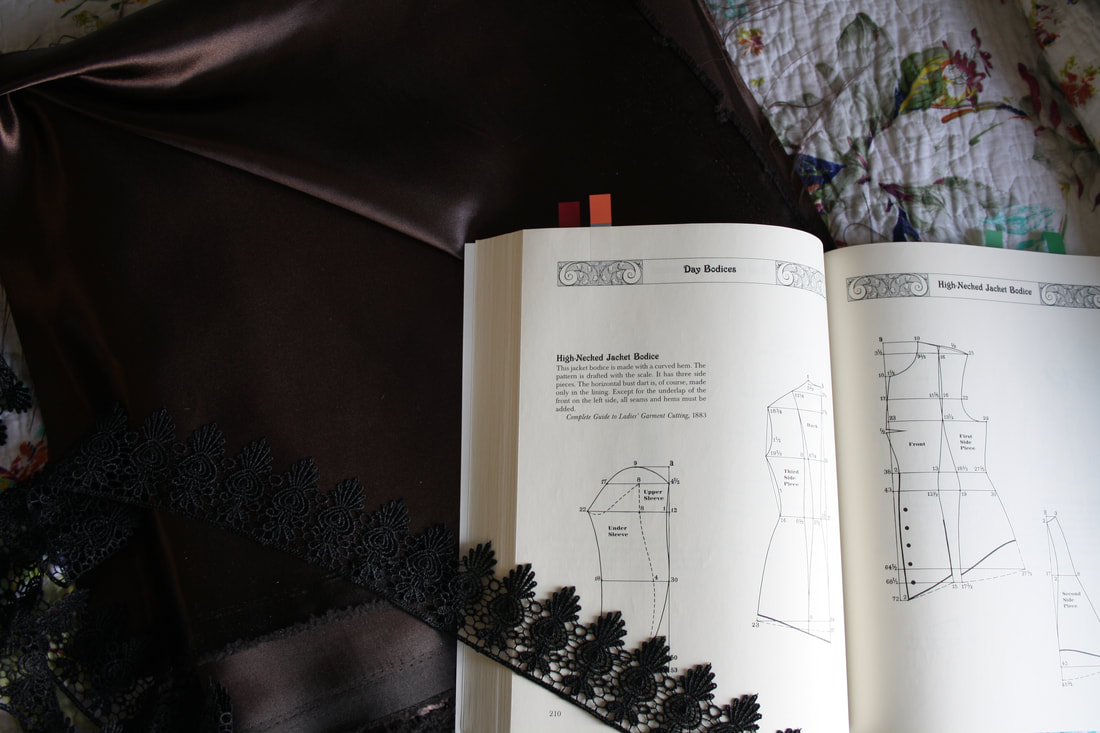 Hopefully my progress isn't too slow over the next few months, and that you are as excited for these projects as I am!
~K 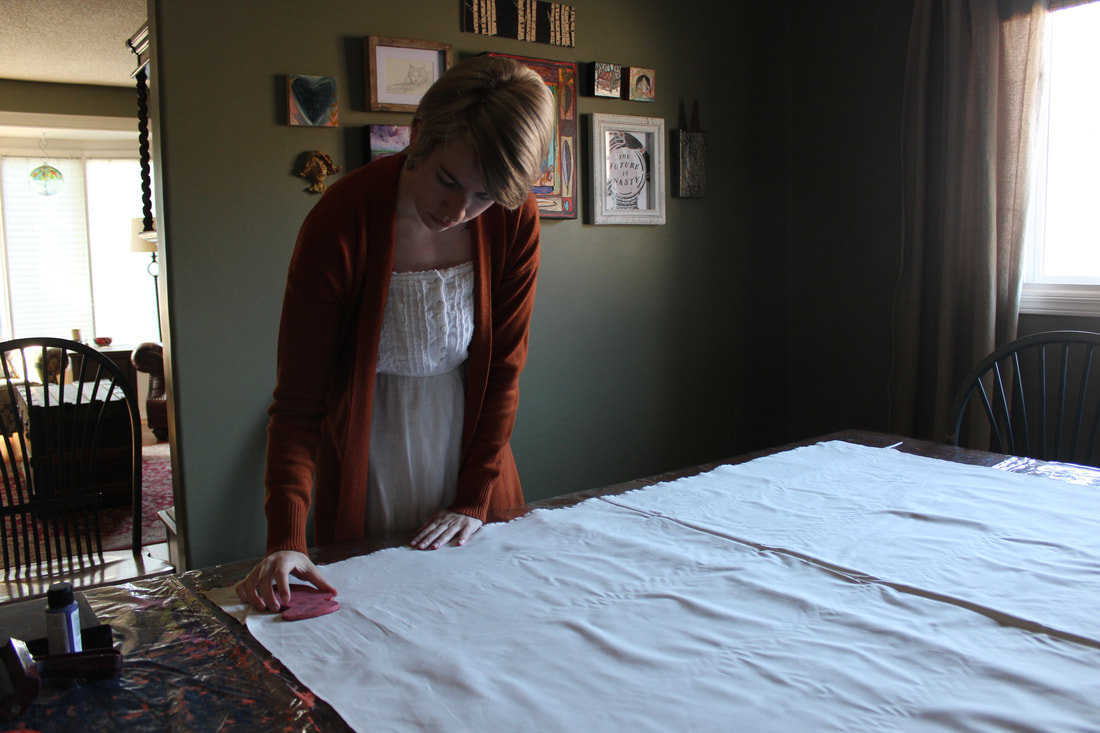 Pattern making at the end of summer Since starting at a new university in September, I have been very busy and slightly neglecting my sewing. However, it has still been in my thoughts, and I haven't abandoned it completely! The last 10 days of September were a whirlwind of excitement since I had my small collections from the Future Oceans fashion show in a pop up boutique. It was so fun to see my garments being displayed in a storefront, and the area that we were given to show our clothes was absolutely stunning. I am still so grateful that I was able to be a part of that, even just to see what it looks like to have my eco couture for sale in a mall (it was a pinch me moment). I also did sell a few pieces through the 10 days, so the past few weeks I have been altering my patterns to fit the customers measurements, printing custom fabrics, and sewing the dresses. Luckily, my university has a maker space with an industrial sewing machine, so that part was easier than I thought that it would be. 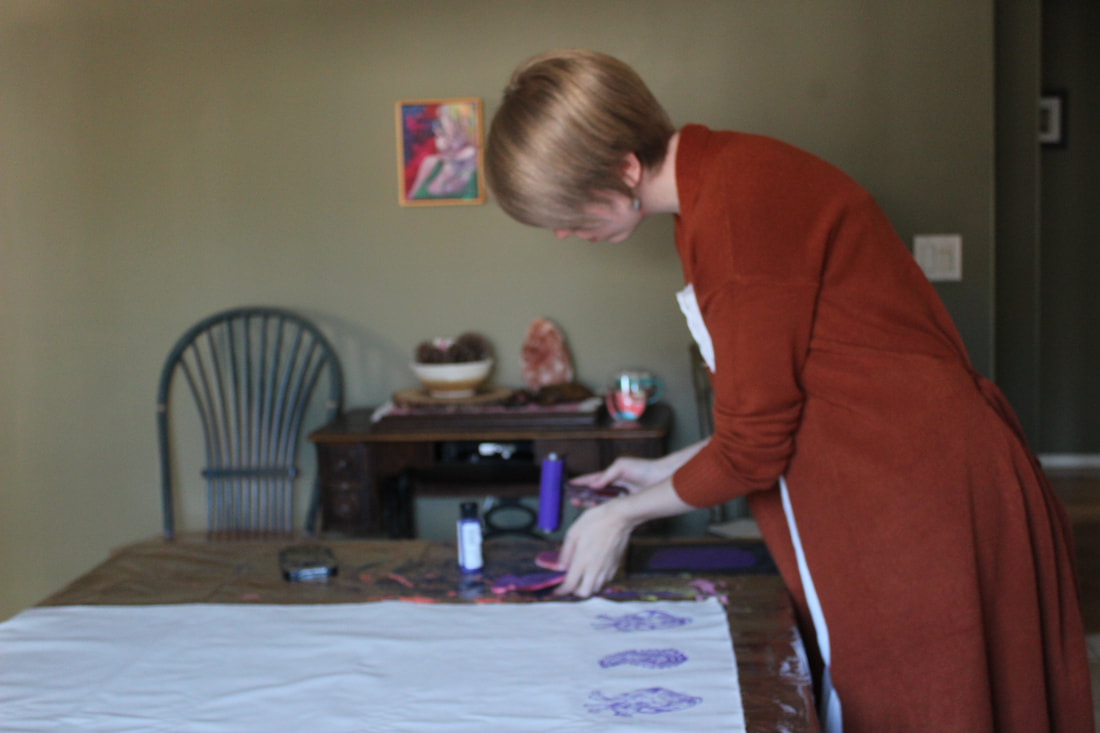  Example of a Chemise a la Reine. This one is housed at the Manchester Art Gallery Since making the orders for my Future Oceans dresses, I have been hit with inspiration. This is also thanks to my classes, since I am writing a research paper about the Chemise a la Reine (which I'm sure I will make a version some day, since I've been fascinated with them for ages). Doing the research on clothing in the late 18th century has been giving me so many ideas. I thought that I would talk about some of those tentative ideas here. 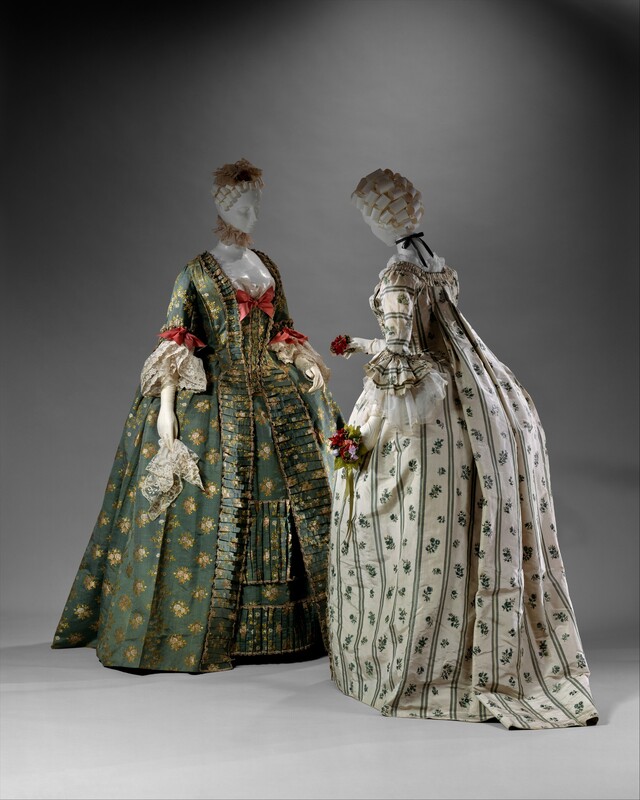 An example of a Robe a la Francais/Sacque Back Gown. These ones are from the MET Up first: a Robe a la Francais, also known as a Sacque Back Gown. I have been in love with these gowns since middle school, when I saw a photo of one on pinterest. These gowns have such a unique construction method, and if they done properly they are absolutely stunning (at least in my opinion). It would be so much fun to chose the decoration for this type of dress as well, which makes my decision to make one even easier. I am planning on draping it myself using the instructions from the American Duchess Guide to 18th Century Dressmaking. 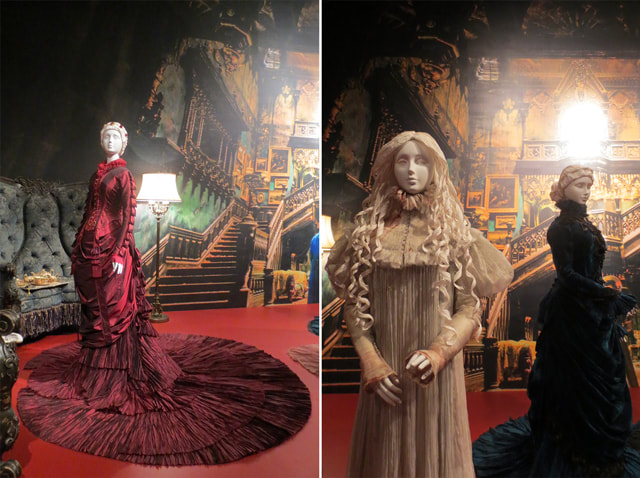 Costumes for Guillermo del Toro's Crimson Peak by Kate Hawley. These photos are from the exhibit at the Toronto Art Gallery (called Guillermo del Toro: At Home with Monsters that was shown in 2018) Another gown that I have been desperate to make for a few years now is something inspired by Crimson Peak. I loved Lucille Sharpe's costumes throughout the movie (the red and navy dresses in the above photos) since I love the natural form era (late 1800s). I am also a sucker for beautiful yet morbid things, so these costumes are right up my alley. I don't want to copy any of the dresses from the movie, but I would like to make something inspired by them. Other than that, I have other ideas swirling around in my head but I'm not sure how much time I will have for sewing, and since both of these ideas are pretty big (I would need to also make specialized undergarments to go under them, so that will add quite a bit of work) I think that they will take a pretty long time.
Thanks for reading! ~K 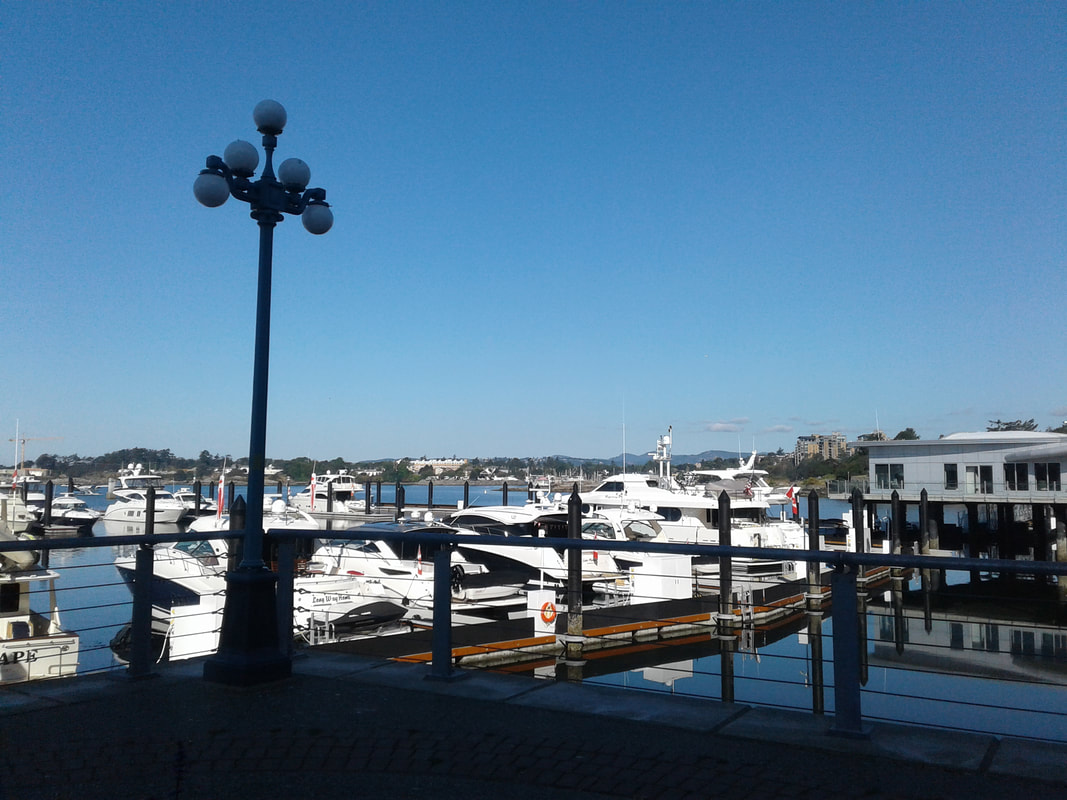 The day has finally come that I can talk about the Future Oceans fashion show and the pieces I made for it! I have been waiting as patiently as possible to show what I've been working on, and I am so excited to show the pictures that I have from this weekend. There were some incredible photographers at the event as well that I will be showing photos from as soon as I am able to. 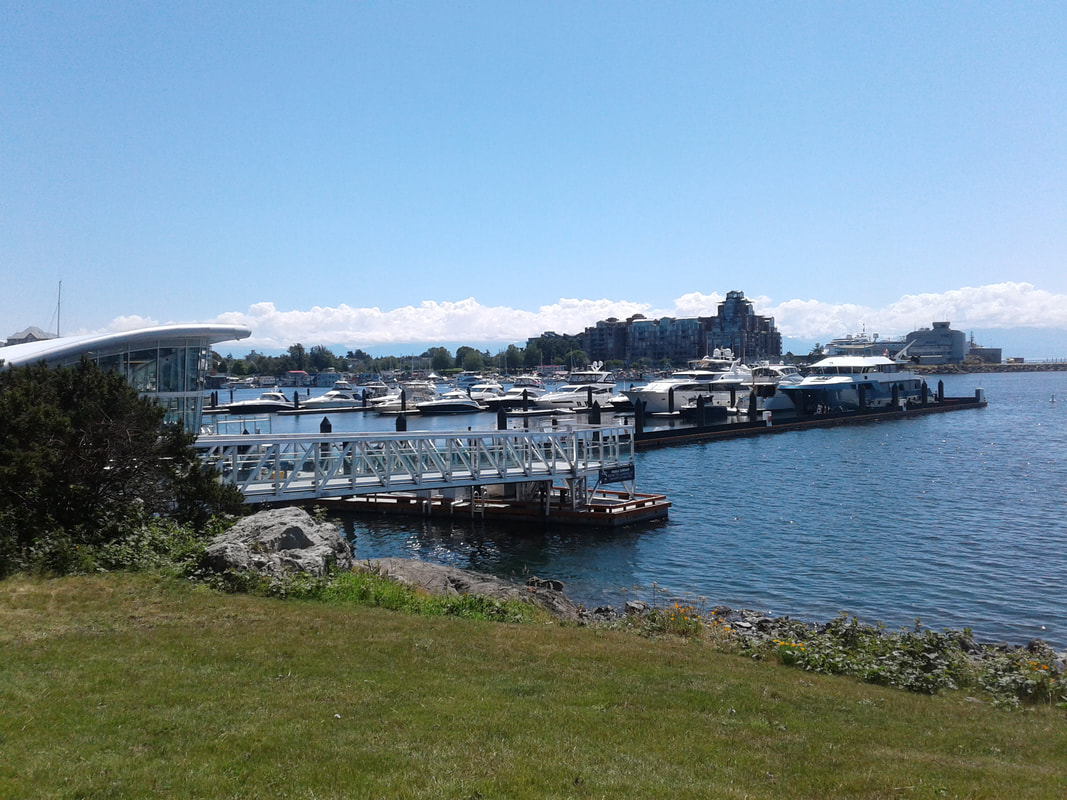 The Victoria International Marina, the location of the fashion show Before I talk about my designs at the time that I spent in Victoria, I want to talk about the reason for this show. Future Oceans partnered with the Victoria International Marina (where the show was held), Natural Talent Alliance, and the Ocean Legacy Foundation. The point of the show was to give a platform to ocean conservation in the fashion industry. The fashion industry is the second largest polluter, and by bringing attention to it and giving people an alternative we are taking the first step to turning the Fashion Industry into something that is more earth friendly and thoughtful. Learning about how terrible the fashion industry is on the environment was making me lose my faith in something that I really love. Being a part of this helped me get excited about it again. I hope that this show will help in getting people and brands to think twice before choosing certain fabrics The event started on Canada Day with the ribbon cutting for the Victoria International Marina. There was live music, performances by the Nanaimo Contemporary Ballet, and the fashion show. We had so many incredible people working together to make this a reality!  Natalia Hennady and Mildred Rincon in two of my designs I created 6 Eco Couture pieces inspired by different eras and 1 Art Dress. The Art Dress was created from garbage that was fished from the ocean. The Eco Couture pieces are all created from eco friendly fabrics from KenDor Textiles, a Canadian company that specializes in environmentally and socially responsible fabrics. I will wait to talk about the design process of each of my pieces for when the photos come back and you can actually see them in detail (all of these photos are just from my phone), but for now, here are some travel pics! I was in Victoria for 3 crazy, hectic days that were filled with fittings and photo shoots. The first day I spent almost entirely at the Marina (which is a stunning building) getting ready for the show. We had an amazing lunch at Spinnakers (Canada's first microbrewery), and spent the rest of the day planning and prepping. 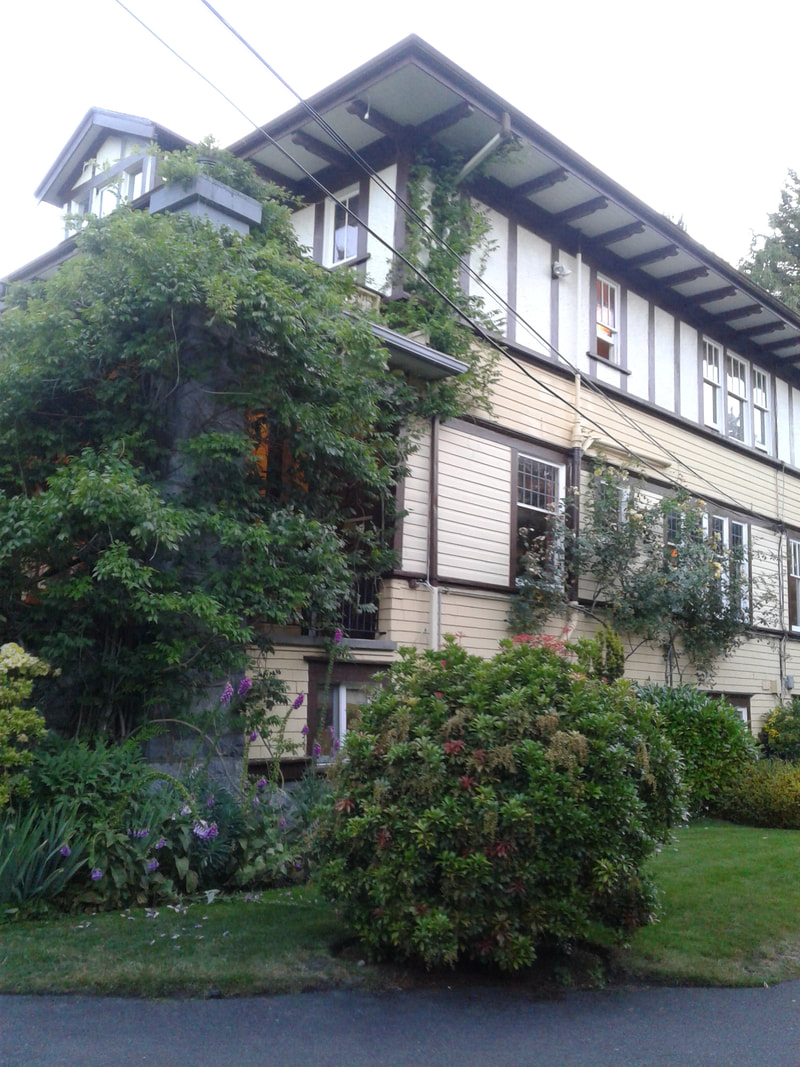 The Abbeymoore Manor We were housed in the most amazing Bed and Breakfast called Abbeymoore Manor. It's an old house with beautiful rooms, the best breakfast I've ever had, and really friendly staff. 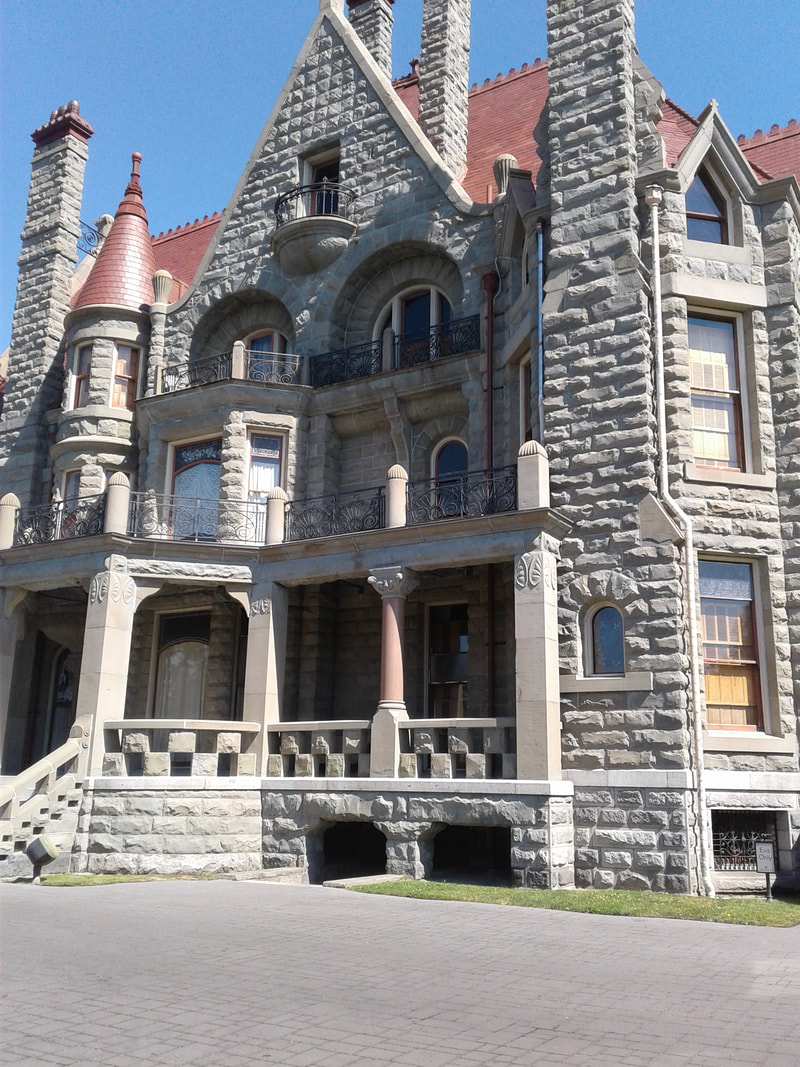 Craigdarroch Castle 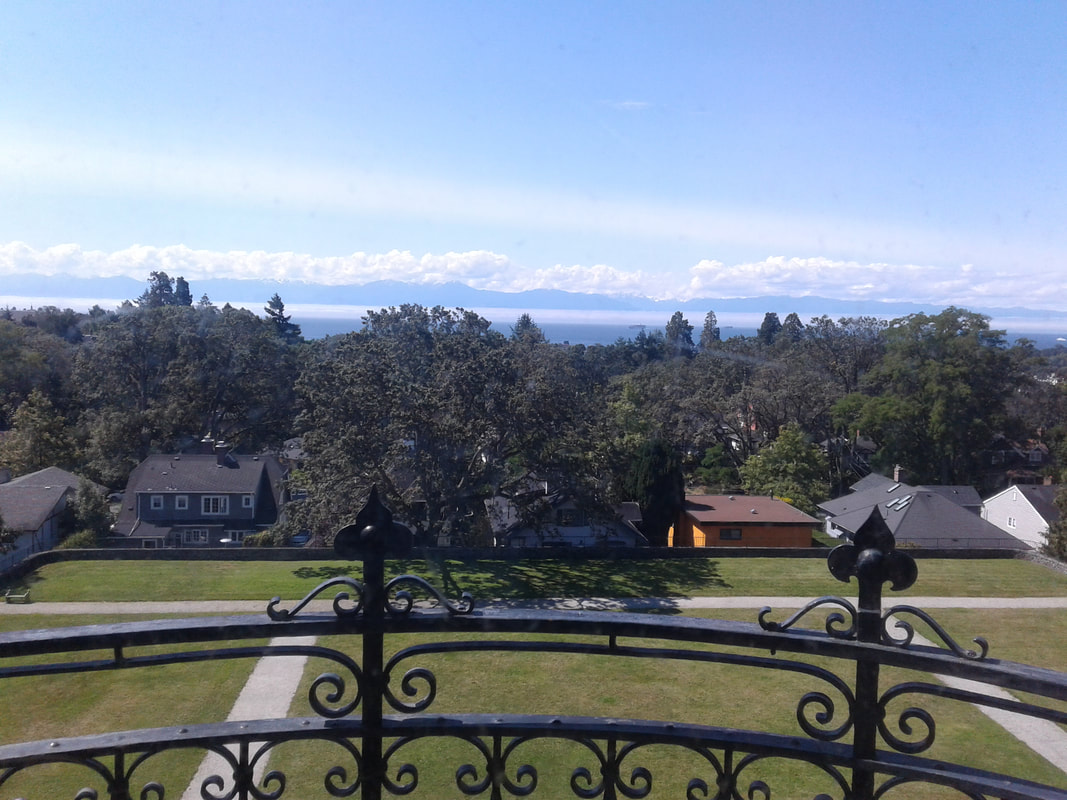 The view from the top floor of the castle The next day that I was there was Canada Day, meaning the day of the fashion show! I've been working on this for 6 months, so it was like a dream to be there. Luckily enough, the designers weren't needed until noon so I had all morning to myself. I ended up going for a walk to the Craigdarroch Castle, which was a 5 minute walk away. The castle was built in 1890 by Robert Dunsmuir, who passed away before it was finished. His wife, Joan, lived there until her death in 1908. During WW1 it was used as a military hospital, and after that it was used as a College, Conservatory, School Board, and now a museum. 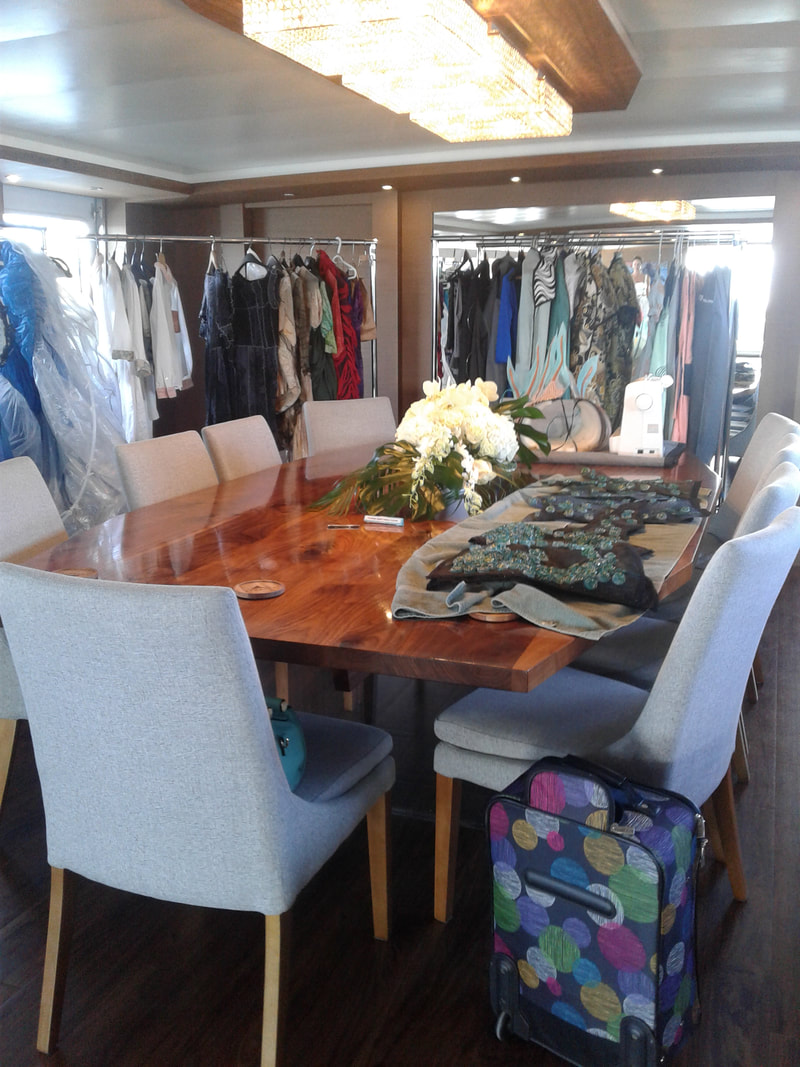 The dining room of the Ascente, which we took over for our garments 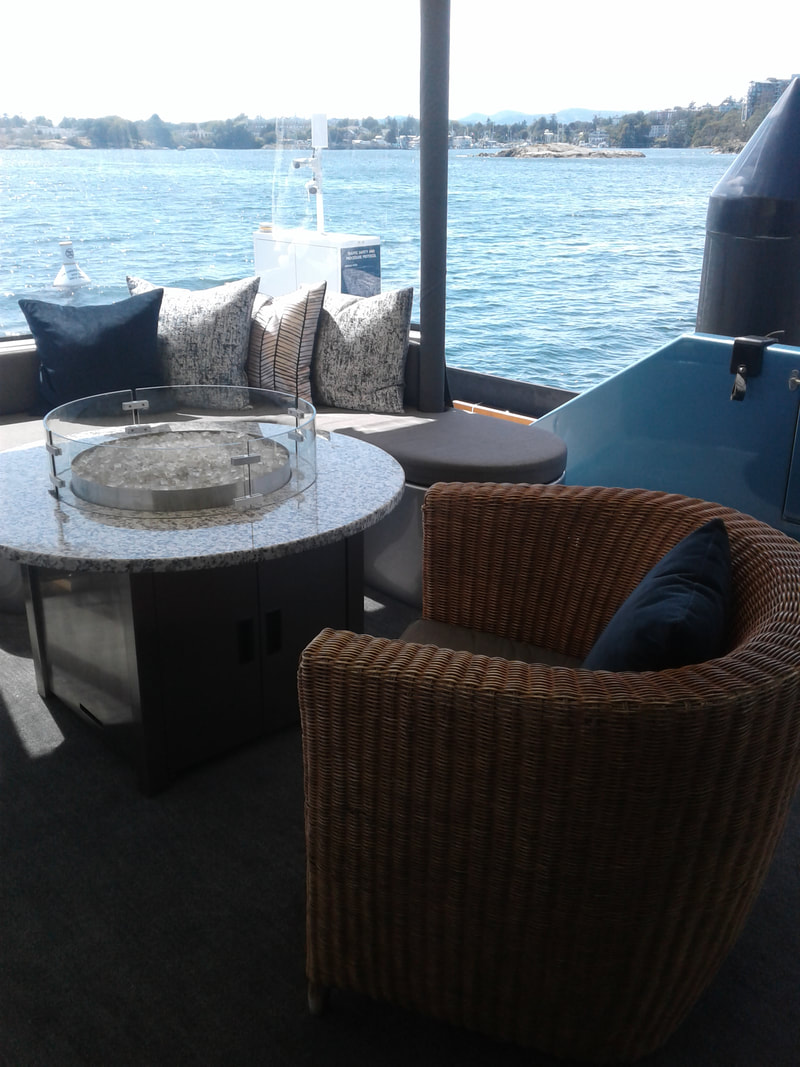 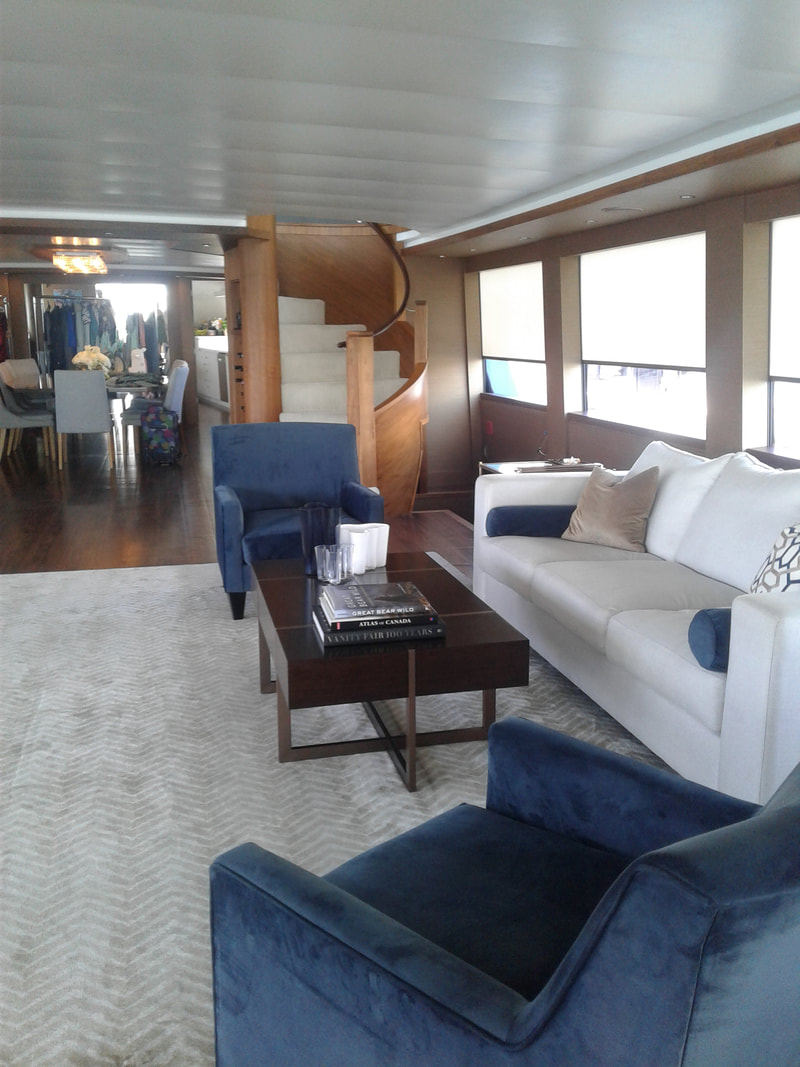 We were able to use a beautiful yacht, the Ascente, as our backstage. They were extremely generous with us and the space was the nicest backstage that I have ever worked in. This was definitely a trip of a lifetime. 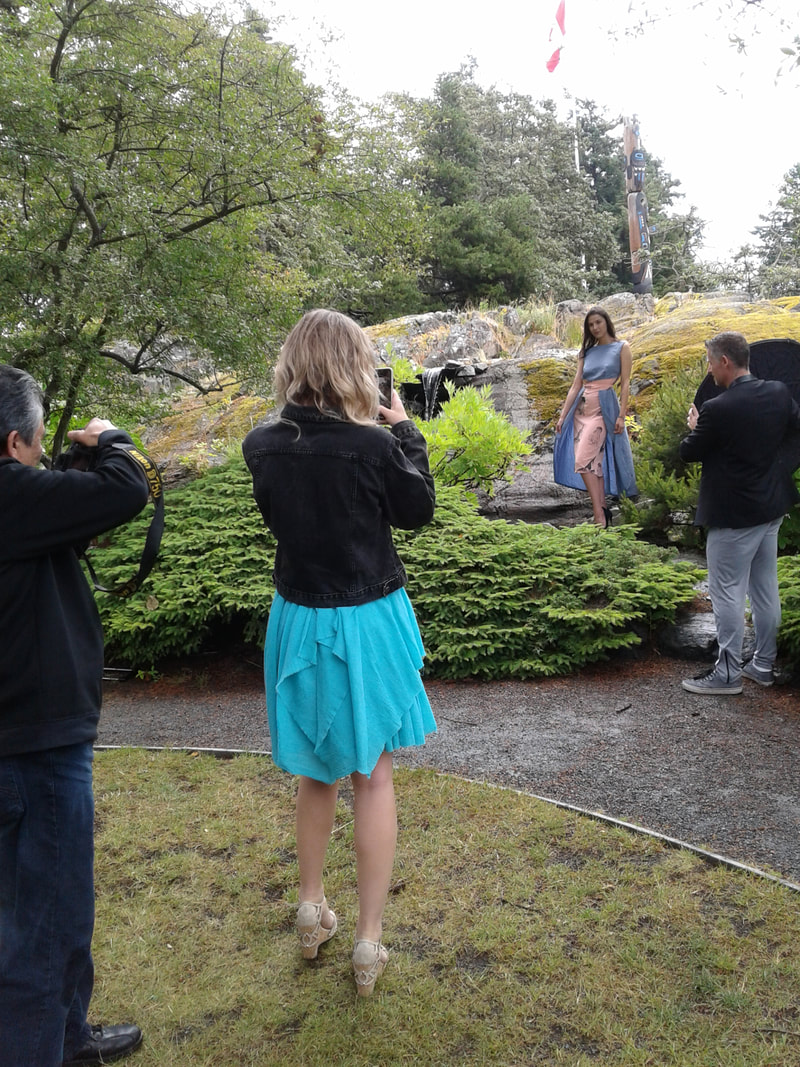 Shooting at the Government House in Victoria. The lovely model wearing one of my dresses on the rocks in Mildred Rincon, the other model is Natalia Hennady, We had Doug Wong taking some amazing photos and Matt Laprairie, the Director of Operations and Stage Manager, helping him out 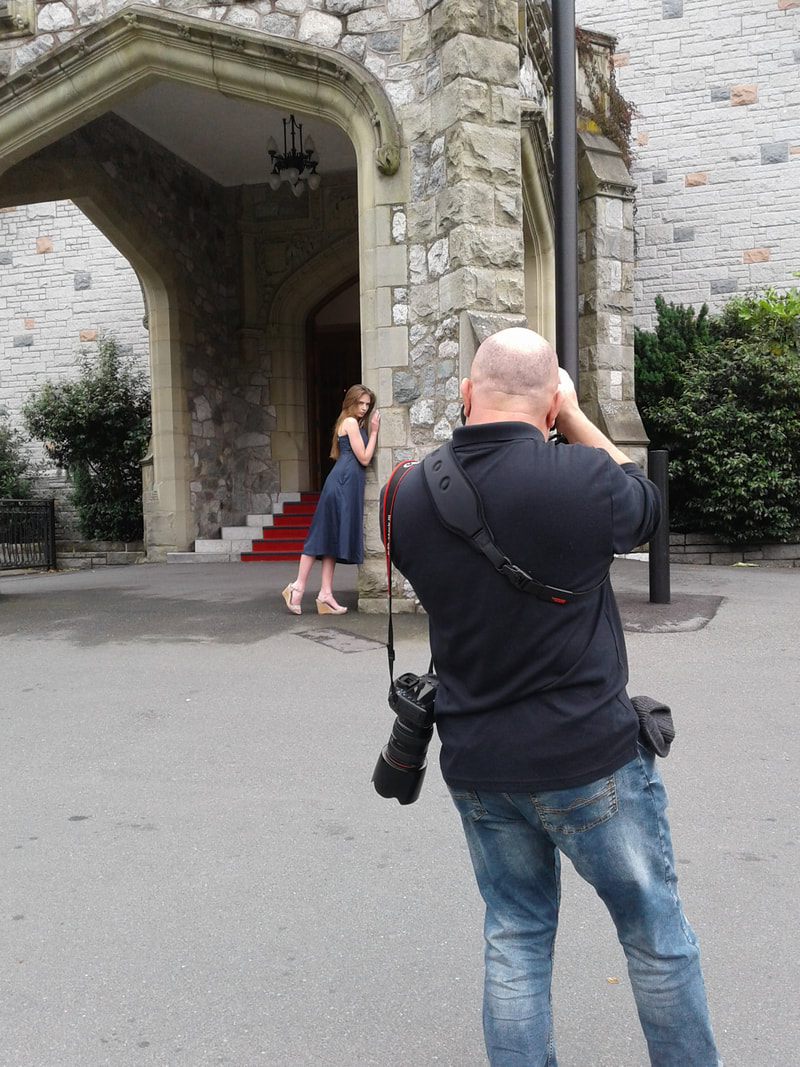 Zev Vitally Abosh (the photographer) and the stunning Taylor McCarroll wearing one of my designs  Natalia Hennady in one of my Eco Couture designs at the Government Mansion The last day that I was there was photo shoot day! And boy, did we have some really incredible places to take pictures in. While a group of people went to get photos at the ocean, I went with another group to the Government House. I can not wait to get all of the photos back from the 2nd because not only are the photographers fantastic, but the locations were some of the prettiest places I've been to since Germany. The last location of the day was Hatley Castle, which some of you may recognize from movies such as X Men and Deadpool. Everyone here was also so accommodating for us and we were able to go everywhere on the extensive grounds to get photos. If you aren't from Canada, you might not understand how exciting it is to find 2 castles, but in Canada it is very rare to have such old and beautiful architecture. 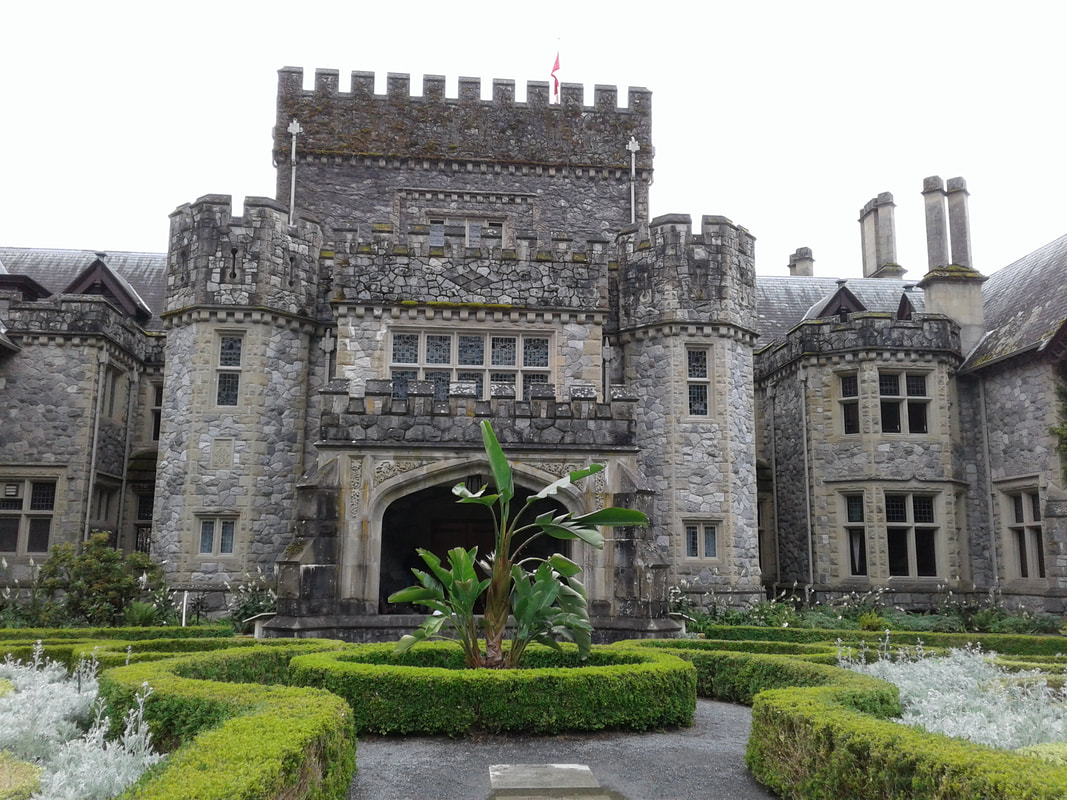 Hatley Castle 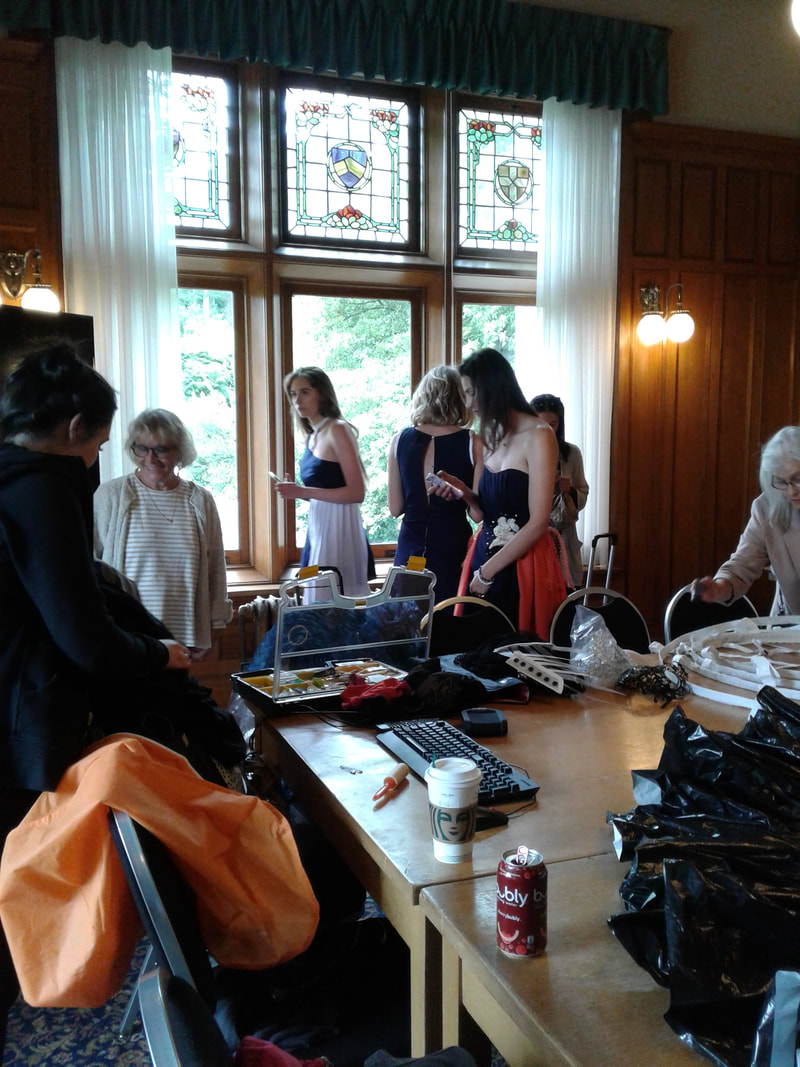 The room inside Hatley that they gave us to get ready in. As you can see, behind the scenes of a photo shoot can be pretty hectic and messy 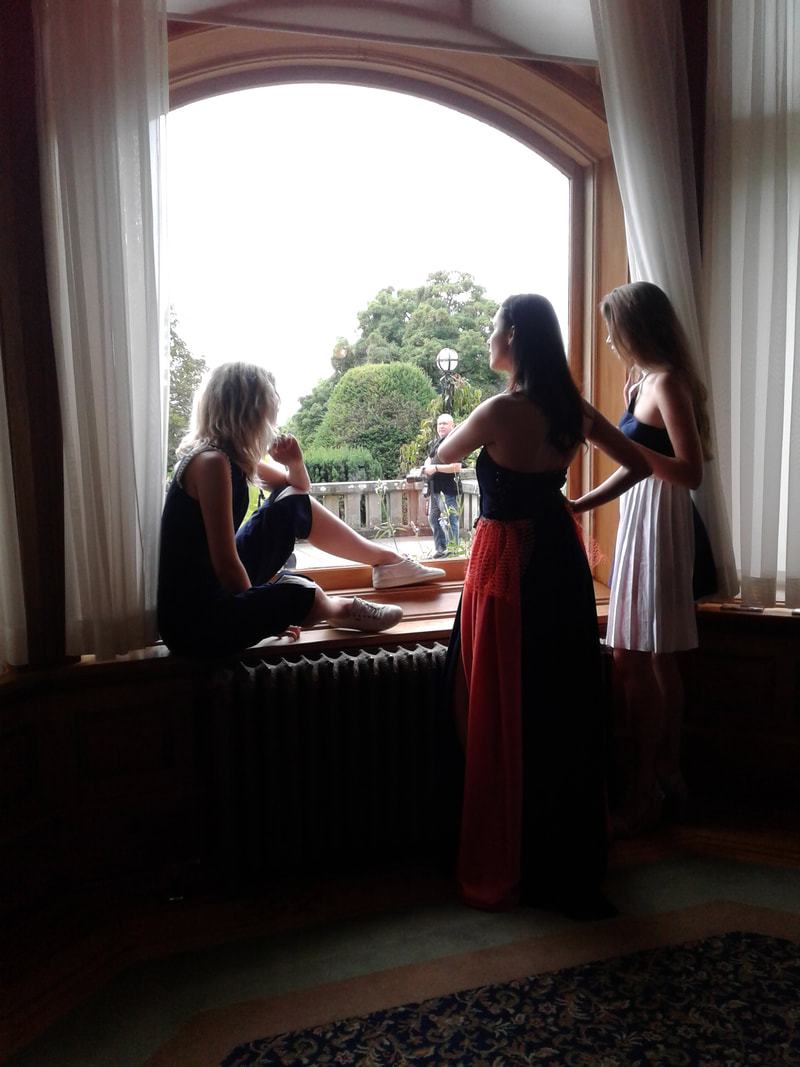 Taylor, Mildred, and Natalia getting photos done in the window of the castle wearing designs by Janani Senarathne 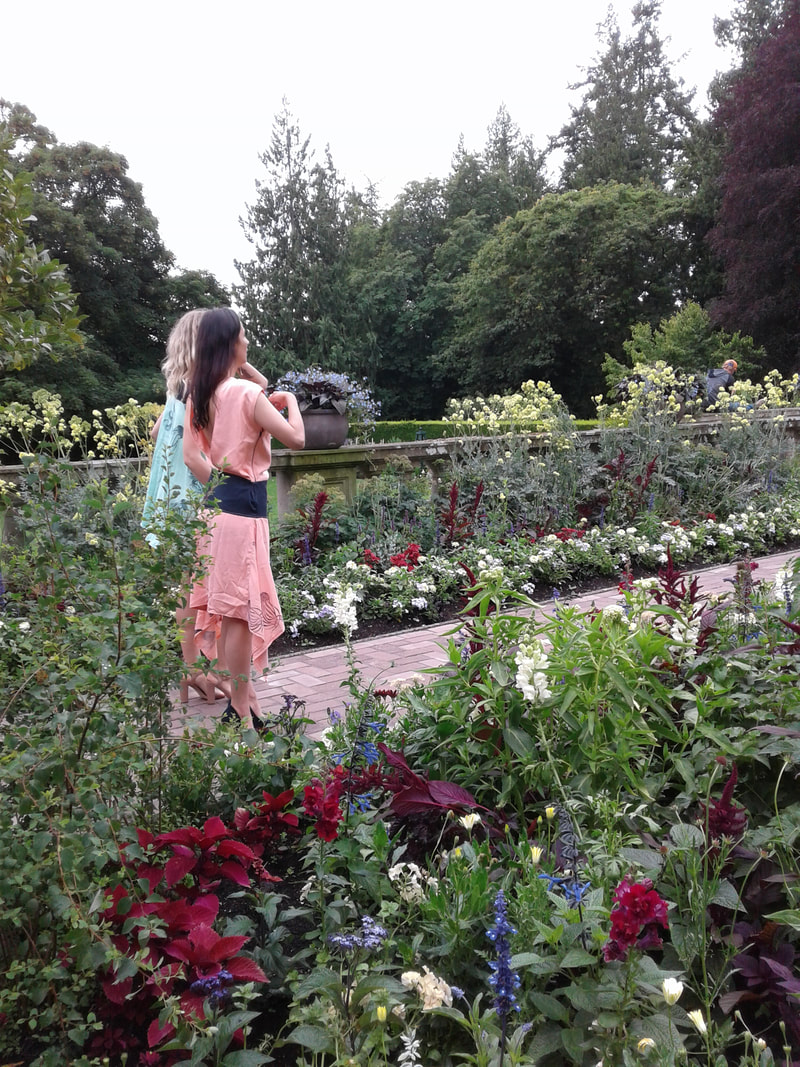 Natalia and Mildred in two more of my designs in the garden behind the castle I can't wait to show you my pieces in better detail, but in the meantime I hope you enjoyed a bit of a behind the scenes of my time for the Future Oceans Fashion Show! ~K
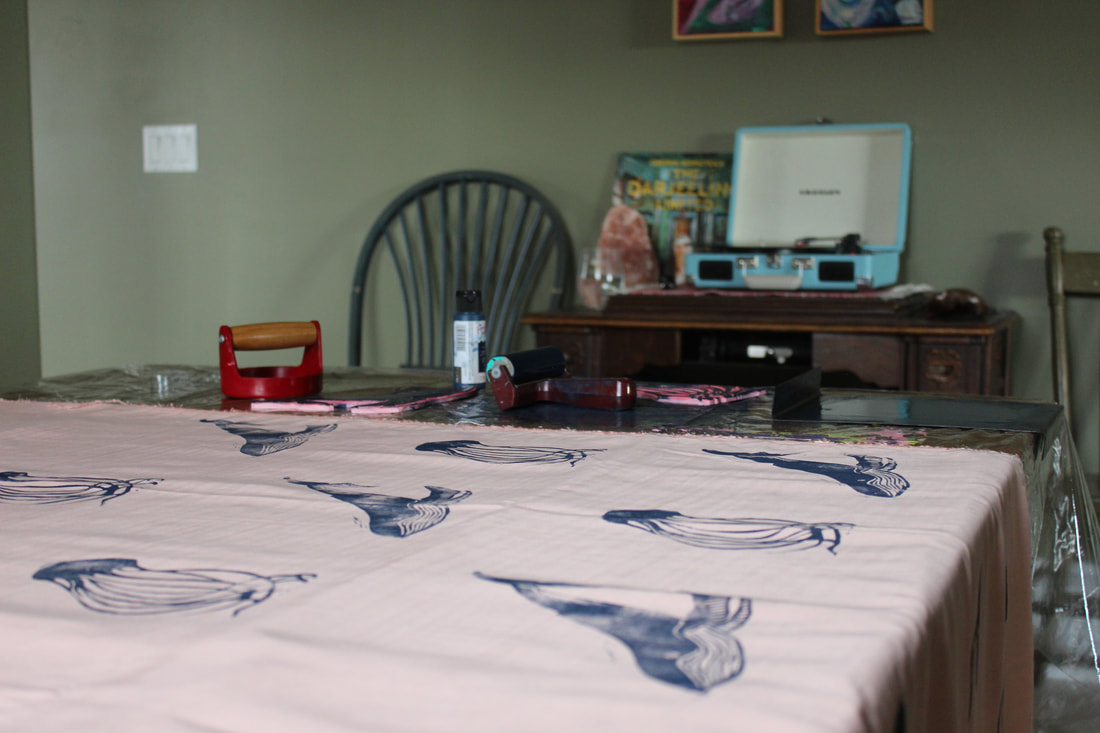 I was lucky enough to be chosen as one of the 10 designers to create a small ready to wear collection and one art dress for a fashion show that will take place on Canada Day in Victoria, BC, at the Victoria International Marina. 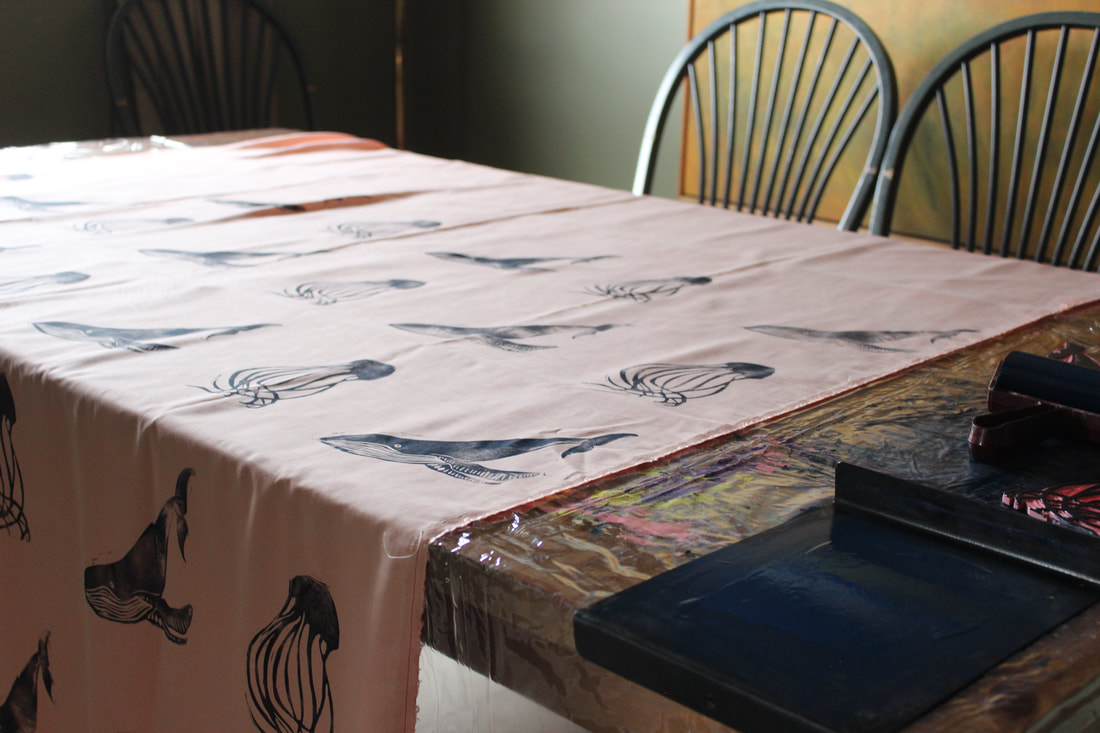 Printing on of the fabrics I had so much fun coming up with the design ideas since I could do whatever era's and whatever styles I wanted to, as long as I used eco-friendly materials to make them. I am currently working on the ready to wear pieces and having a great deal of fun playing around with the materials and designs. 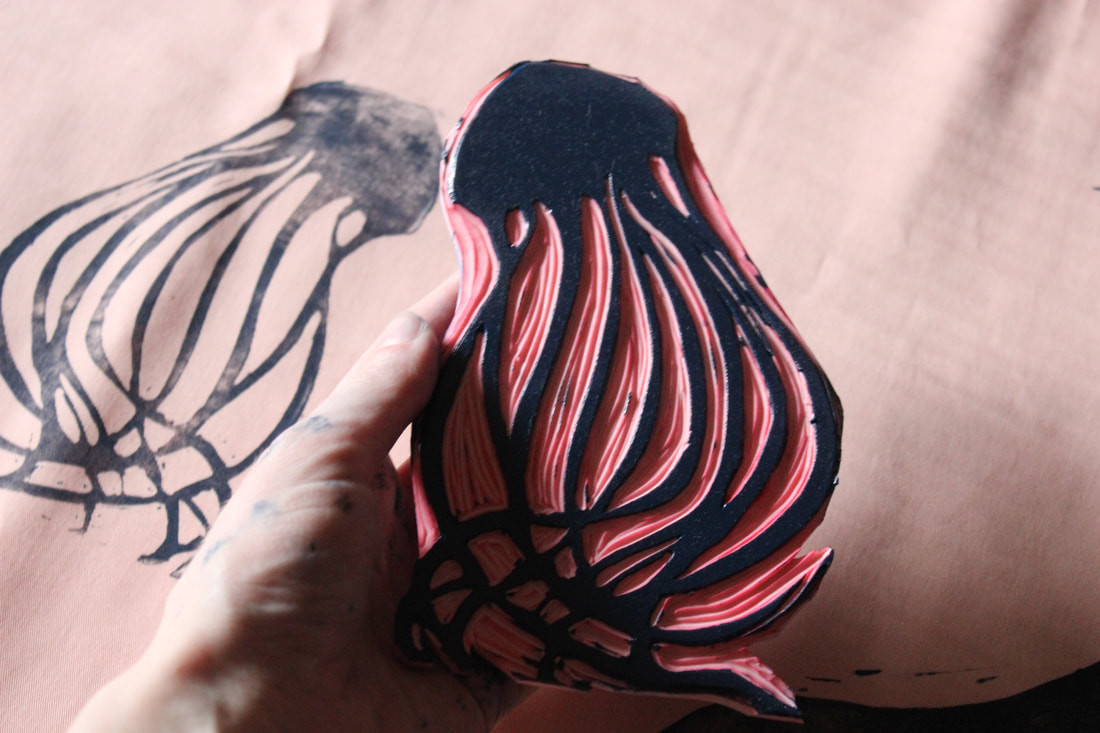 So far I have gotten all of my fabric through KenDor Textiles, which is a Canadian company that specializes in eco-friendly and sustainable fabrics. I have so far printed two of the fabrics, drafted two of the patterns, and cut out those two dresses so they are ready to be sewn together. Once I got my fabrics in, it has all been coming together pretty quickly! 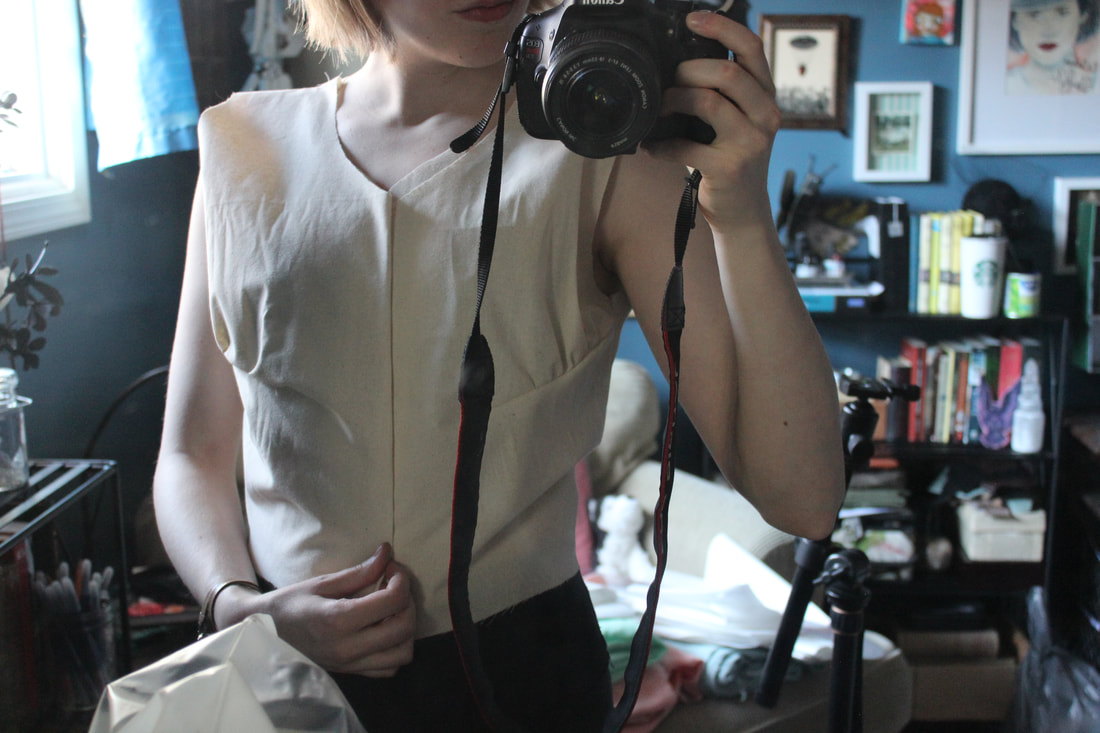 Trying on a quick bodice toile I can't wait for the actual show so I can show everyone exactly what I have been working on, but for now here are some sneak peaks! If you would like to hear more about V.I.M. Future Oceans, you can check out their website here, Instagram here, and their Facebook page here. 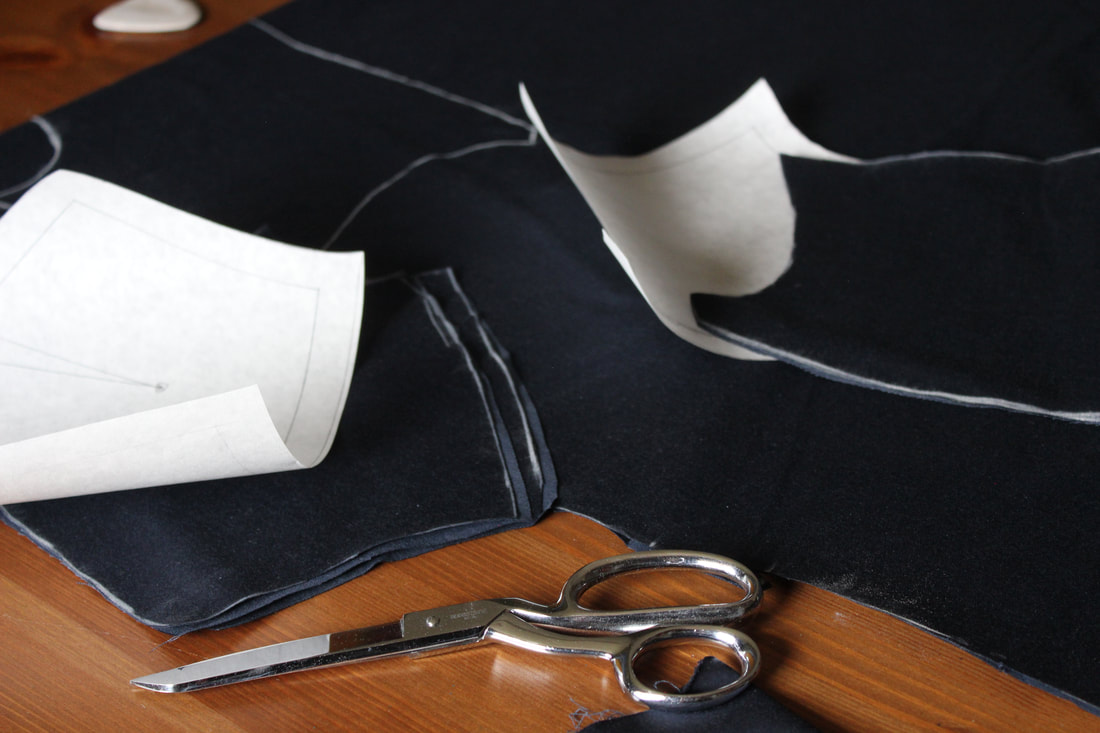 Cutting out pieces 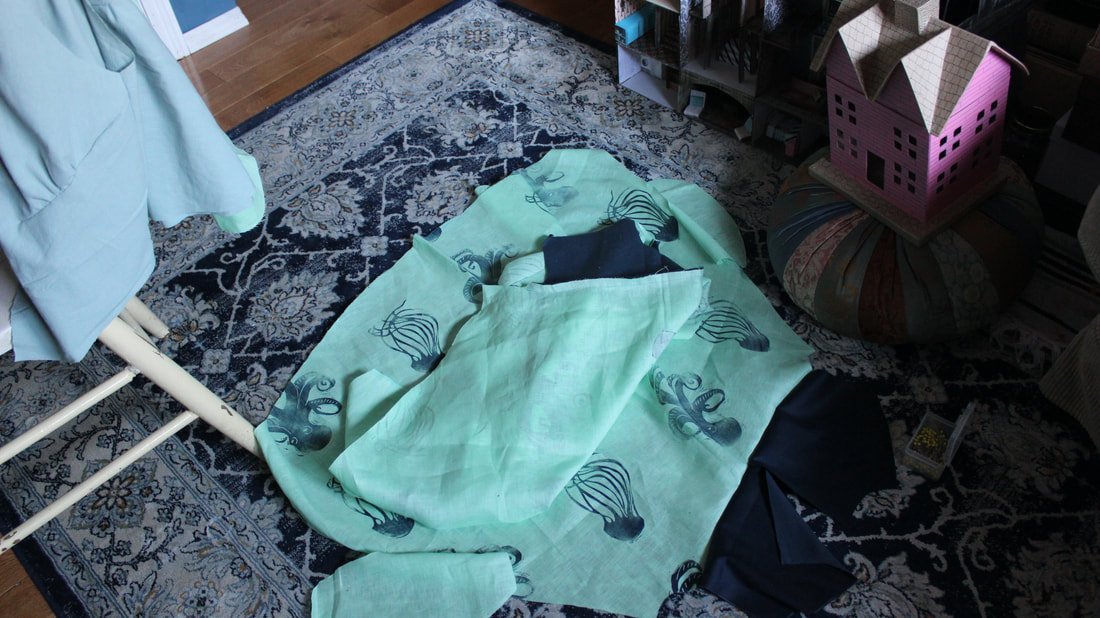 ~K
 The final projects in my second semester of school were making a blouse and vest. I haven't gotten photos of my blouse (yet), but we spent a lovely day in the city getting photos of my vest yesterday. We took photos near the Simmons Building, which used to be a mattress factory but now holds three businesses: Charbar, Phil and Sebastian Coffee Roasters, and Sidewalk Citizen Bakery. This area is really beautiful since it is right on the river, plus it is on the edge of downtown Calgary. It was easy to find some lovely spots to get photos, plus we got the added benefit of a delicious breakfast of pastries and tea.  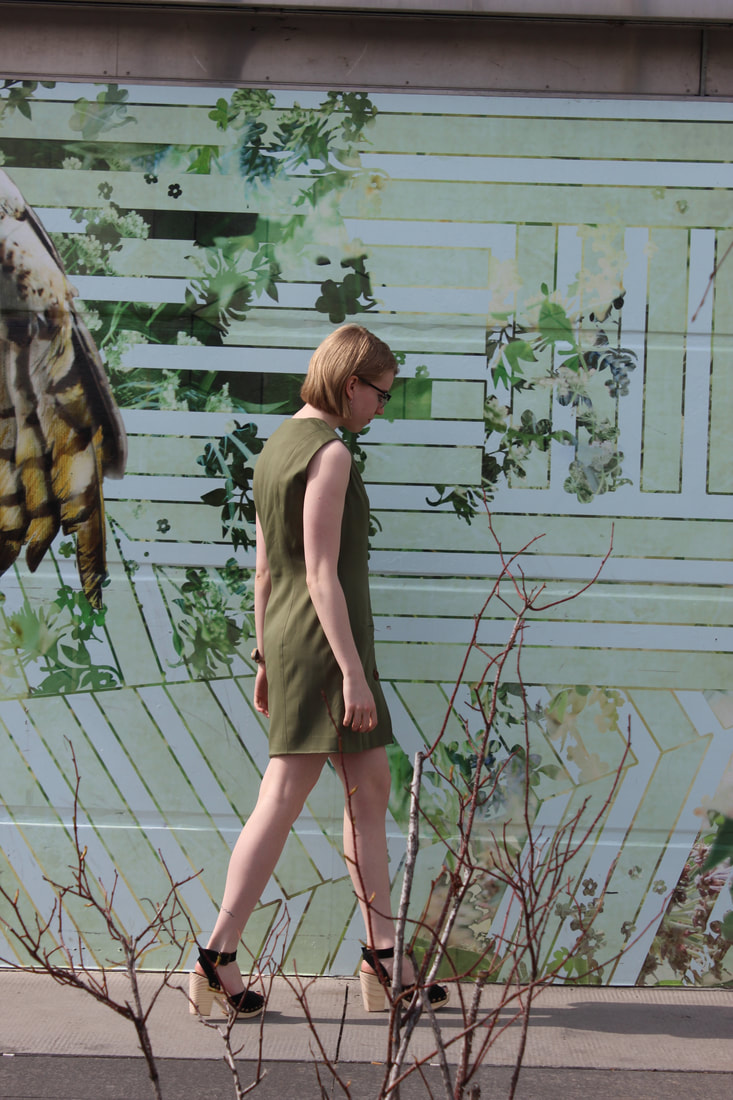 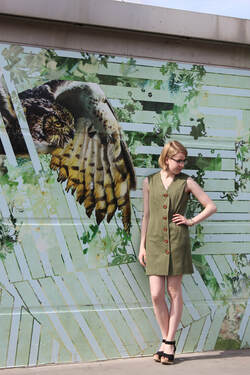 This vest is made using the same wool as my trousers and skirt projects from last semester (more photos of those ones here) and is fully lined. This vest is completely designed, patterned, and sewn by me. It includes princess seams, top stitching, and a welt pocket.   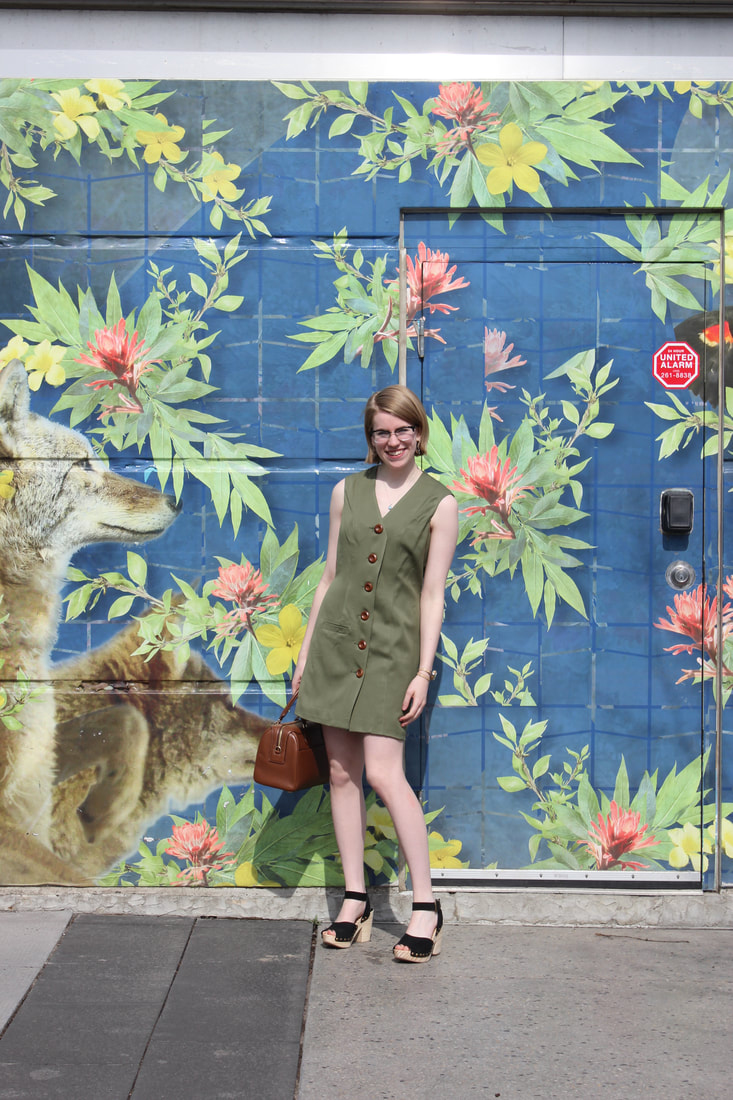 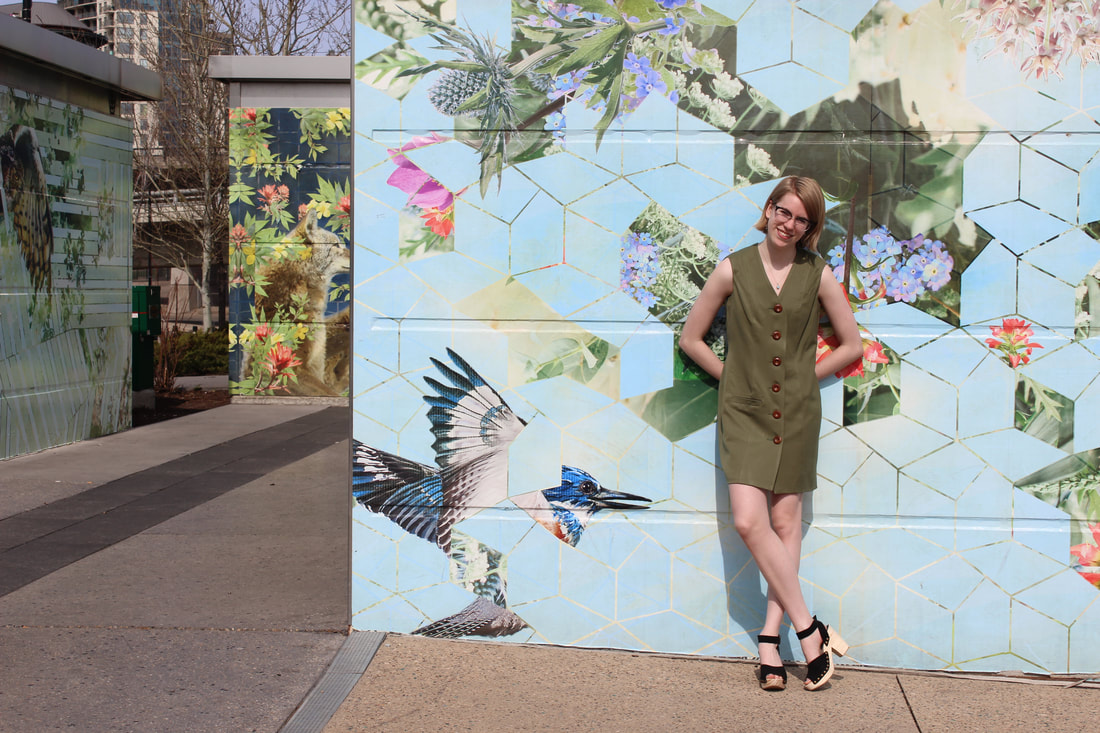 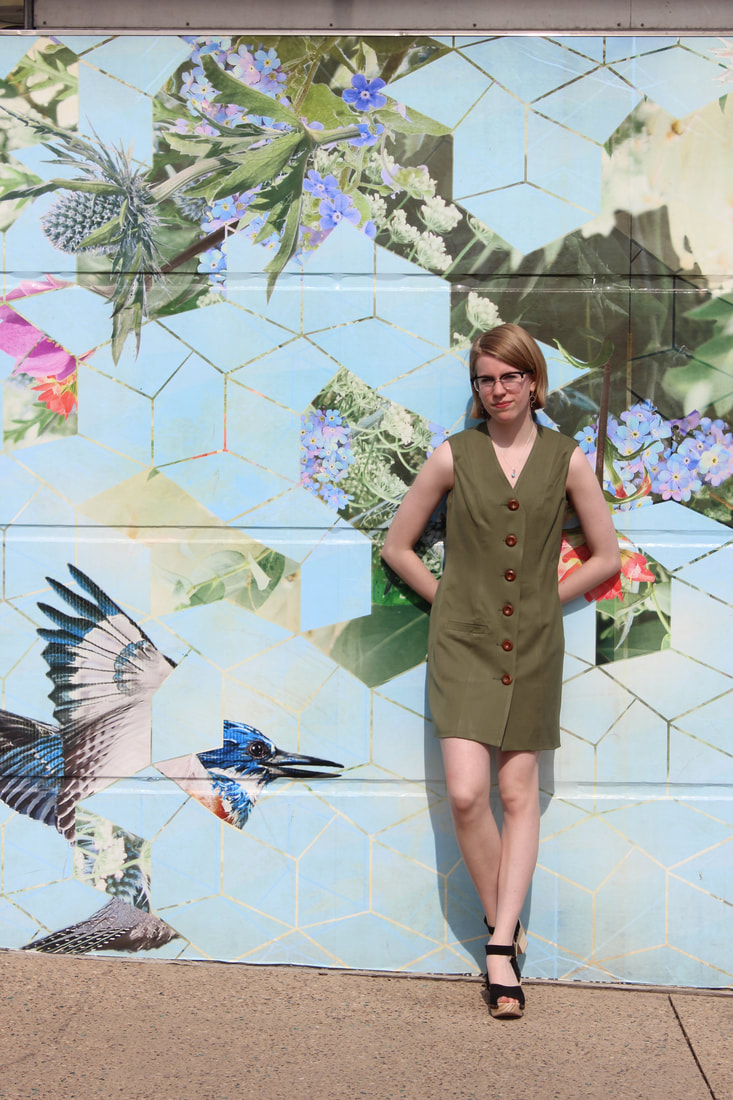 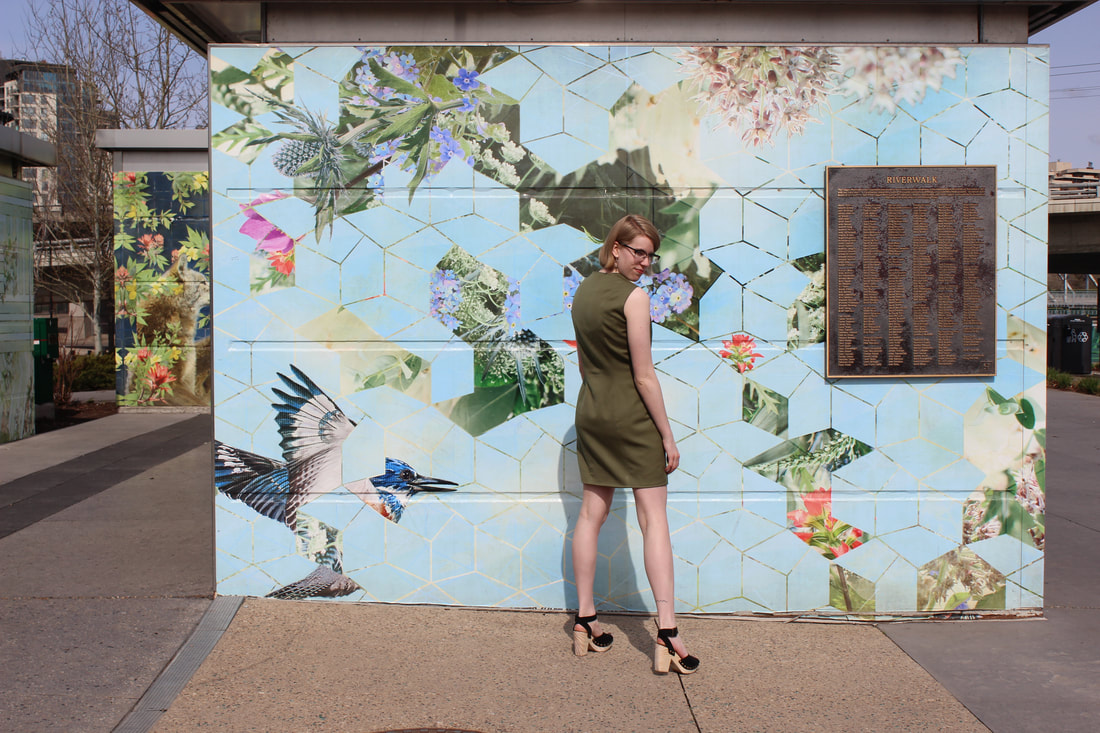 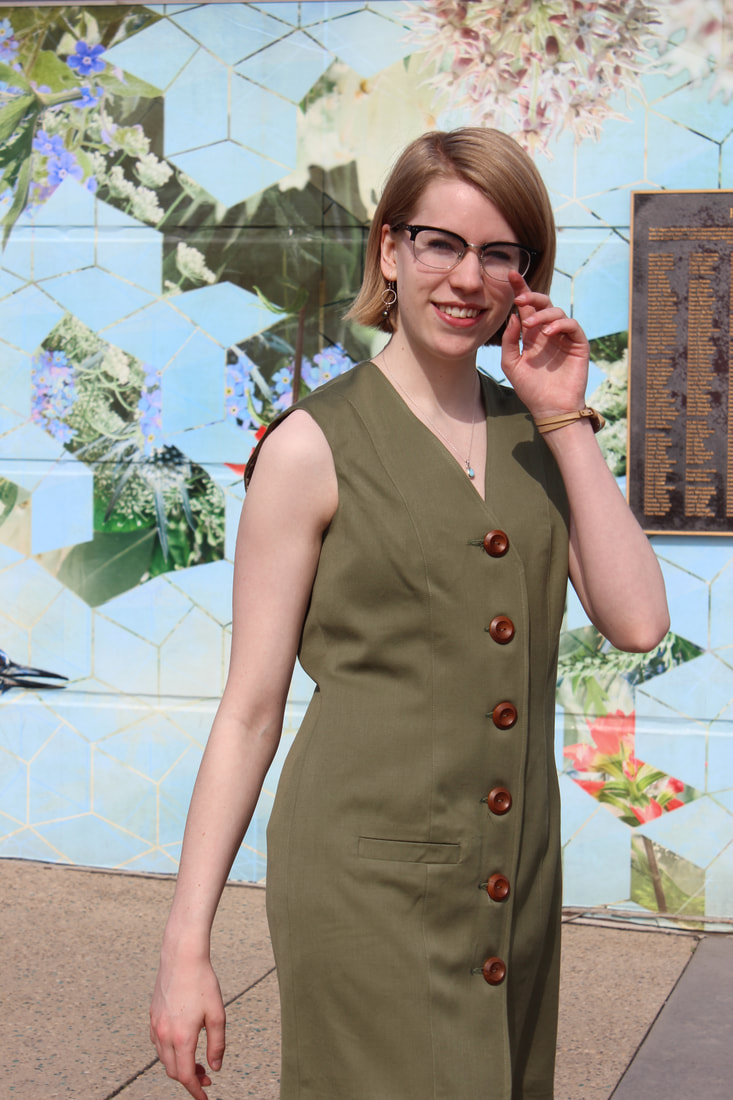 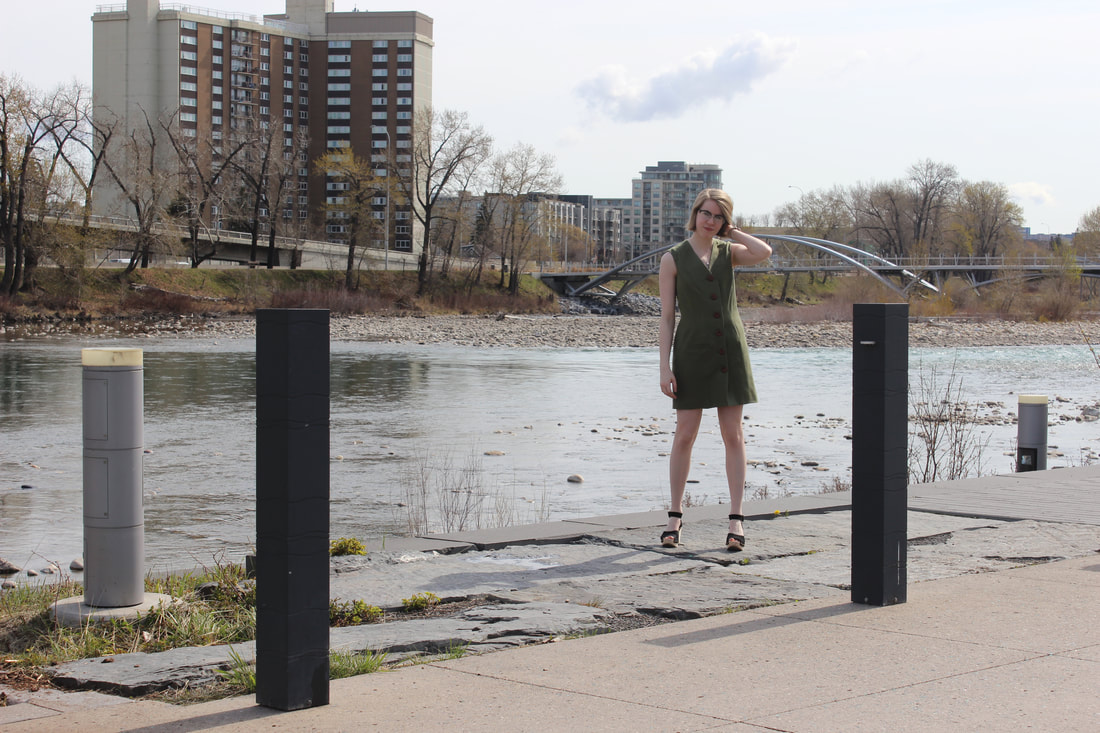 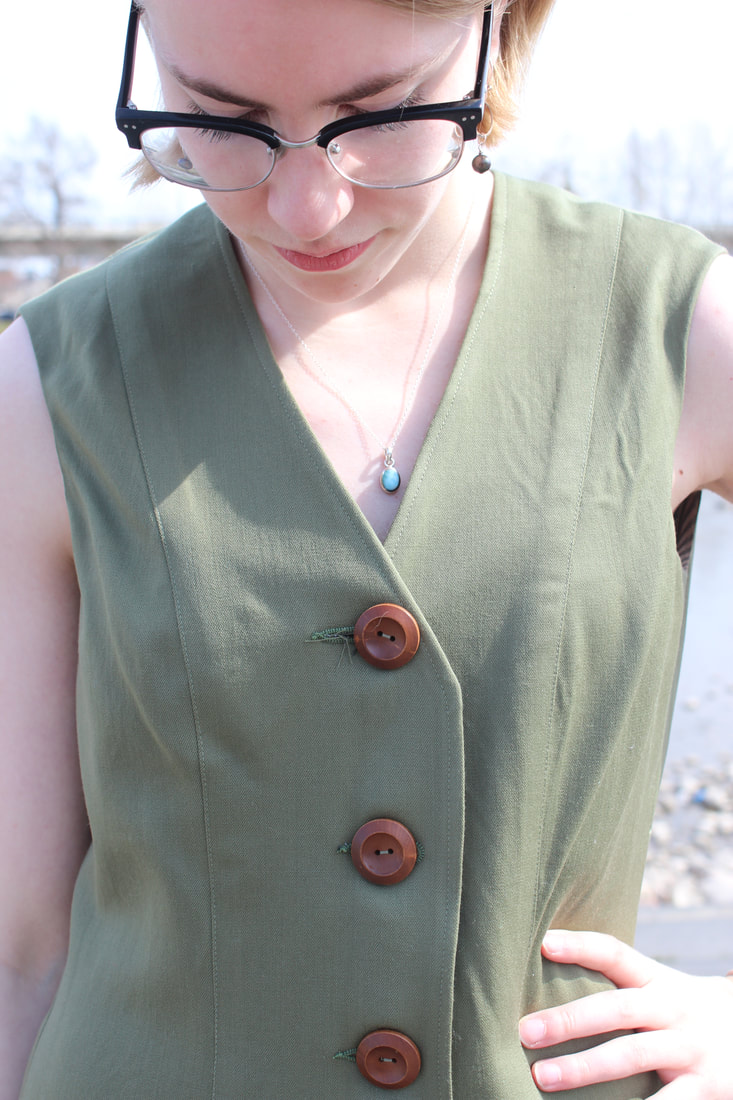 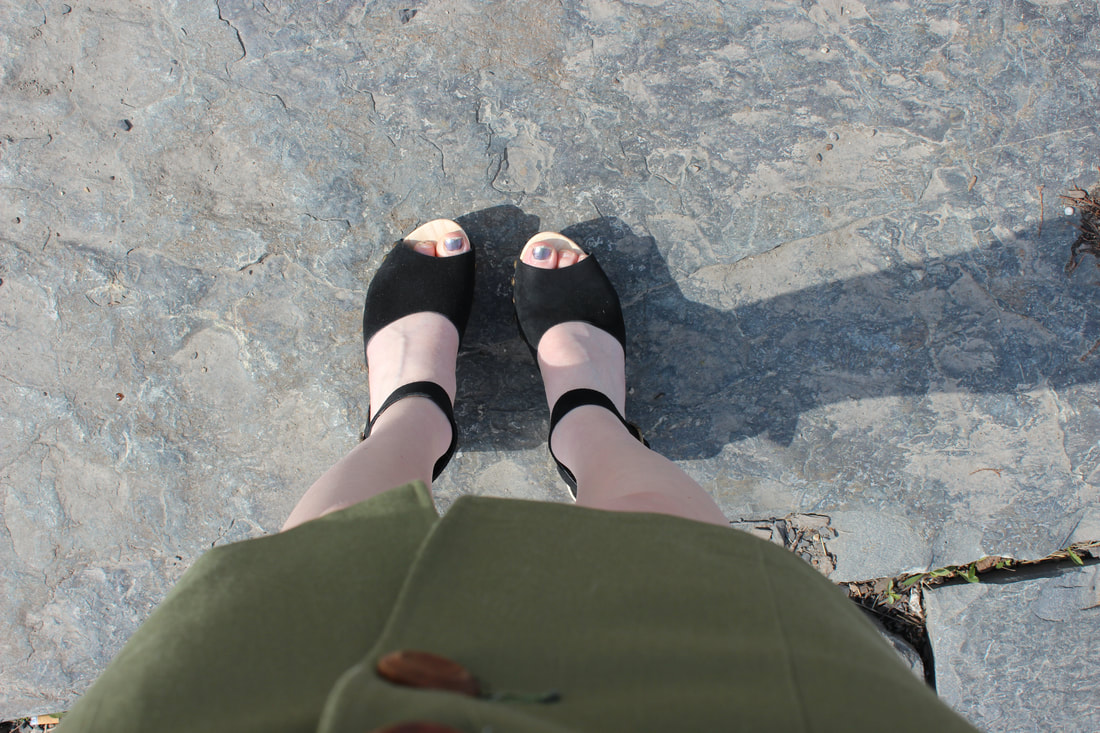 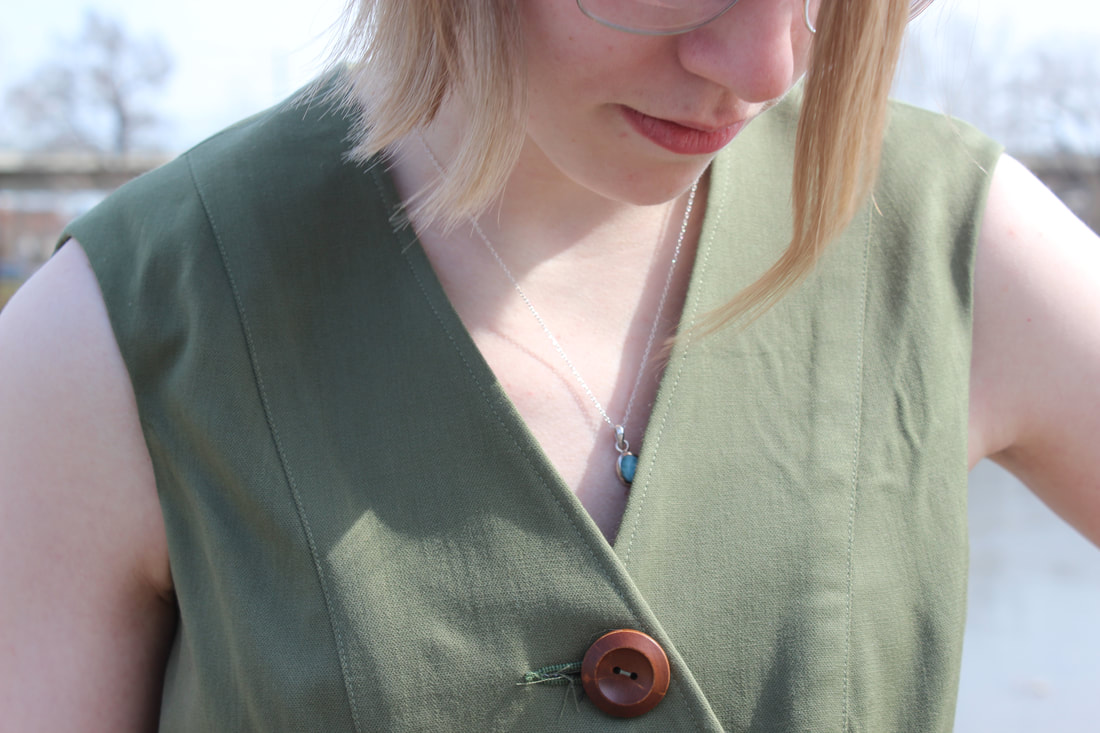 ~K
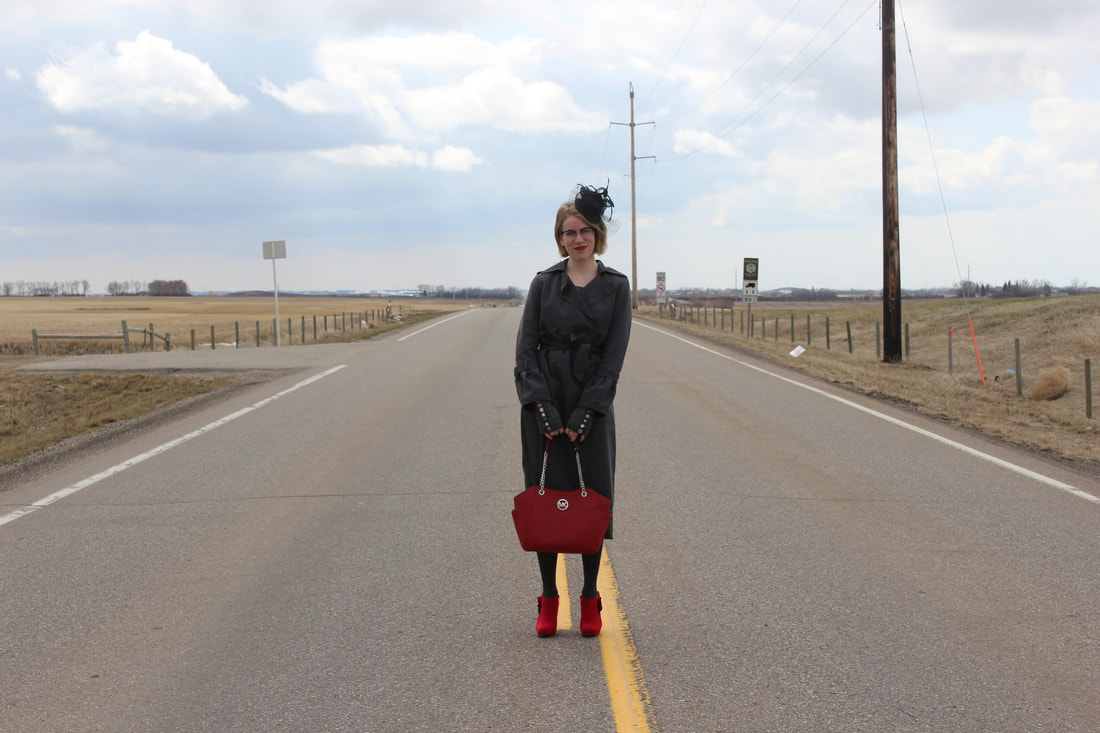  How beautiful is this outfit?? For the next one in my Umbrella Academy series is The Handler! The Handler is very different in the comics than in the show. She has a fabulous 1950's style in the show, with a fascinator, fingerless gloves, and a beautiful A-Line coat. I immediately fell in love with her costume, hair, and makeup when I first watched the show, and I have the urge to make her dress. 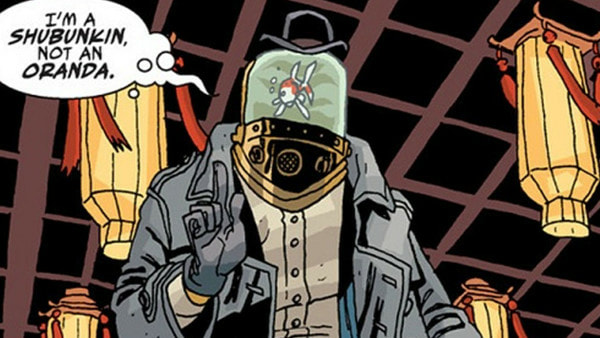 The Handler in the comics... slightly different than in the show  I love her whole look! It is paired with a fabulous pair of red heels as well 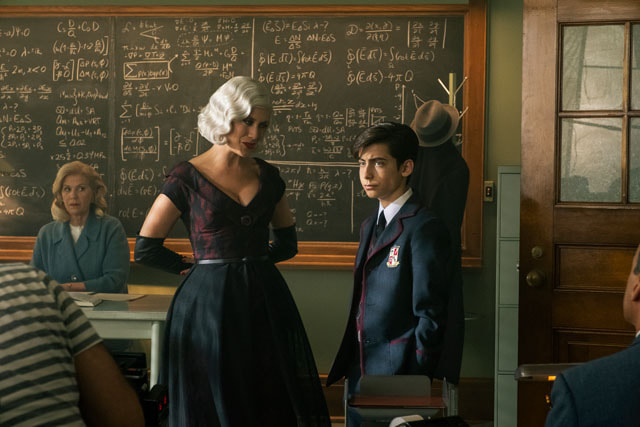 The dress that I would love to make one day Underneath the coat, I wore my pencil dress from last years little Fall Collection (photos here), and the rest are all pieces that I had in my closet already. The coat is from Reitmans, the fascinator I have had for a few years, and the gloves were hand made (not by me). I ended up wearing this little outfit to the Comic Expo in our area since I liked wearing it so much, and I love The Handlers personality. 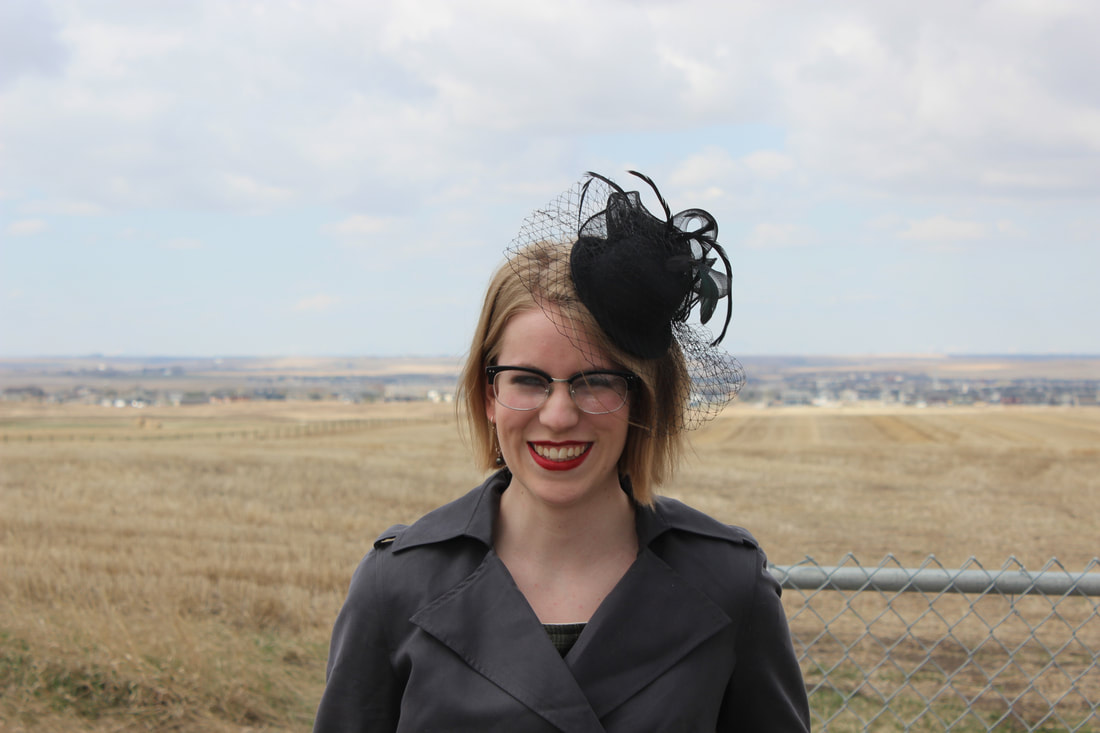 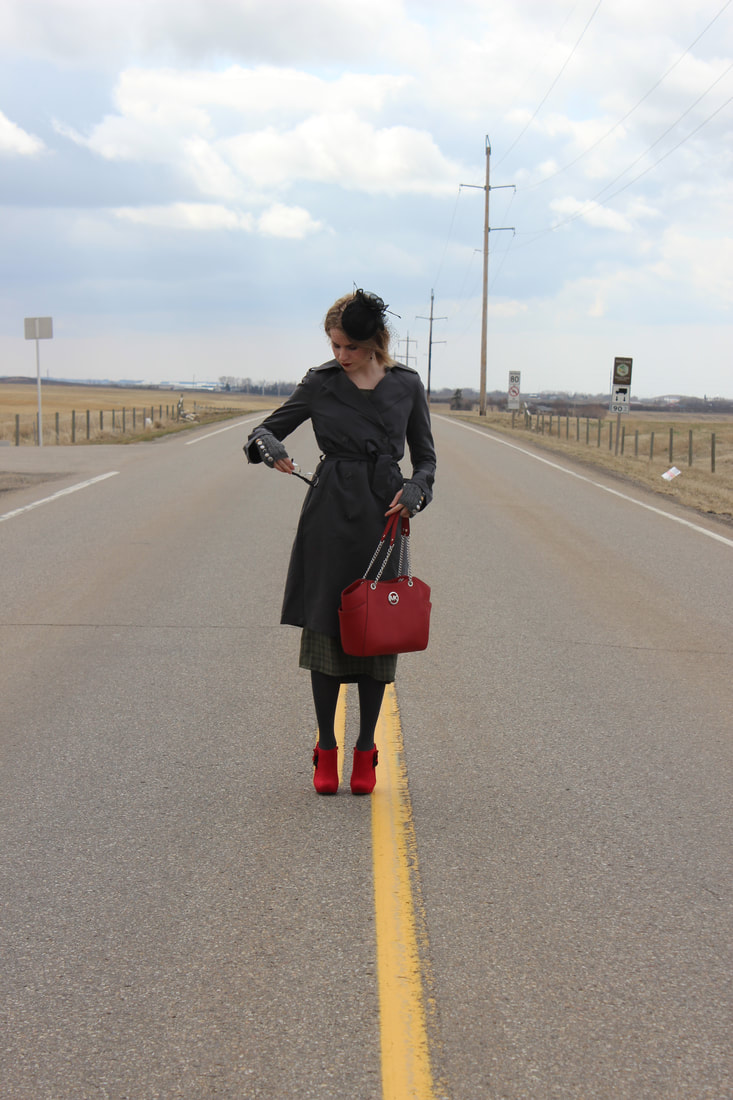 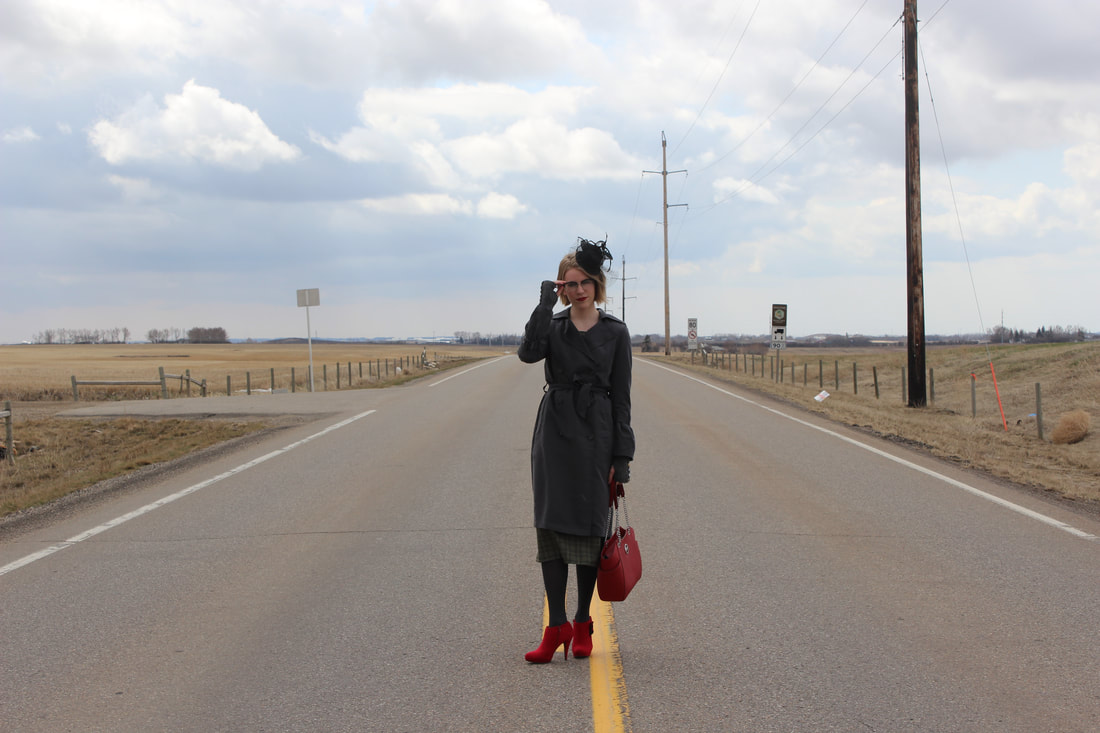 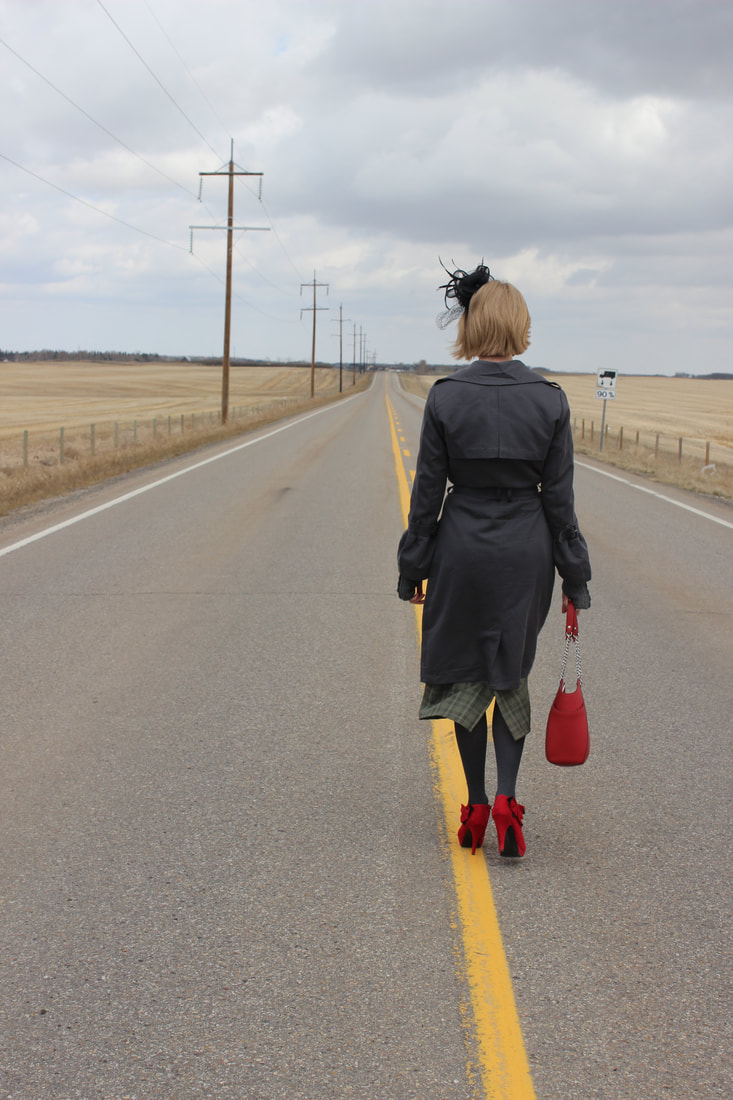 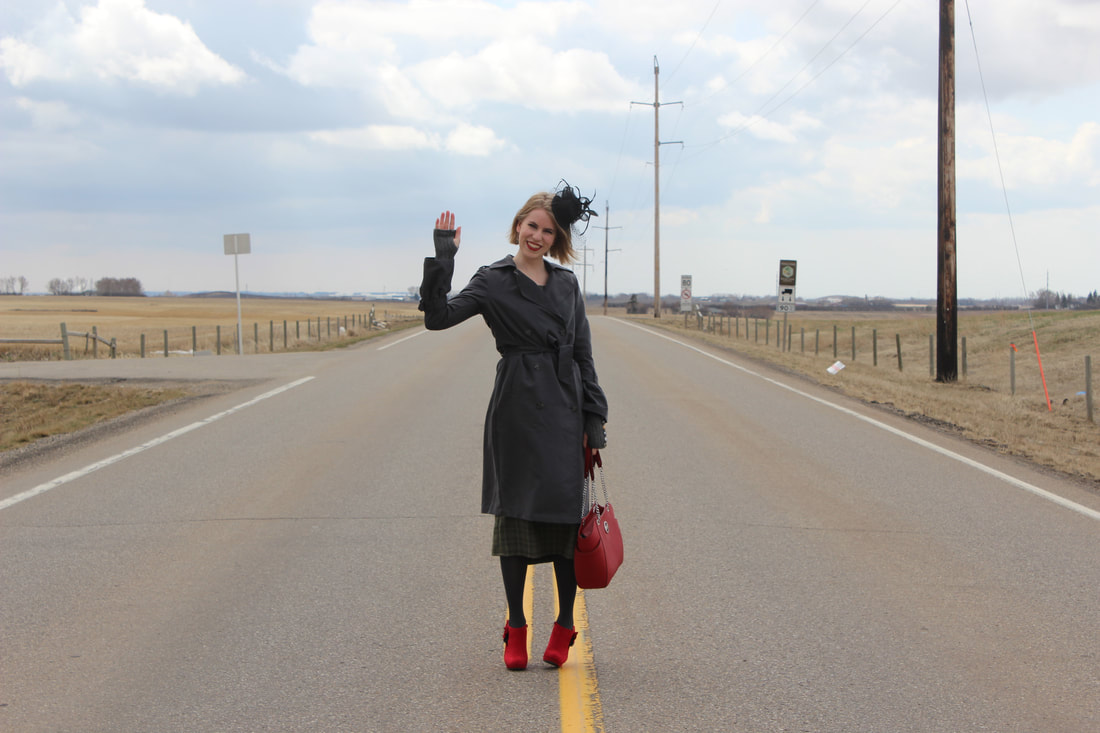 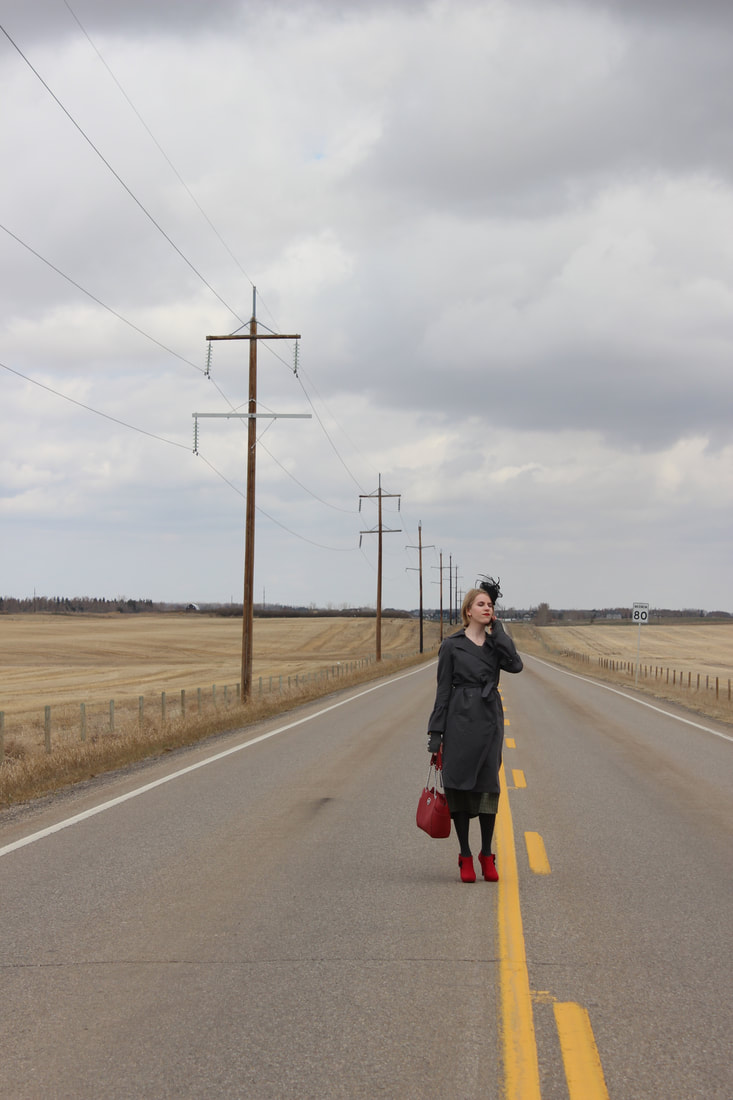 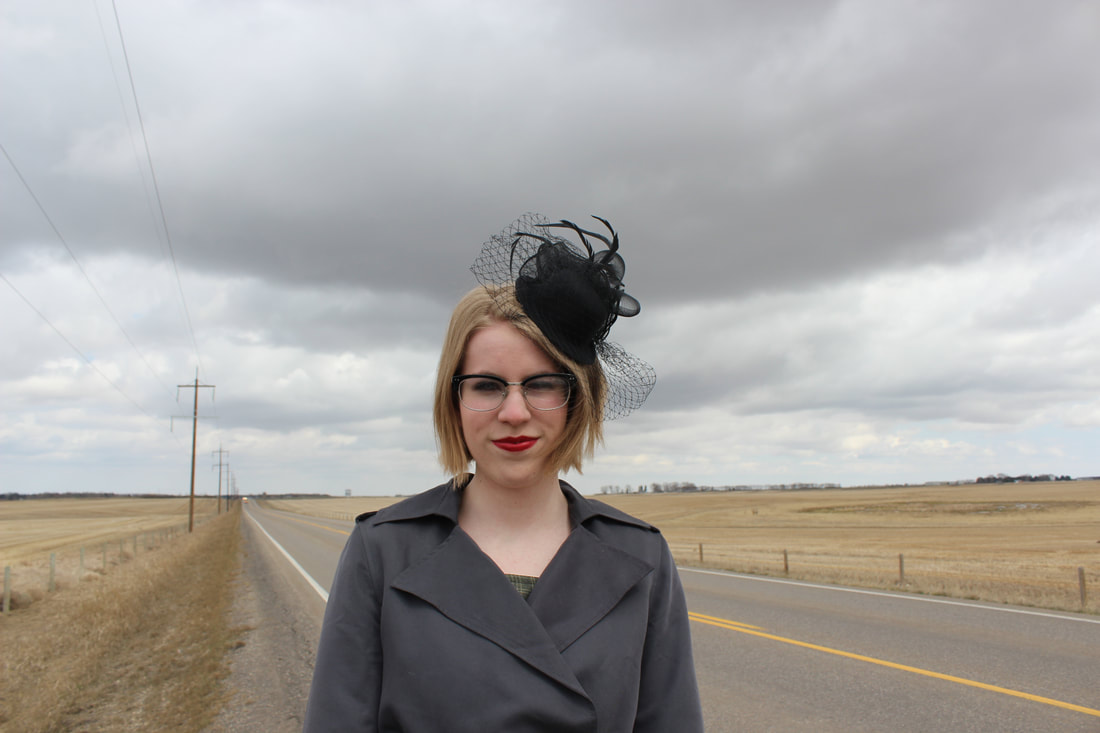 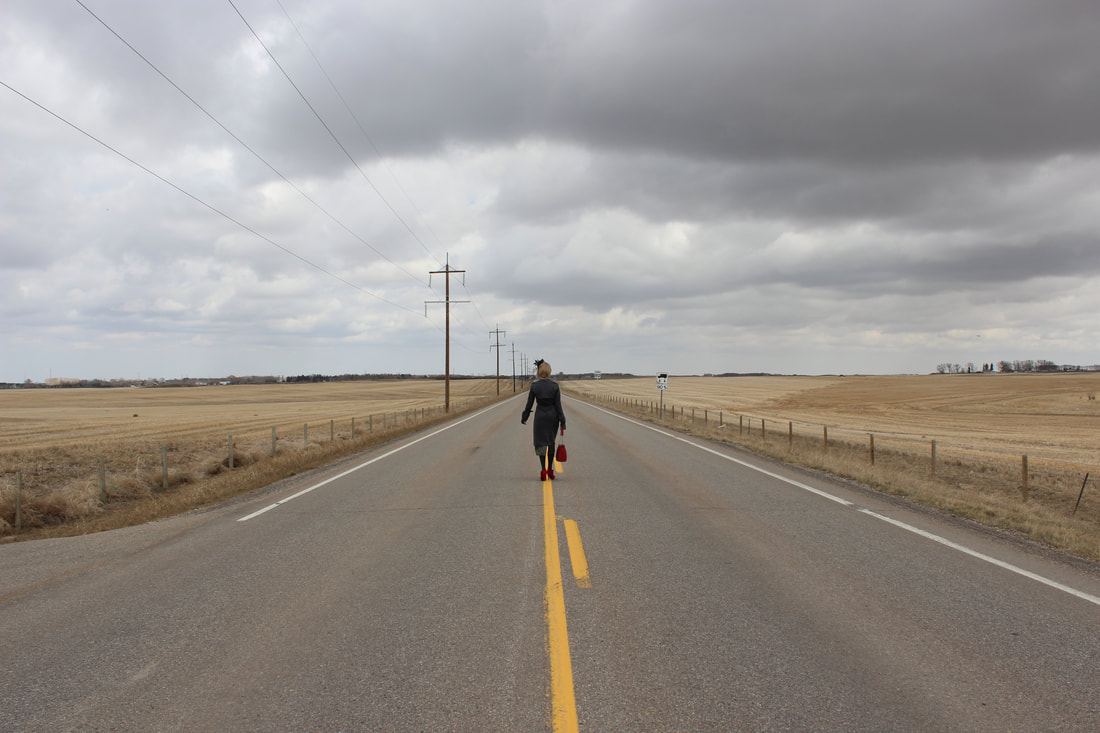 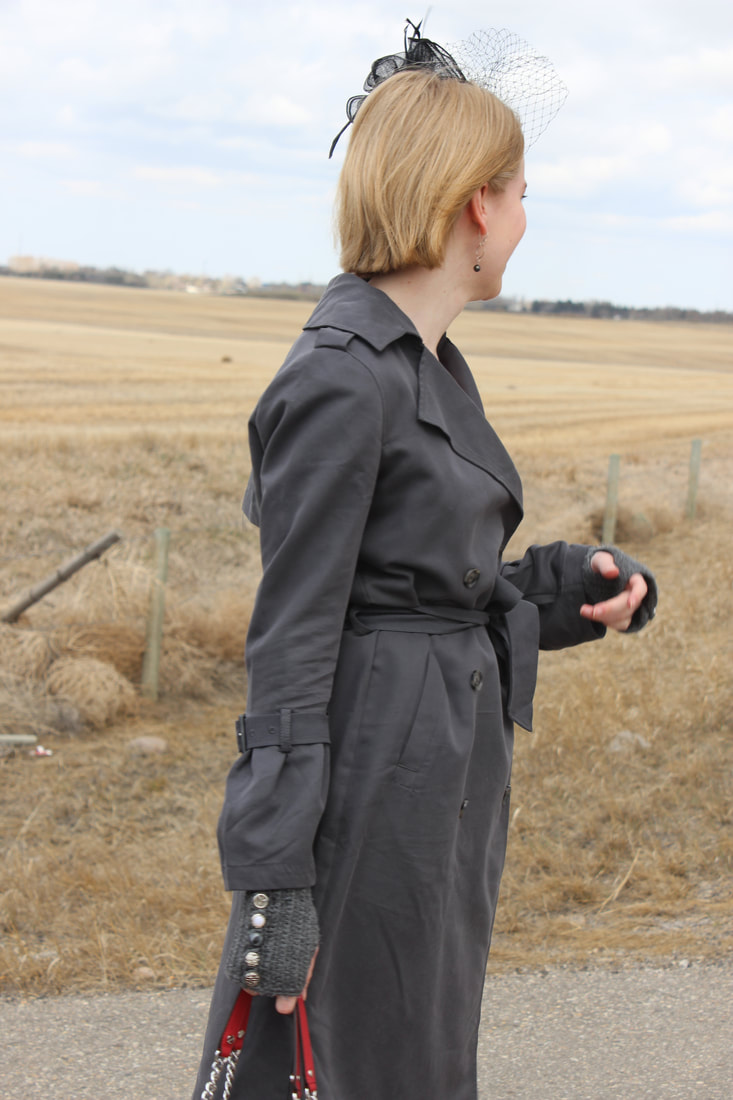 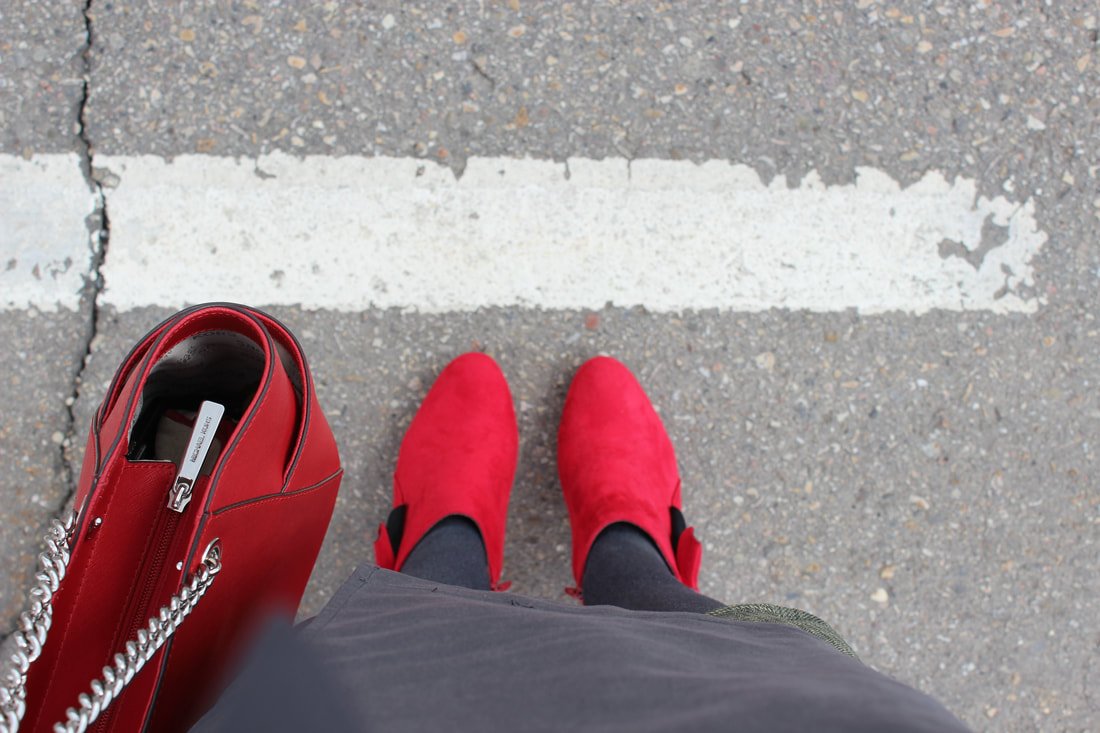 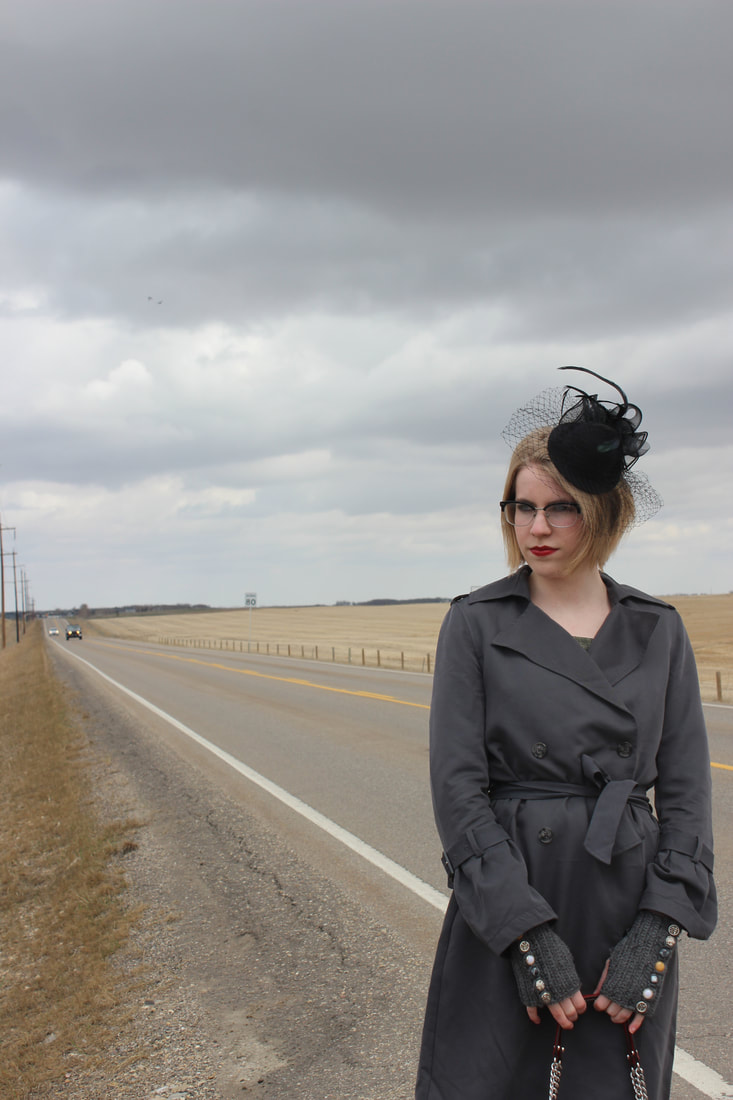 ~K
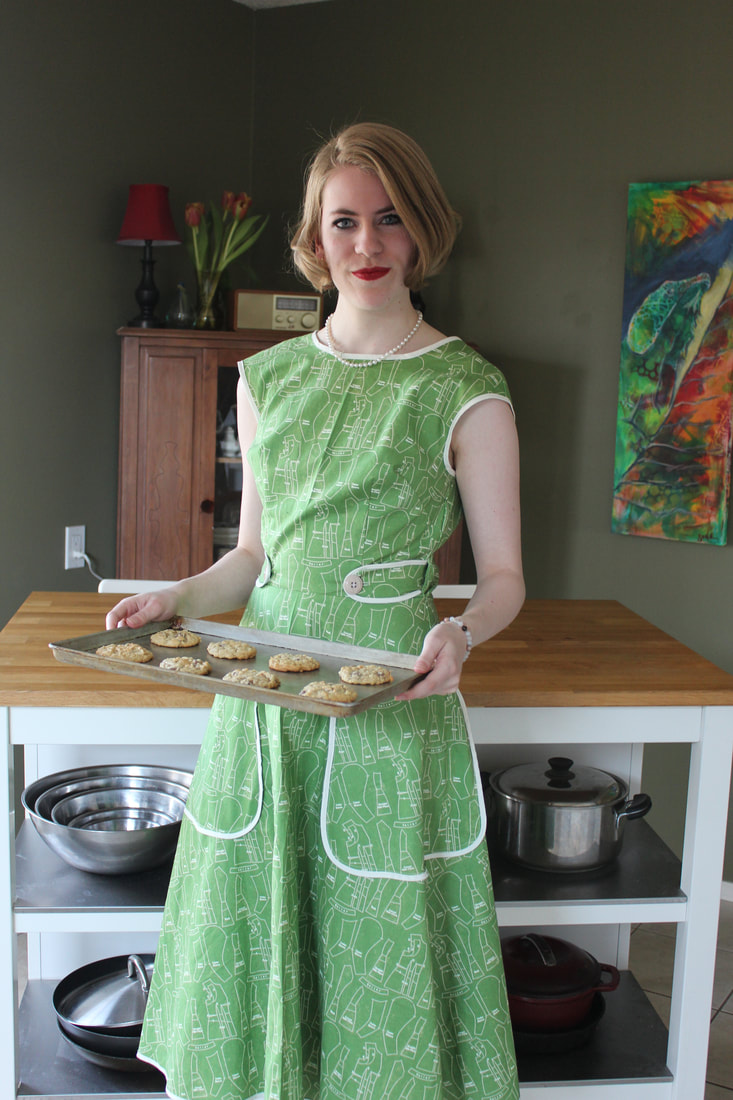 Netflix recently released Season 1 of The Umbrella Academy, a TV show based off of comics by Gerard Way (from the band My Chemical Romance) and Gabriel Ba. I immediately loved everything about the show after watching about 2 minutes of it. The music is fantastic, the set design is beautiful, and I absolutely love the characters. If you haven't heard of The Umbrella Academy, it is about 7 kids who were all born on the same day and have different 'super powers', and have been adopted by an eccentric billionaire to be superheros. The show is set when they are all adults and have left the Academy that he set up, and talks about their dysfunctional family. 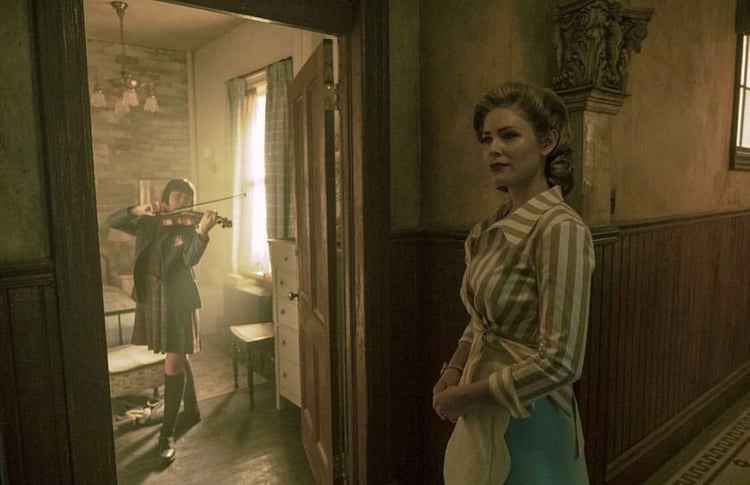 Grace played by Jordan Claire Robbins. Here she is wearing just one of her many stunning 1950's styled costumes 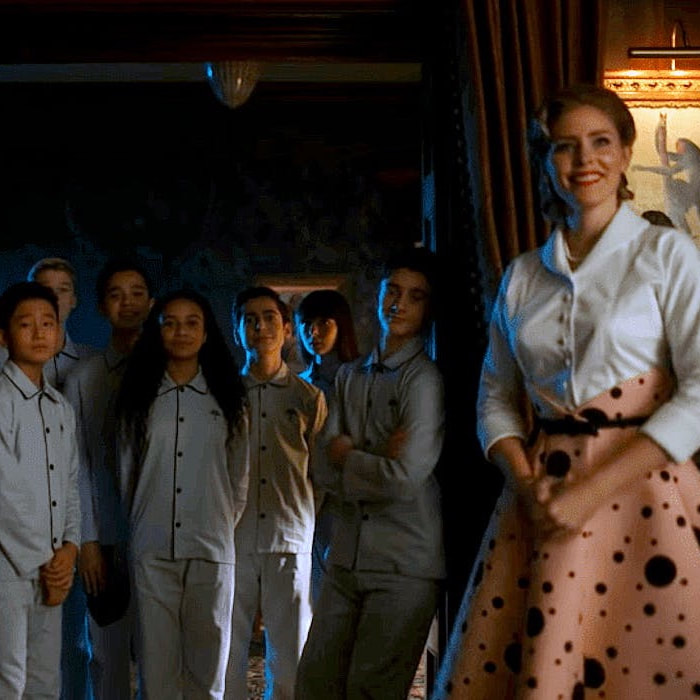 Grace with the kids in the TV show 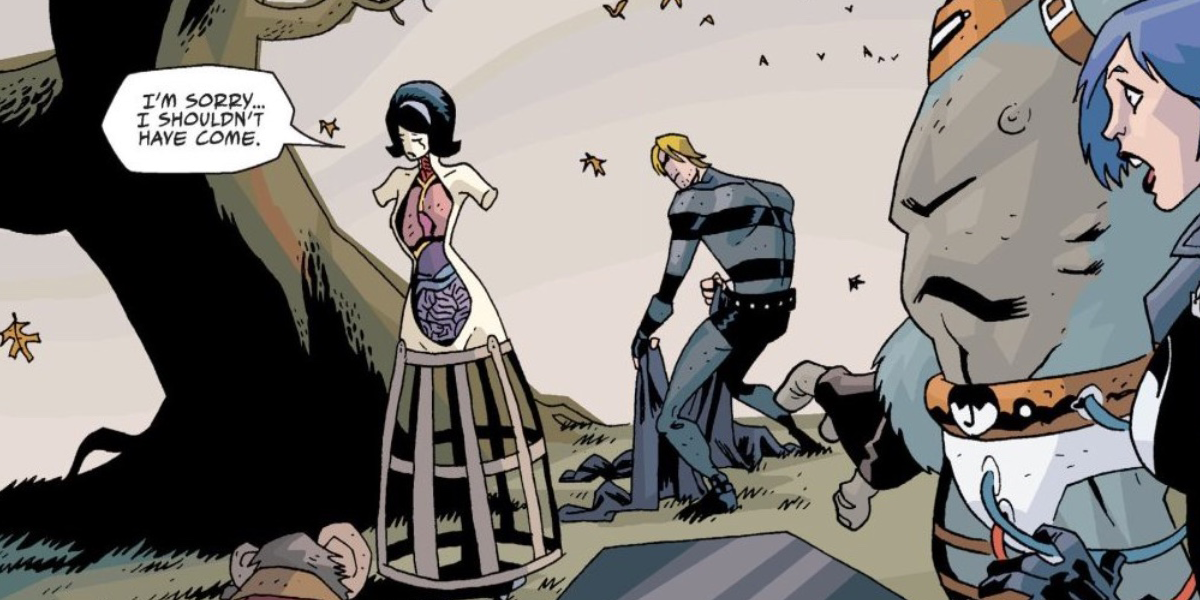 Grace looks a little bit different in the comic books I am a sucker for stories about dysfunctional families, so this show was right up my alley. I also love the retro style that pops through that is mixed with a bit of steampunk vibes. 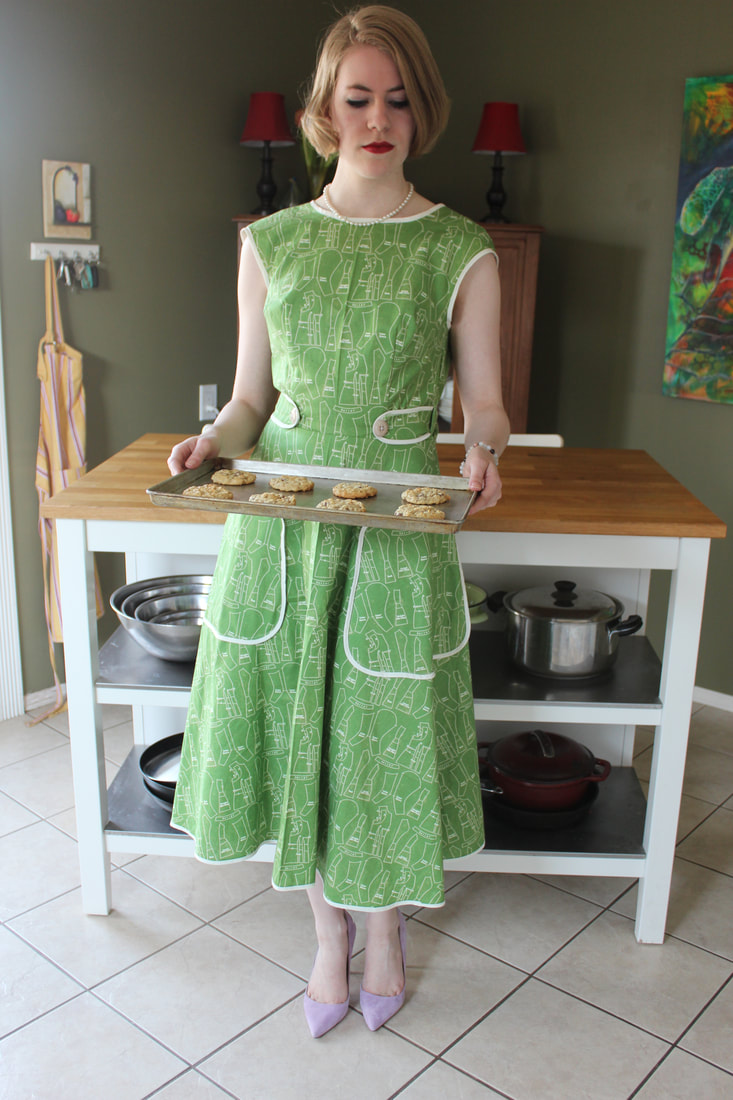 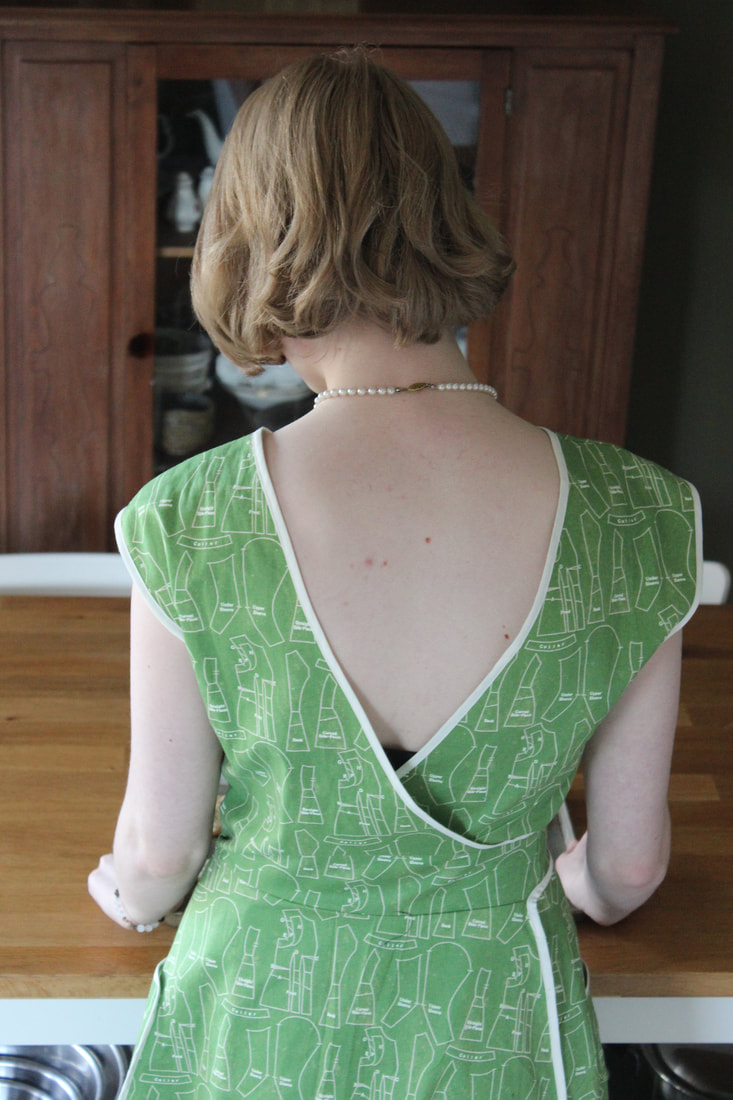 After watching the show many times and reading the comics, I have decided to do each of my favourite characters. I just recently (as in a few days ago) finished my courses, so I wanted to do something that was just for fun! I also had a dress that I finished sewing a few months ago that I never got photos of, so I decided to do a bit of a Grace cosplay. Grace is the kids 'mom', a robot created by the billionaire who adopted them. In the show, she has the most fabulous 1950's dresses. 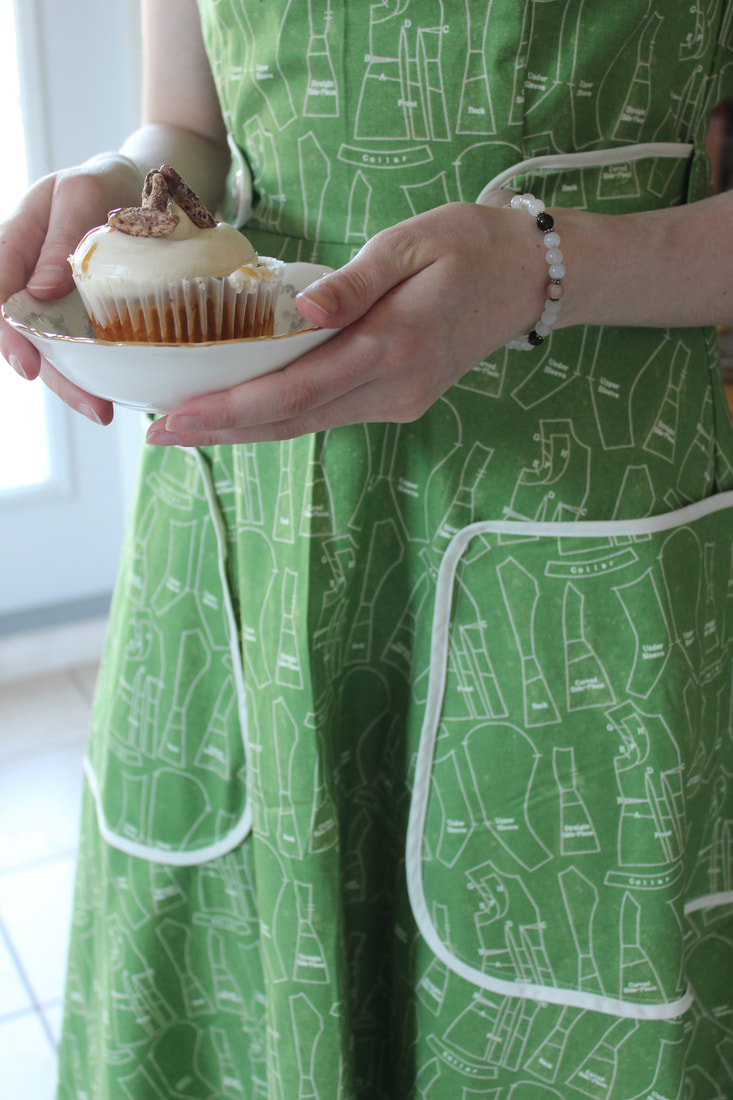 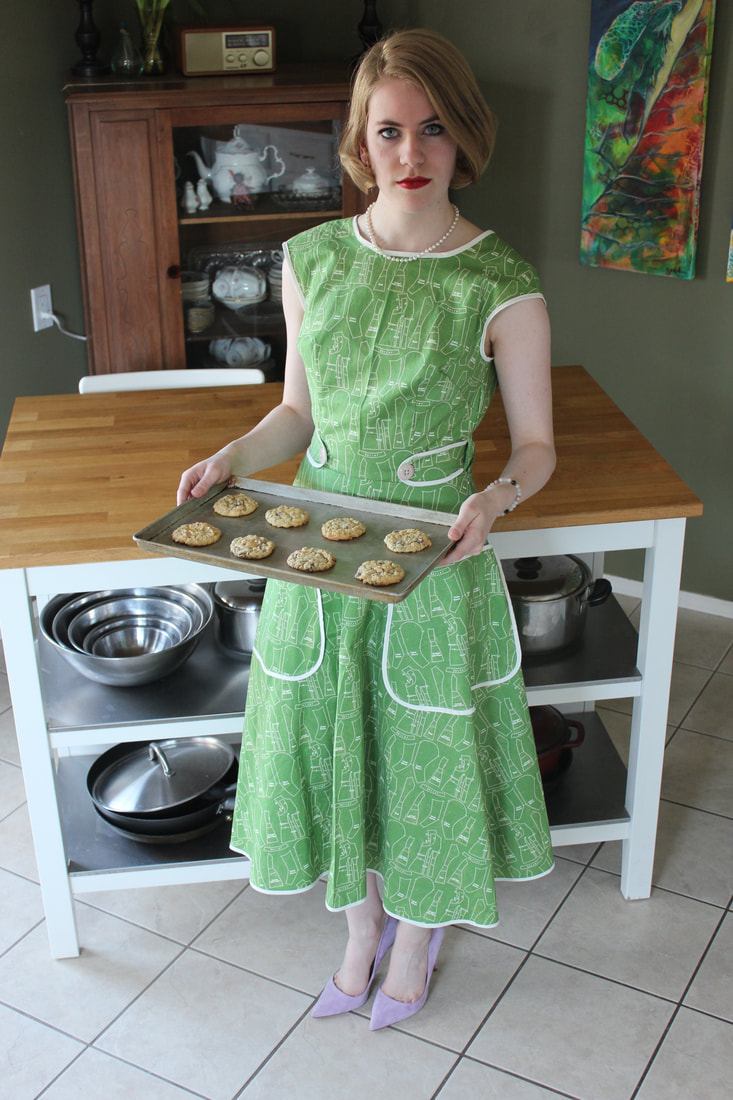 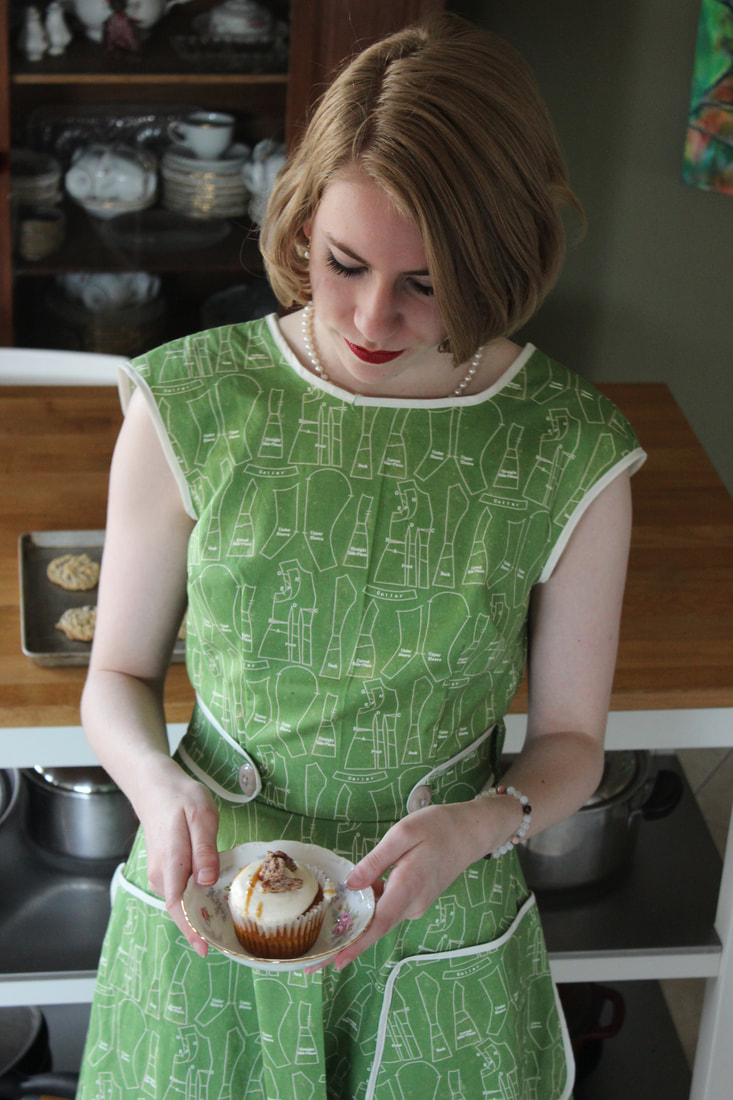 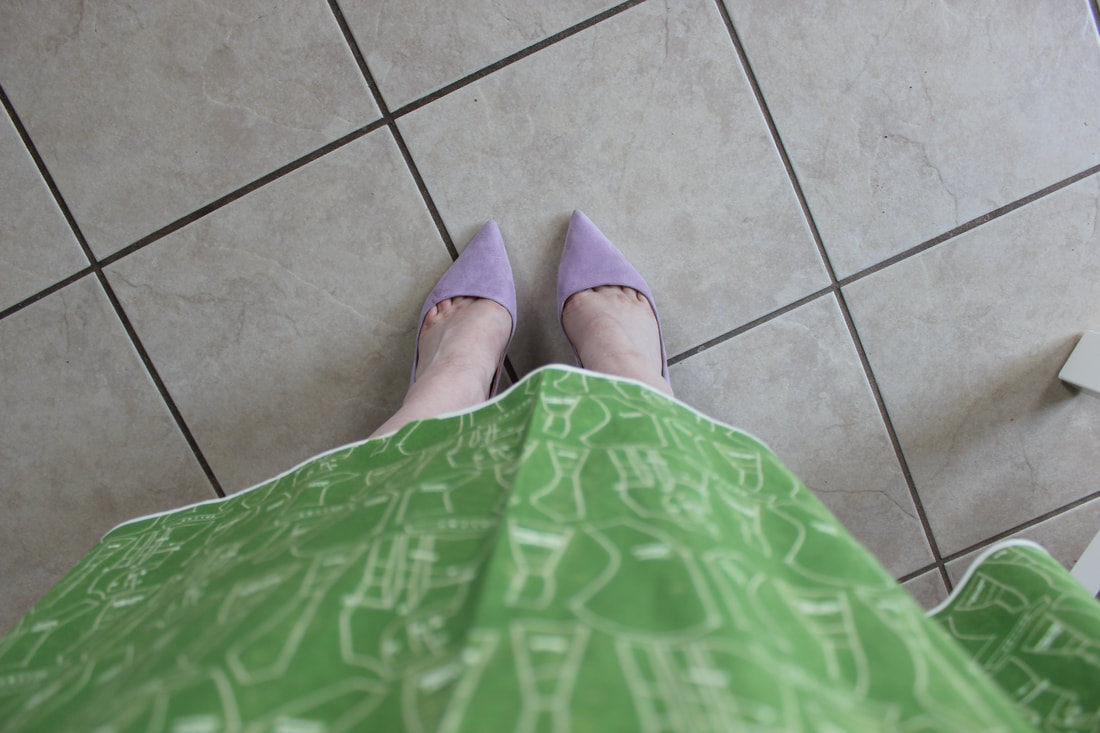 I thought that the pattern on the fabric of this dress was very fitting for Grace since it has sewing pattern pieces on it. This was made from a Vintage Vogue pattern and is a wrap dress with a V back and patch pockets. 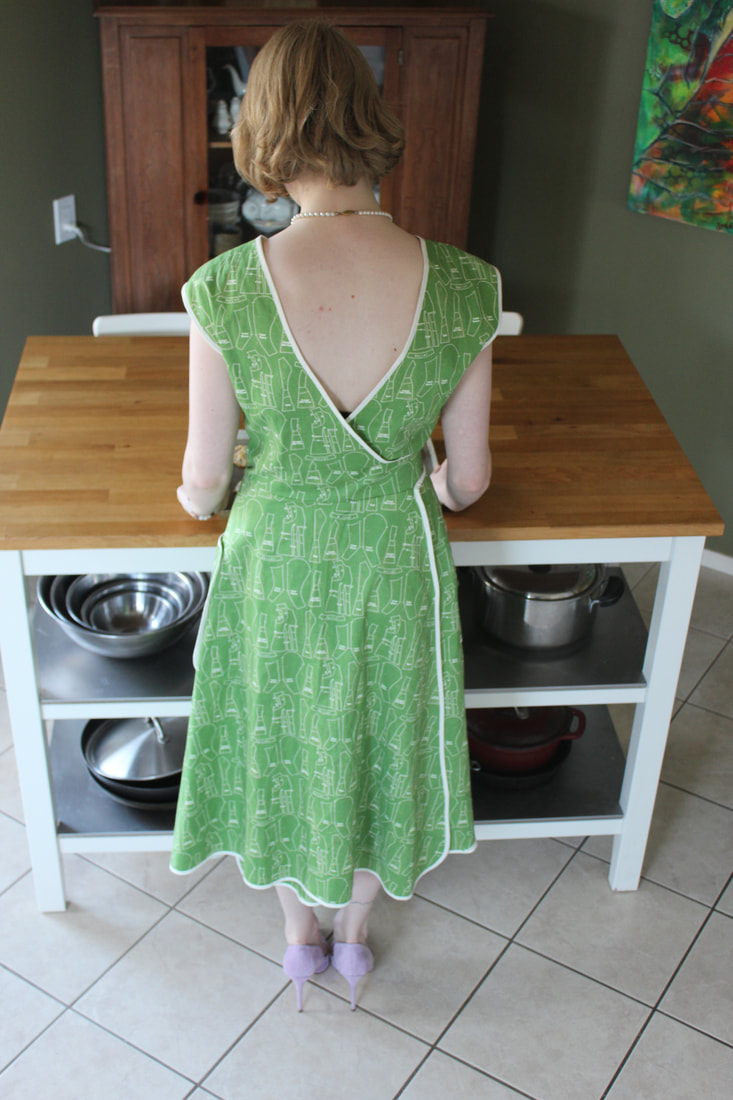 ~K 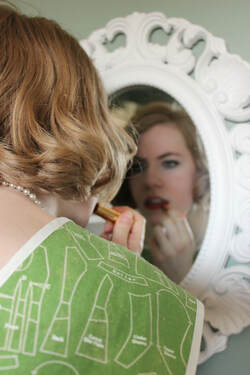 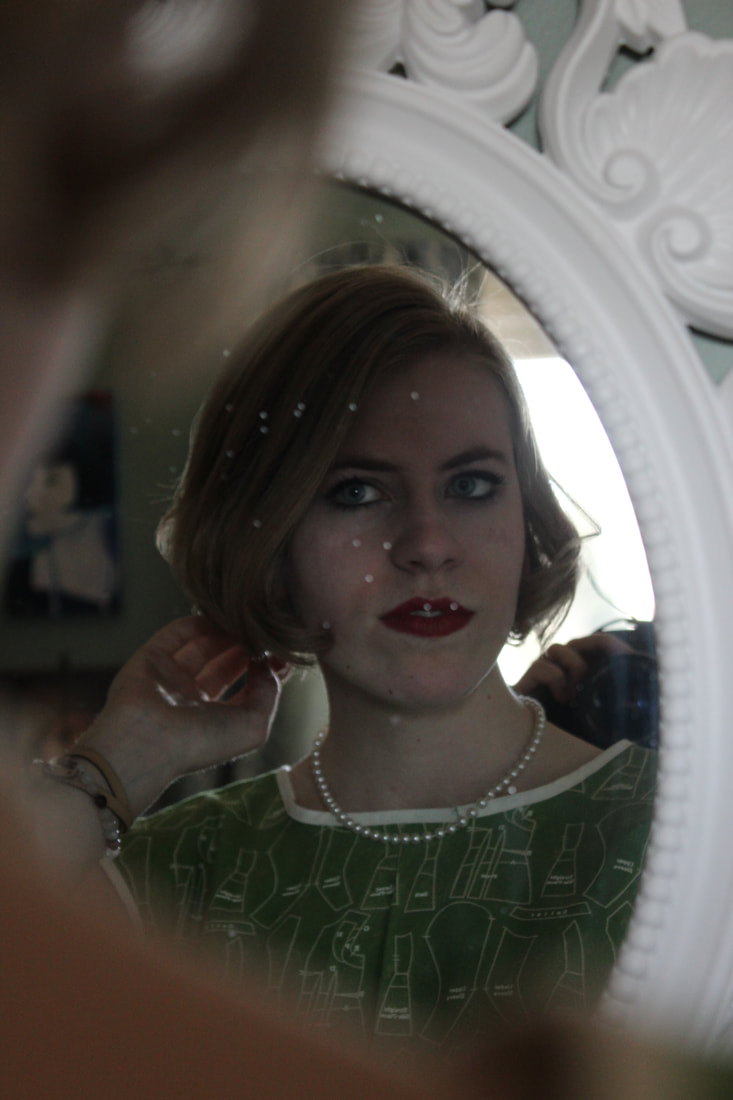 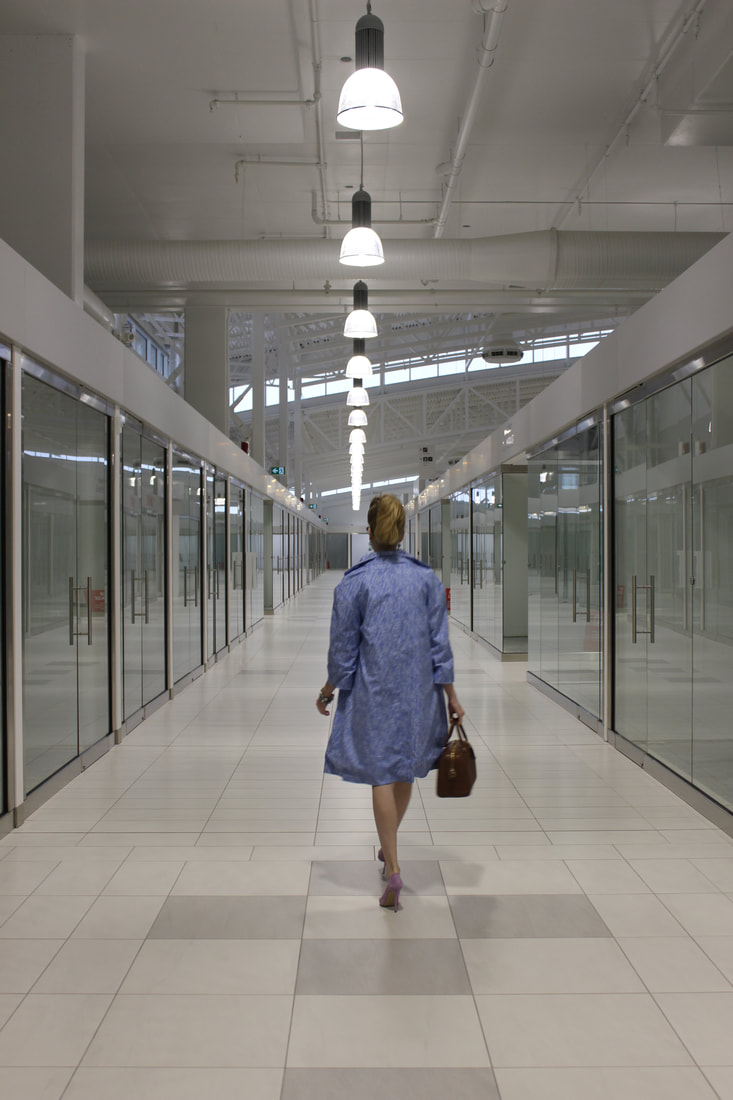 I started a 1960's ensemble almost a year ago, and was completely distracted by the beginning of school. After some issues with the lining and top stitching, I was not motivated to finish it. It has been sitting nicely on a chair in my sewing room until Christmas break, when it was finally finished and we got some lovely photos of it!  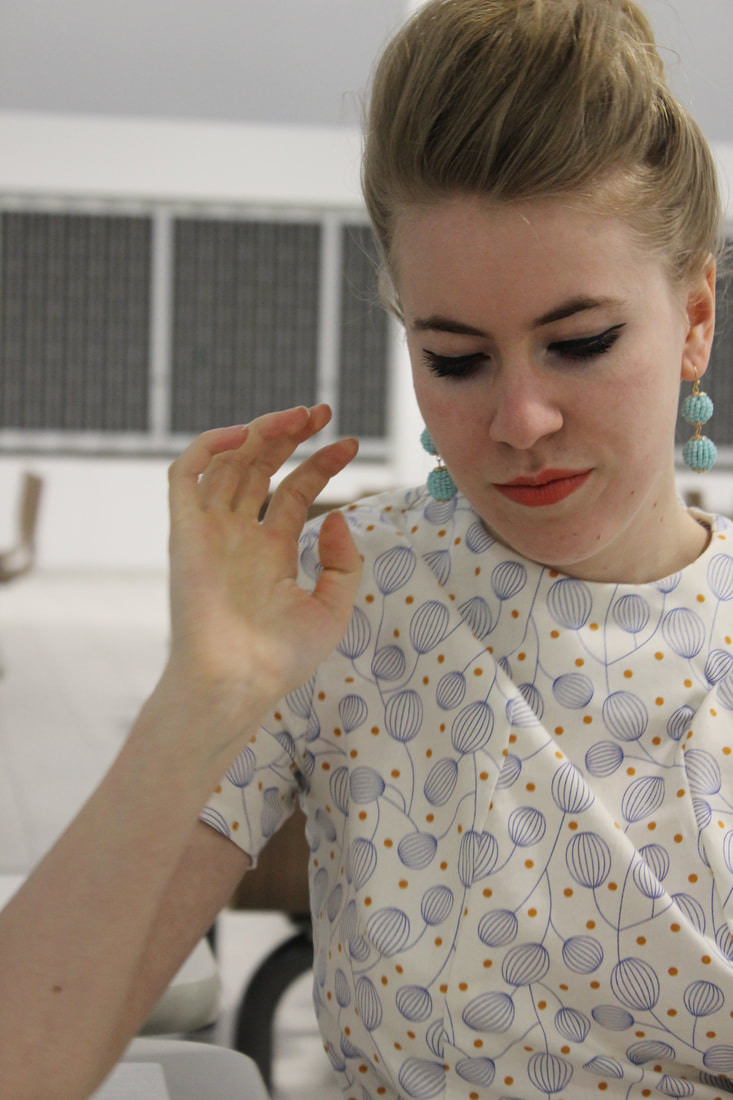   This is from a Simplicity pattern from the 1960's, and I made it using coordinating quilting cottons. I think that this pattern looks so much like Barbie clothes from the 60's! I had so much fun wearing it around a new mall that is at the moment pretty empty. The mall had a pretty creepy feeling (it is massive, and only has a few stores in it so far), but I think the photos turned out perfectly! I mix of 1960's fashion and futuristic, Blade Runner style (at least, I think the photo's look a bit like the Blade Runner). 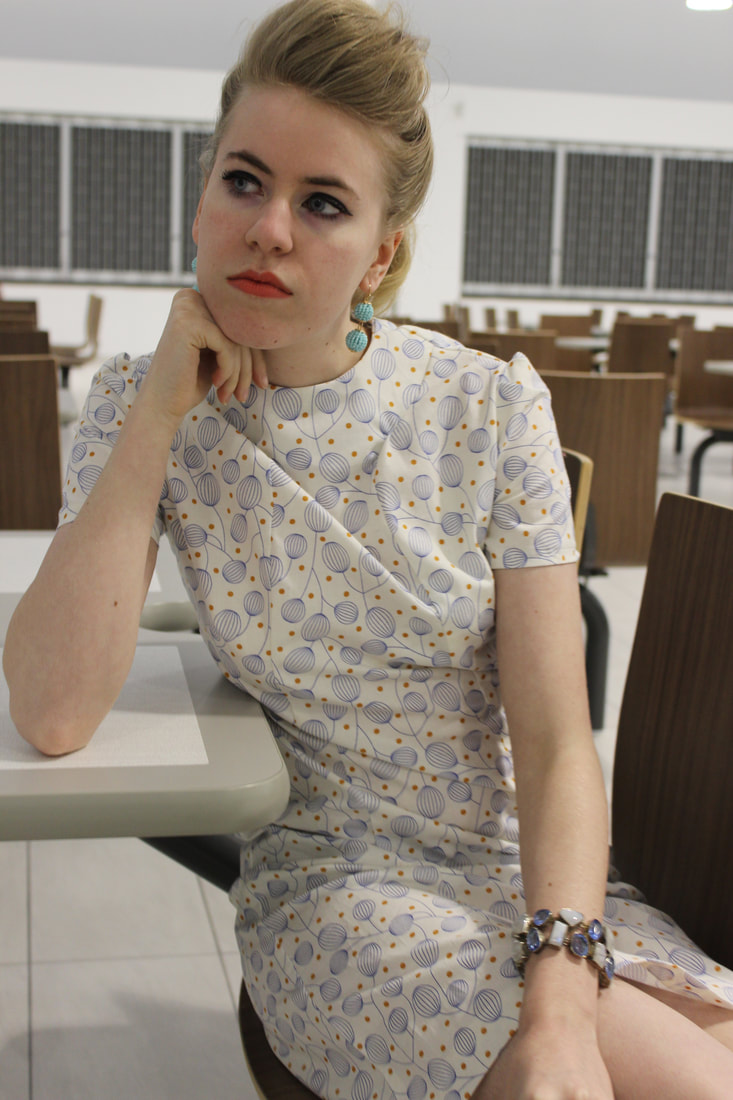 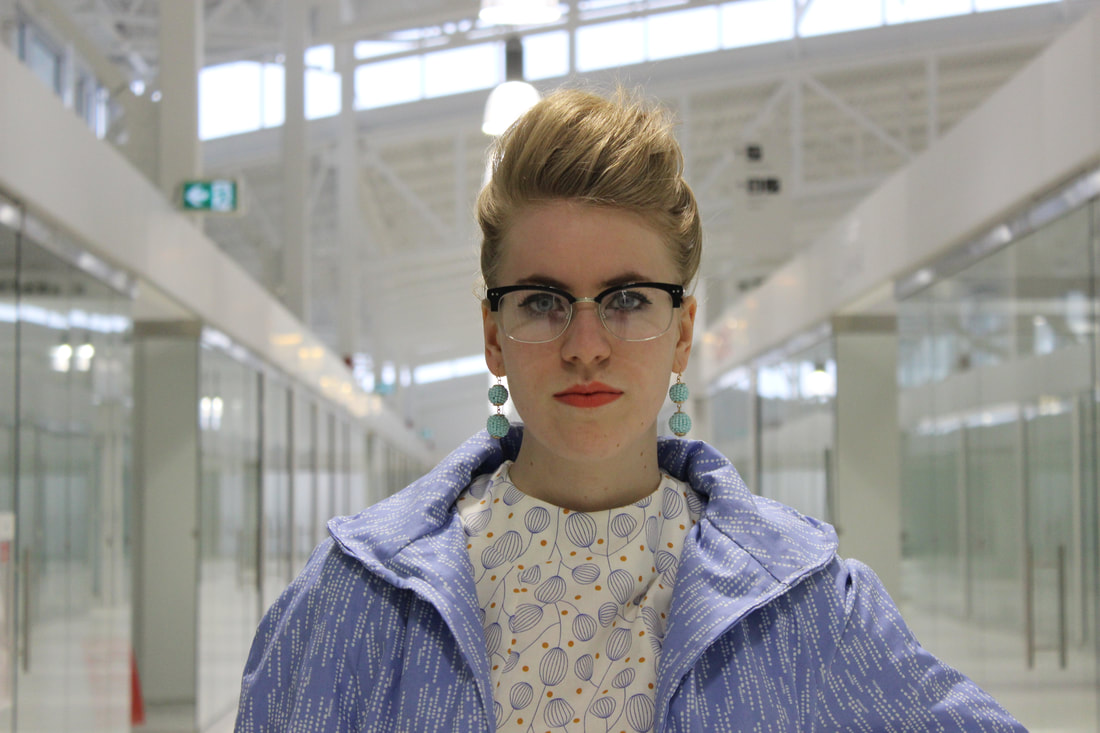 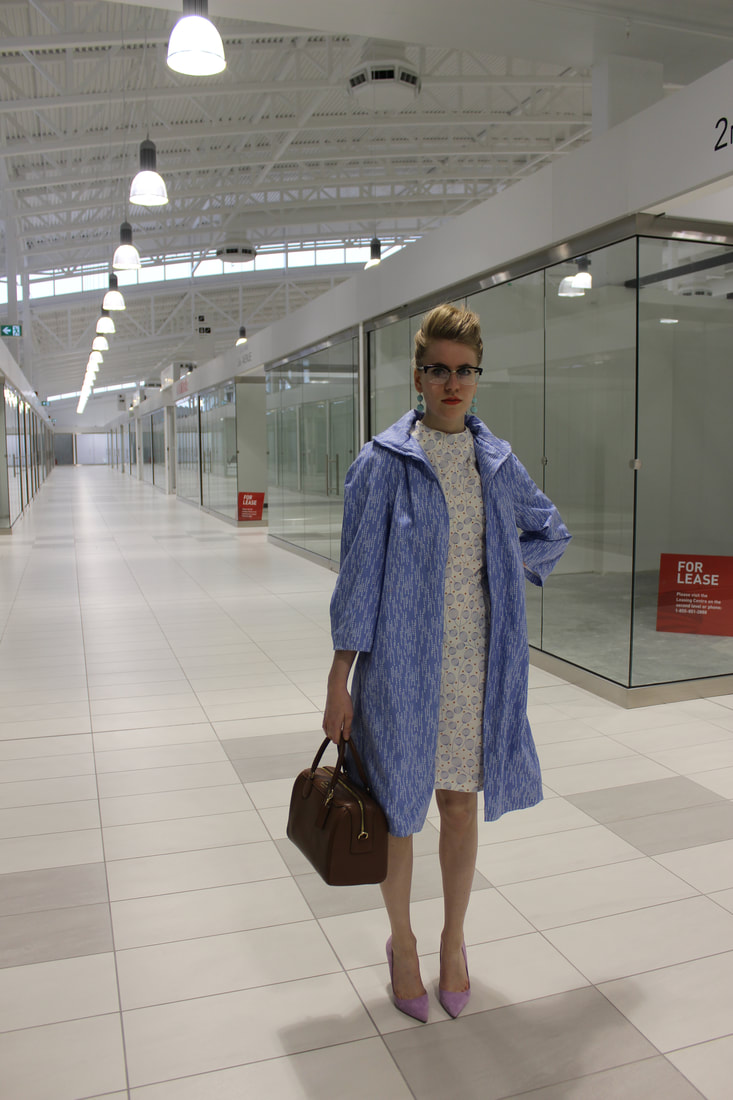 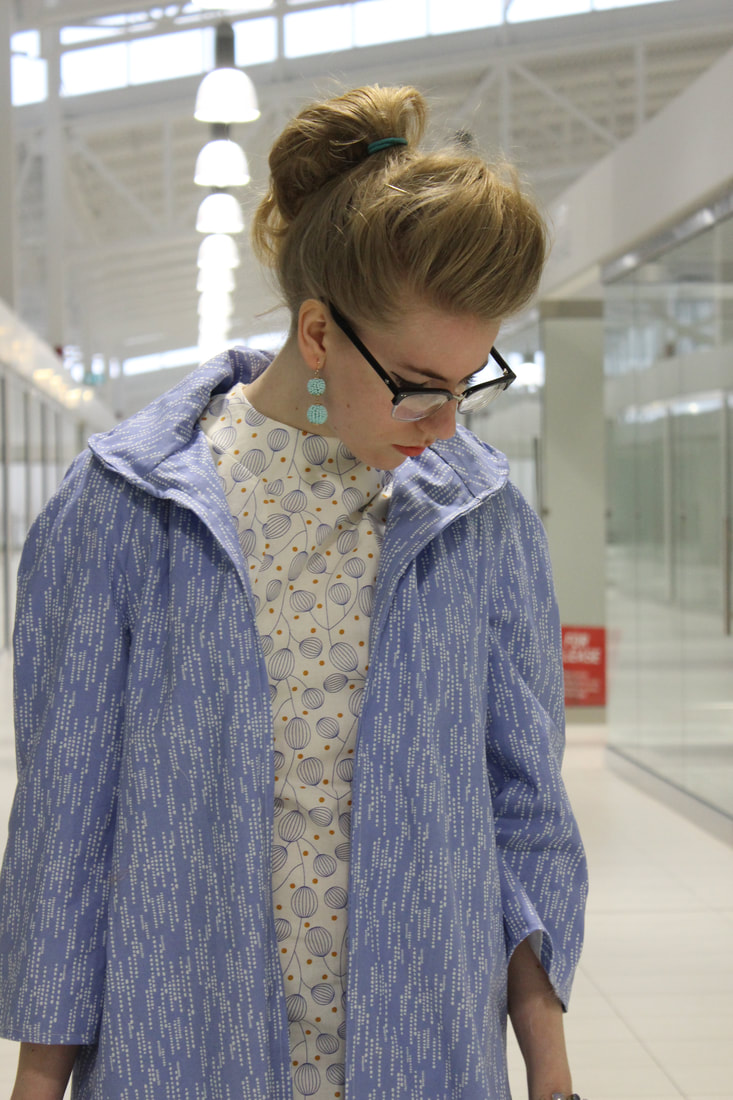 We got these photos on Boxing Day, and they were planned very last minute. We had such fun getting these though! 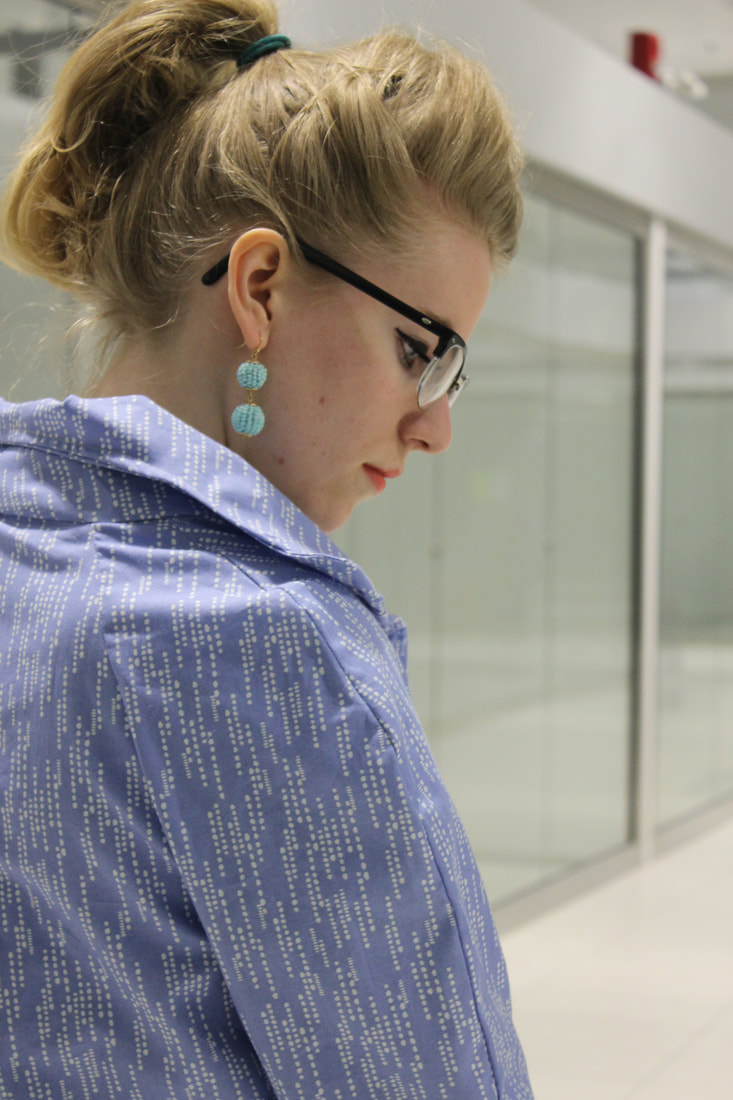 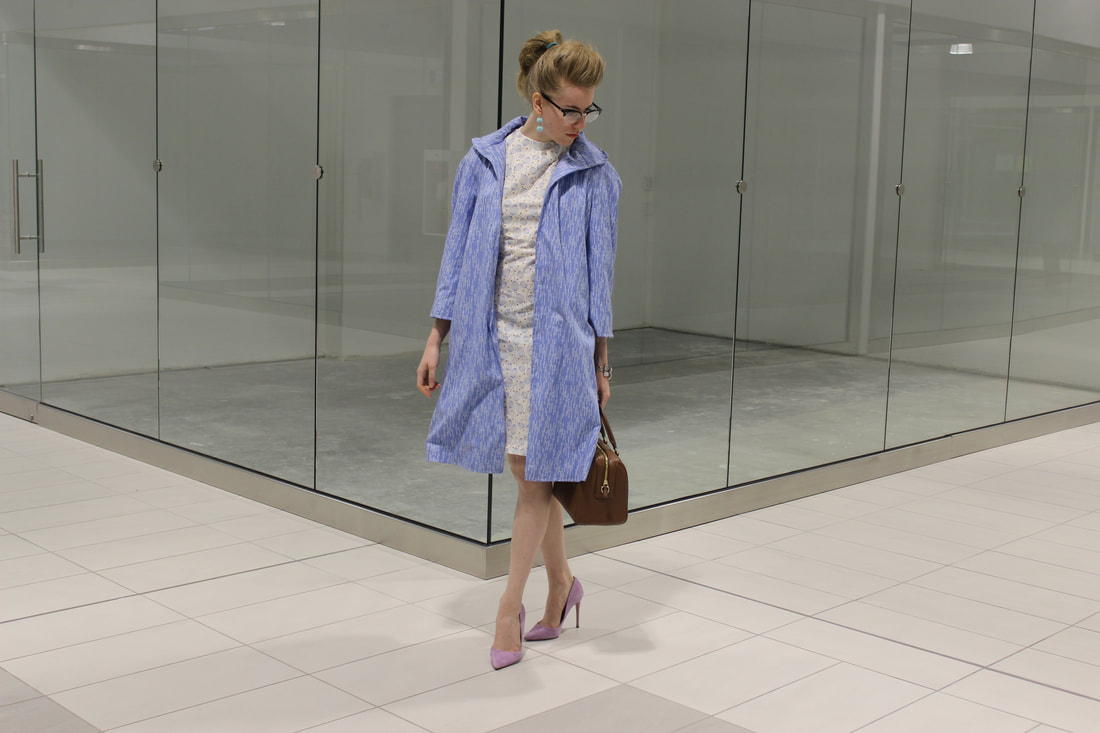 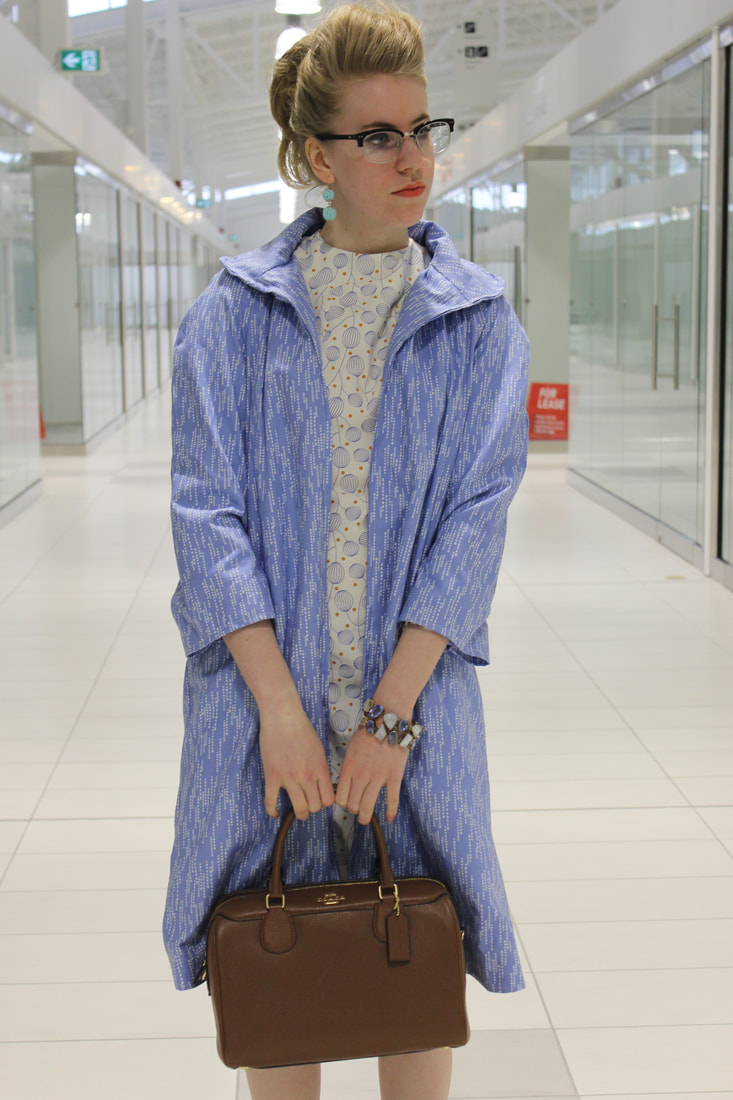 I am back in school for the second semester, so any extra sewing is on the back burner. I do have my final projects from semester one (a pair of pants and a skirt) which I am hoping to get photos of soon though, so keep your eyes peeled:) 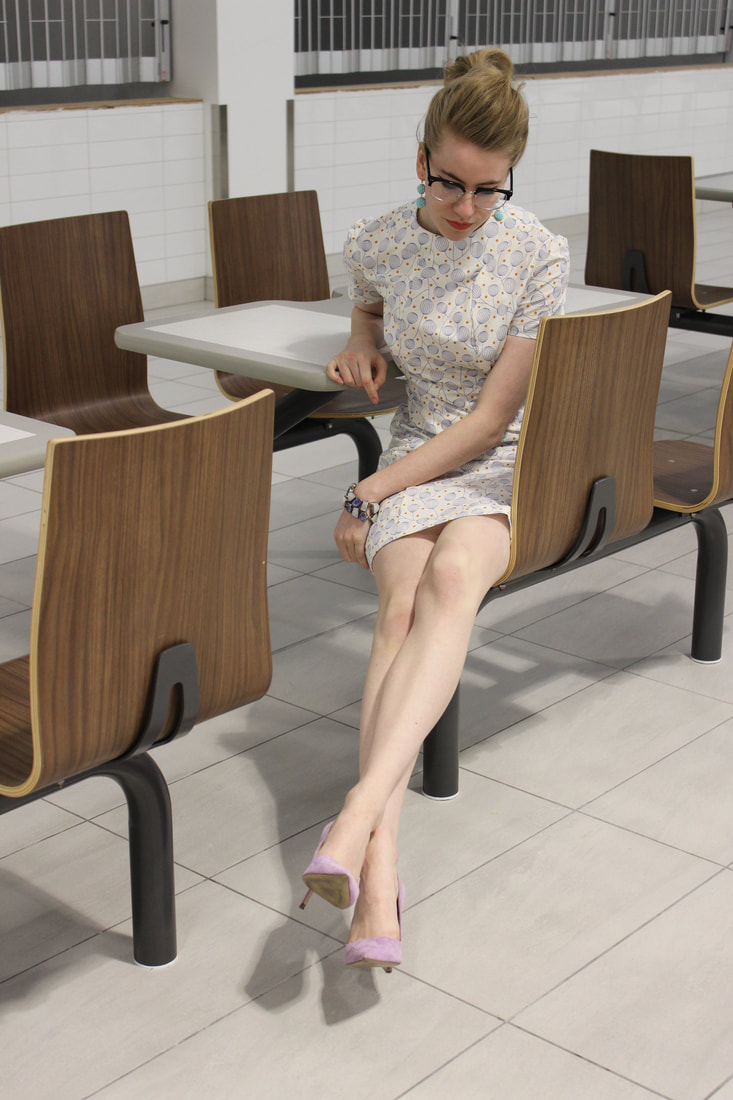 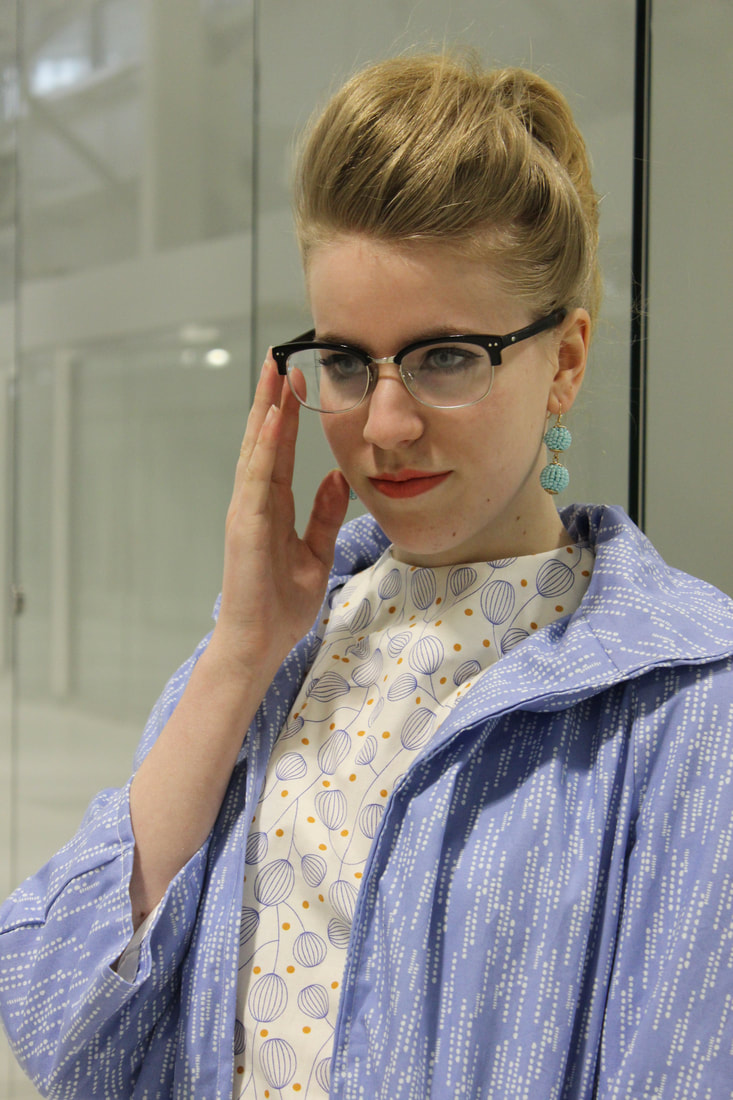 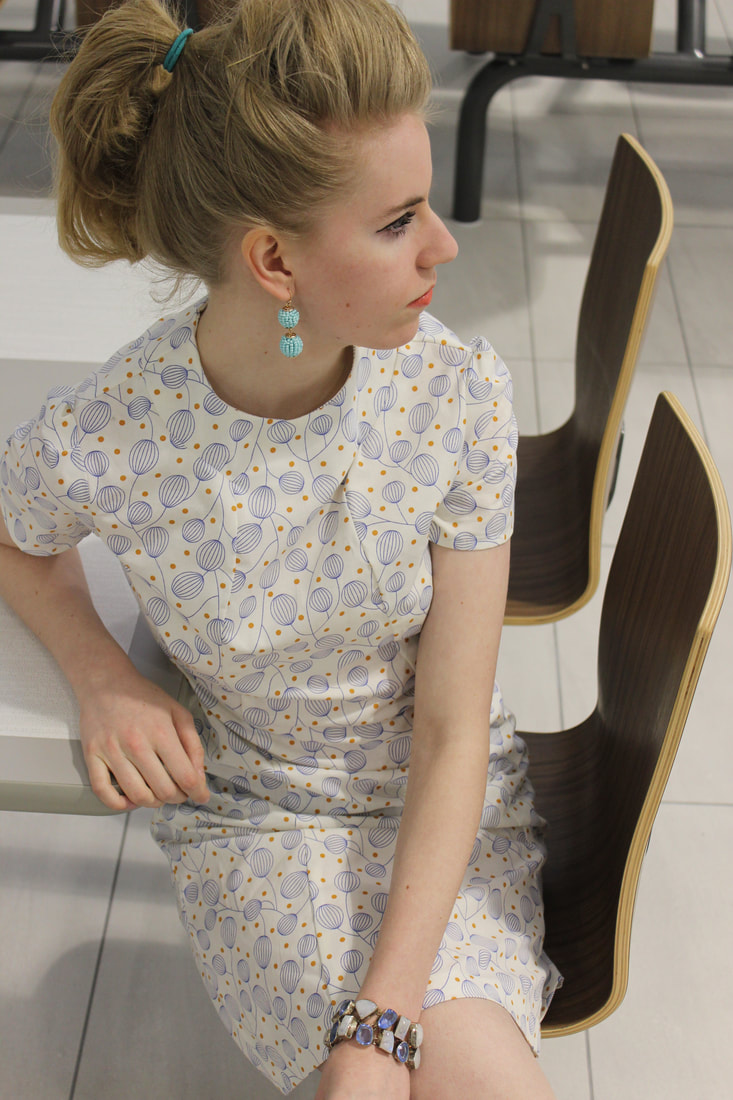 Thanks for reading! ~K 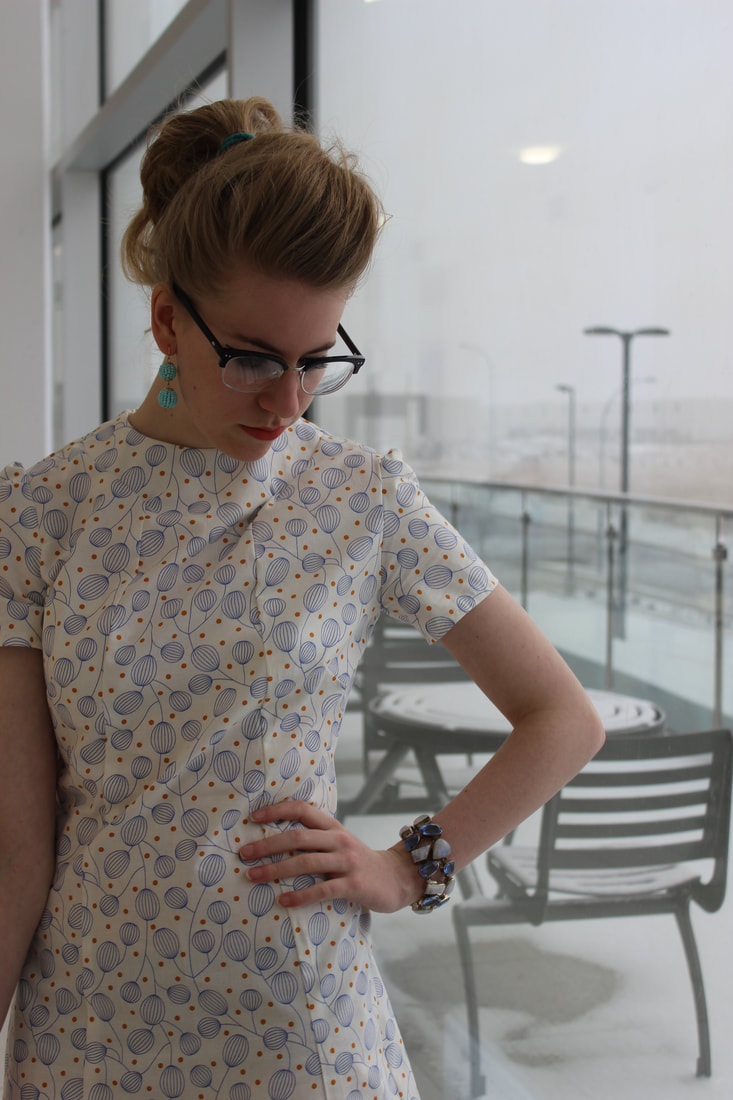 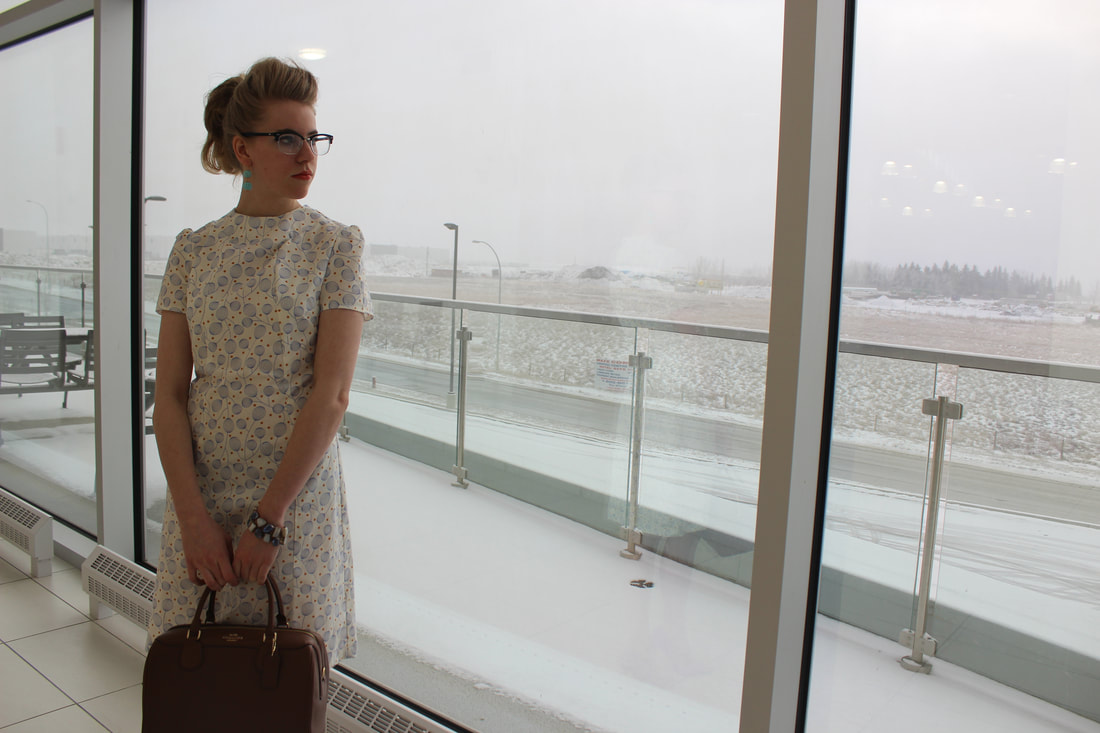 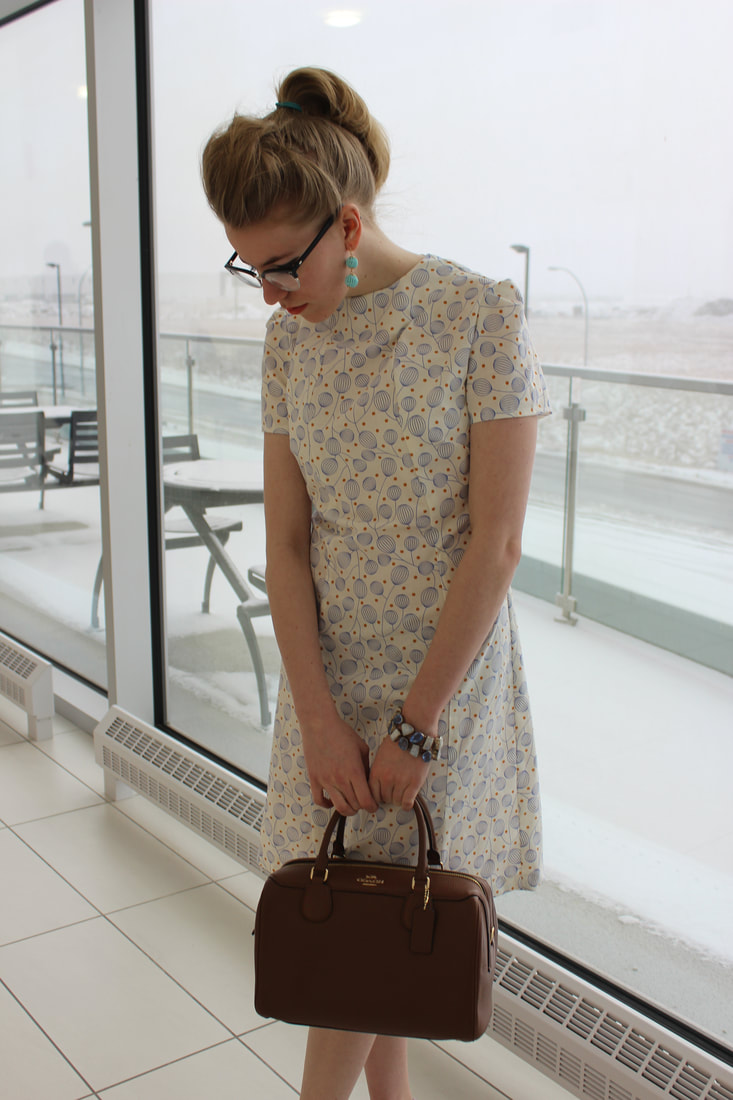 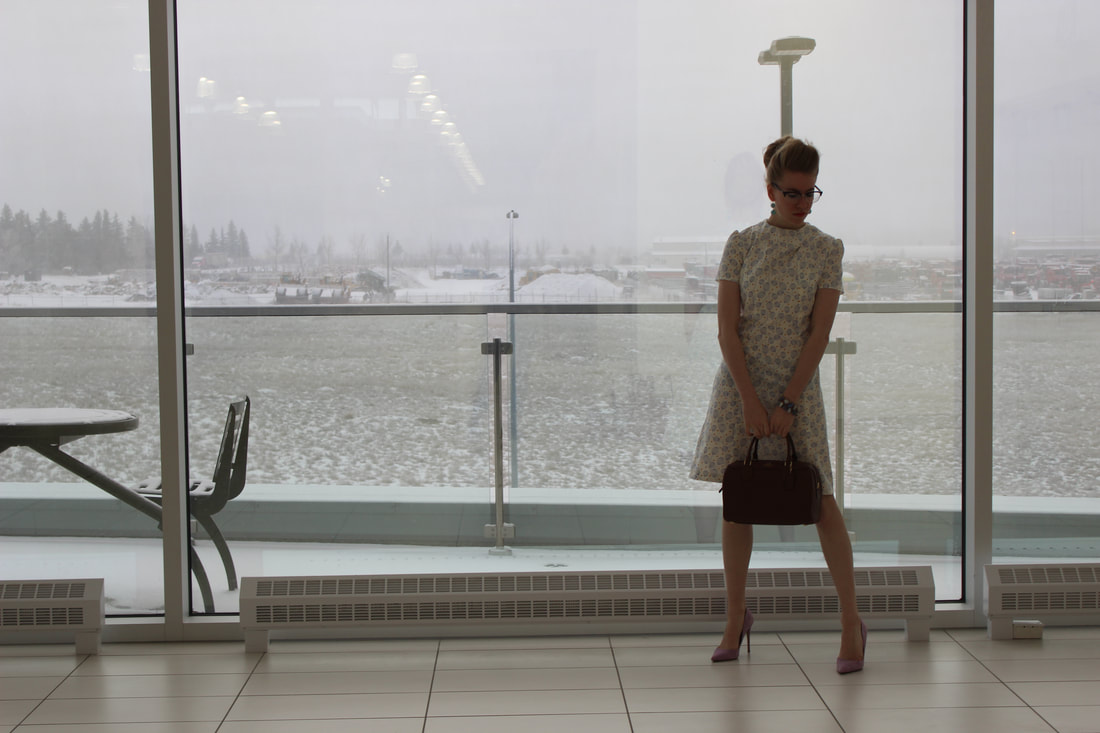 I have been having fun trying out different things lately! Some of them have to do with sewing- such as new techniques for finishing, learning how to make a pattern from scratch, and learning how to draw proper technical drawings to send to factories. I have also been trying out things that are a little bit out of my comfort zone. Last week, Natural Talent Alliance held a model walk not far from my house, so I decided to try out. Natural Talent Alliance is a local partnership of artists in the area where I live. There are photographers, dancers, designers, models, visual artists, and many other professionals who are a part of the NTA. I was lucky enough to meet the people who run it through MakeFashion. I was pretty nervous to try out, but I ended up having a fantastic time!
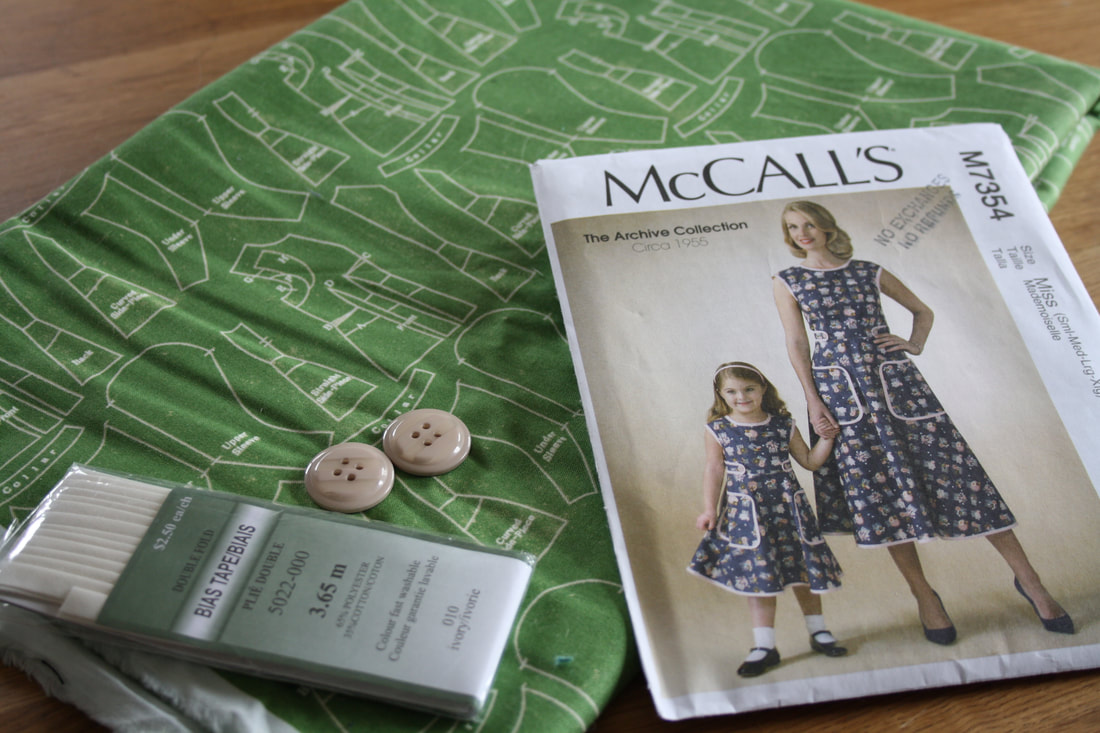 I recently started school, so I have been a little bit busy. While I am loving school, and learning tons of new and helpful things, it has been quite stressful getting started so the blog has been paused. Now that MakeFashion is done, and I have gotten used to my new schedule, I have lots of plans for the winter season! 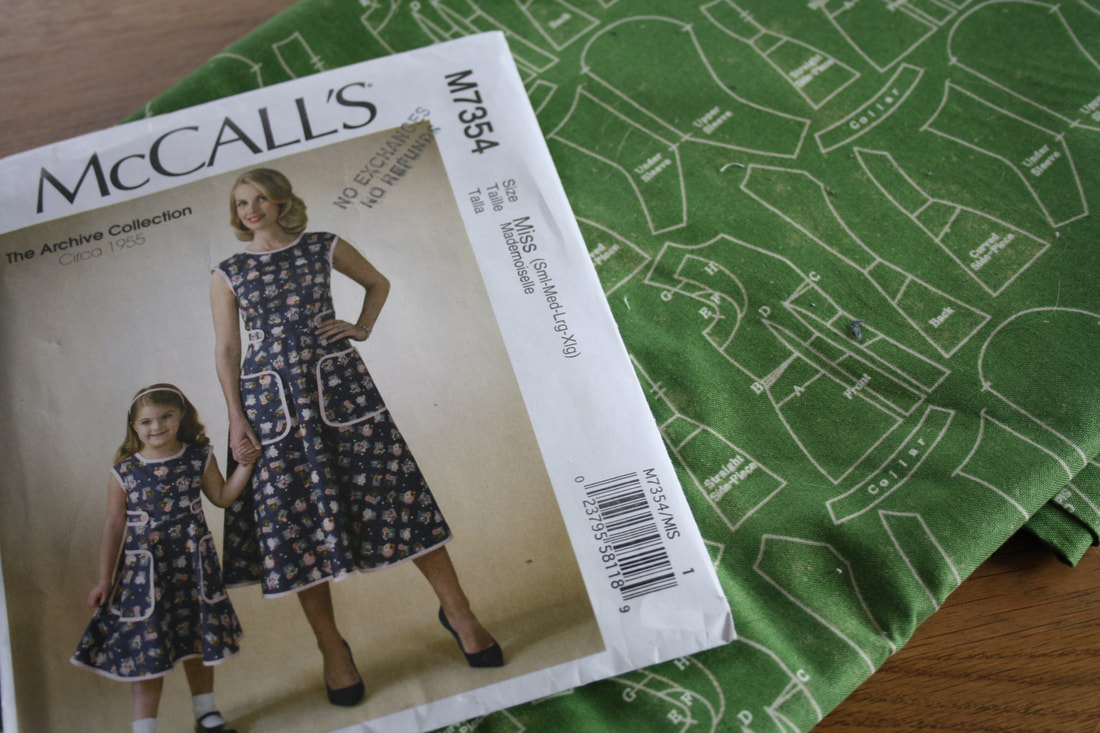 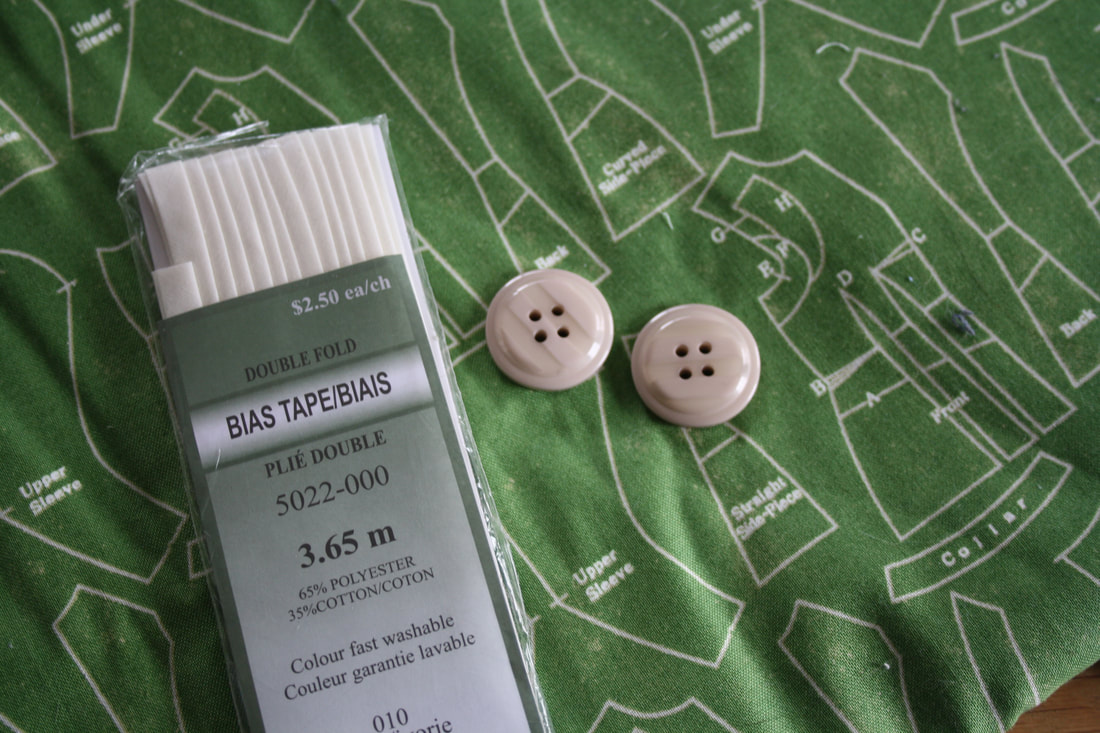 After a trip to Fabricland a while ago, I am filled with inspiration! The first thing on my list is something that I have been wanting to make for a long time- a kitchy, 1950's wrap dress. I picked up the McCalls pattern M7354, and a fabulous printed cotton. I will be binding the dress with cream bias tape, and picking out two cream buttons to finish it off. 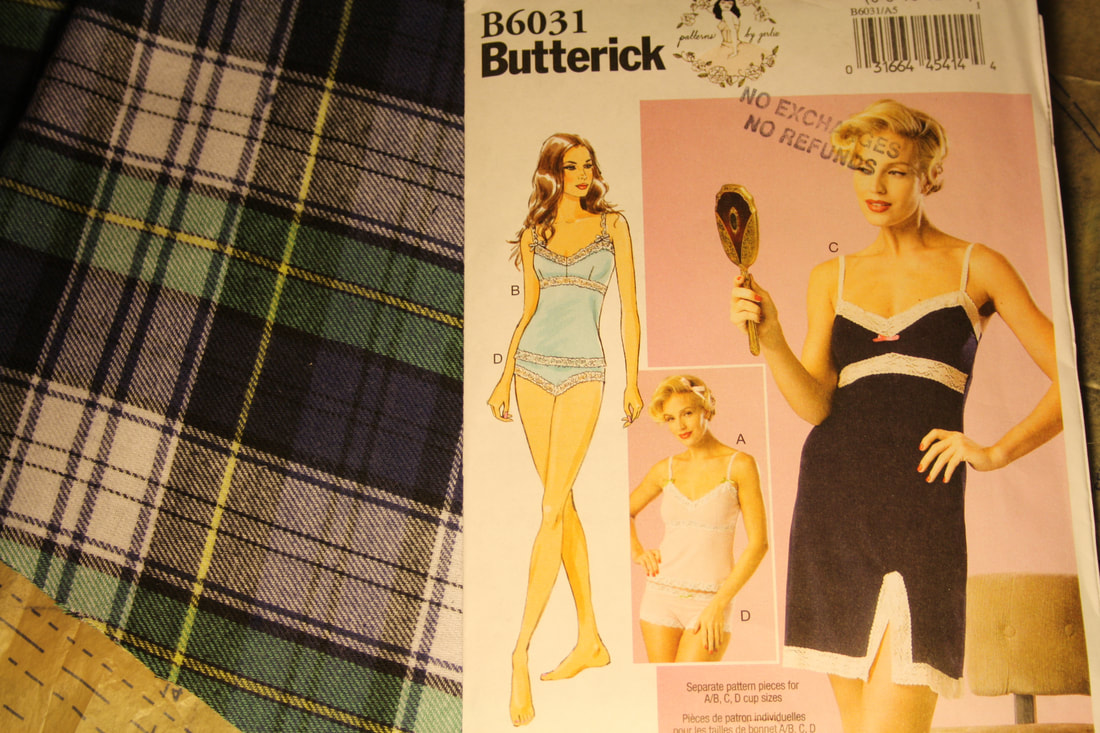 The second pattern that I picked up is a pattern that I have admired for a very long time, and now that I am confident enough in my sewing skills I am ready to make it! I am going to do a trial run with a plaid flannel to make myself a night gown, and then I will make myself a few slips to go underneath my dresses.  I am so excited to make the wrap top out of an anatomical heart print I have always been a huge fan of Patterns by Gertie, and I have used a few of her patterns before, so I did not hesitate to get a few more of her patterns! The first one here is a skirt and blouse pattern. I am making the skirt out of some left over wool from a 1940s styled dress, and I haven't decided what to make the shirt out of quite yet. I also got a stunning boat neckline dress pattern with a V back. This dress can be made as an A-line or as a pencil dress, and I am thinking of making the pencil version first. I may make it out of some left over wool from my Bomb Girl Trousers, but that is yet to be decided! I have so many different fabrics that I think it woulds be fabulous in. Another Gertie pattern that I grabbed is for petticoats! This is thrilling, since I have been wanting to make myself a petticoat or two for ages. The more interested I get in 1950s fashion, the more that I need (okay, maybe not need... but really want!) a petticoat to underneath all of the full skirts that I have. The last one I am extremely excited for (okay, I am excited for them all, but this one is pretty good). It is a Sabrina style dress with a pencil skirt and full back. I am planning on making this out of a burgundy silk dupioni. I was originally saving this dupioni for a natural form era dress inspired by Crimson Peak. I still would like to make a dress like that, but it will be out of a different fabric.  I won't be using this netting for the petticoat (although that would be pretty fabulous), but I think I will use a turquoise netting  The boat neck dress with V back has options for a circle skirt or a pencil skirt  I am so excited to make this Sabrina styled dress! The last pattern that I picked up is the 1890s pattern from Angela Clayton! I absolutely love her blog and youtube channel, and I was so excited when her first pattern came out. I am hoping to make a jacket for myself with this pattern, and at some point I think I will be needing an 1890s ensemble... 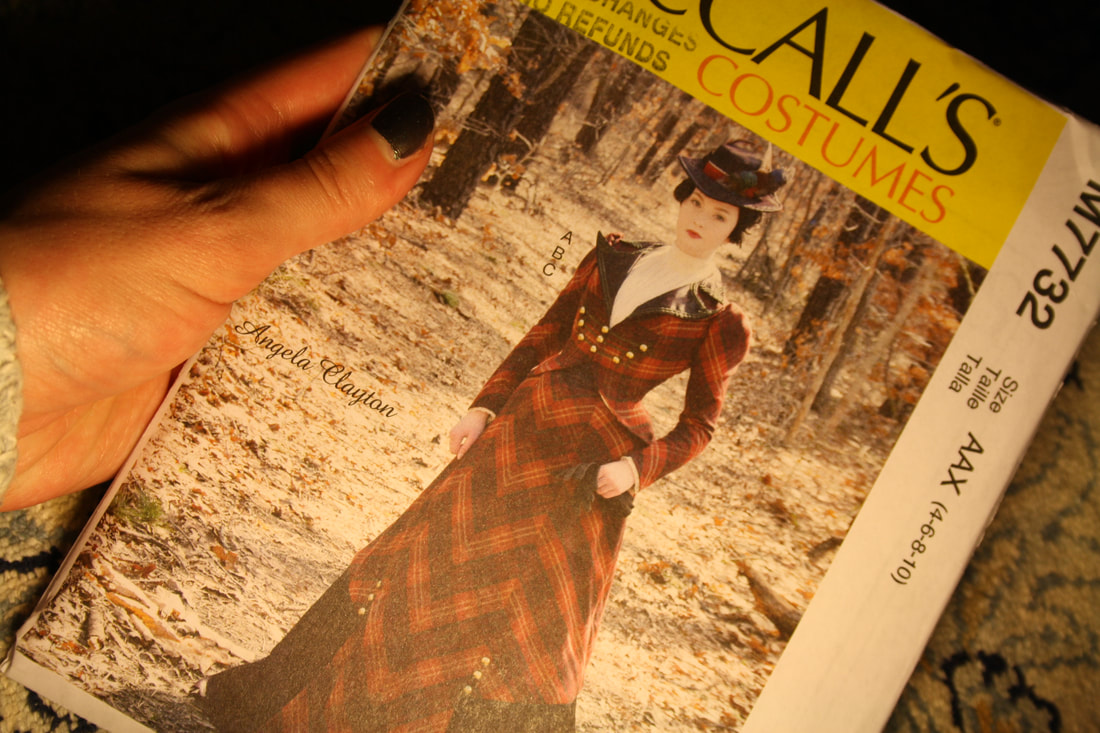 Thank you for reading, and I hope that you are as excited about all of these ideas as I am! ~K
 I was recently gifted these amazing German pattern magazines from the 1950s, and they have proven to be not only great inspiration, but they have also helped me learn about pattern making! 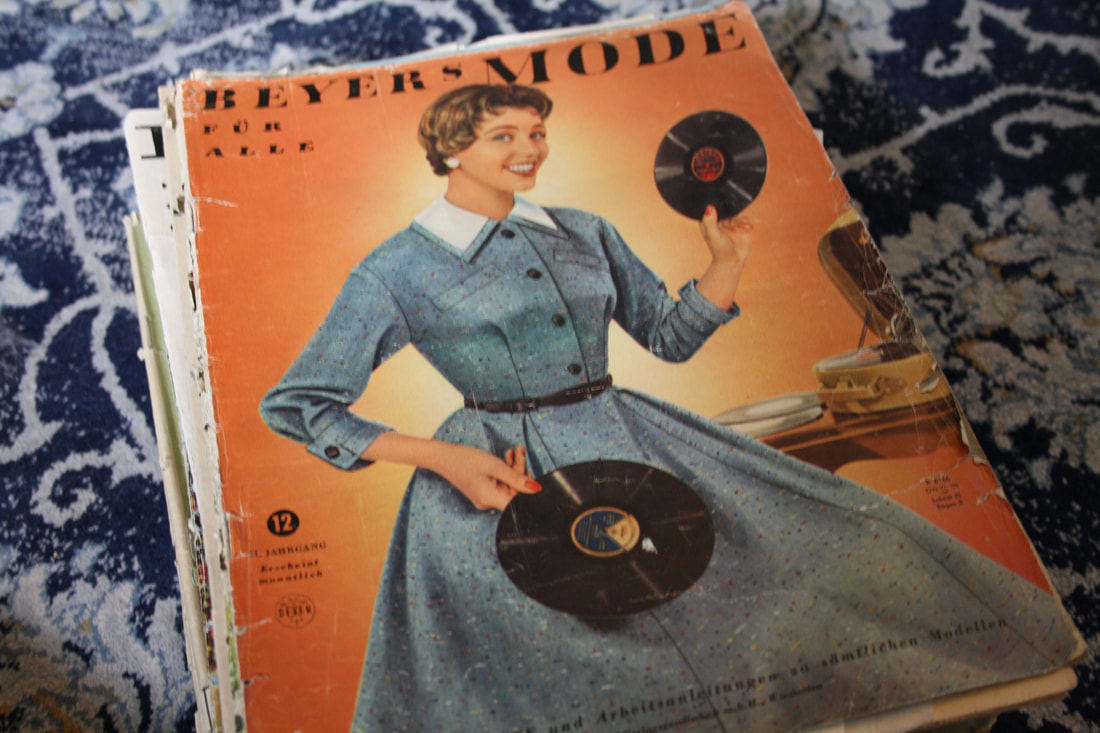 I have been learning the basics of pattern making at school, and so far that has been one of my favourite classes! It is so satisfying to make a garment that is exactly what you pictured and that fits you perfectly. 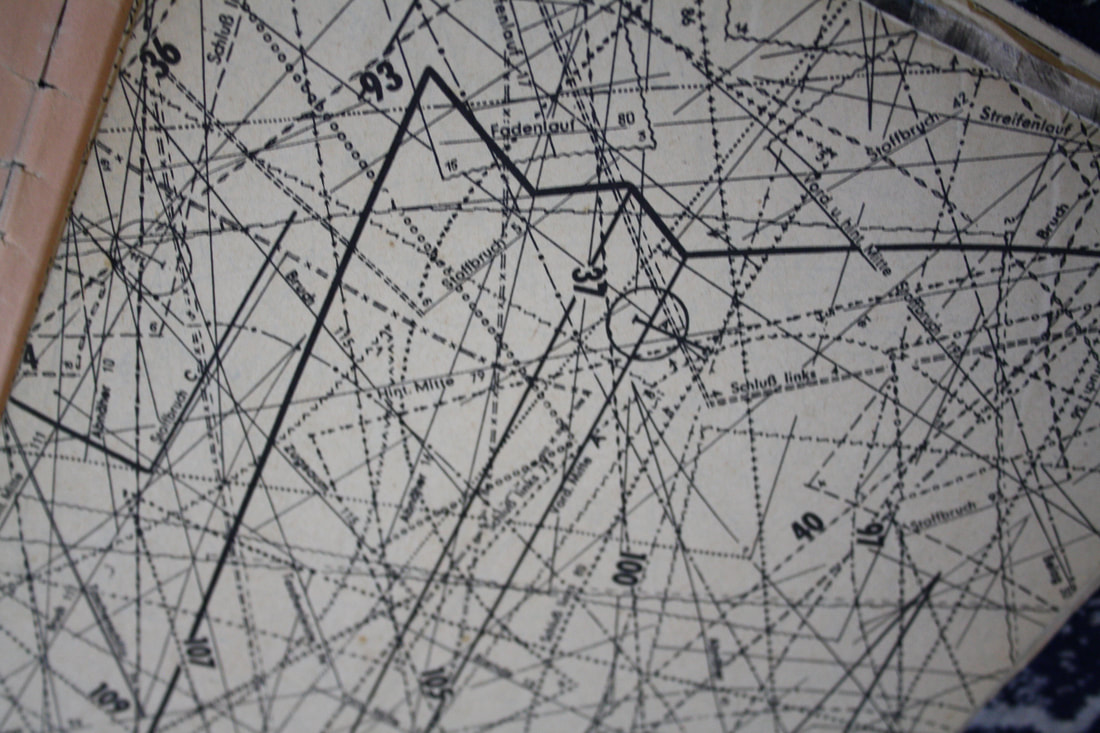 The pages with the patterns look a little scary... These magazines are called 'Beyer Mode', and they include tons of pictures of the possible garments that you could make, a horoscope page (there is nothing better than reading horoscopes from 60 or 70 years ago), as well as tips for sewing and taking care of your home. There are also sometimes recipes in a few of the magazines that I am very curious about! 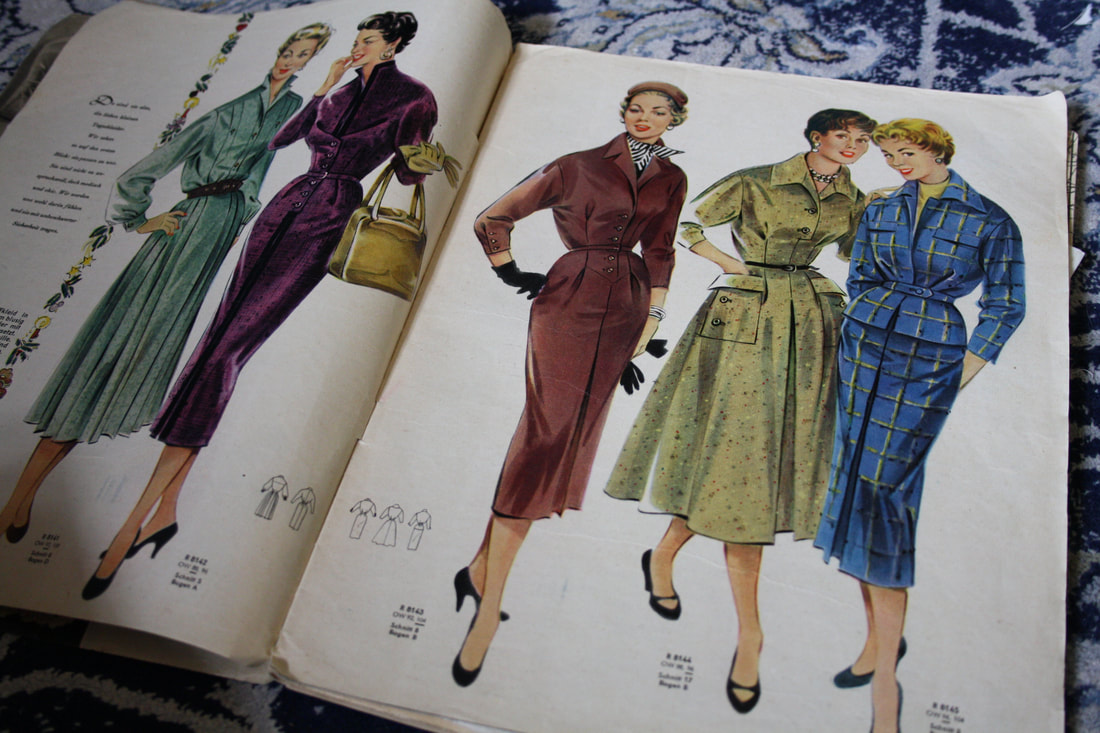 Here are some of my personal favourite pages from the magazines: 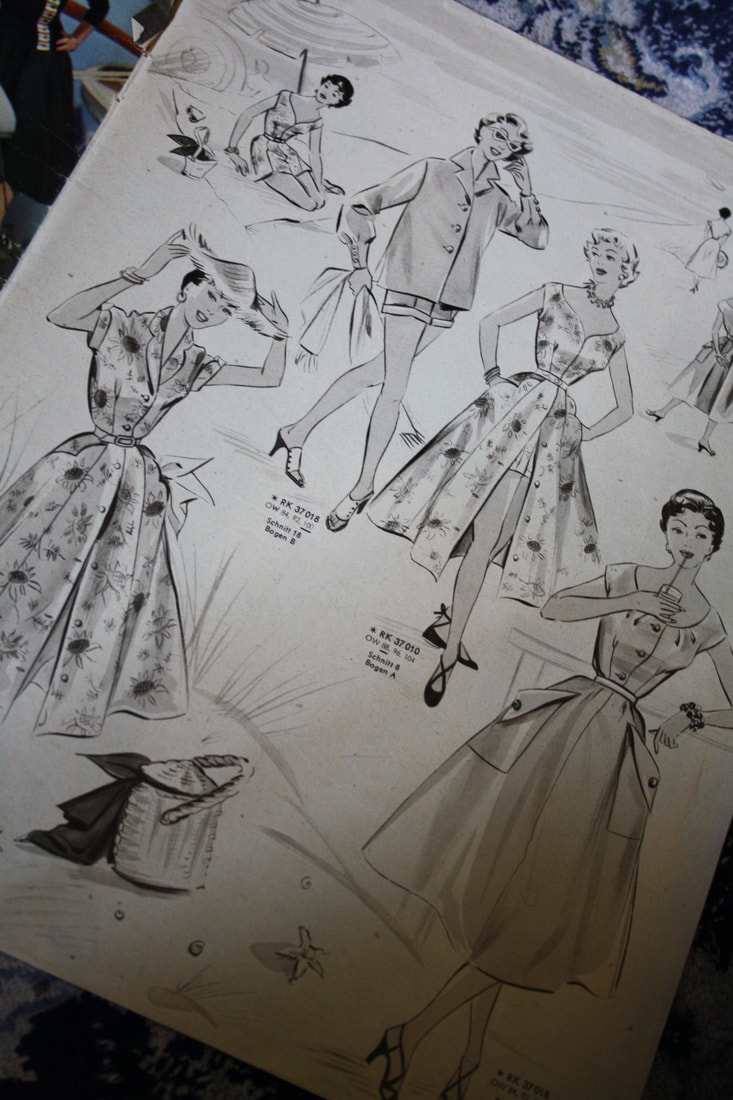 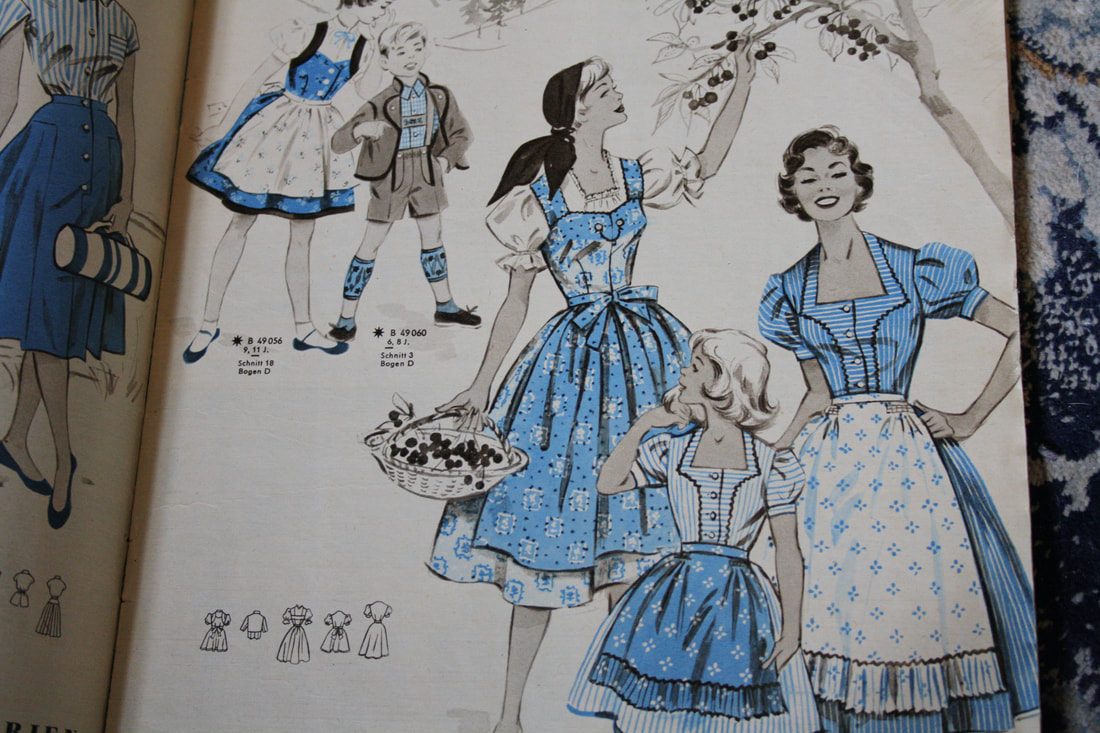 There are patterns for every age 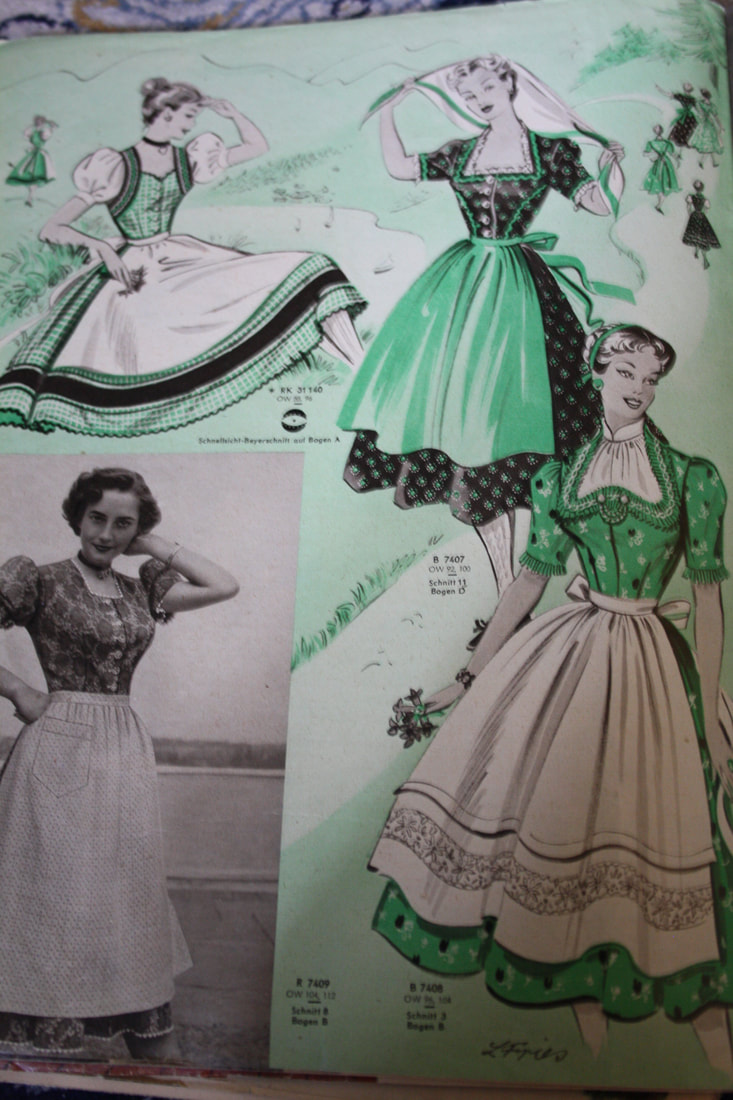 So many beautiful dirndls! There are some in almost every magazine 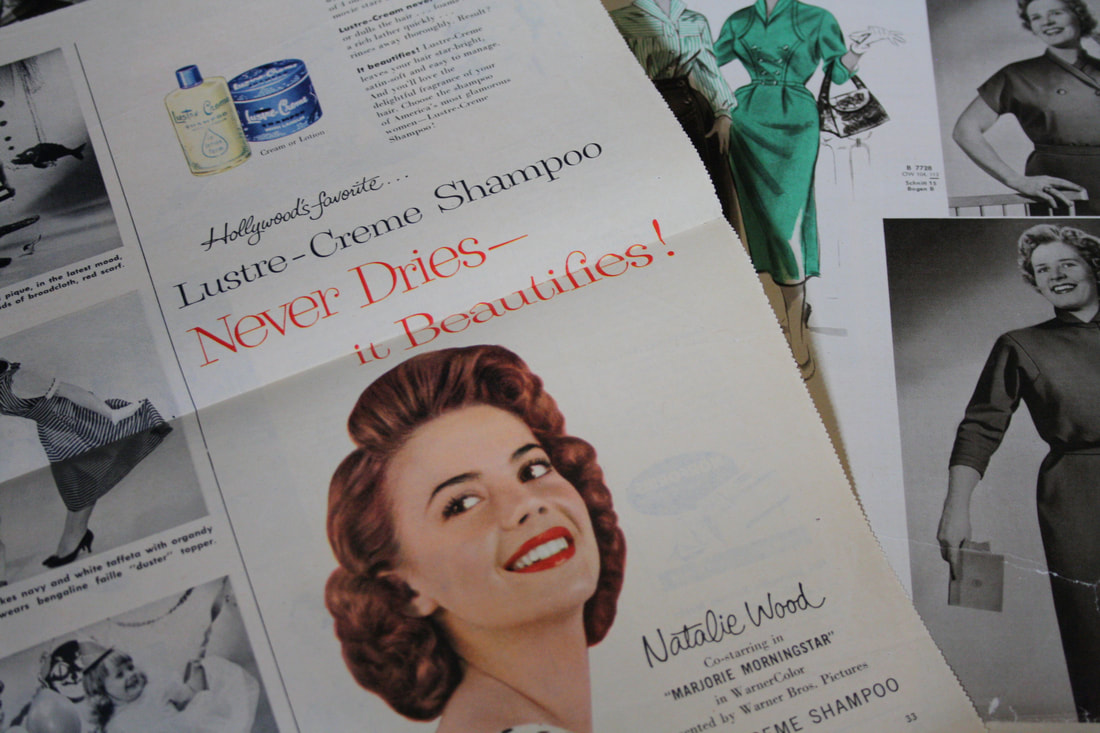 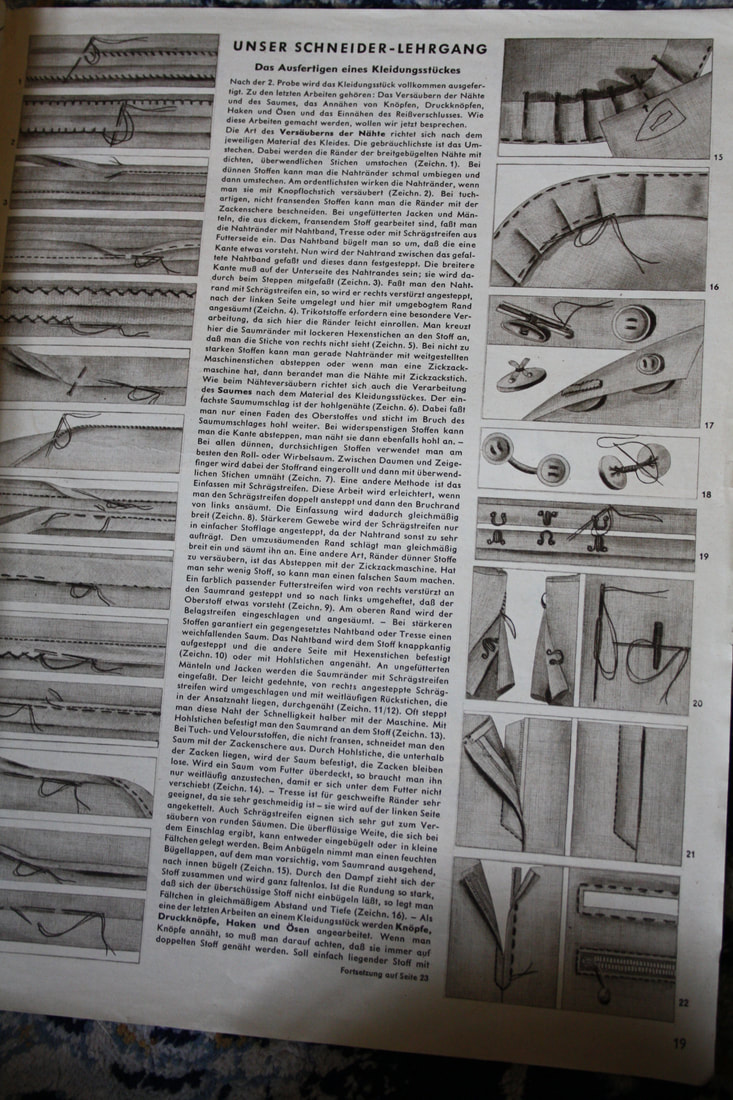 Lots of great tips and techniques! 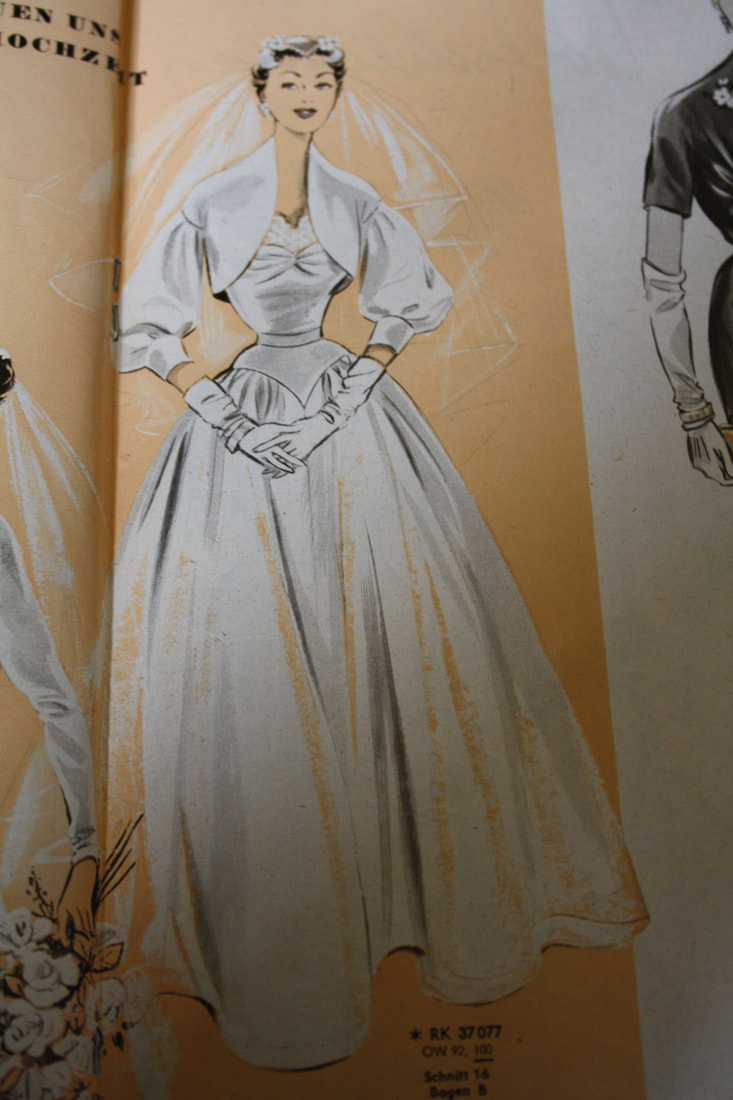 And patterns for every event 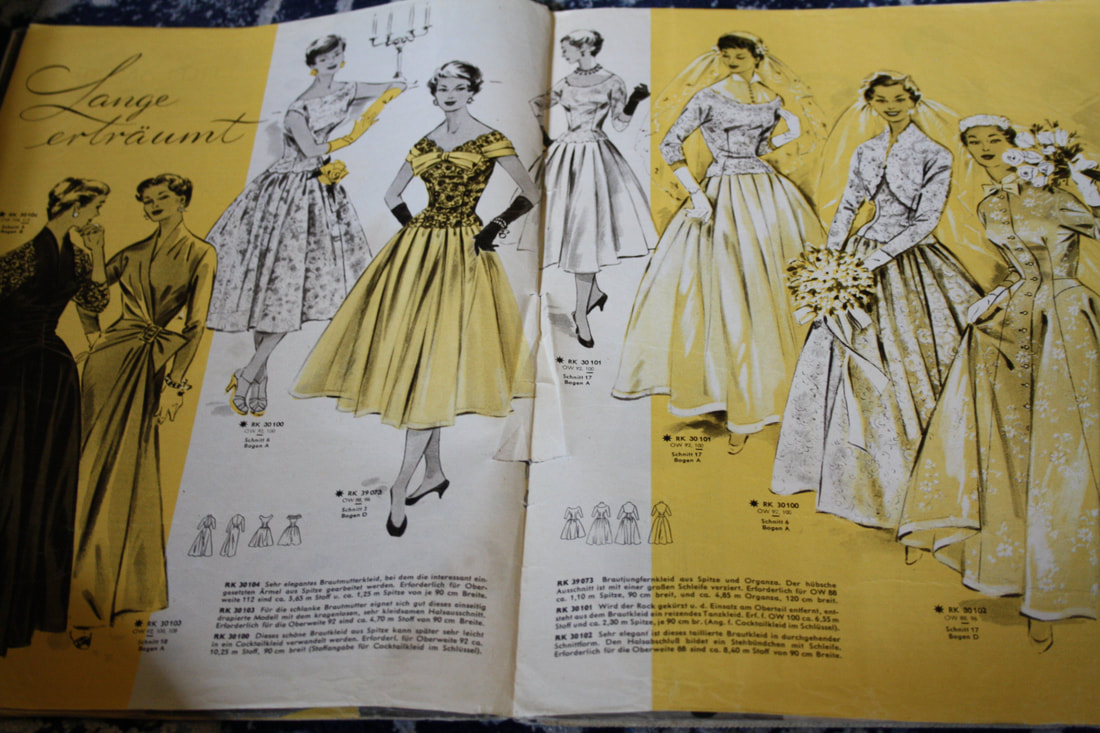 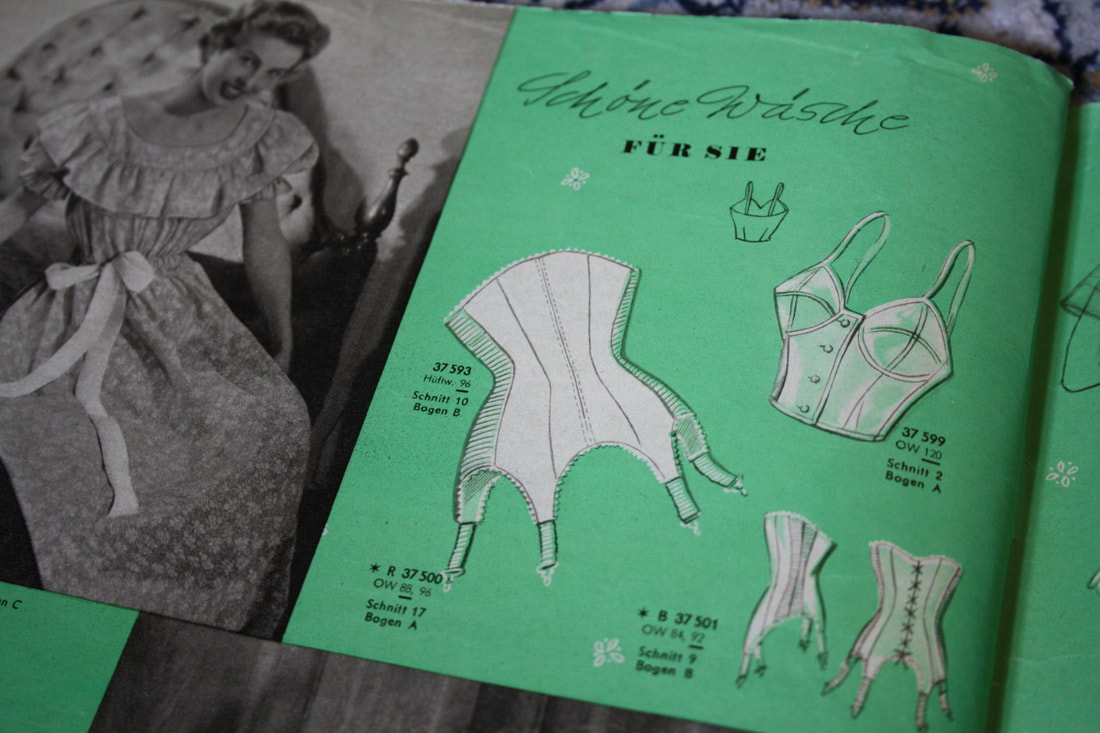 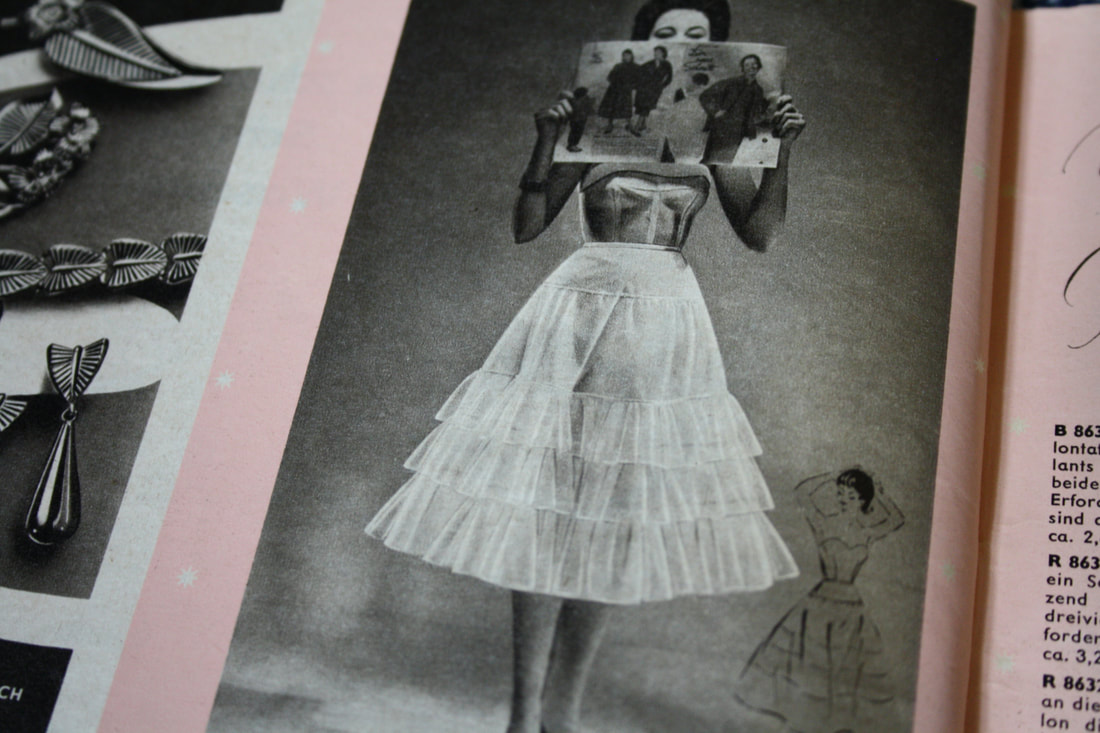 Which is your favourite? Do you prefer the fancy dresses or every day ones? Or the lingerie? I don't think that I have a single favourite in all of the issues, I want to make all of them! ~K   The sketch for my dress this year I am very excited to be working with MakeFashion for a second time, and this time I am a Team Lead!  The bodice as I was getting the boning channels reading 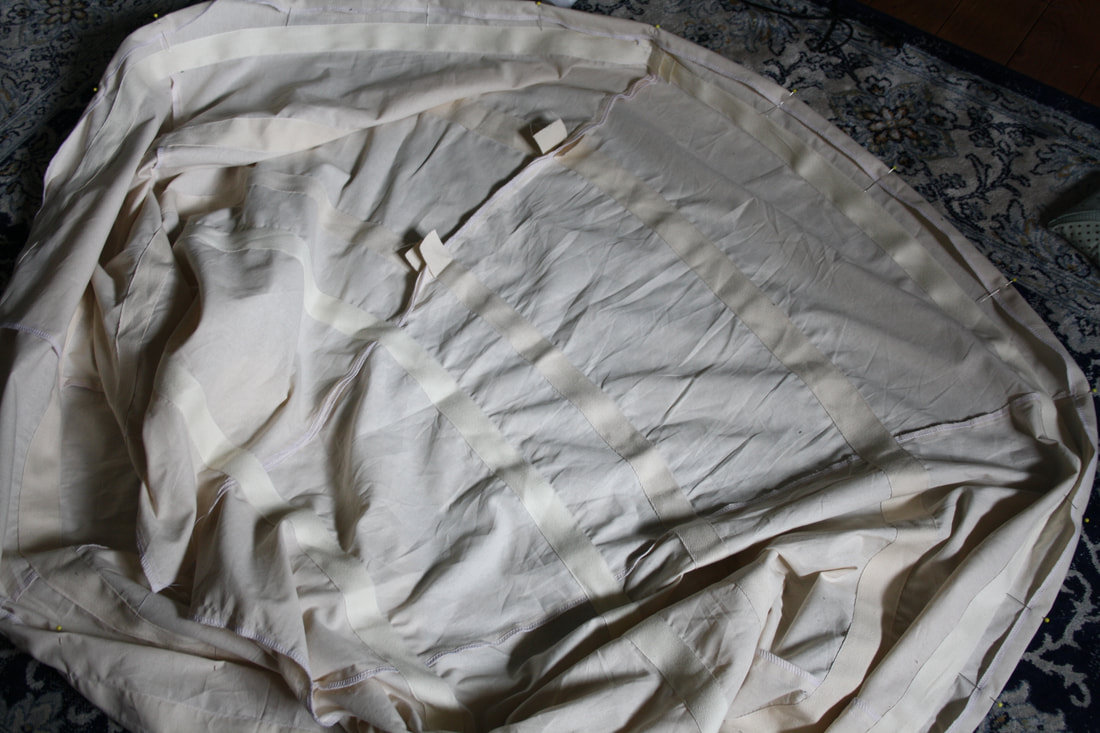 The hoop skirt before I put in the boning I thought that I would explain my dress a little before the show, and let everyone know where they can see it, if you would like to. I decided to design my technology around something close to home- mental illness. The dress is based on the idea to help people struggling with things such as depression, anxiety, and other mental health issues. A switch at the waistband of the dress allows the wearer to change the colours of the lights in the skirt. Each colour of light means something different- the green means that the person wearing the dress is comfortable in the situation, yellow means that they are getting anxious/uncomfortable, and red means that they are not in a good place. We came up with this format since it could benefit many people- I have a hard time with touch and being overwhelmed (with noise, etc), and having a red light would be nice to let the people I love know that I would like some space, and that it is not their fault. Having something the let the people around you know what kind of head space that you are in helps avoid miscommunication. 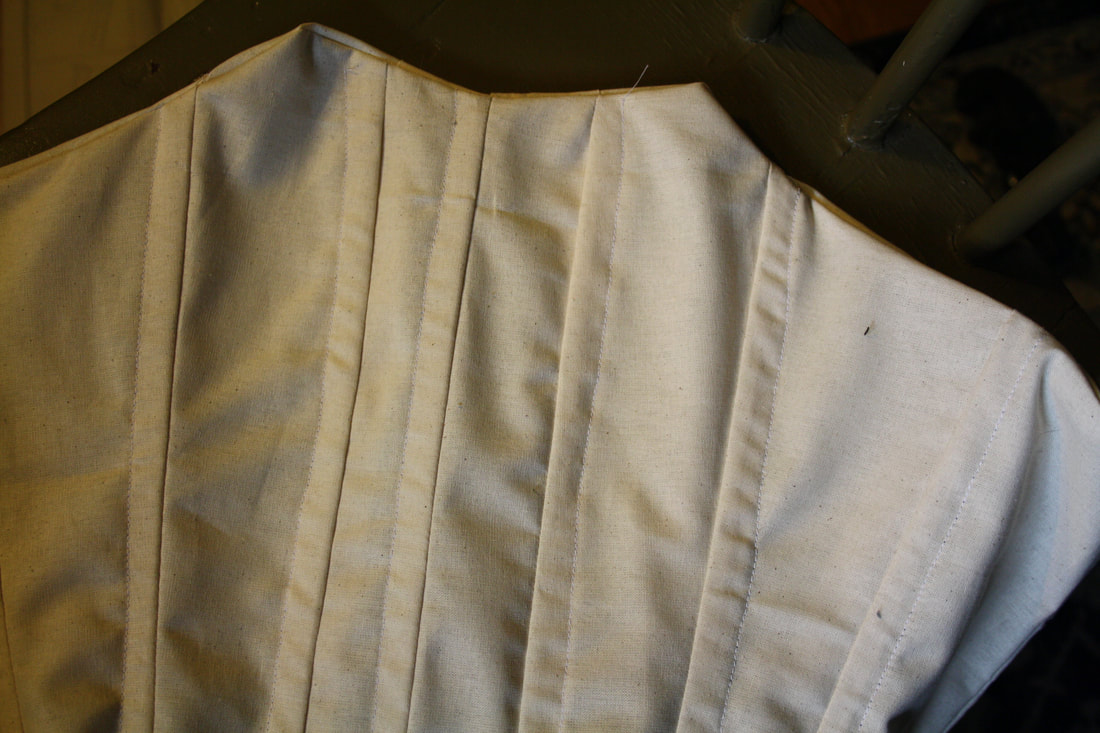 The finished bodice with boning inside 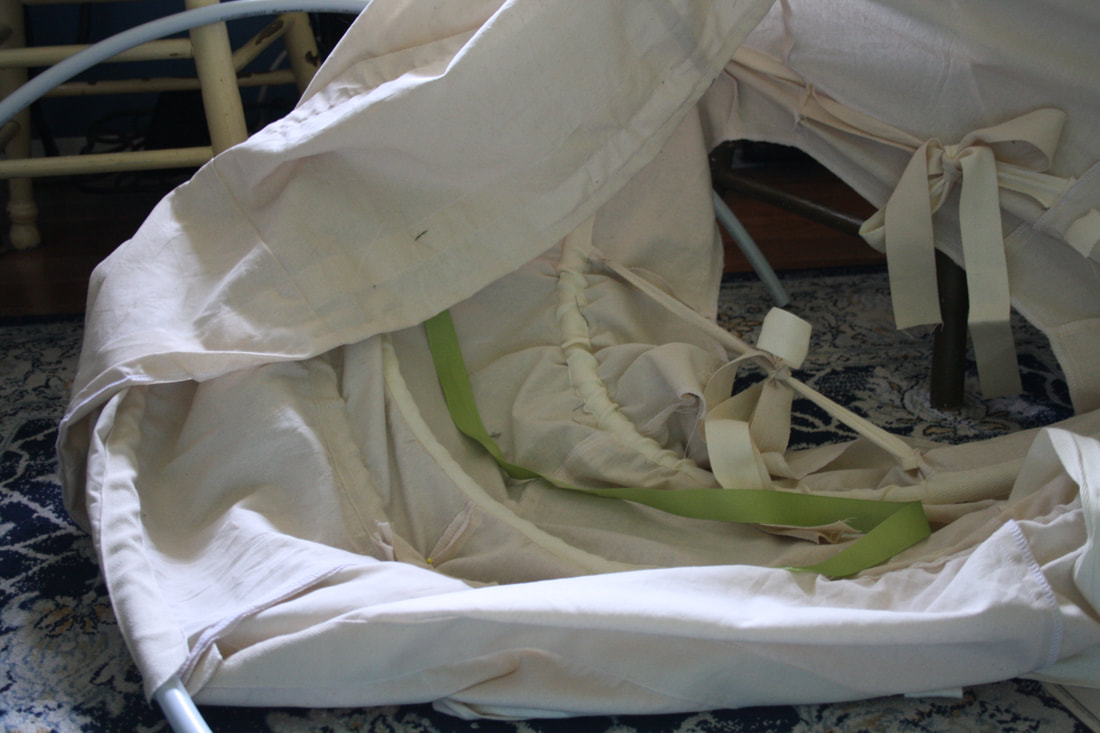 The partially finished hoop skirt 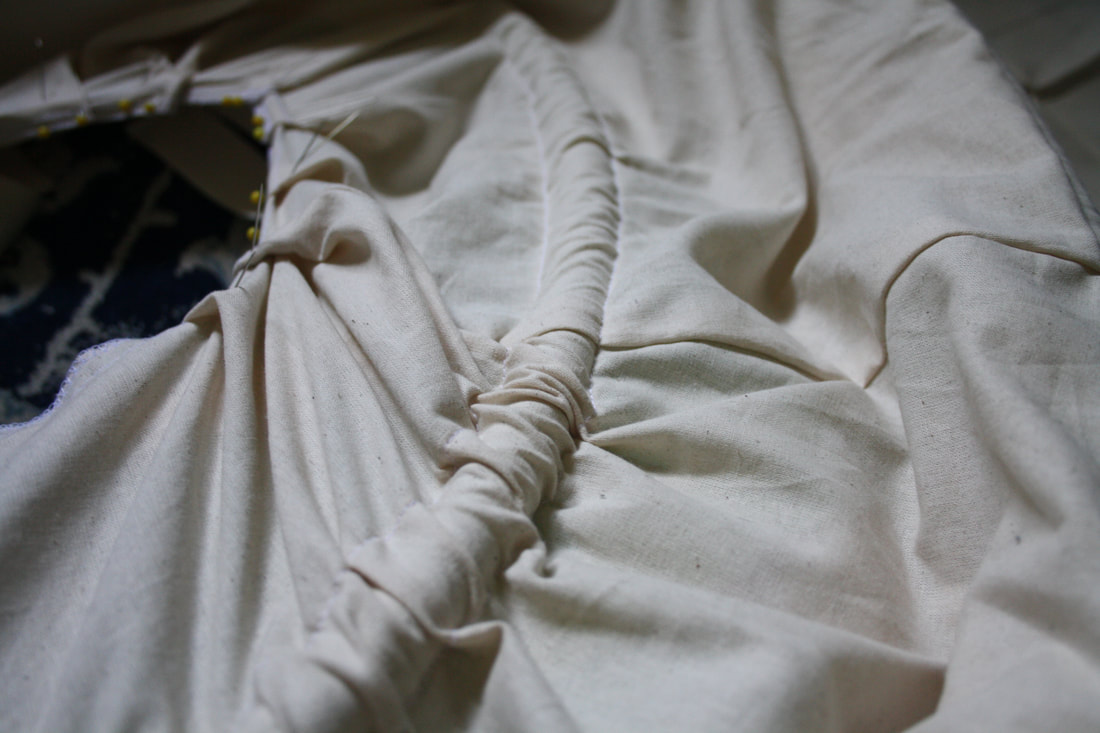 MakeFashion is paired with Beakerhead this year, so the fashion shows will be at the Beakerhead event on September 22. To get behind the scenes access to the show (get to see the models and designers getting ready for the shows), reserved seating, a gift bag from team Luminary, access to the VIP lounge, and a ride in the Beakernight Hot Air balloon you can get the Luminary Experience here! If you would just like to check out a show, tickets to Beakernight are $8, and you can get them here. The show is at Fort Calgary, and my dress will be at the first show at 8pm! 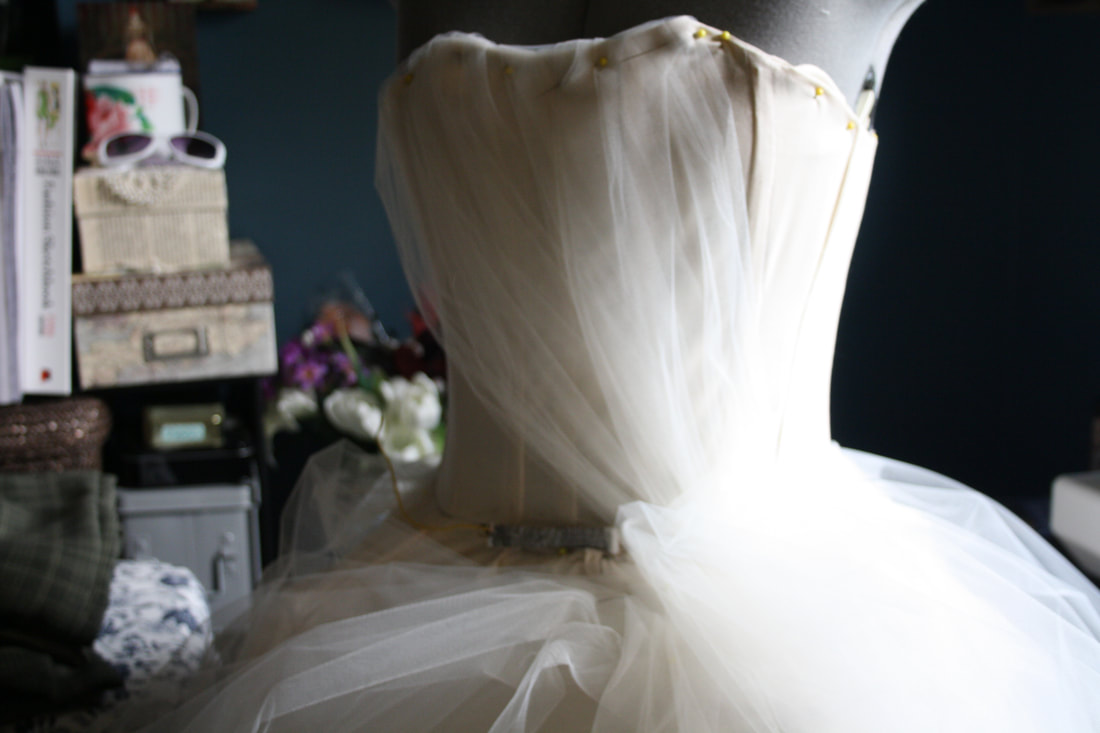 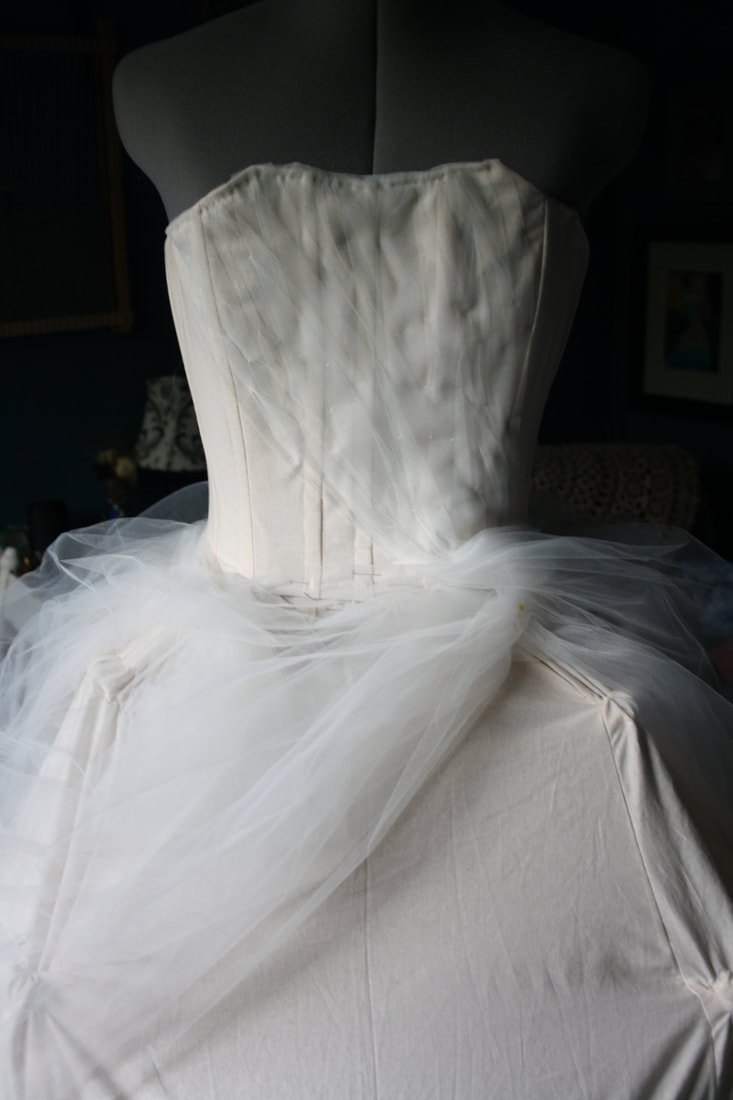 I loved working with MakeFashion last year, and I have met so many brilliant people through this opportunity. I can't wait to show everyone the finished product! ~K
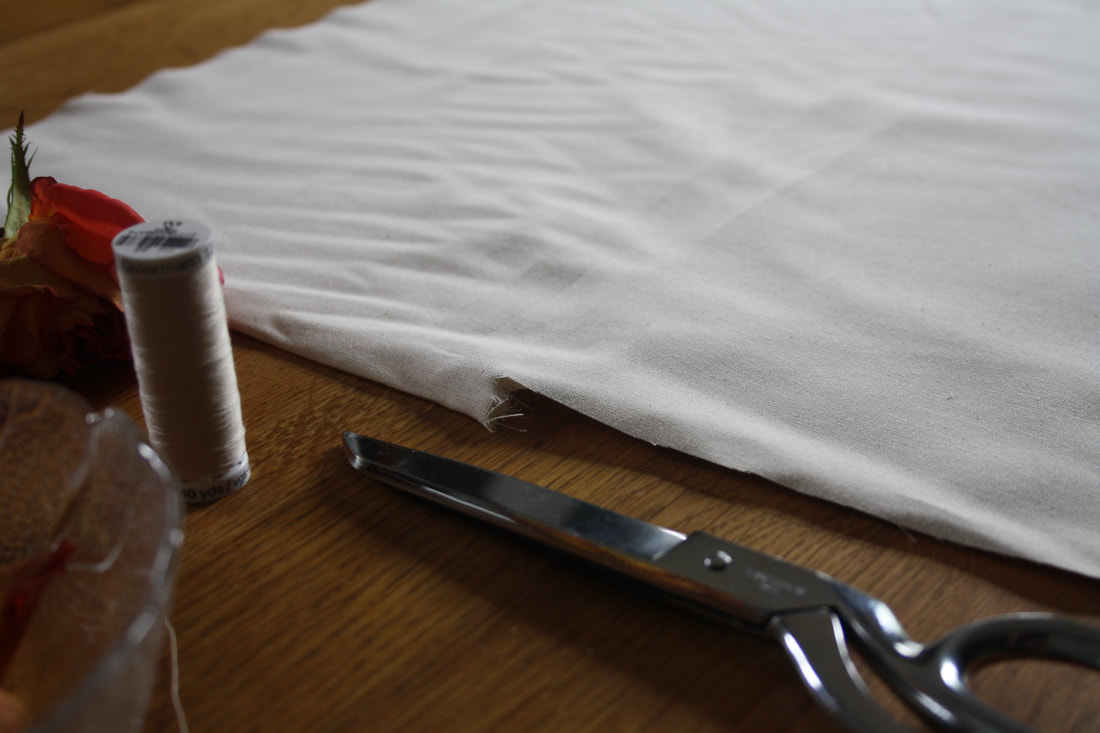 I have been trying out different ways to naturally dye fabric, since I would love for my garments not to be wasteful and to be good for the environment. I use quite a bit of unbleached muslin, so I wanted to try out some new colours for it. I have already done lots of tea staining (it just makes the perfect cream colour!), so the other day I tried a method that I have seen in books. This involved steaming fabric with rose petals folded in it. The final product wasn't quite what I was expecting, but it is very pretty! I think next time I will try with deep red rose petals in the hopes that it will make a pink or lavender colour. 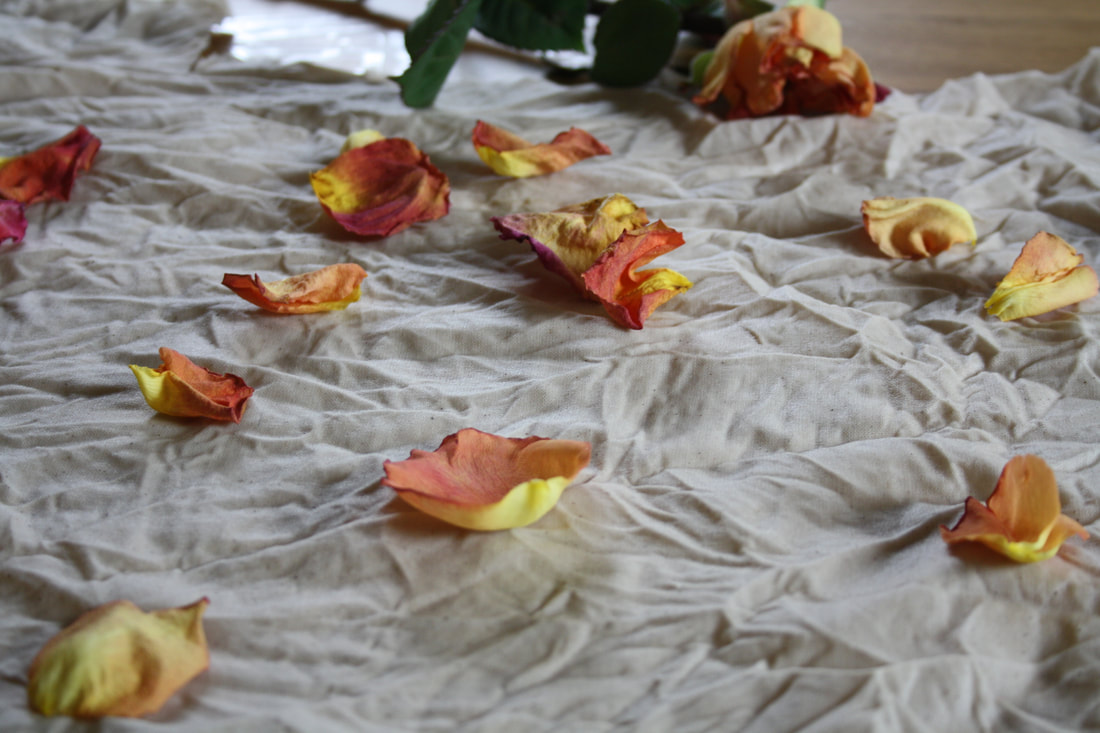 To try it, I just used a small section of unbleached muslin, which I dampened. I then arranged rose petals on it in a random pattern. Once I was happy with where the petals were, I folded and rolled the piece together and tied the ends with strings. That was steamed for a few hours, and then left to cool. After it was cool enough, I unrolled it, took out all of the petals, and left it out to dry. 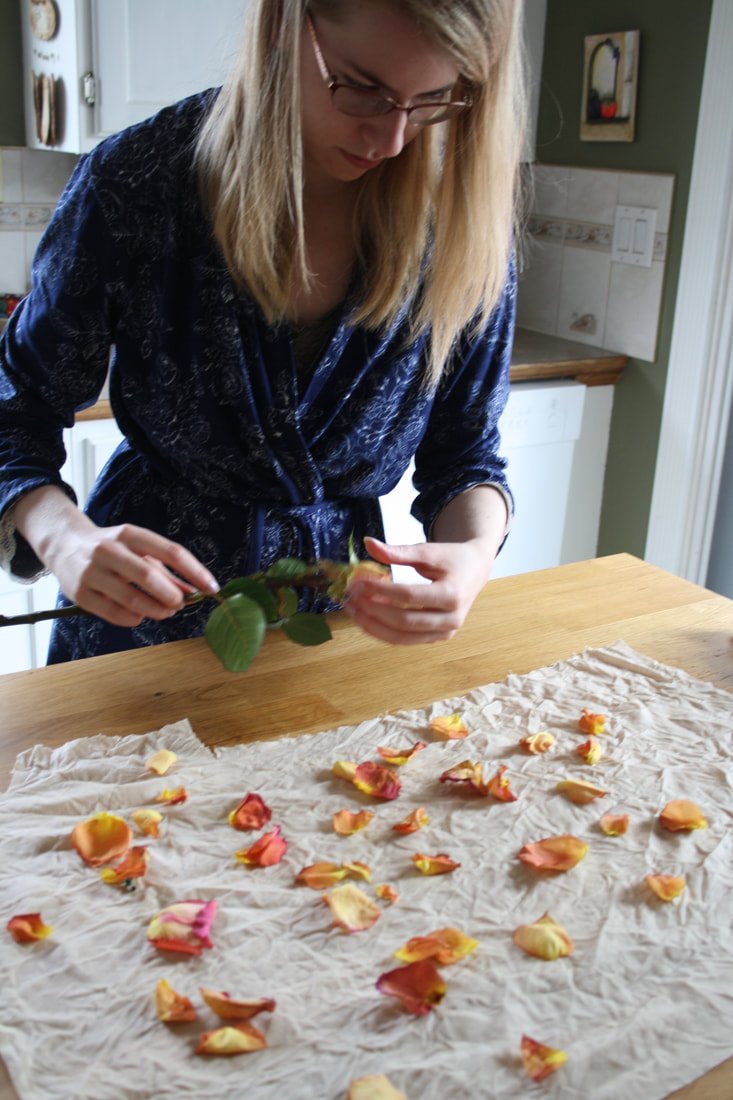 This was, of course, all done in my pyjamas 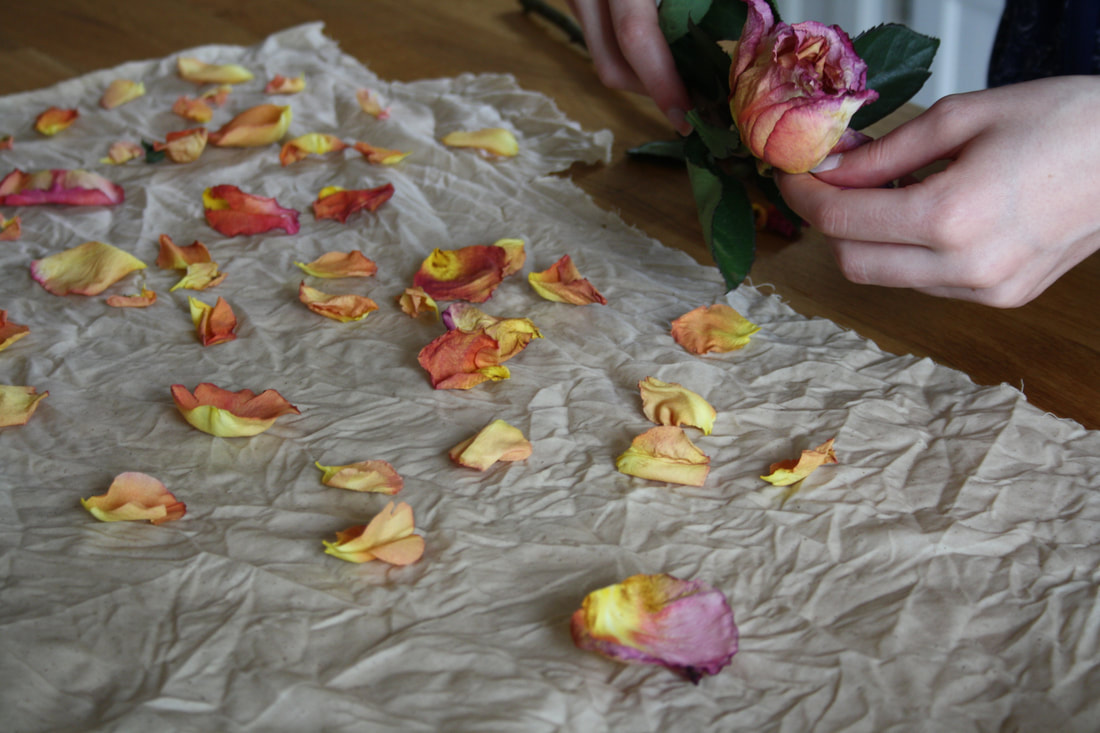 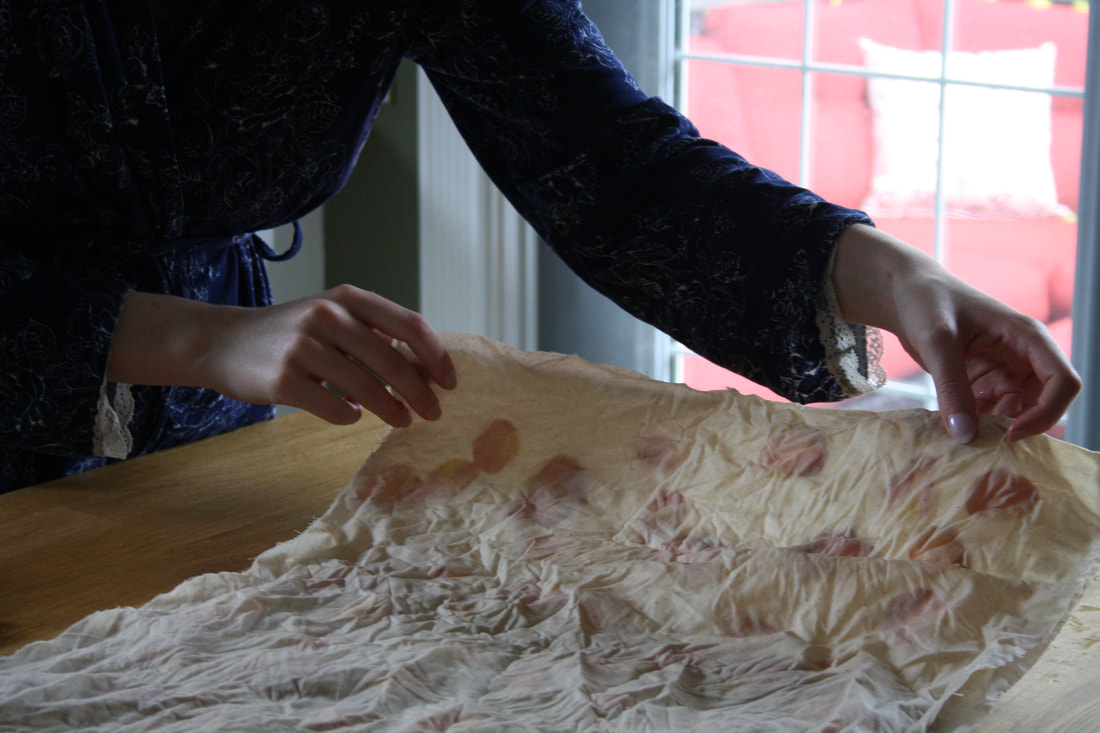 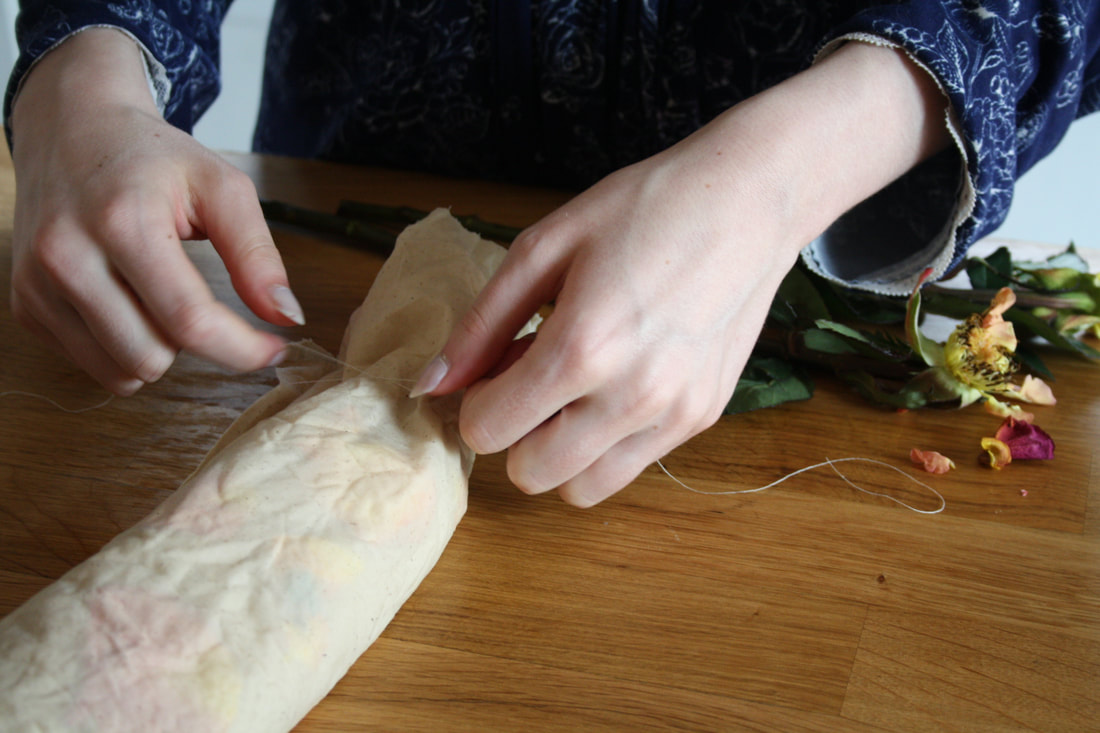 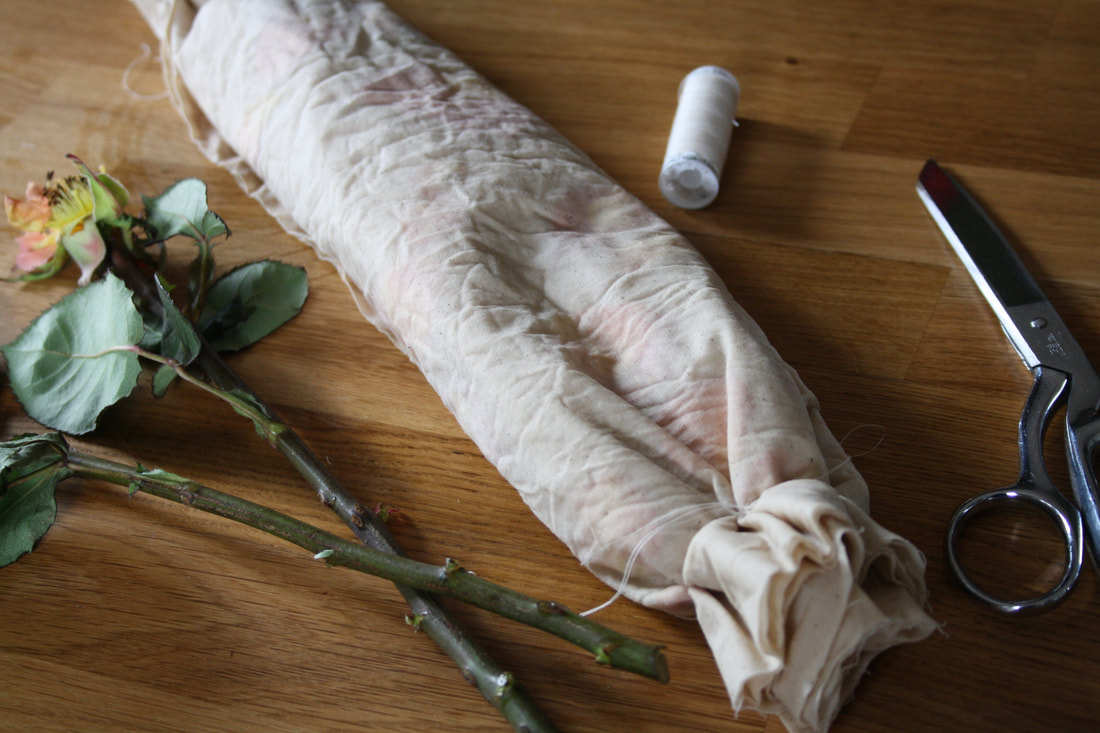 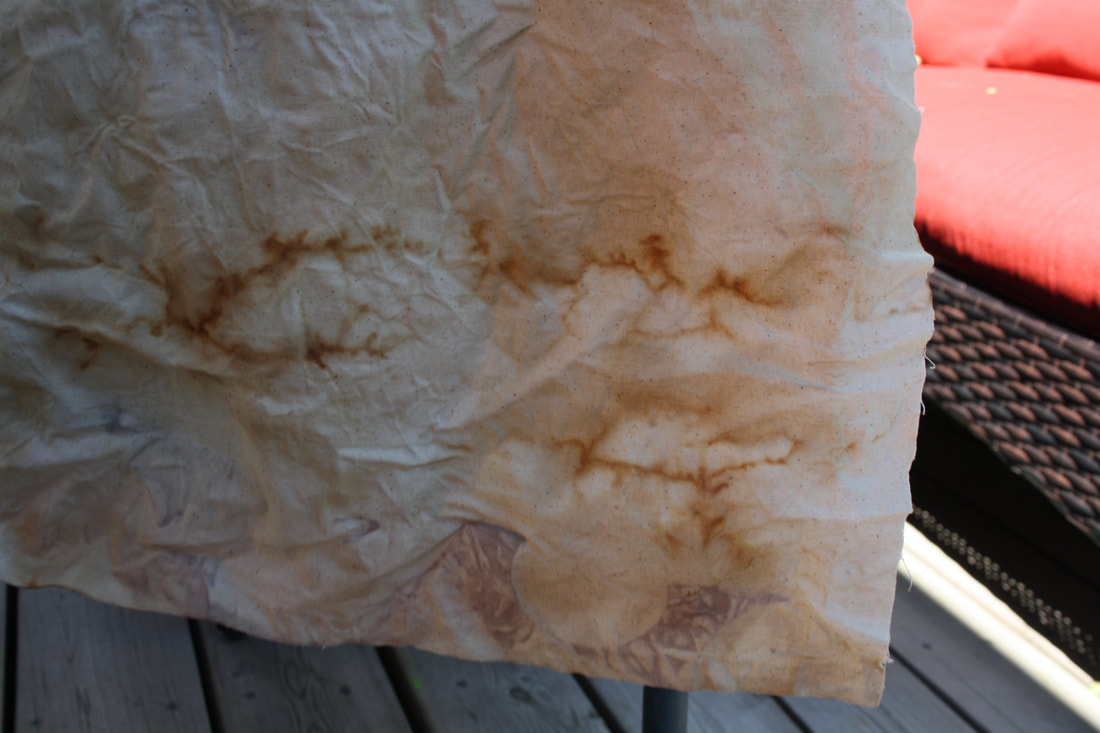 Have you ever tried natural dyeing? How did it turn out?
~K |
EtsyArchives
April 2020
Categories
All
|
 RSS Feed
