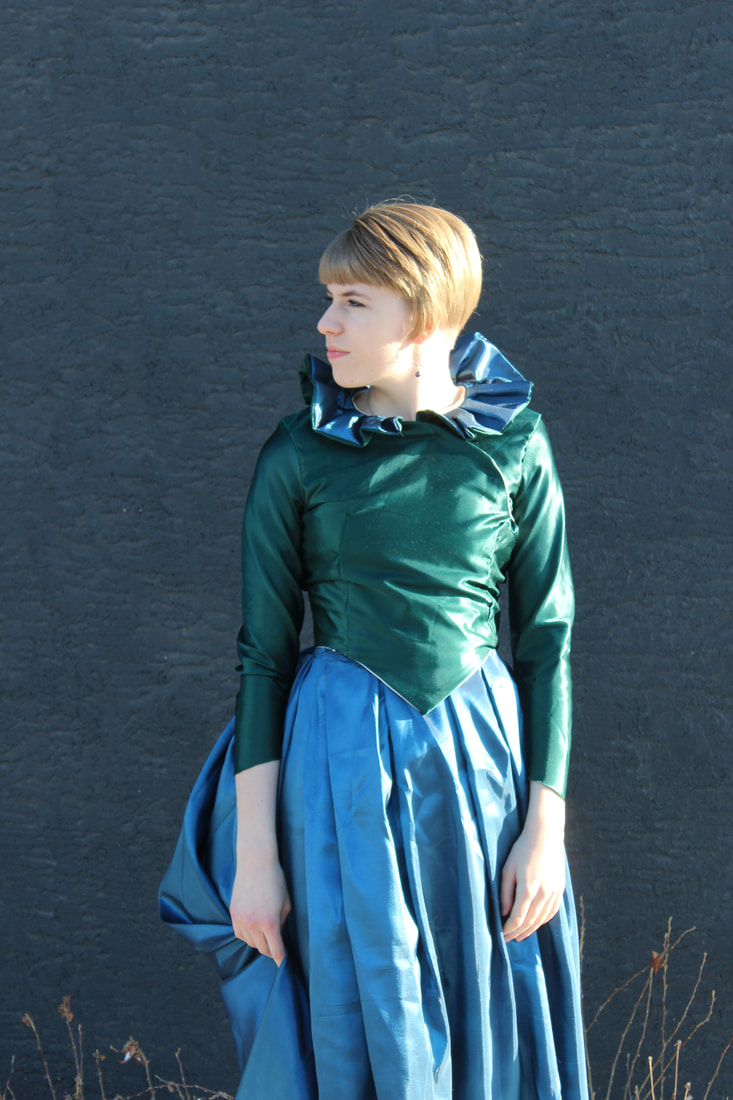
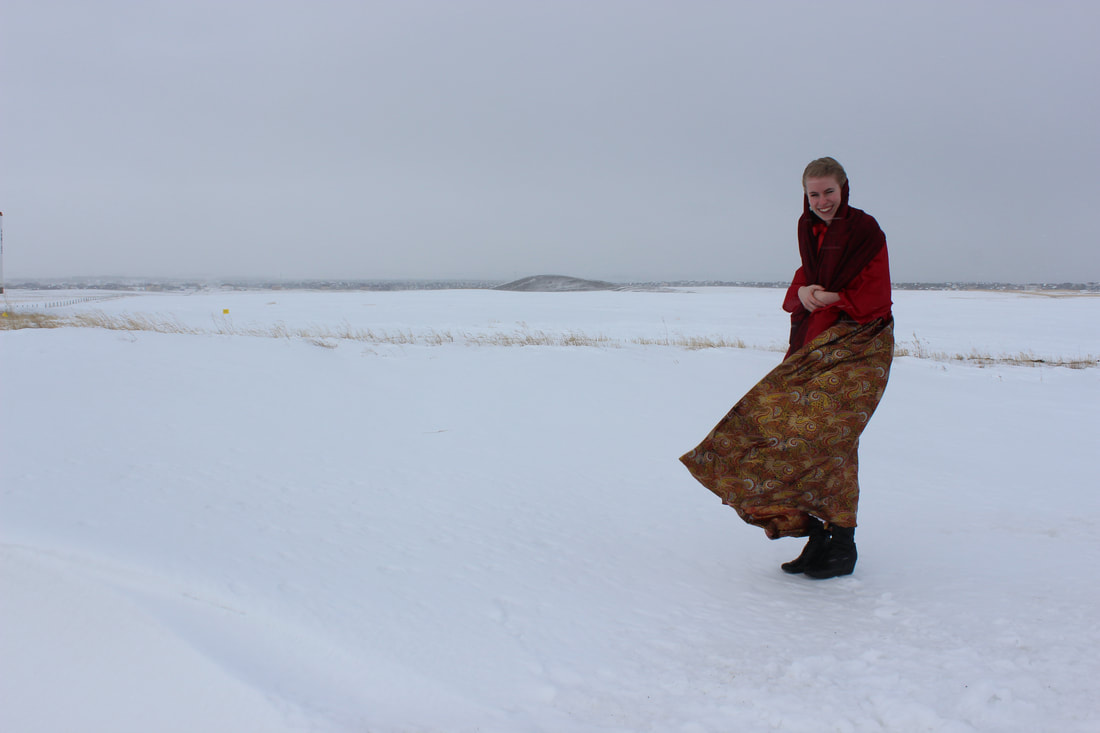
 This dress ended up being a much larger project than it ever was supposed to be. I started designing it a year ago, when I made my red bustle dress. The plan was to make 3 different bustle dresses, each with some modern details. The red one was inspired by Alice in Wonderland, and ended up looking quite Russian (thanks to the blizzard that we did the photo shoot in). This second one was inspired by Long Susan in the BBC series, Ripper Street. I am perfectly aware that the costumes in Ripper Street aren't historically accurate, but I have loved the jewel tones and black lace in them right from the beginning. In my 2018 year in review post, I mentioned that I had started a second bustle dress and it was a goal of mine to finish it this year. Well, I did finally finish it! The poor outfit sat on my To Do list for an entire year, and I had to drag it to university with me, but I finally got the motivation to put together the bodice and hem the skirt this month.  The photo from my 2018 year in review post. At this point the front of the bodice, the collar, and the skirt had all been draped. This dress had a completely different plan for it before I started draping it last year. When I first came up with the collection, this was going to be called the Bug Dress, and it was going to have flowers and bugs on the bustle, which is why I chose the teal and emerald fabrics. I didn't want it to be too obvious, just small details that you would notice if you looked closely. However, once I actually got the fabric and had draped the skirt, I played around with placement and found that I liked the dress plain more. That is when it started to be the Long Susan dress. She often wears jewel tones, and her wardrobe was a huge inspiration for this collection (if you check out my pinterest board for this collection, there are quite a few pictures of her). Long Susan is a proprietress of brothel, which made me think of the most common dark side of the Victorian era- prostitution. This wasn't just a Victorian thing, its been a part of life since the dawn of civilization. What the biggest issue with prostitution (specifically in that era) is the treatment of the people in the field, and also the danger of it. 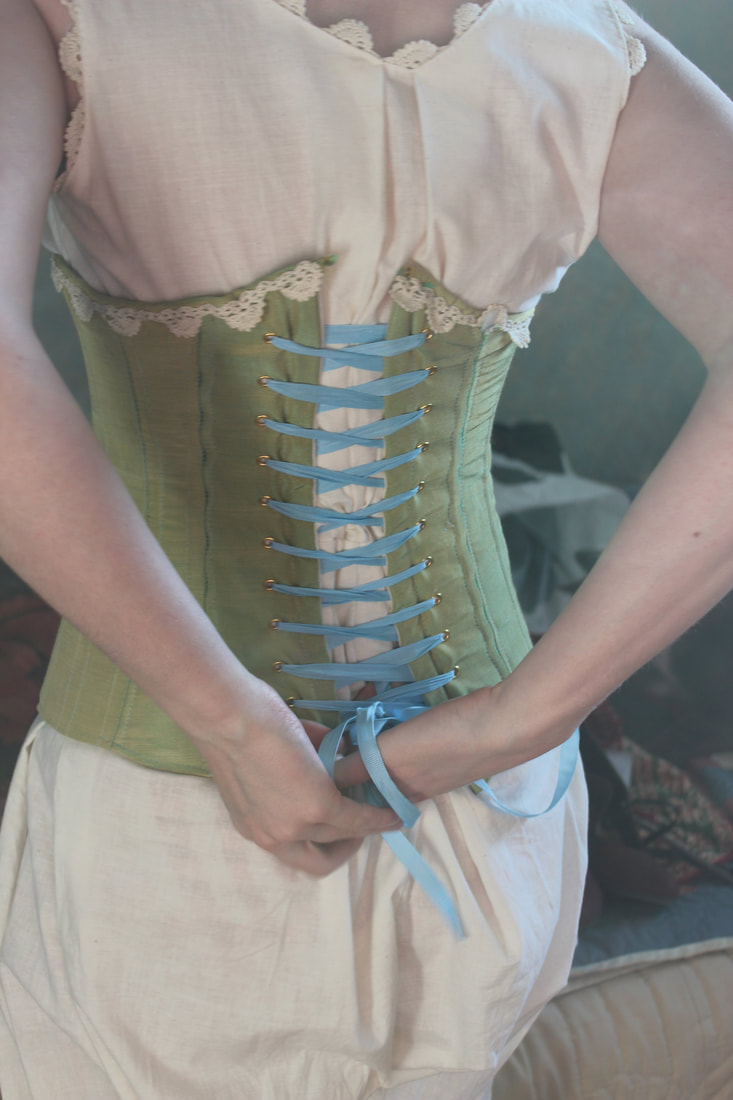 The first layers when getting dressed in the bustle era: my combinations (basically a combined pair of bloomers and chemise, a soft muslin layer to go between the skin and corset), and my taffeta corset that I made a few years ago and desperately needs an update. 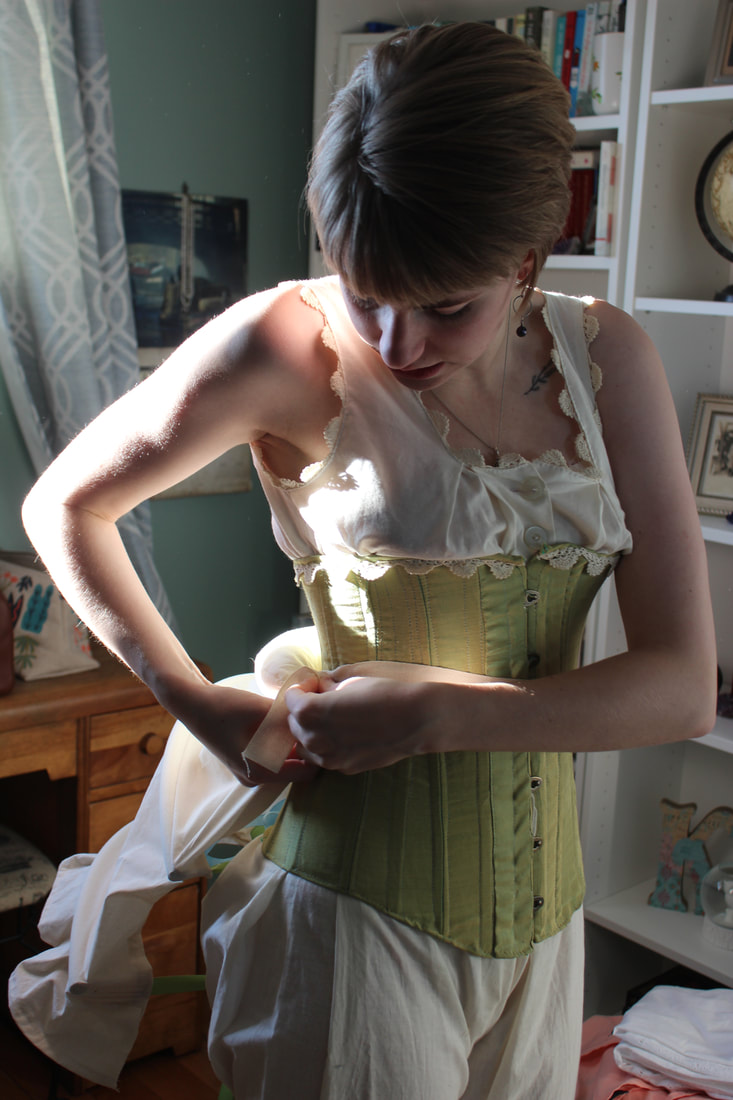 Next: the bustle cage! This is a boned garment that is collapsible for sitting. Mine has a little bum pad at the top to round out the shape. Bustle cages from the 1880's come in many shapes and sizes and can be really stunning 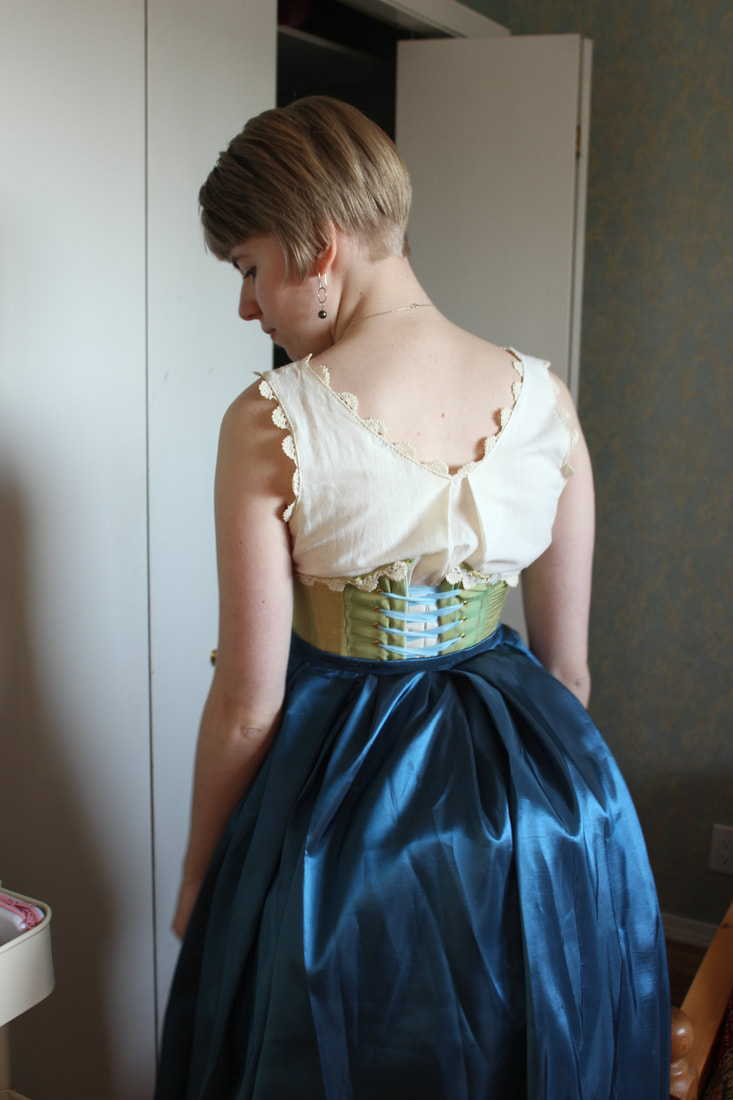 There were the obvious dangers (syphilis and other diseases), but there was also the issue of harassment. Harassment came from the police, men who visited them, people who did not agree with their trade (wives of devoted customers, or people who had different morals). When it comes to the 1880s, there is also Jack the Ripper. Everyone has heard many stories (maybe from Buzzfeed Unsolved, or from books, etc), but when it comes to what actually happened it is difficult to get details that have not been sensationalized. There is also the issue of a very corrupt police force. The police force didn't start until 1829 when Englands Prime Minister Robert Peel with the Metropolitan Police Act. This was the start of the nicknace 'Bobbies', or 'Peelers'. The latter did not stick for as long as the first. There were other police forces before this, but they were the same as the police now- Glasgow had a tax funded force started in 1800. They had many duties which included fire fighting as well as being police officers. Ireland also had a force that started in 1822, which became the Royal Irish Constabulary in 1867.  Next layer after the petticoat: the skirt. This is made out of a cheap but pretty synthetic fiber. It makes the loveliest swishing sound when walking, but it's an awful fabric to work with. 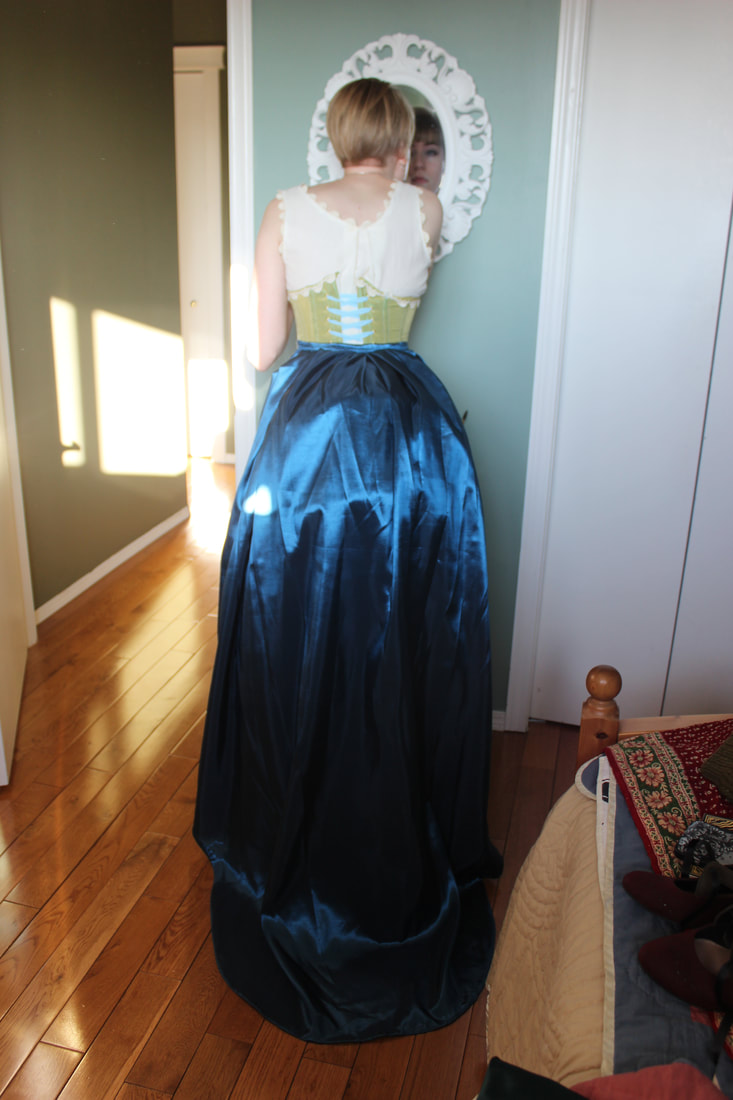 The skirt is shaped so that the front is a bit shorter for ease of walking and the back extends into a train. When the Metropolitan police were set up in London, there were 17 divisions controlled by 4 inspectors and 144 constables. The headquarters was Scotland Yard. Most counties however kept their Parish Constable, since the police were widely distrusted for a long time. It wasn't until 1839 that the Rural Constabulary Act came in and forced the English counties to have a paid police force. Though the force was organized, there was still not one style of policing that was used throughout the country. In 1855 there were only 12 000 policemen in all of England and Wales. The force was not government regulated until 1856. The CID (Criminal Investigation Department) was created later, and police detectives were brought in in 1878. Detectives relationship with journalists is what eventually got the masses to accept them as necessary and not spies, as they were originally thought to be. The Jack the Ripper case caused huge problems with the police force, since it turned people against the police. 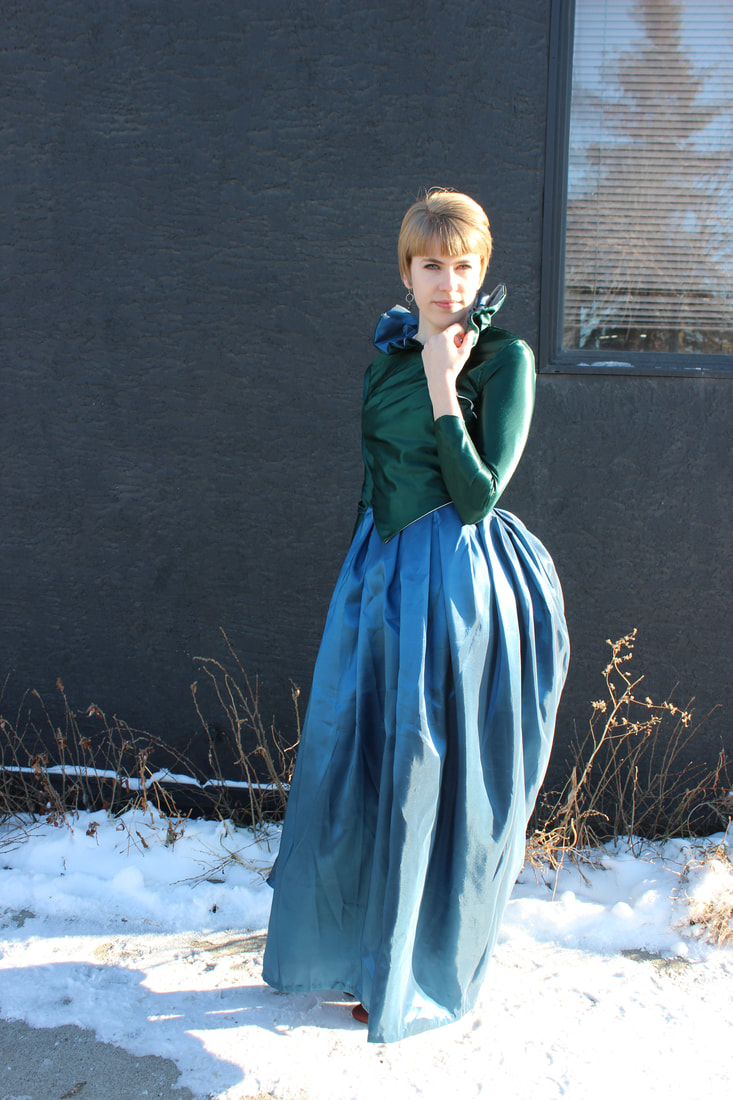 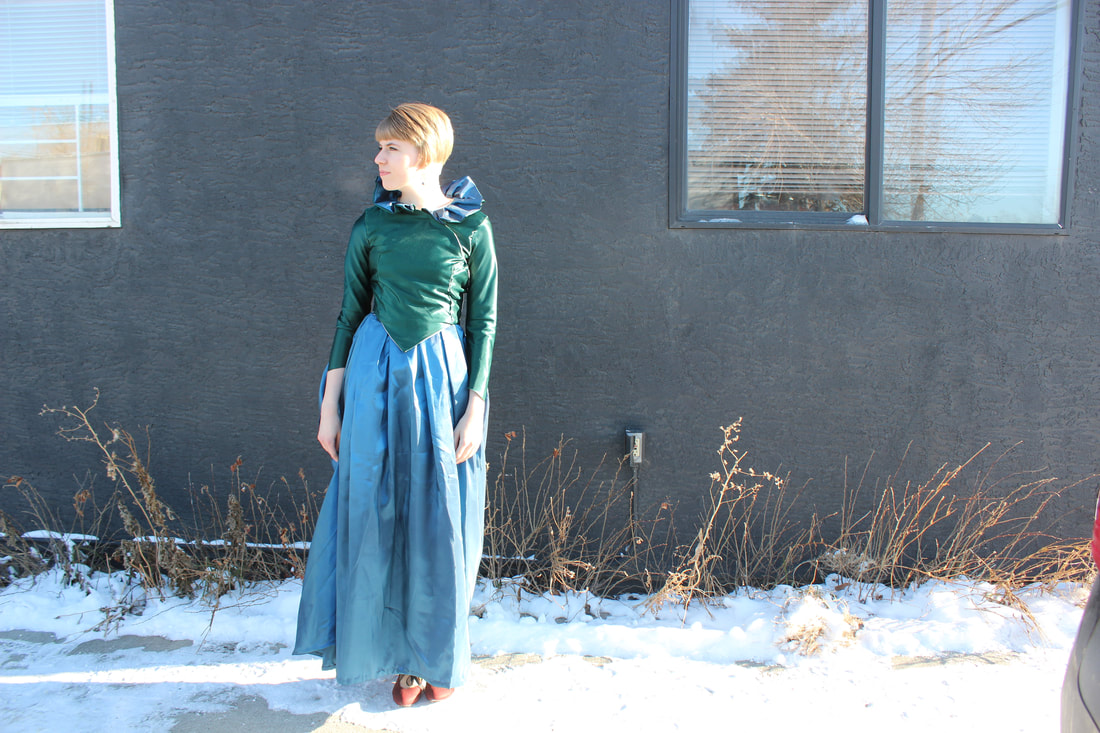 Those who have seen Ripper Street will know Edmund Reid. Inspector Edmund Reid of H Division was a real person, who was in charge of H Division's CID. He rose quickly in the ranks of the police force, and ended up being moved to H Division to replace Frederick Abberline in 1887. Abberline had been moved to Scotland Yard, but later returned to take charge of the murder investigation for the Ripper. Before Abberline came back, Reid lead the inquiries of the first two known victims- Emma Elizabeth Smith and Martha Tabram. He was present for four more of the investigations that were thought to have been done my the Ripper and also for the Pinchin Street Torso case. While Abberline is often known as the lead for the investigation, it turns out that Reid was just as involved. No matter who investigated the cases, no person was found to be the Ripper. This is a case that attracts many conspiracy theorists, but when it comes to getting actual facts, it can be difficult. What is known is that there are five murders attributed to one person. Each of the victims were prostitutes, and each were horribly mutilated except for one (Elizabeth Stride). There are other cases that are thought to have been done by the same person as well, but it is not confirmed. Martha Tabram is often thought to have been the first one, but Annie Chapman is the official first victim. While there is much speculation about the psychology behind the crimes, there is nothing substantial to most ideas, since there is so little information behind it. This is the most famous case of prostitutes being victims of crimes, but it is far from being the only one. What makes these crimes so terrible (apart from the obvious) is how people have used and sensationalized them to turn them into a marketing ploy. Whitechapel (which once was the worst part of the city) is a shrine to the murders, with Jack the Ripper tours and memorabilia. It is forgotten, or sometimes ignored to make such topics easier, that the victims were people, and that they had gone through horrible things. Prostitutes at the time did not just have to worry about a serial killer (which they did), but also about brutality against them quite often. Women who had a 'mistress', someone who owned a brothel, were actually luckier than those who just sold themselves on the streets. They had a home and a room to sleep in, as well as food. They also had people who would look out for them, since many brothels had some form of guards to keep an eye on rowdy customers. 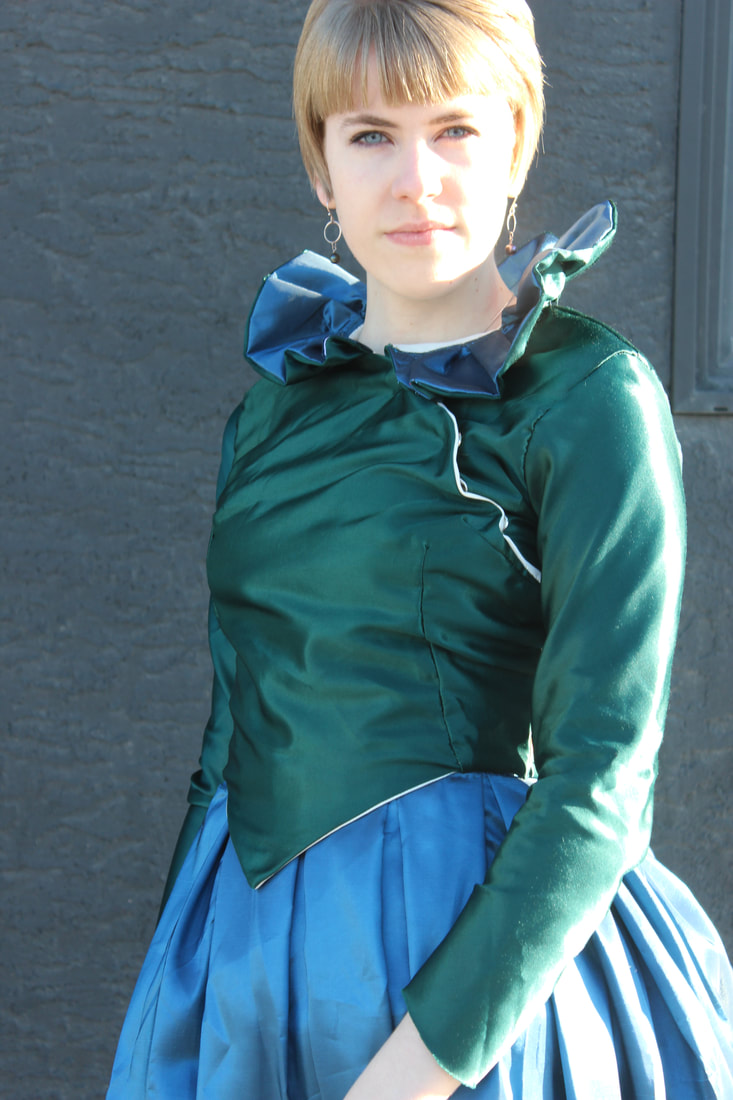 All photos taken outside of nvrlnd (check out my last post for details about that, and the tintype that I got while wearing this dress!) 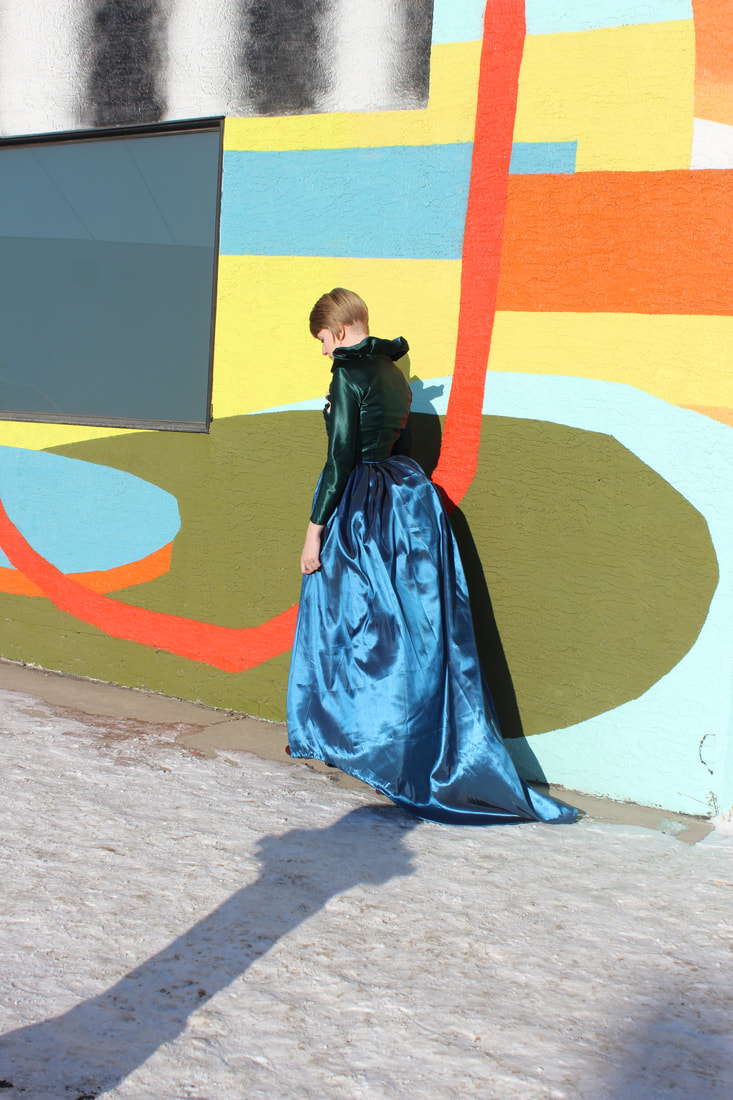 Another side of this dark part of history that is swept under the rug is how many very young people were either sold or taken in by such houses. Male or female (we do like to forget that there were male prostitutes then, but they had to deal with just as much disease and brutality that the women did), having a young person as a part of the household was very common. This also brings up another form of prostitution, however not a consenting version of it. Kidnapping people, normally girls, to sell or bring to other places (sex trafficking, something that still happens), reached a fever pitch in the 1880s. In 1885 and 1912 the beginnings of modern anti-trafficking regulations were created. The regulation from 1885 was created in response to a rally in Hyde Park in the August of that year that demanded the outlaw of white slavery (the term 'traffic' only replaced 'white salvery' in 1921), and for the age of consent of girls be raised. The act made it an offence to kidnap “any girl or woman under twenty-one years of age, not being a common prostitute, or of known immoral character, to have unlawful carnal connexion” (Criminal Law Ammendment Act of 1885). By adding in that they must not be a prostitute or have immoral character, it excluded any woman who might be seen as promiscuous. This put up a divide between a victim and a prostitute, though both would be victims if they were taken by a trafficker. This is not the only law that set aside the rights of people, especially women, who were in the business or seen as not respectable. These laws also made immigrants seem like the 'bad guys', furthering the racism that Whitechapel (and all of the UK, US, Canada, etc) already struggled with. 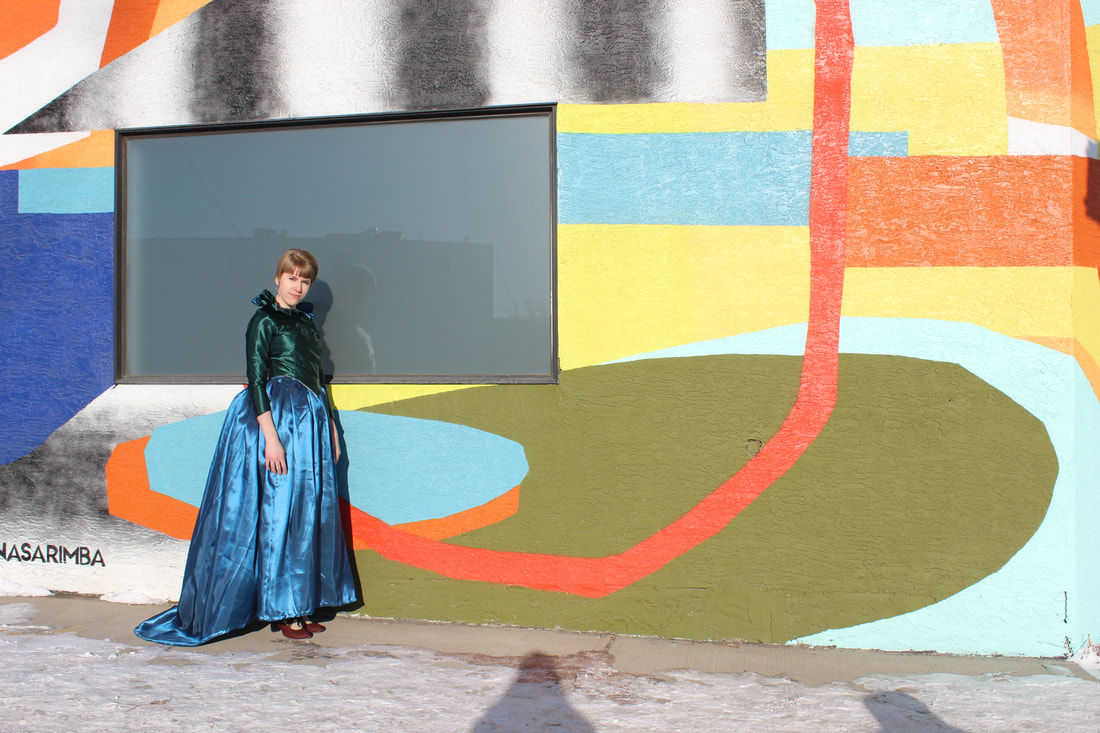 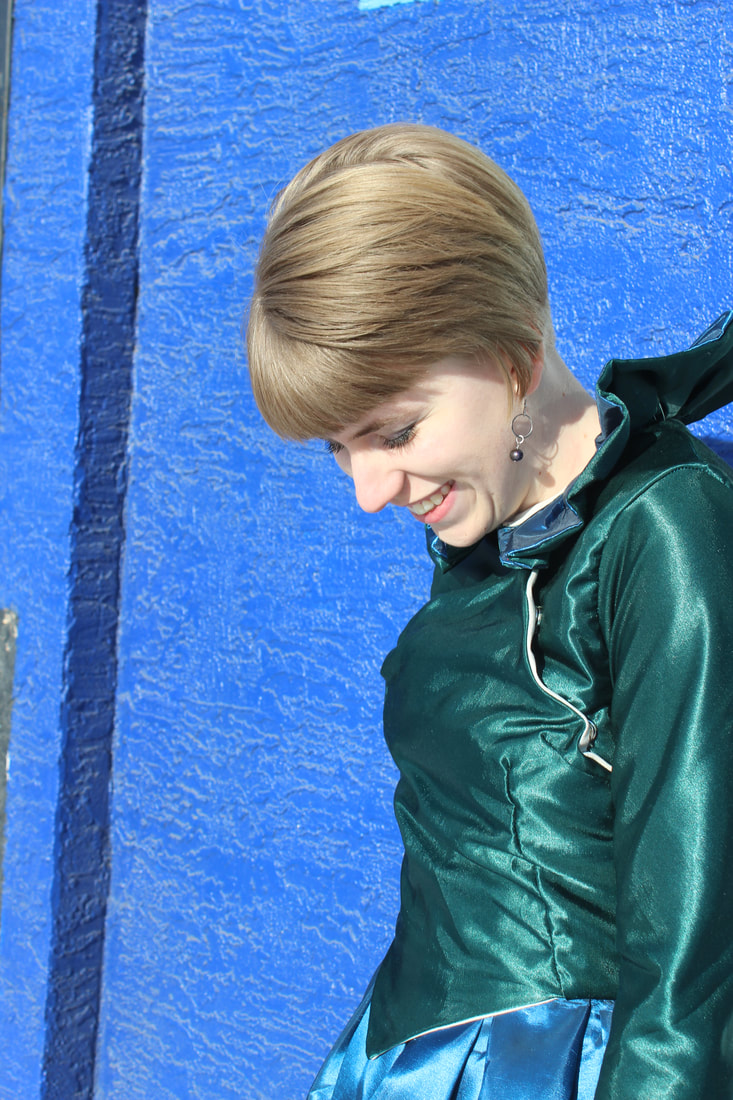 If you want to read or see more about some of the things I have talked about here, I do have many recommendations of both fiction and non-fiction. The book-turned-tv show The Alienist offers up a fascinating and not well known view of male prostitutes in New York, based on a serial killer (that sounds very much like Jack the Ripper) as well as the beginnings of females in the police force. I would recommend the book, but not the show. Obviously I recommend Ripper Street (I know, I talk about it way too much, but the costumes did inspire much of this collection!). The Murdoch Mystery books by Maureen Jennings are also a well done look at the depravity and dark side the the late 1800's. These ones are set in Toronto, and much darker and more based on history than the TV show that we Canadians know and love (though the show is great too, I've been watching it since middle school and I still love it). Out of the Easy by Rita Sepetys is a beautifully done book set in the 1950s in New Orleans with an interesting perspective on prostitution (the main characters mother is a prostitute). If you are more interested in the history of the police force, the BBC has a really great documentary that is available on youtube here that talks about the history of Scotland Yard. There is also The History of the British Police Force documentary available on youtube which I have seen part of and seems very interesting. When it comes to Jack the Ripper specifically, there are tons of books and such about it, although most will not give you very much honest information. I have found this page and this page which have some interesting facts that I do trust, but I would recommend being careful and discerning when researching the cases on the internet since there is a lot of false information. Let me know if you have any documentaries, TV shows, books, or movies that you think I would be interested in! 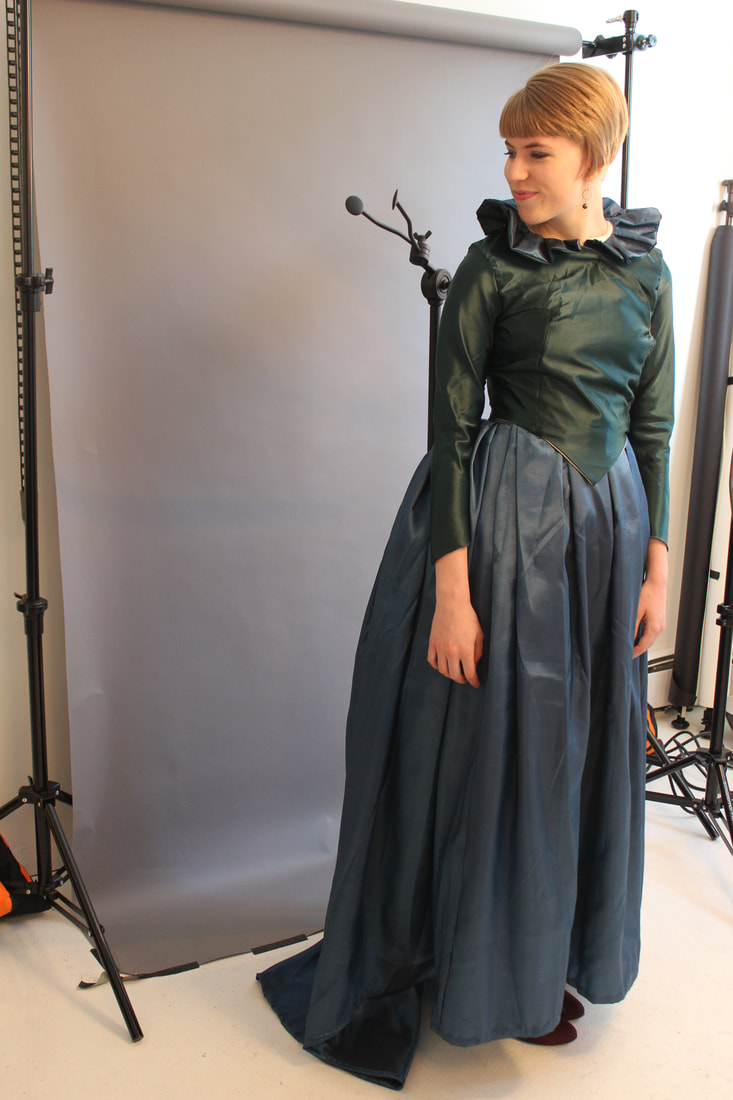 Inside the studio before getting a tintype made! Anyway, thank you for sticking around through the accidental essay that I have written about Whitechapel in the Victorian era! ~K 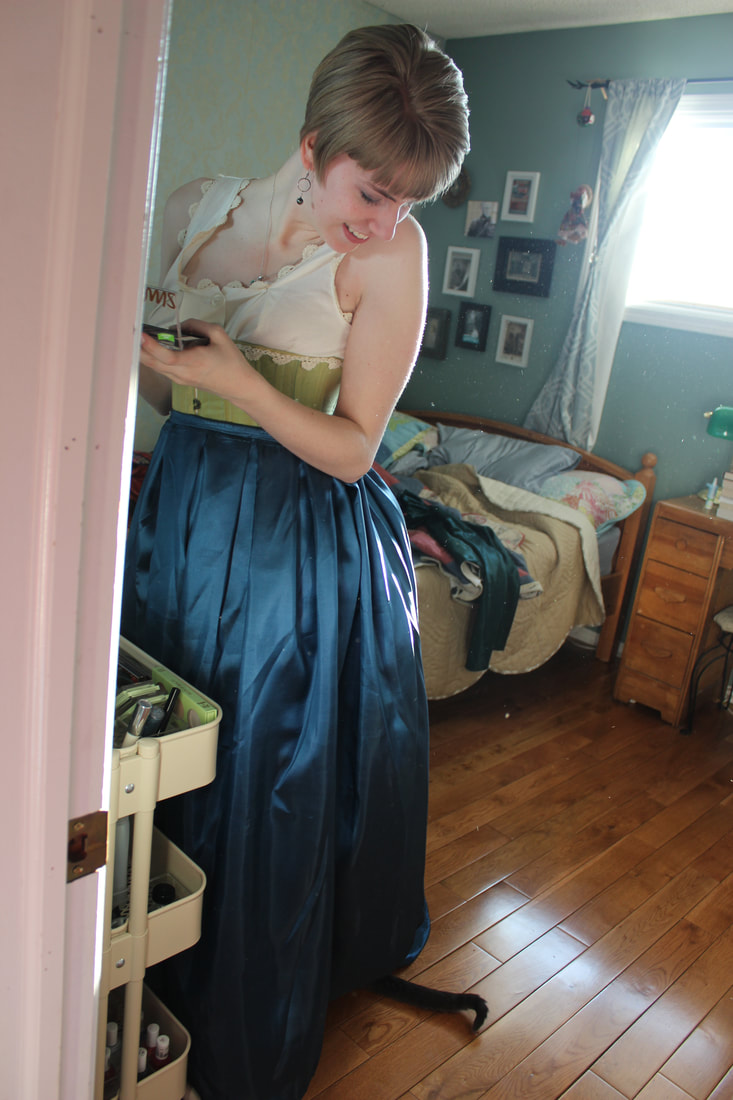 My cat really enjoys bustle dresses and often crawls under them if I stand in one spot for too long
0 Comments
Over the past few days I have been spending all of my time working on a new pair of 18th century stays to go underneath the Robe a la Francaise. I used the American Duchess stays pattern as a tentative base, then altered it with the help of extant garments, other historical costumers advice, and a little imagination. Since this project is going to be entirely hand sewn and will take quite a while to complete, I thought that I would make a bit of a step-by-step of how I created them. Please don't take this as a guide to sew your own though, since I'm not focusing on historical accuracy. I just want a mostly accurate shape and a pretty garment at the end of this.  A look at the paper pattern piece of the center front panel  The two back panels of the stays After drafting the pattern on paper and adjusting it a million times to get a better fit (okay, it wasn't a million, but it sure felt like it), I cut out each section for three layers: two inside layers (where the boning will be sandwiched between) and the top silk layer. I then copied my boning pattern onto the inside layer so that I can follow that with my stitching. The boning pattern took me nearly as long as actually drafting the shape of the stays, just because I wanted to make sure that it was both comfortable and efficient. I also wanted to follow a historical example, since seamstresses through history always knew best. It can be pretty difficult to find clear photos of extant stays, but I used this one from the V&A as inspiration, since it doesn't have a front and back lacing. I cut out my front panel as just one piece, so it won't have the option of front lacing.   After all of the boning channels are drawn onto one of the inside layers, I pad stitched the layers together. Pad stitching is a type of tailors stitch that bastes two layers together (this is how you attach a non-fusible interfacing). I did this quickly and a bit sloppily, since I just need it to make sure that the layers don't slip while I'm stitching the channels. The sections especially needed it because of how slippery the silk is. I then ironed everything before I started any of the real stitching.   The boning channels in one panel entirely sewn up, but with the pad stitching still in. I will be removing that in a while. Now it is finally time to start on the boning channels! This could be a very tedious process since it is just a running stitch down all of the lines you drew for your boning channels, but I actually really enjoy the process. So far I've watched Crimson Peak, some Ripper Street, and Marie Antoinette while working on my sewing!  The finished panel from the inside (this will be covered with lining near the end of construction) Before I sign off, I thought that I would talk through a bit of my thought process behind the decisions I've made so far in the process. To begin with, I am including the top layer while sewing the boning channels because I want to see the stitching from the front. I have seen some more decorative stays where the top layer was sewn separately and then attached after the bones were put in, but I love the texture of the stitches and want to be able to see that once the stays are done. Another thing that I would like to mention is my choice of silk that makes up the top layer. I am very aware that it isn't historically accurate (though it does have a vintage flair to it). I decided on this one for a few reasons: one is that I only had a meter of it, so it was the perfect amount for a project like this. Second, I want the final piece to have a bit of a modern Marie Antoinette style, and I thought that this would be a great way to achieve that. Thirdly, I just really like the colour and how it looks! ~K
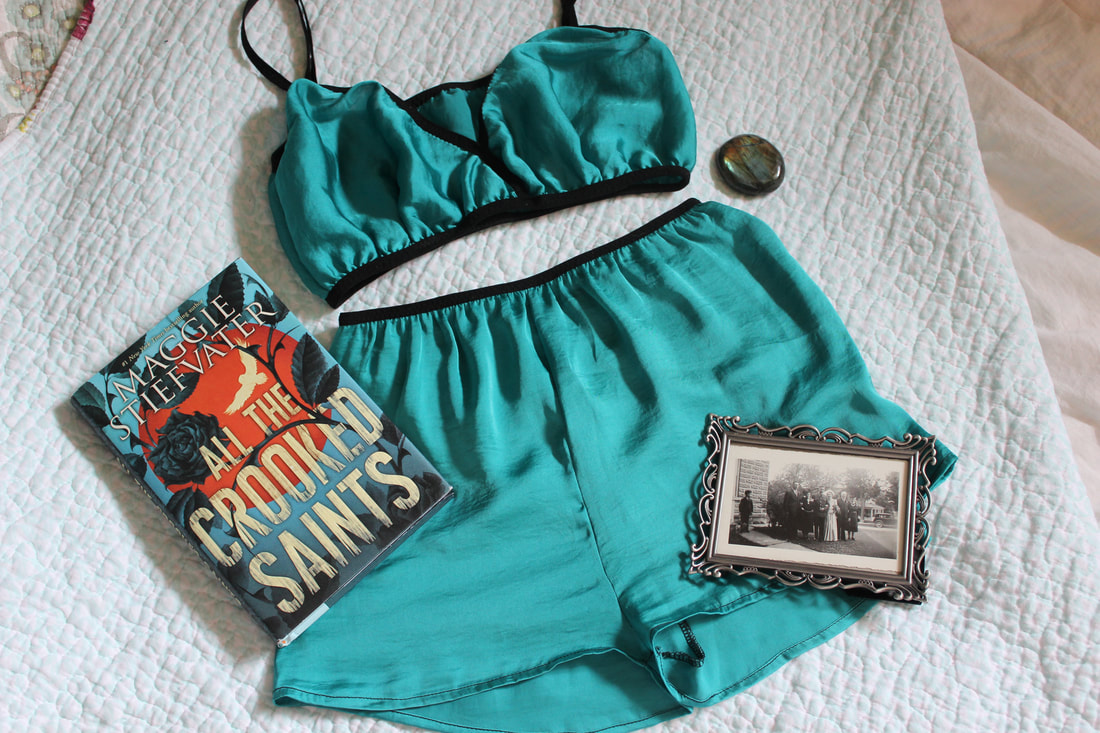  I was lucky enough to get a message about collaborating from LAL Couture, a company that makes custom sized and handmade lingerie. It was very difficult to chose which sets I wanted (all of them are stunning, and have such a vintage vibe to them!), and I am so thrilled with the two that I picked. The first set that I got is the Diane Pajama Set, and the second set is the Susan Lingerie Set    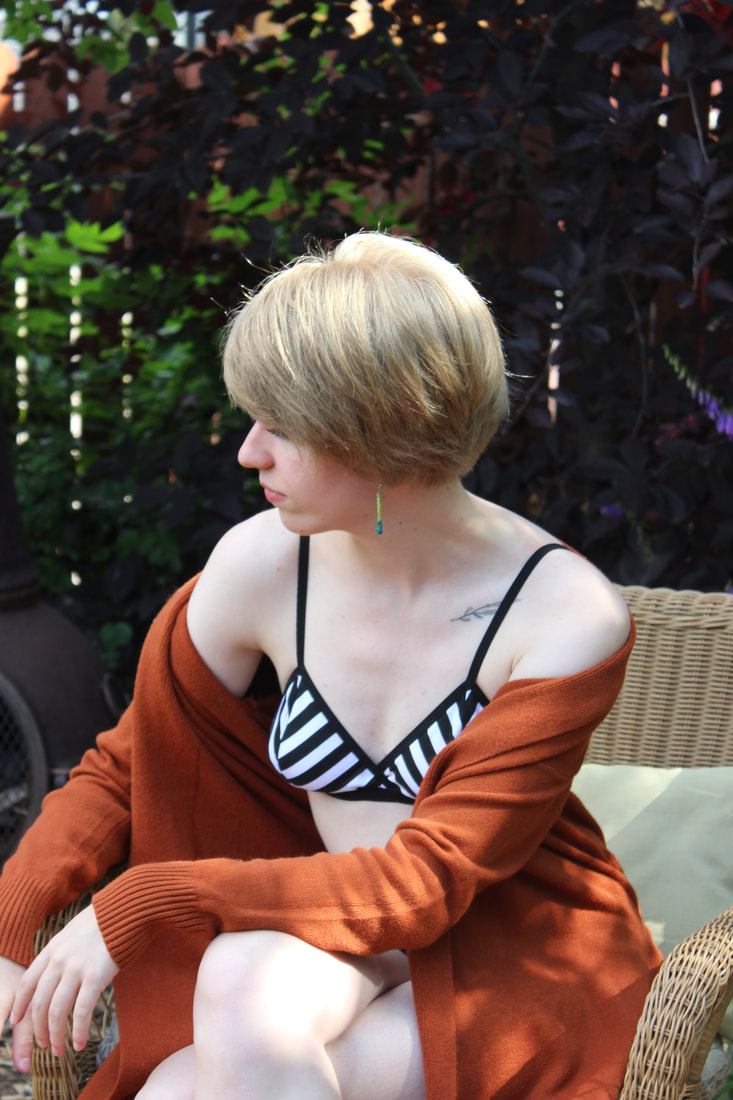 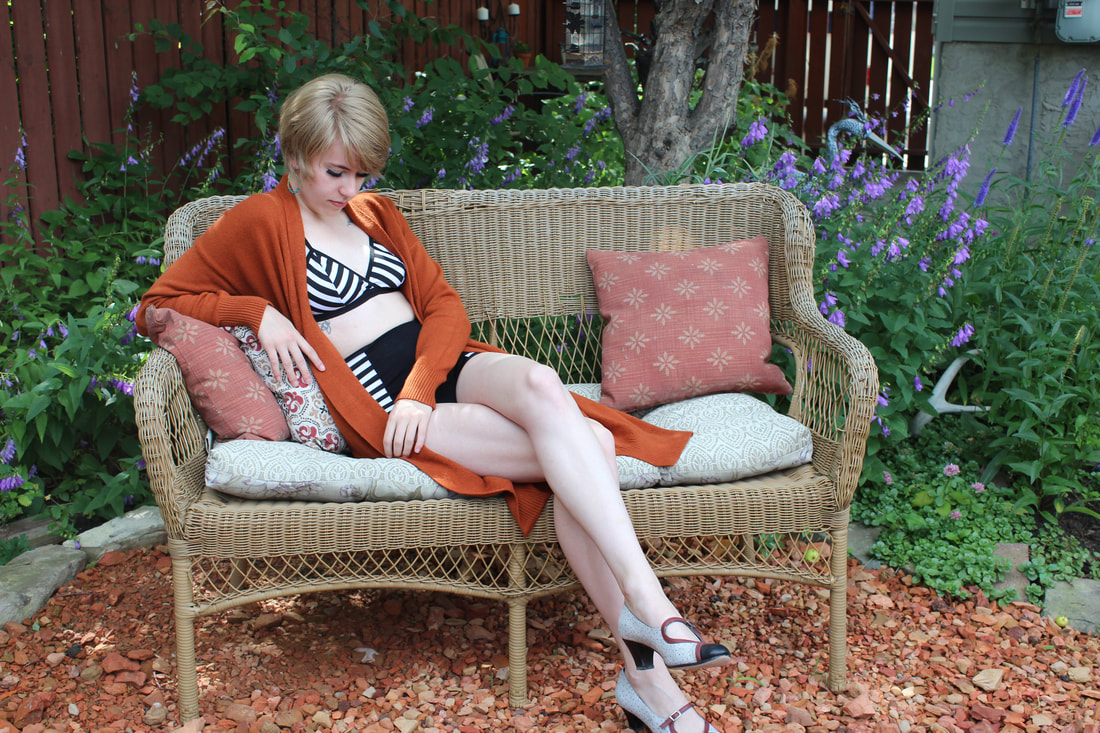 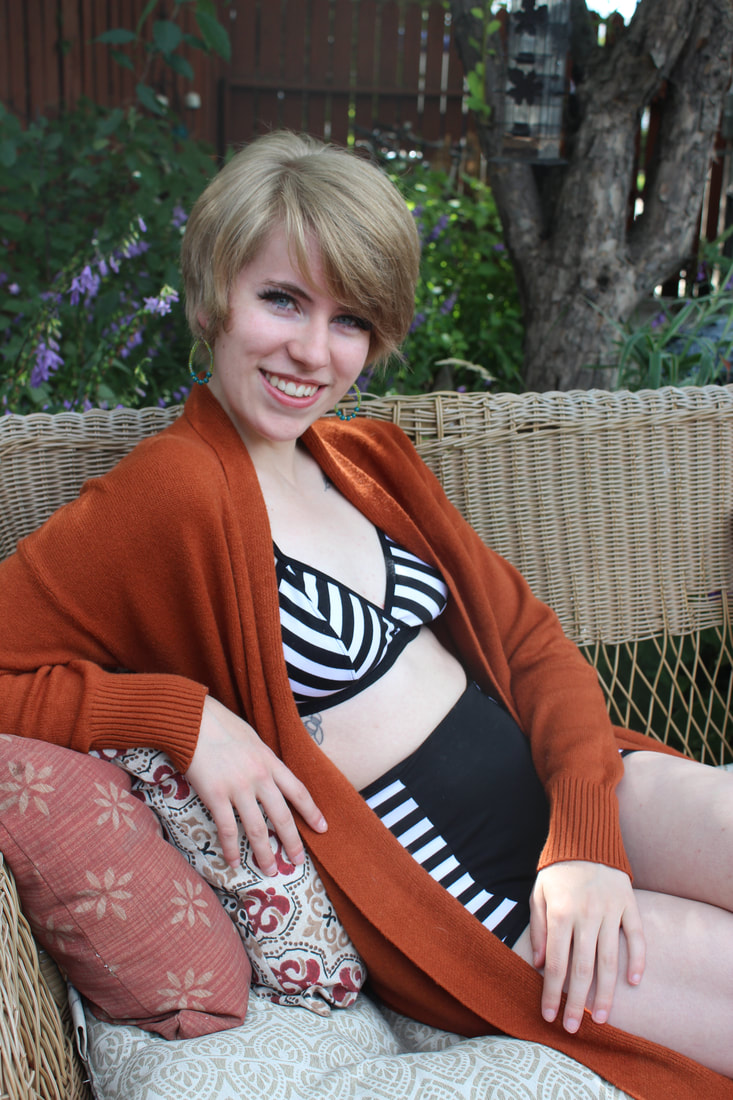 It was so exciting to get these in the mail, and they are so beautifully made! The materials that were used are high quality and feel amazing on the skin. I also had so much fun getting photos of them, since they both have such a retro look to them. 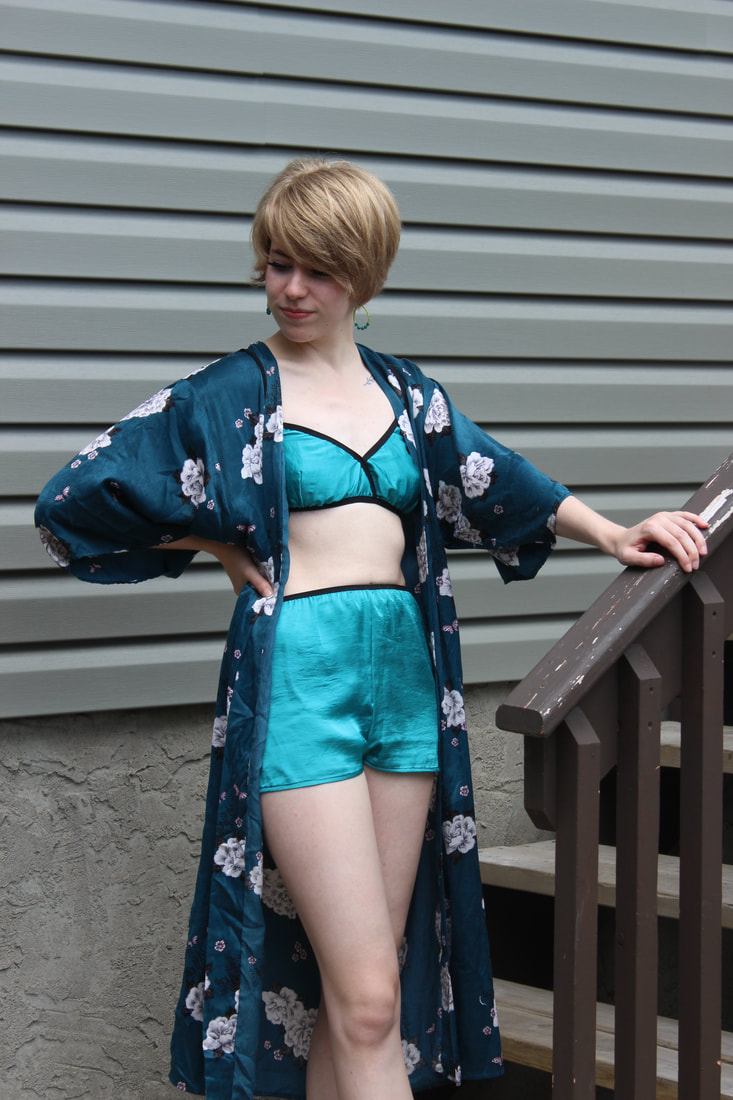 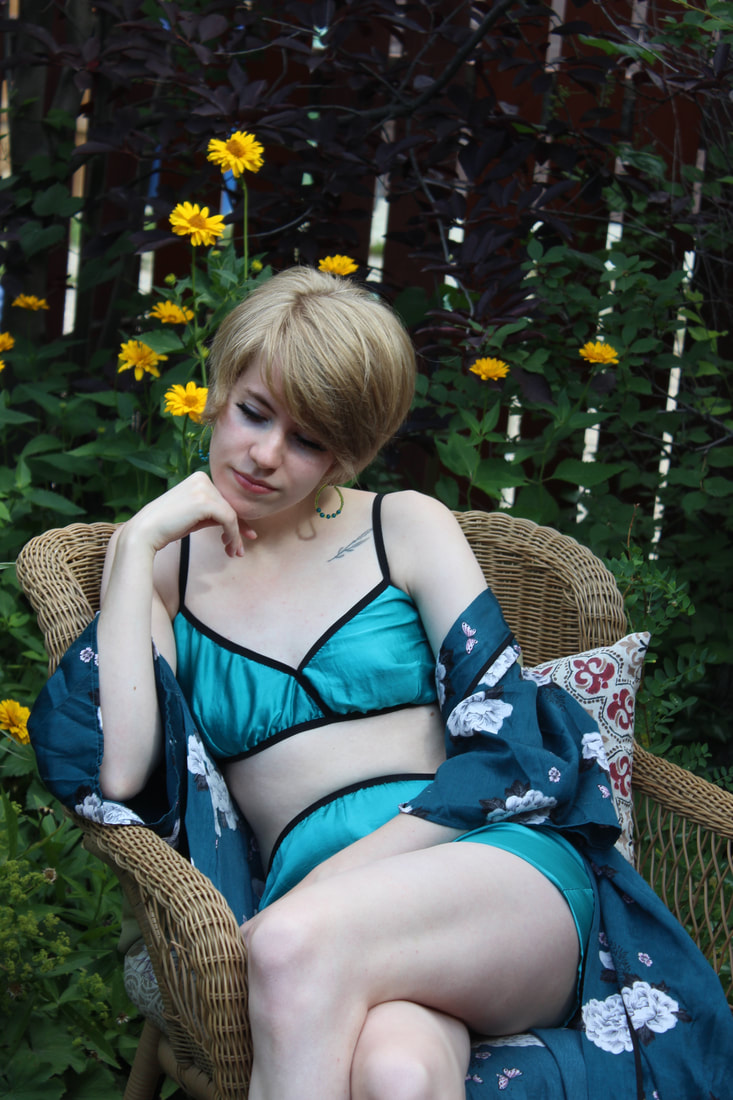 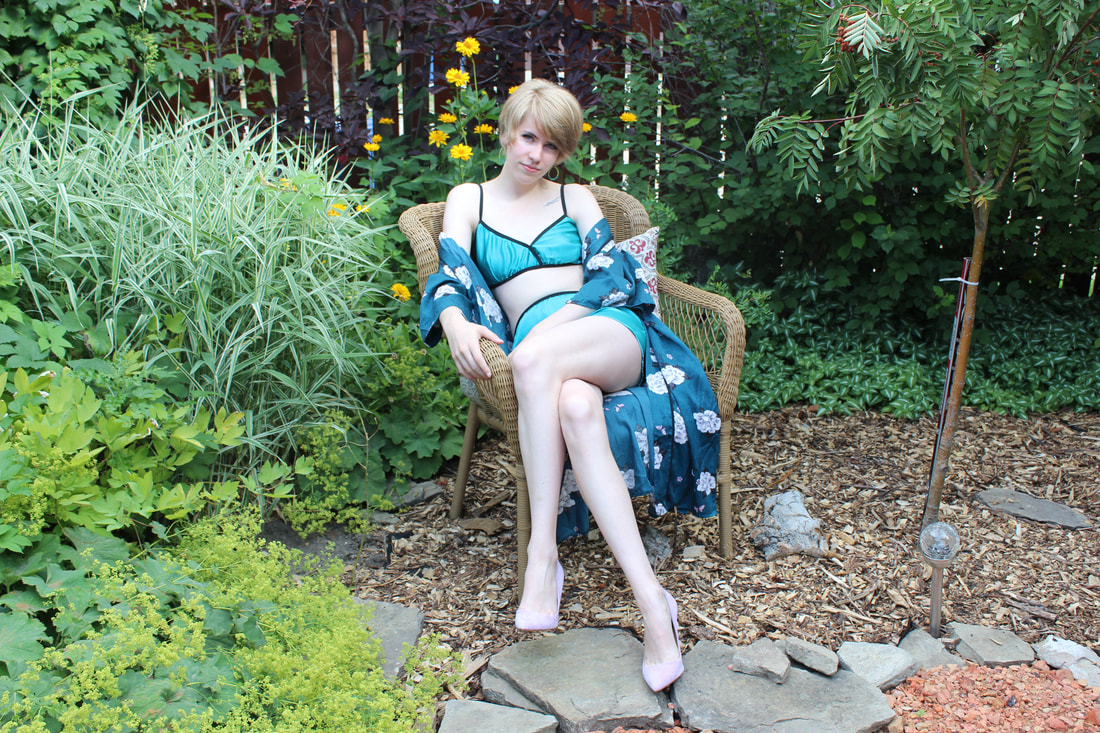 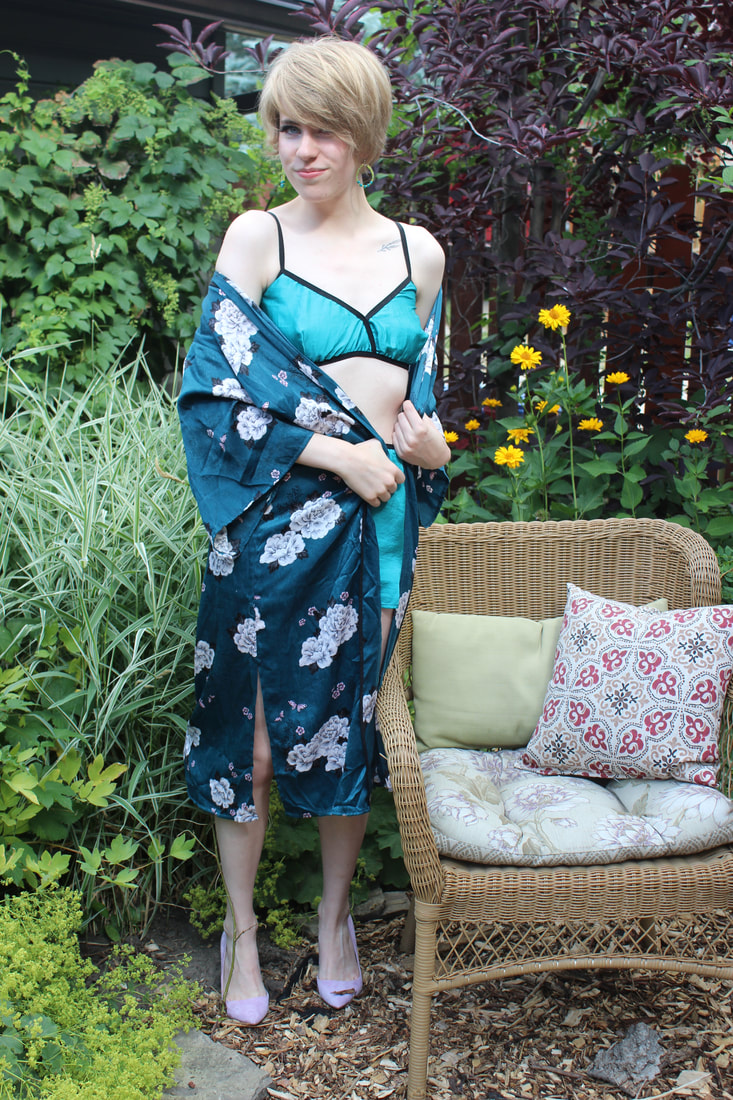 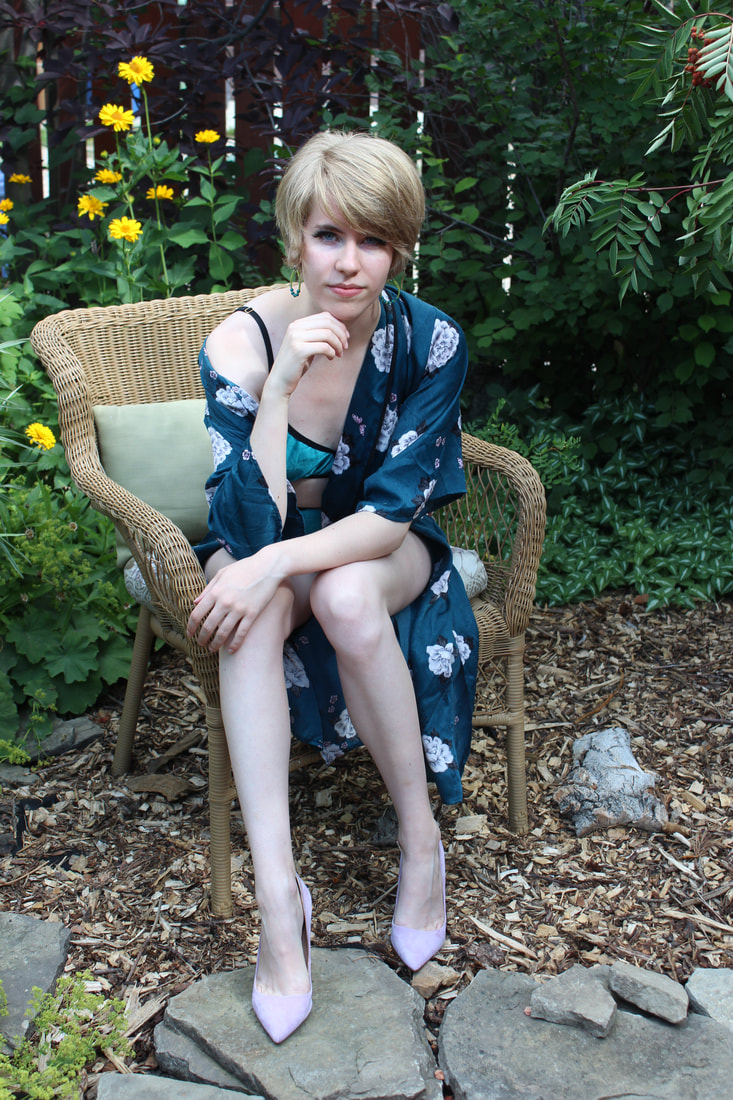 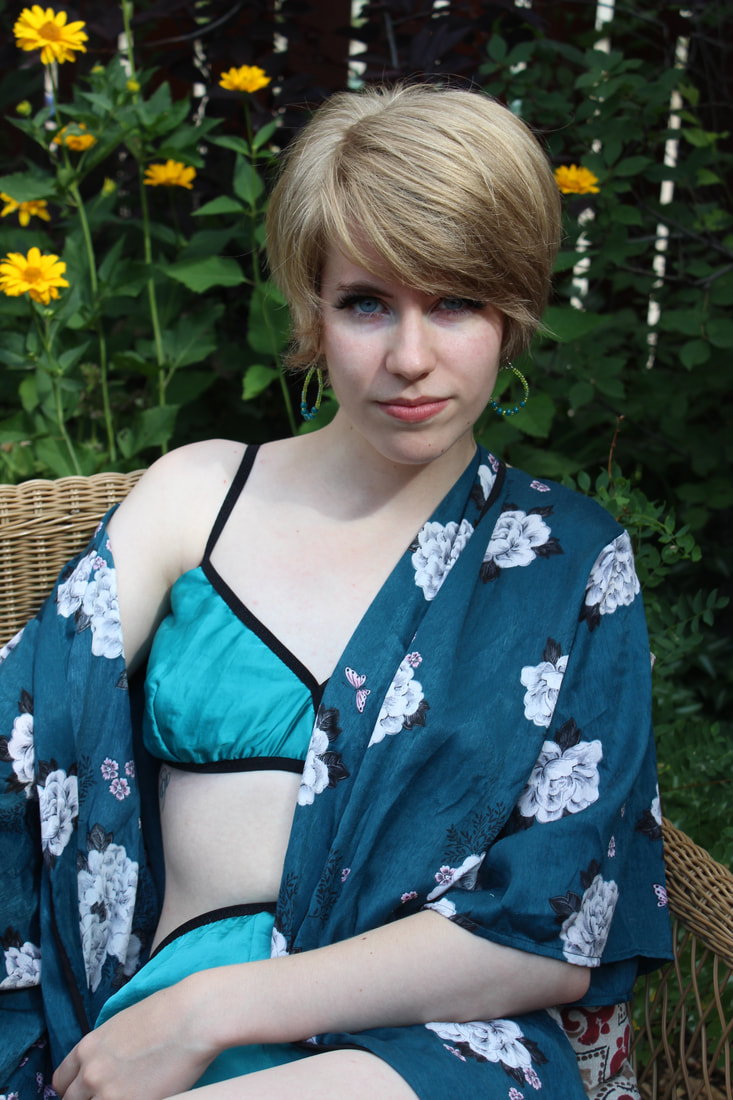 ~K
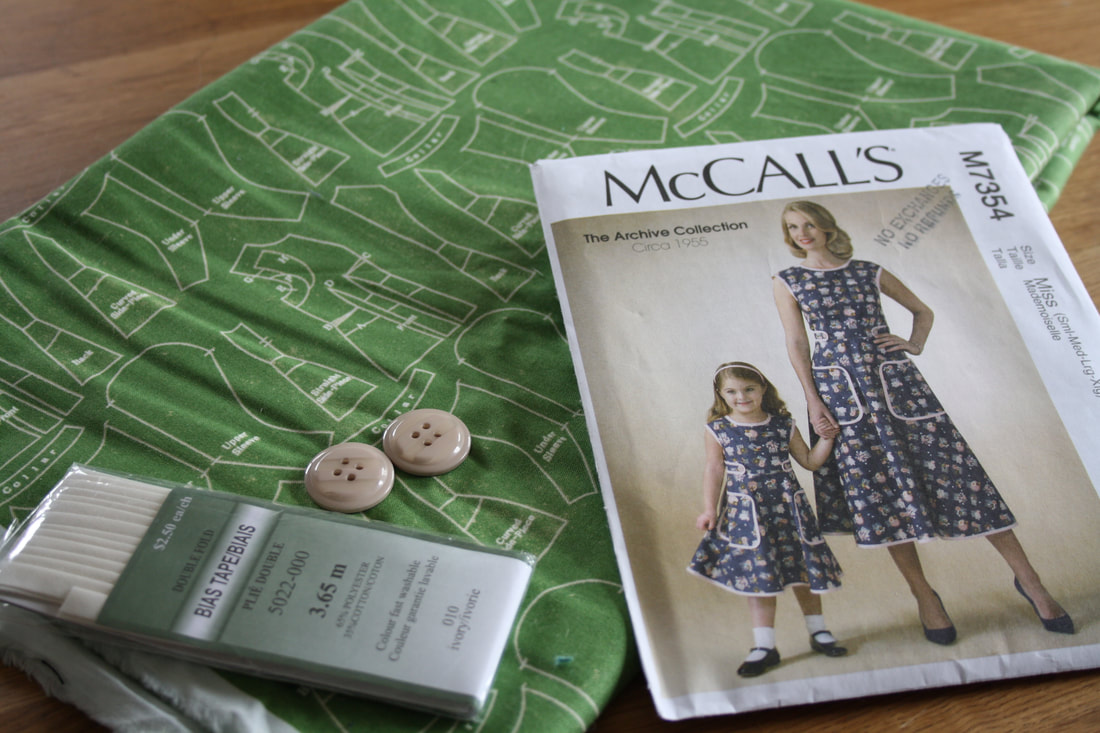 I recently started school, so I have been a little bit busy. While I am loving school, and learning tons of new and helpful things, it has been quite stressful getting started so the blog has been paused. Now that MakeFashion is done, and I have gotten used to my new schedule, I have lots of plans for the winter season! 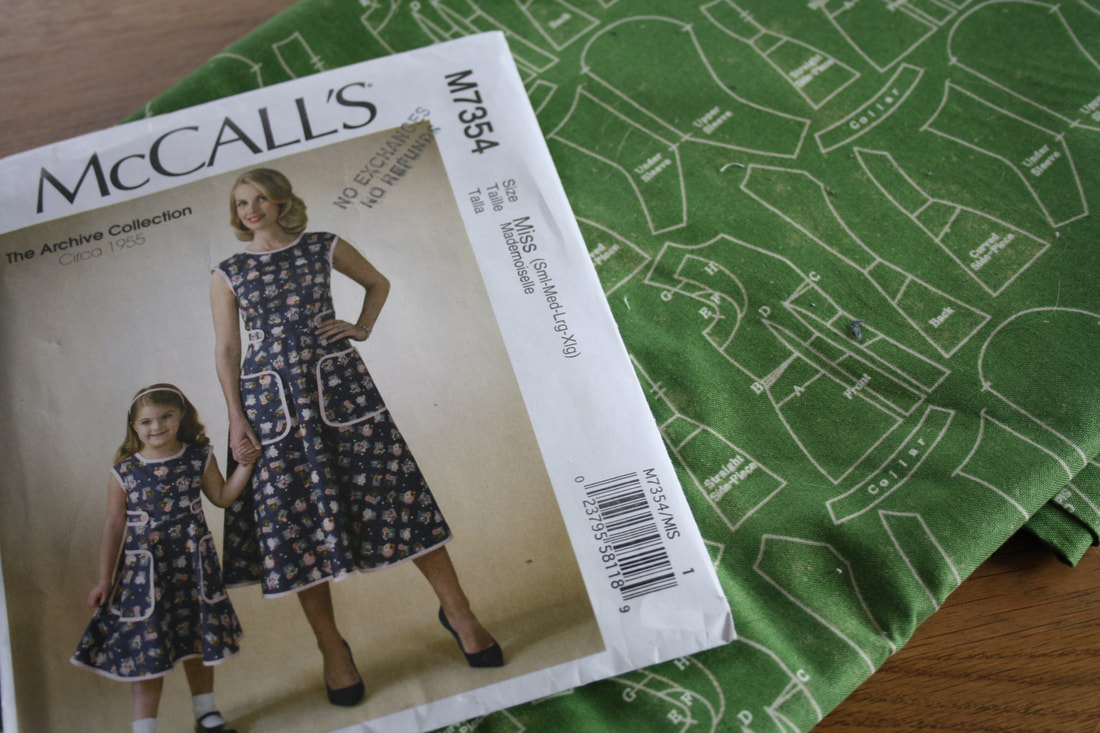 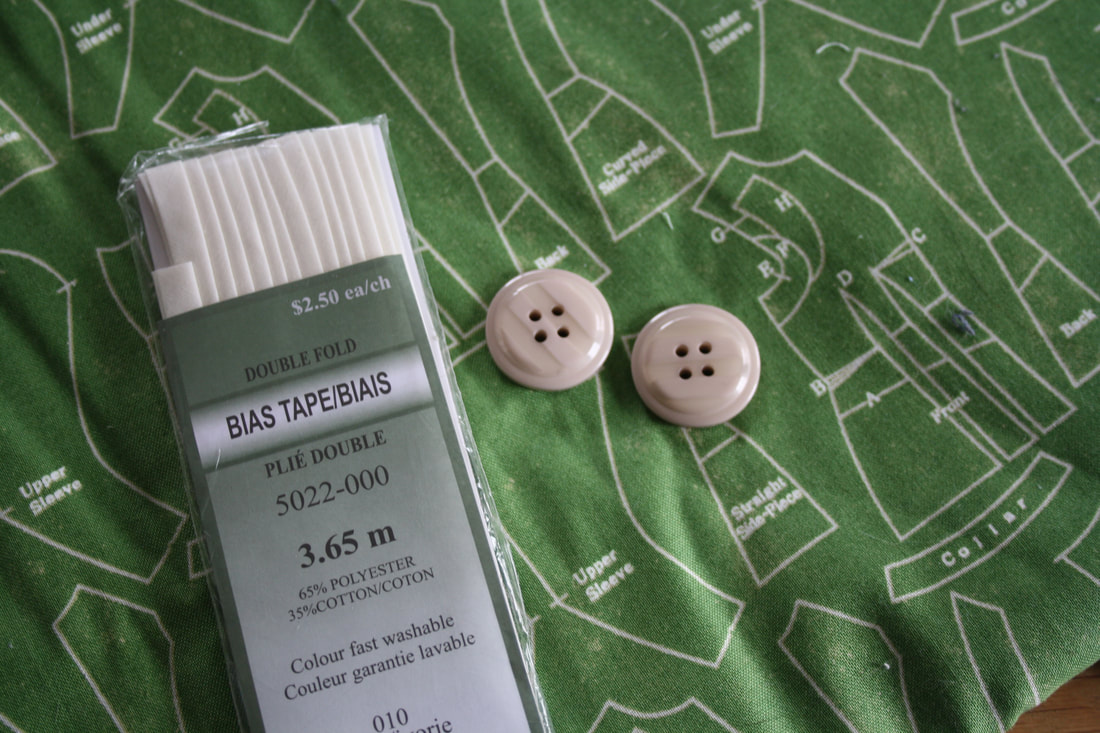 After a trip to Fabricland a while ago, I am filled with inspiration! The first thing on my list is something that I have been wanting to make for a long time- a kitchy, 1950's wrap dress. I picked up the McCalls pattern M7354, and a fabulous printed cotton. I will be binding the dress with cream bias tape, and picking out two cream buttons to finish it off. 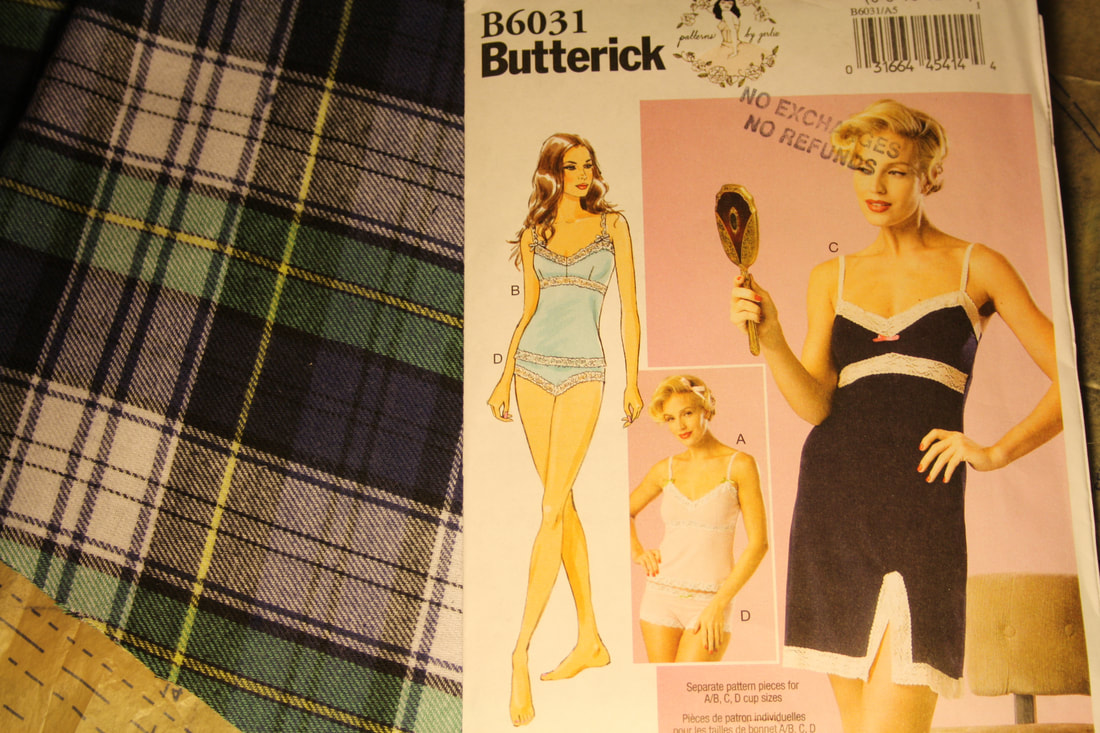 The second pattern that I picked up is a pattern that I have admired for a very long time, and now that I am confident enough in my sewing skills I am ready to make it! I am going to do a trial run with a plaid flannel to make myself a night gown, and then I will make myself a few slips to go underneath my dresses.  I am so excited to make the wrap top out of an anatomical heart print I have always been a huge fan of Patterns by Gertie, and I have used a few of her patterns before, so I did not hesitate to get a few more of her patterns! The first one here is a skirt and blouse pattern. I am making the skirt out of some left over wool from a 1940s styled dress, and I haven't decided what to make the shirt out of quite yet. I also got a stunning boat neckline dress pattern with a V back. This dress can be made as an A-line or as a pencil dress, and I am thinking of making the pencil version first. I may make it out of some left over wool from my Bomb Girl Trousers, but that is yet to be decided! I have so many different fabrics that I think it woulds be fabulous in. Another Gertie pattern that I grabbed is for petticoats! This is thrilling, since I have been wanting to make myself a petticoat or two for ages. The more interested I get in 1950s fashion, the more that I need (okay, maybe not need... but really want!) a petticoat to underneath all of the full skirts that I have. The last one I am extremely excited for (okay, I am excited for them all, but this one is pretty good). It is a Sabrina style dress with a pencil skirt and full back. I am planning on making this out of a burgundy silk dupioni. I was originally saving this dupioni for a natural form era dress inspired by Crimson Peak. I still would like to make a dress like that, but it will be out of a different fabric.  I won't be using this netting for the petticoat (although that would be pretty fabulous), but I think I will use a turquoise netting  The boat neck dress with V back has options for a circle skirt or a pencil skirt 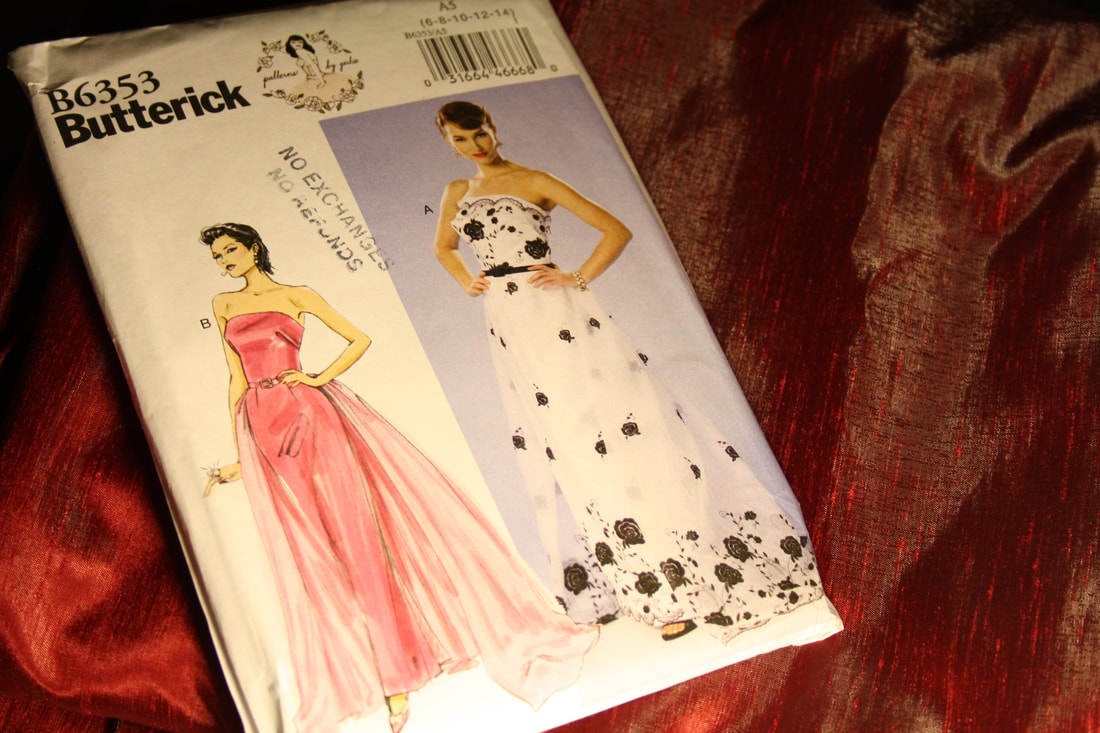 I am so excited to make this Sabrina styled dress! The last pattern that I picked up is the 1890s pattern from Angela Clayton! I absolutely love her blog and youtube channel, and I was so excited when her first pattern came out. I am hoping to make a jacket for myself with this pattern, and at some point I think I will be needing an 1890s ensemble... 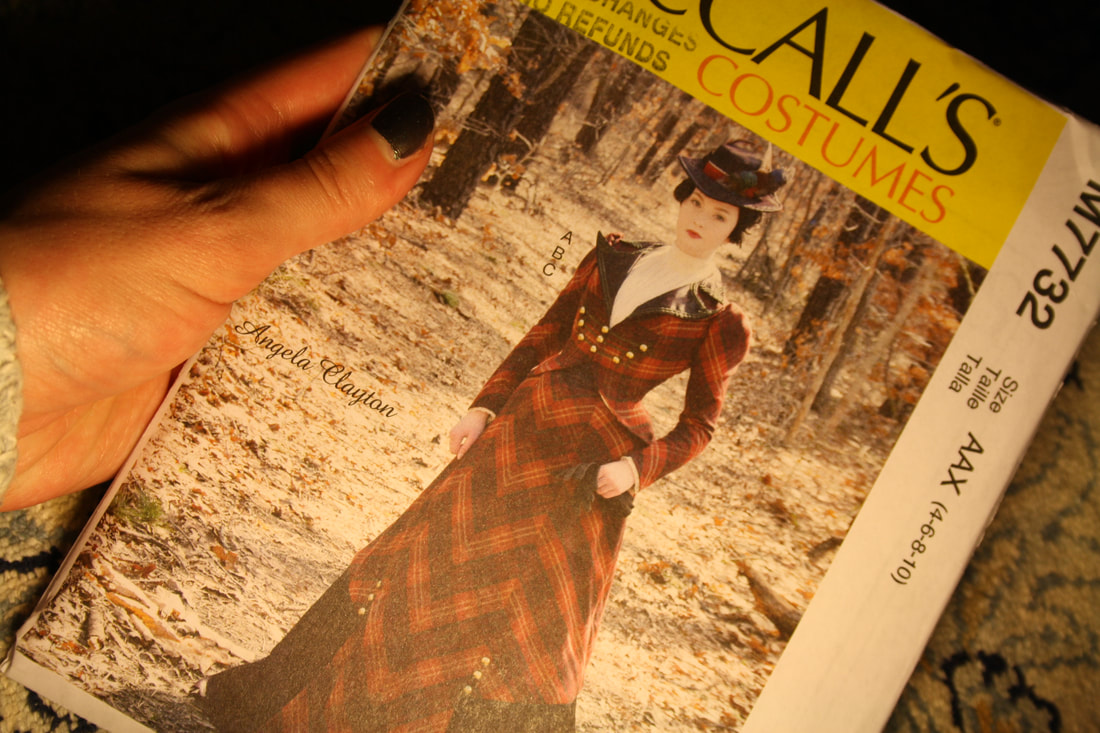 Thank you for reading, and I hope that you are as excited about all of these ideas as I am! ~K
  Well, not quite at the Stampede... but at a Stampede breakfast:) I finished this corset cover a month or so ago, and it has been sitting on my dress form since. The side seams are sewn by machine, and the rest is completely done by hand. The lace is vintage and given to me by a family friend, as well as the buttons.  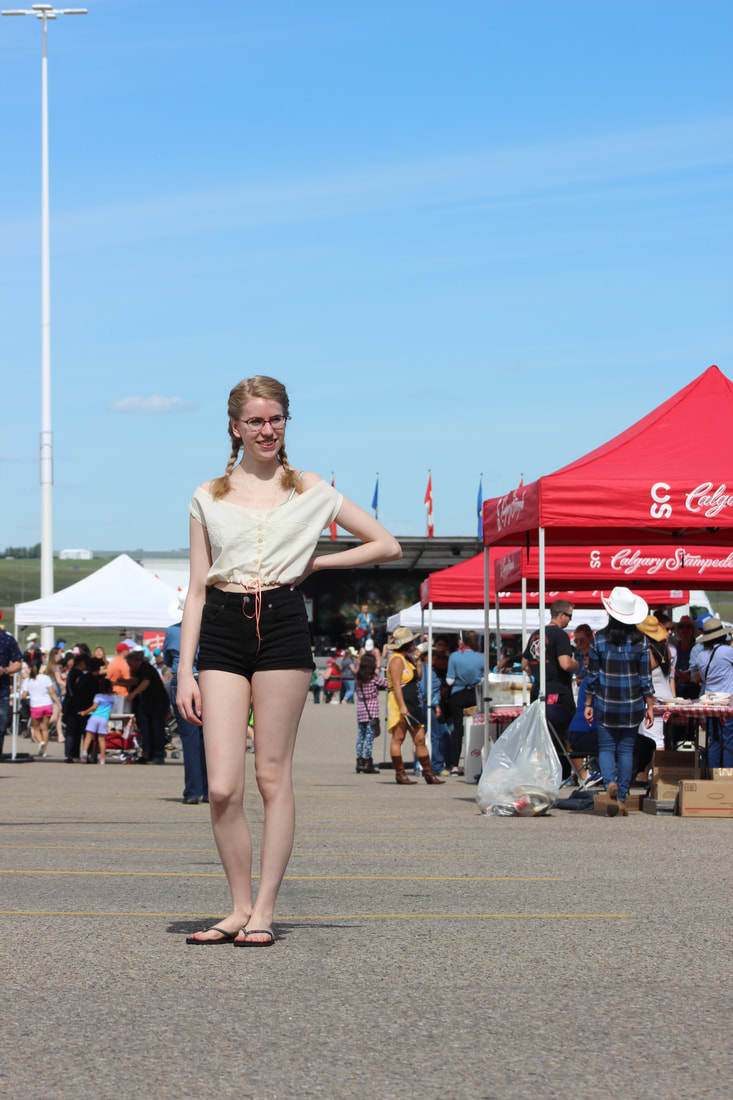 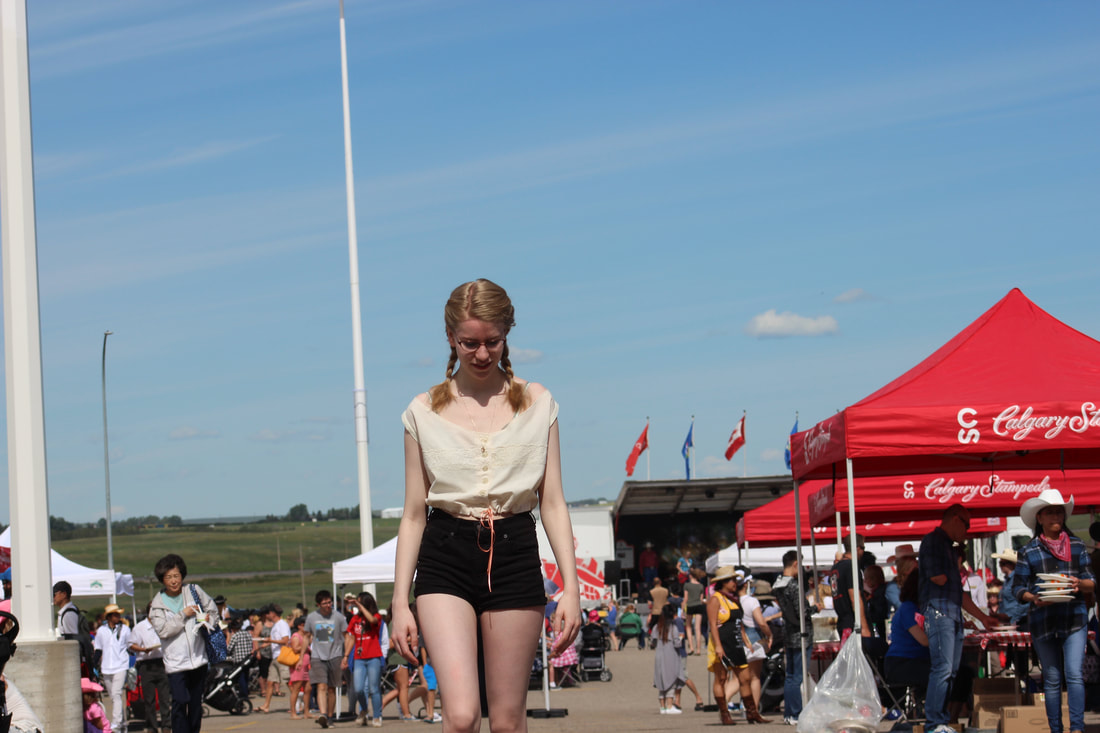 Calgary Stampede is always a fun time of year around here, so we thought it would be fun to get pictures of this at the pancake breakfast! Unfortunately they normally have hay bales, but they didn't have them this year. But I think the pictures turned out well anyway! 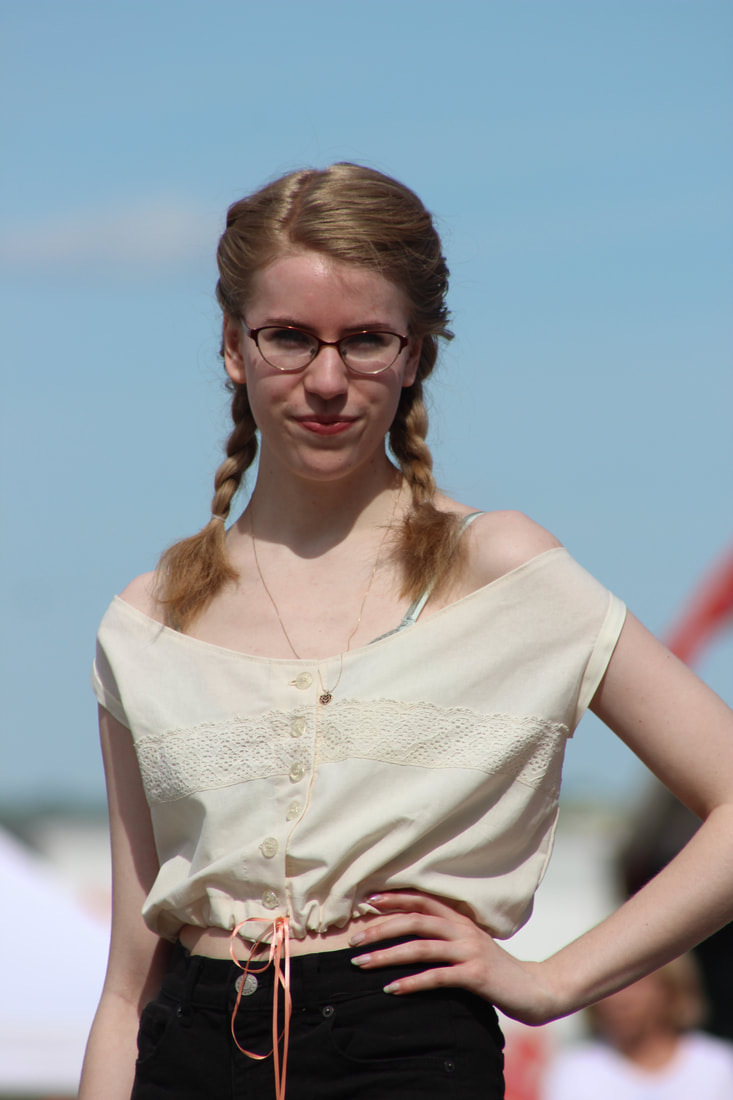 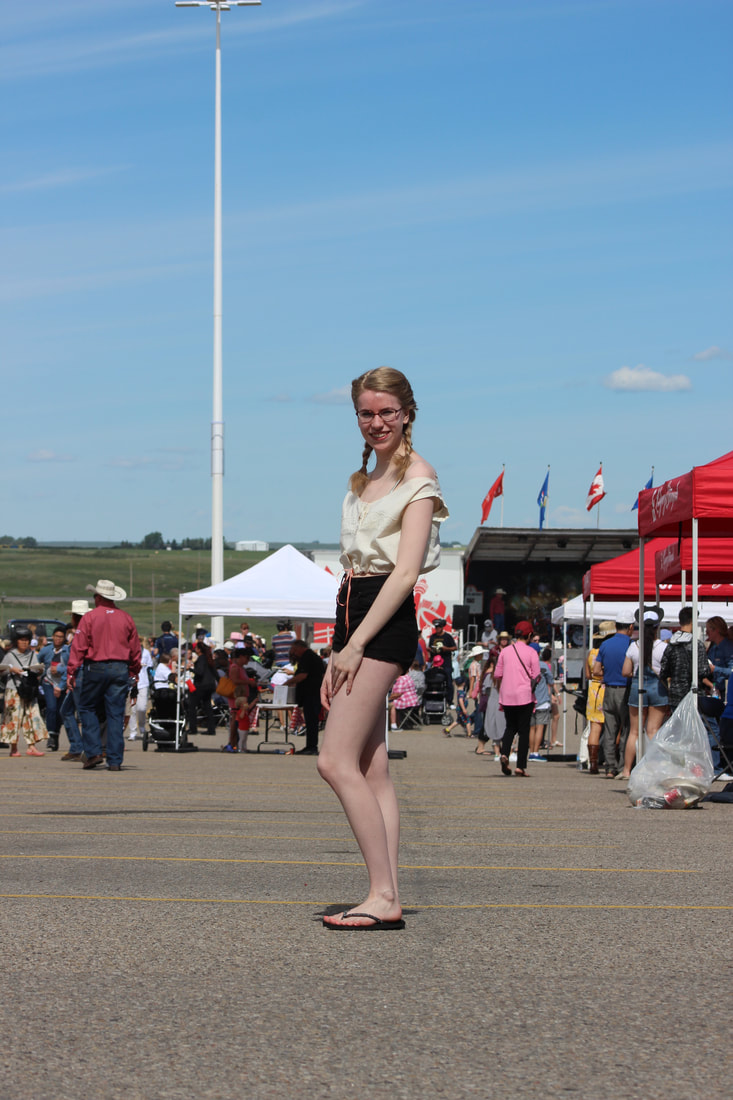 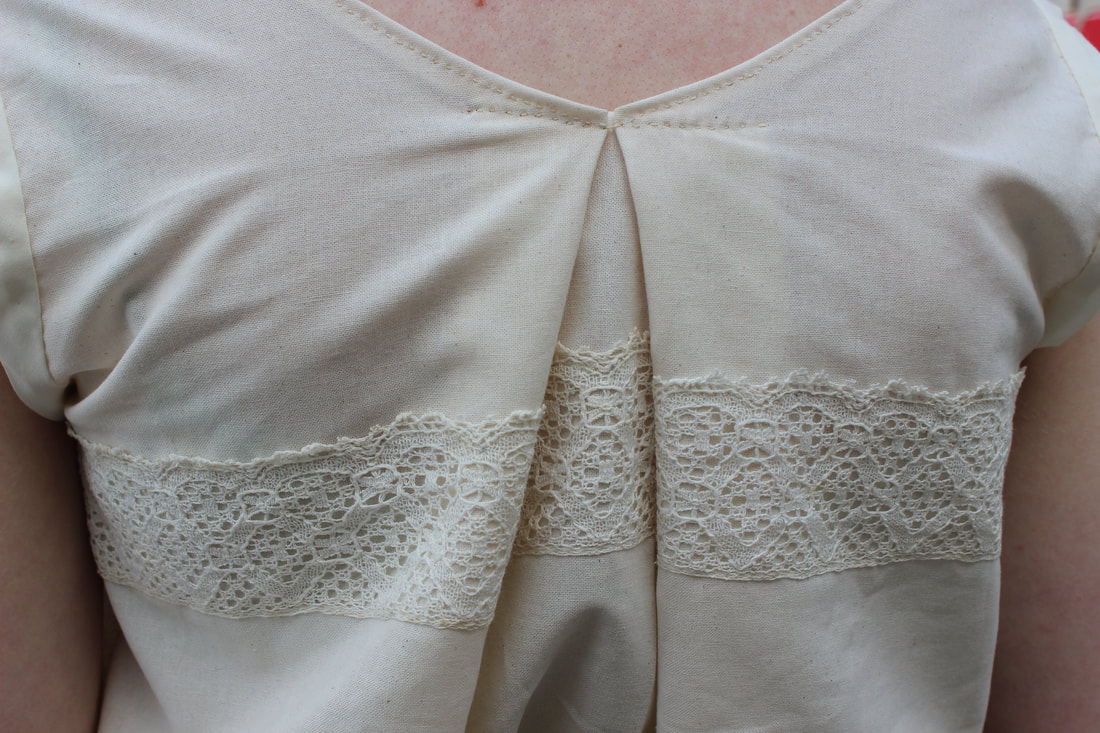 I have loved the look of corset covers for years, I love the shape and detail of them. While mine is relatively plain compared to some historical examples, I am so glad that I was able to use the beautiful lace that I was given. Corset covers were usually made of thin fabric to fit under a bodice, and weren't fitted for much of the 19th century. They were lavishly decorated with lace, ribbons, pin tucks, and embroidery. They were normally light colours as well, to make sure that they didn't show through under sheer bodices. They were made to help smooth the lines from boning in corsets, or were used in the summer like undershirts to go underneath sheer muslin dresses. 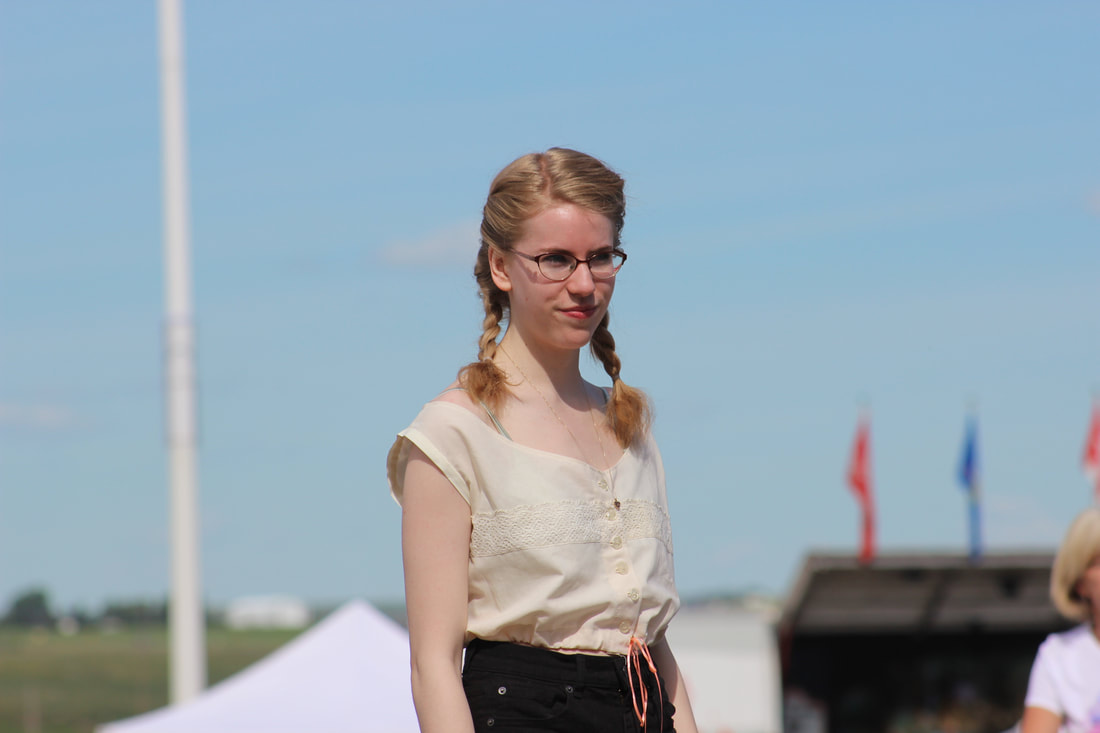 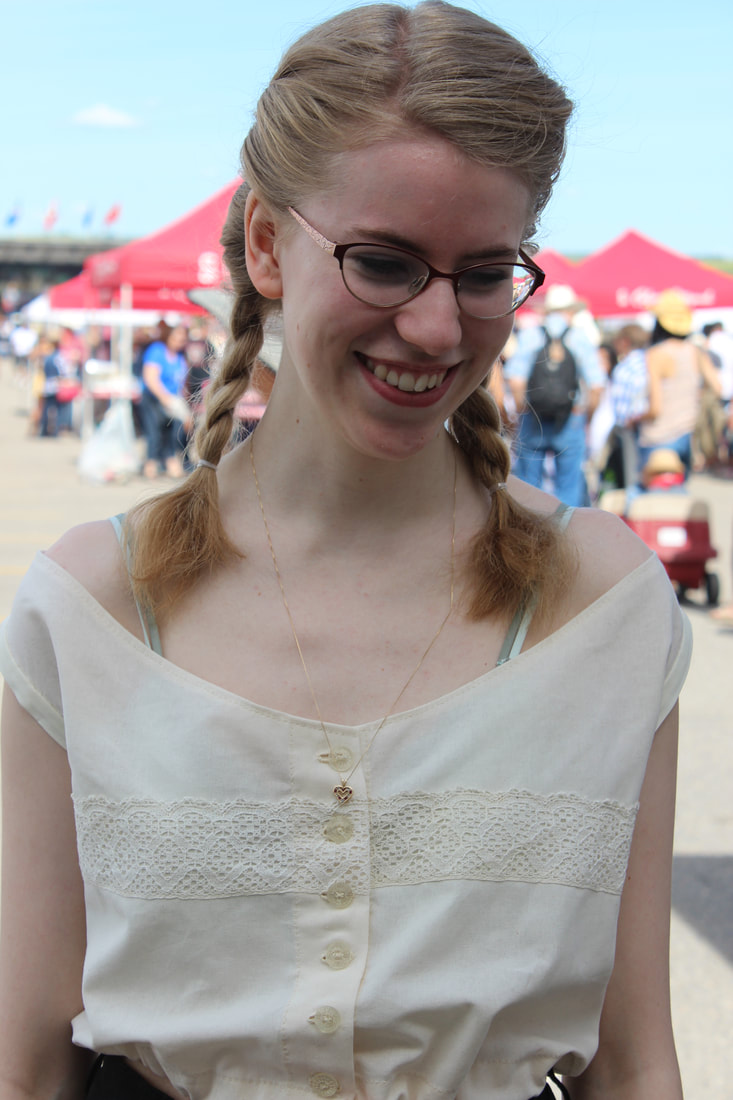 ~K
 It happened to be freezing and very gusty outside when we got these photos, so the detail shots were done at home When I started this collection, I was inspired by the darker aspect of the Victorian Era. When it comes to costuming, it is very easy to see the beautiful parts of history, especially when your research focuses more on fashion plates and patterns, which it normally does when researching a dress. While I love seeing the lovely parts of history, I am more fascinated by the darker parts than anything else. As you have seen before (especially in my Frankenstein dress), I have a dark side that I love to mix in to my costuming. I have made quite a few costumes that were purely historical and as pretty as I could make it, but I have decided that I should make them more in my style, rather than just historically accurate. 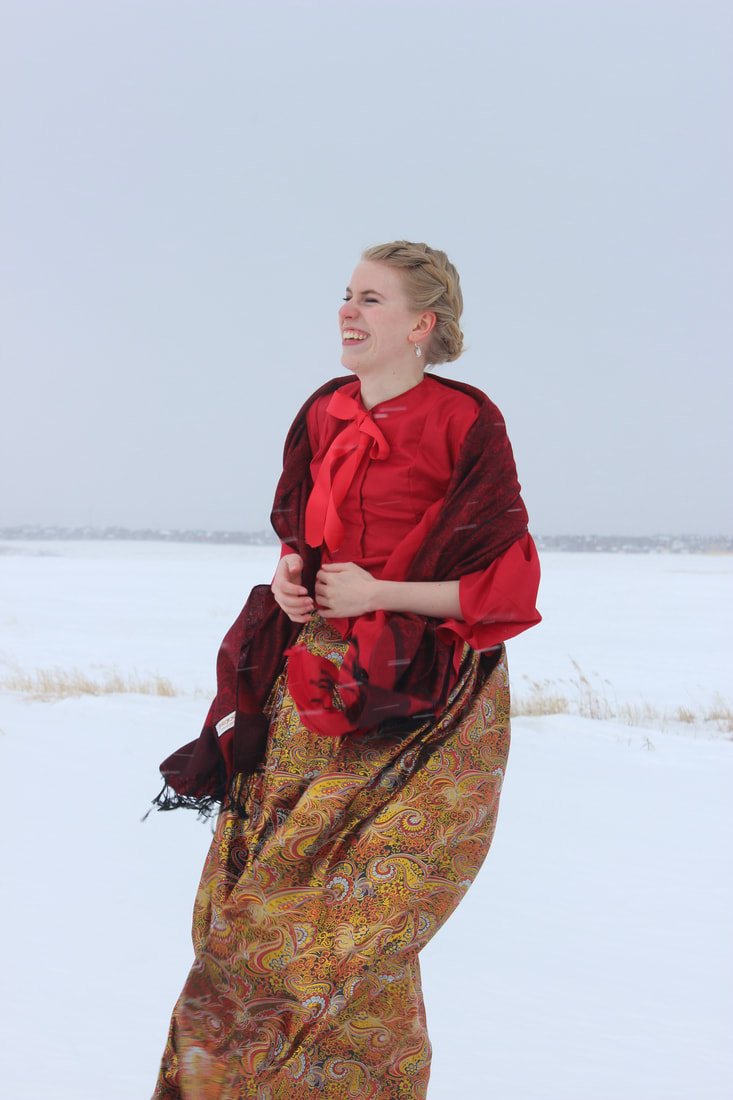 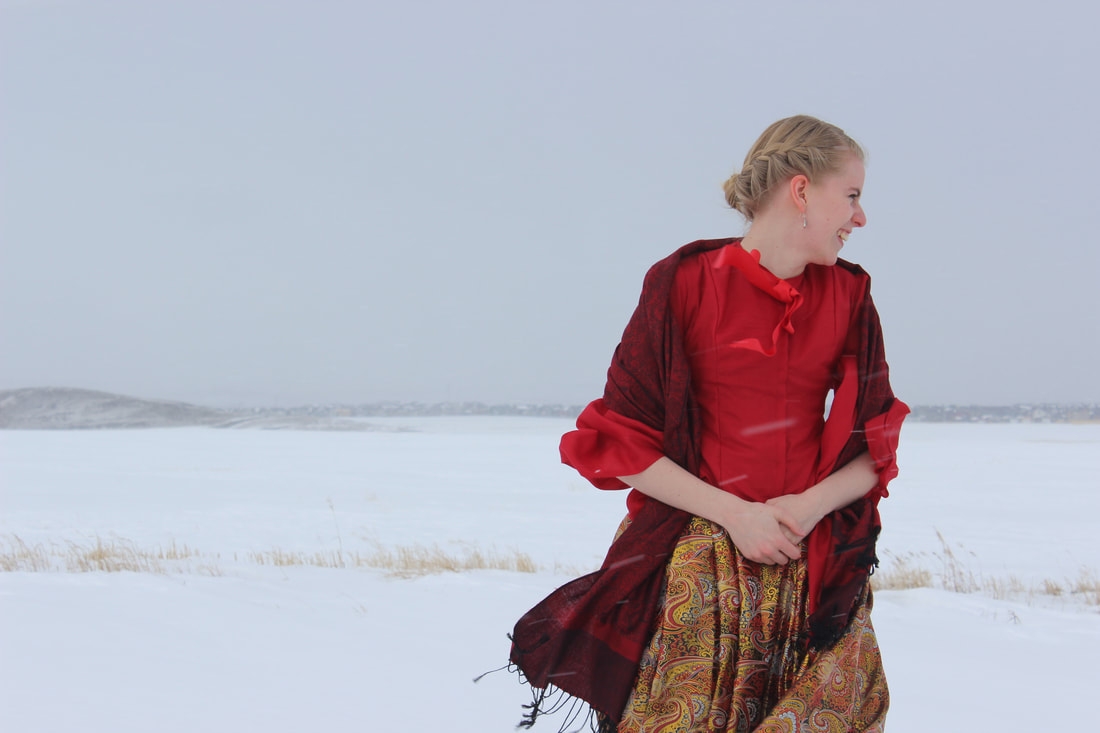 I love the taking historical silhouettes and ideas and making them a little different, and a little bit darker. I had mentioned in a previous post about some of the things that inspired this collection. I made four dresses, each one representing another dark side of the late 1800s. This first one that I made, which I called Through the Looking Glass, was inspired by the drug issues that were so prevalent in this era. Opium was a huge problem in the late 1800s, with Opium Dens available all around, especially in large cities like New York and London. In the US, it was the Civil War that started many addictions. Most also didn't realize how addicting the drug was, so doctors prescribed it for many nervous conditions as well as for pain. Those who didn't have money for a doctor were able to buy it from a pharmacist to solve any medical problems. Opium wasn't the only highly addictive drug wandering the streets- such as laudanum and cocaine. Arsenic and other dangerous (and poisonous) ingredients were readily available. To make things a little worse, doctors did not know how to treat addiction at the time. Hospitals would sometimes get them addicted to a different drug in an attempt to wean them off of opium, or whatever other drug was the issue, and the patient would end up with a few addictions instead of just the one. This may be a familiar concept if you have watched The Knick. The Knick is a show set in the 1890s following surgeons in a New York hospital. It is based on a true story, and the main doctor (John W. Thackeray) is based off of one of Americas Founding Fathers of surgery and medicine. Thackeray is based on William Halstead. Halstead had a rather unfortunate life, but did incredible things for modern surgery! 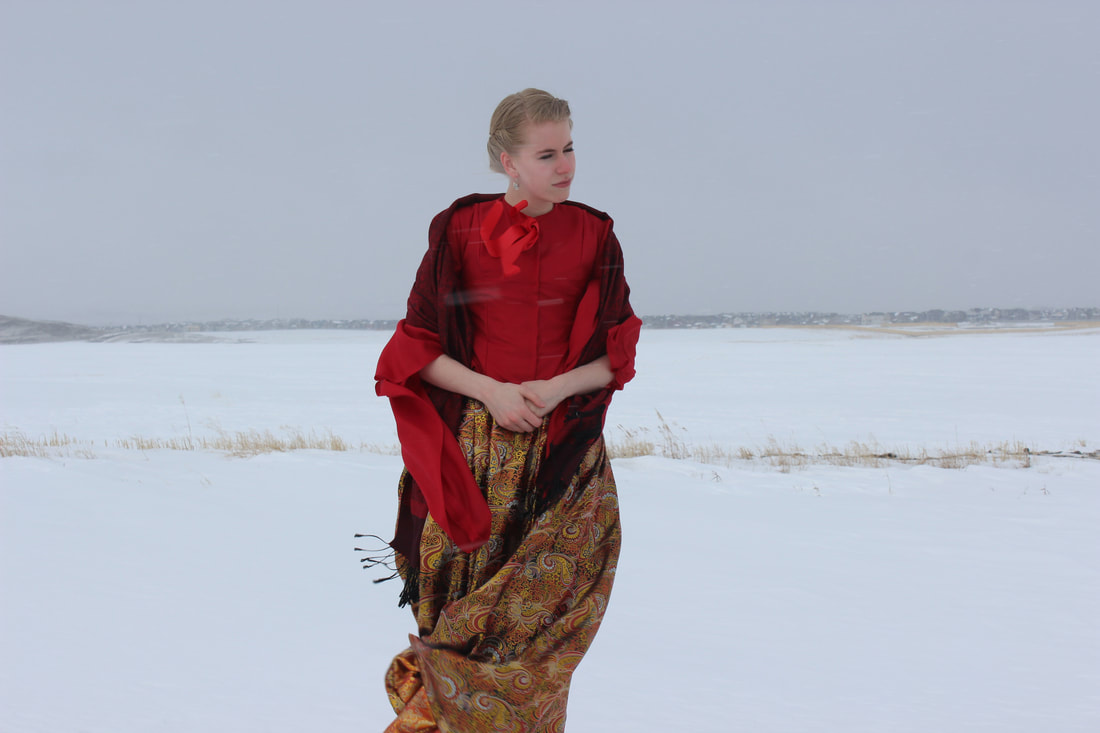 In a time when surgery had a mortality rate of close to 50%, Halstead brought in sterile gloves, developed radical mastectomy, carried out the first ever successful hernia and aneurysm repairs, as well as the first emergency blood transfusion, and brought in washing hands before operations. Halstead was originally addicted to cocaine, and ended up being checked into a hospital to get his addiction under control. They introduced him to morphine, and he lived the rest of his life addicted to both. His wife, a nurse, was also addicted to morphine. 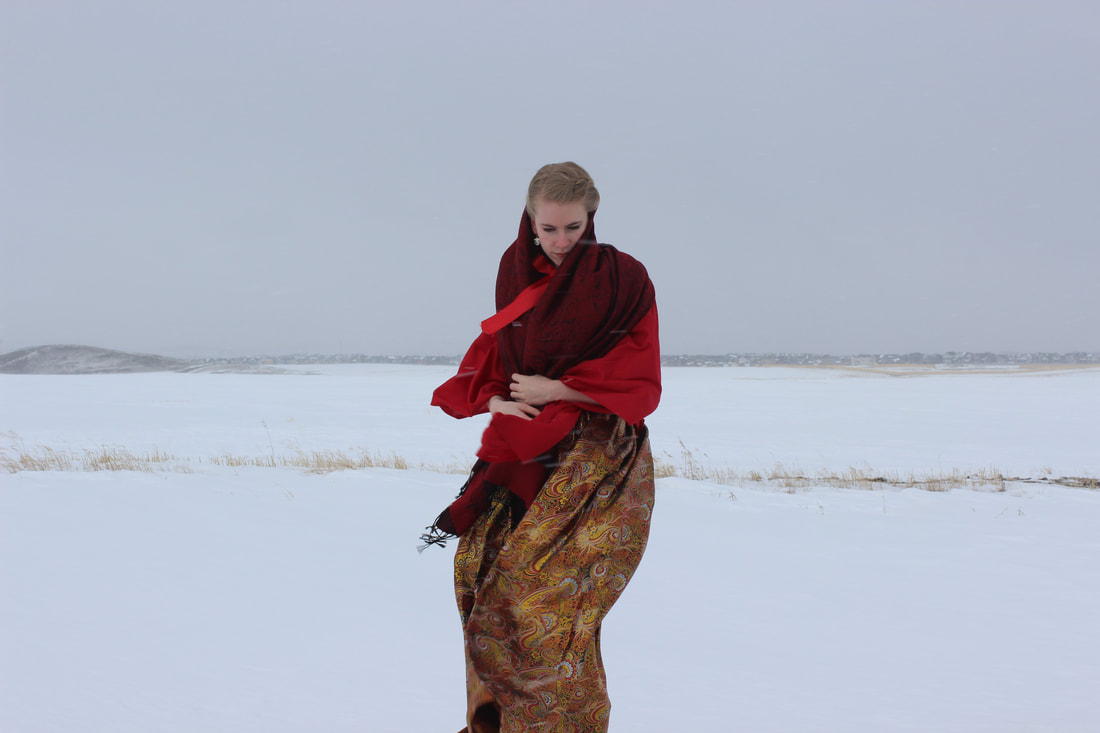 Morphine and other opiates were incredibly easy to get your hands on- morphine and cocaine injection kits (with newly invented syringes) were available in the Sears catalog. Herione was known as a remedy for morphine addiction, and one philanthropic society mailed heroin to a group of morphine addicts. Cocaine eventually was replaced by methamphetamine and amphetamine, which was used for asthma. Many countries used amphetamine during World War Two to keep pilots and soldiers awake. 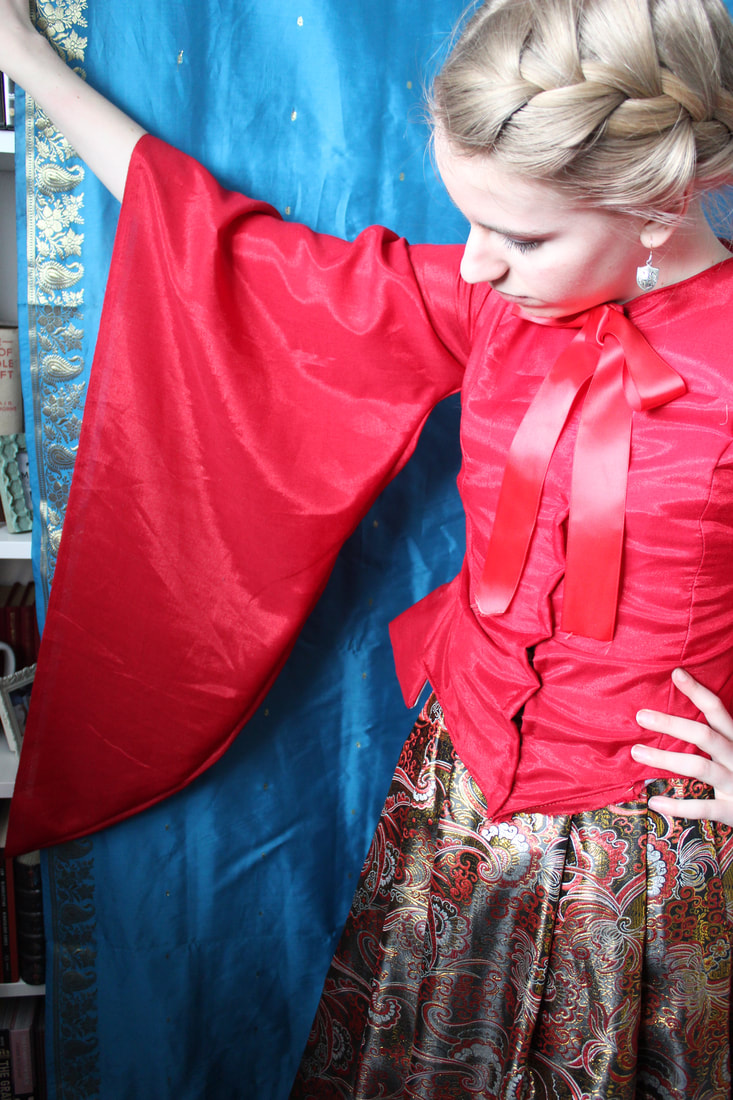 Through the early 1800s, most of the opium coming to Britain was from Turkey. It was known to be stronger, and its popularity only dropped in the 1870s and 1880s for Persian import. The opium was known as a cure all, and used as such by doctors and anyone needing pain relief, etc. It was also used to quiet fussing babies, mixed with water and treacle. It occasionally resulted in deaths, and often in illnesses. Raw opium could be bought as pills or sticks, and it was used normally for women more often than men. Medications containing opium were called 'women's friends' since it was taken for 'female troubles' (menstruation and childbirth), and 'female maladies' (hysteria, depression, fainting fits, and mood swings). 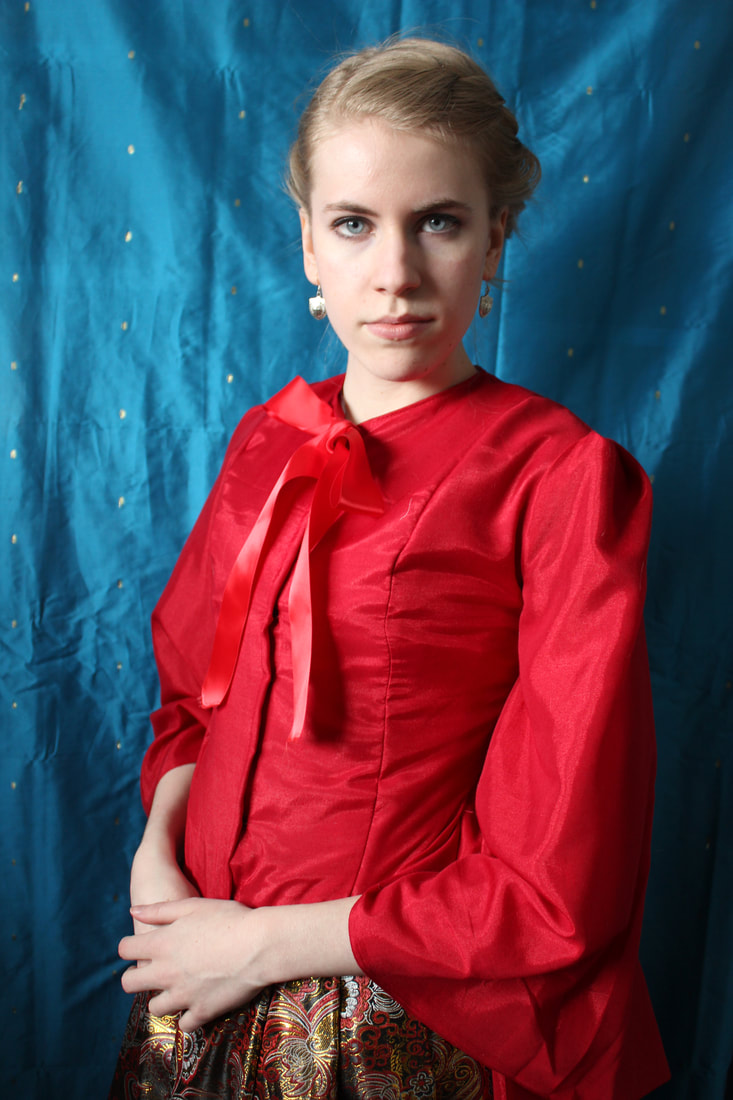 Cocaine was discovered in 1860 from coca leaves, but it wasn't available for commercial use until the 1880s. However, in 1863 a chemist named Angelo Mariani came up with a tonic that used coca leaves. It was advertised to solve everything, and could be taken like a daily vitamin. The tonic was praised by Queen Victoria and Rudyard Kipling, as well as others. In two glasses it is believed to have contained 50 milligrams of pure cocaine. The drug problem in this era affected every part of society. It wasn't actually realized to be a problem until 1920, when the Dangerous Drug Act came to be in Britain. 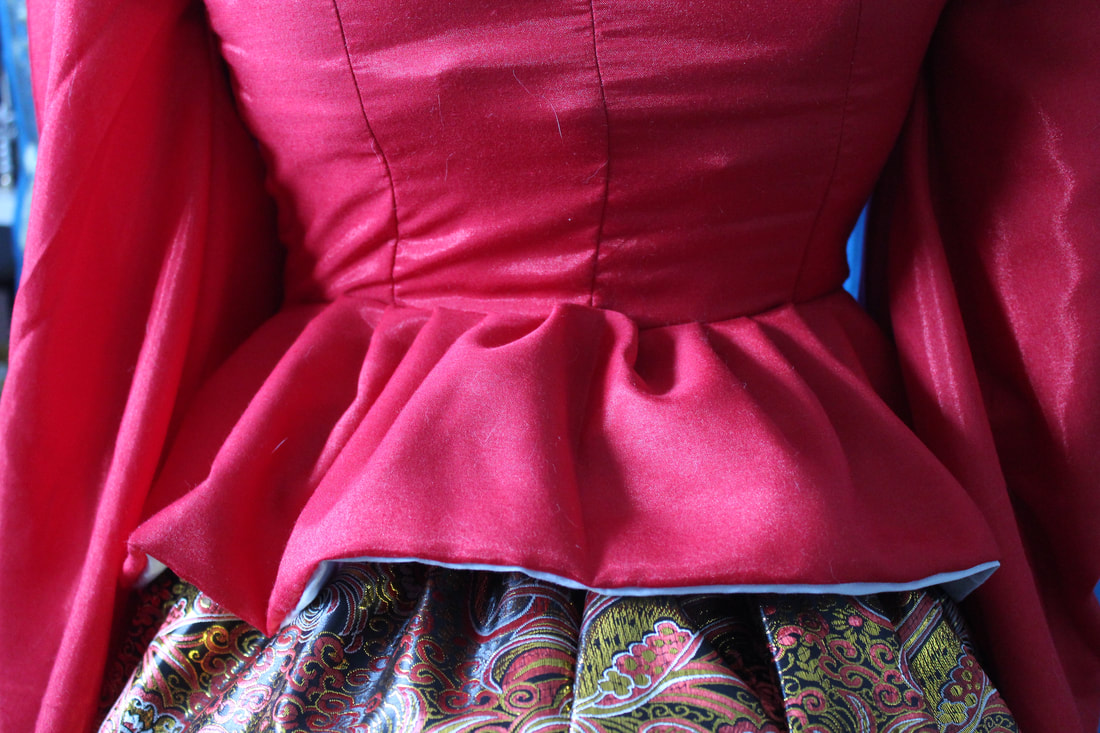 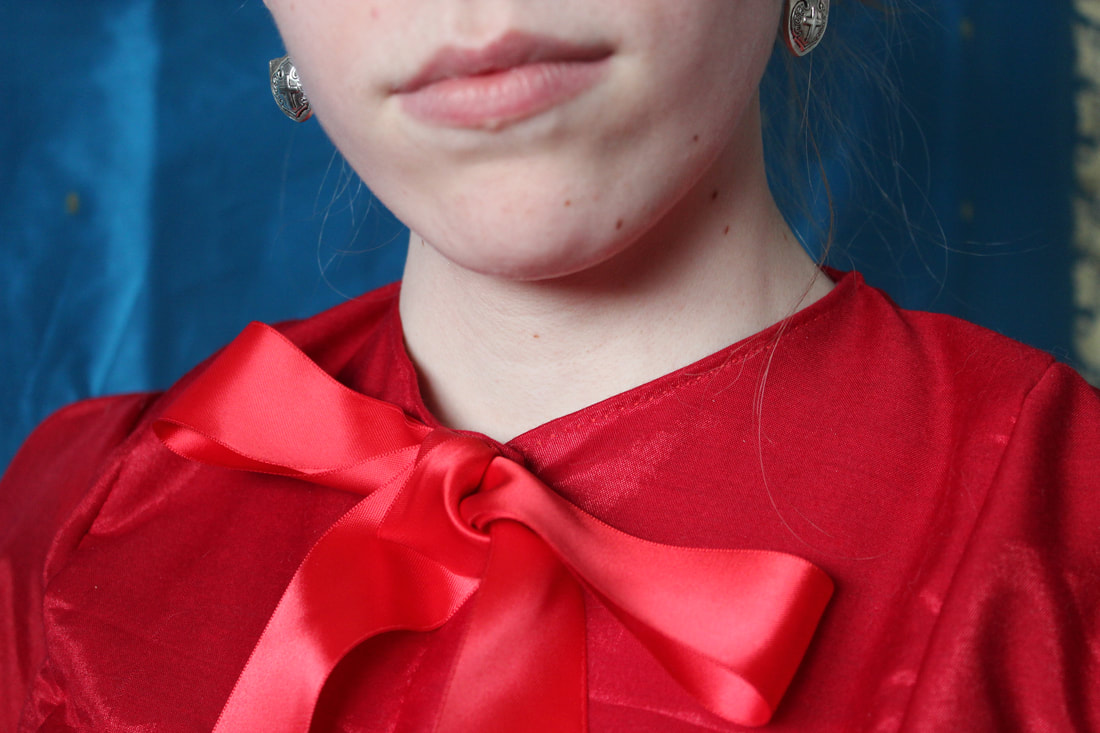 The bodice has top stitching along the neckline and bottom, and at the front closure, that is all done by hand. It closes with snaps Ripper Street has been a show that I have been inspired by for this collection, and The Knick has been another inspiration. If you would like to read more about how modern medicine was started in this era, Lindsey Fitzharris has a fascinating new book out called The Butchering Art, based on the surgeon Joseph Lister's life and success in modernizing surgery. If you would like to see the images that have inspired the collection, I have a pinterest board here (all of the images are dresses. I have very dark and gruesome information that I have found through research, but I promise there are no bad images, just pretty things!). I will recommend other books, movies, and TV shows that I have gotten information from for each of the dresses. For the Jewel dress I will talk about prostitution, especially in Britain, through the late 1800s, and for the other two gowns I will talk about circuses and sideshows, and death practices in the 1800s. Most of my information focuses on London, since that is what I am most interested in, but it also moves around to New York, Toronto, and other large cities with dark underbellies. 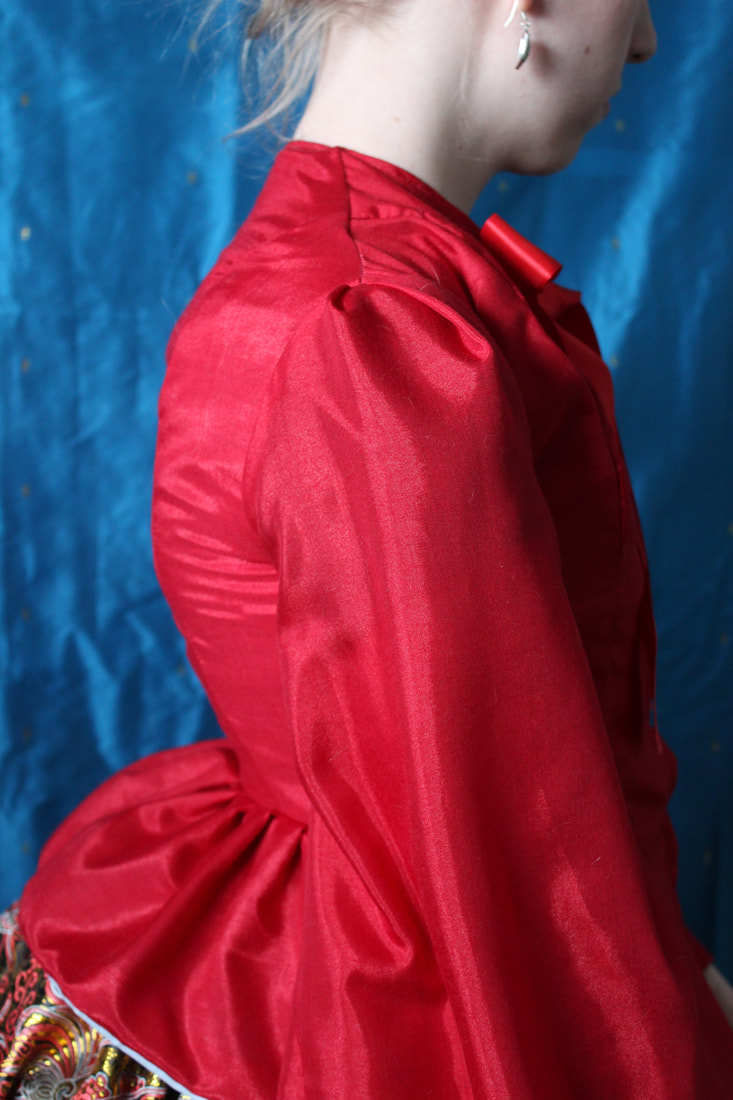  I chose the name for this dress (Through the Looking Glass) based off of the author, Lewis Carroll. Although there is much debate, Alice in Wonderland is well known as being a drug-induced dream, so I thought that would be a perfect name for the first Dark History. 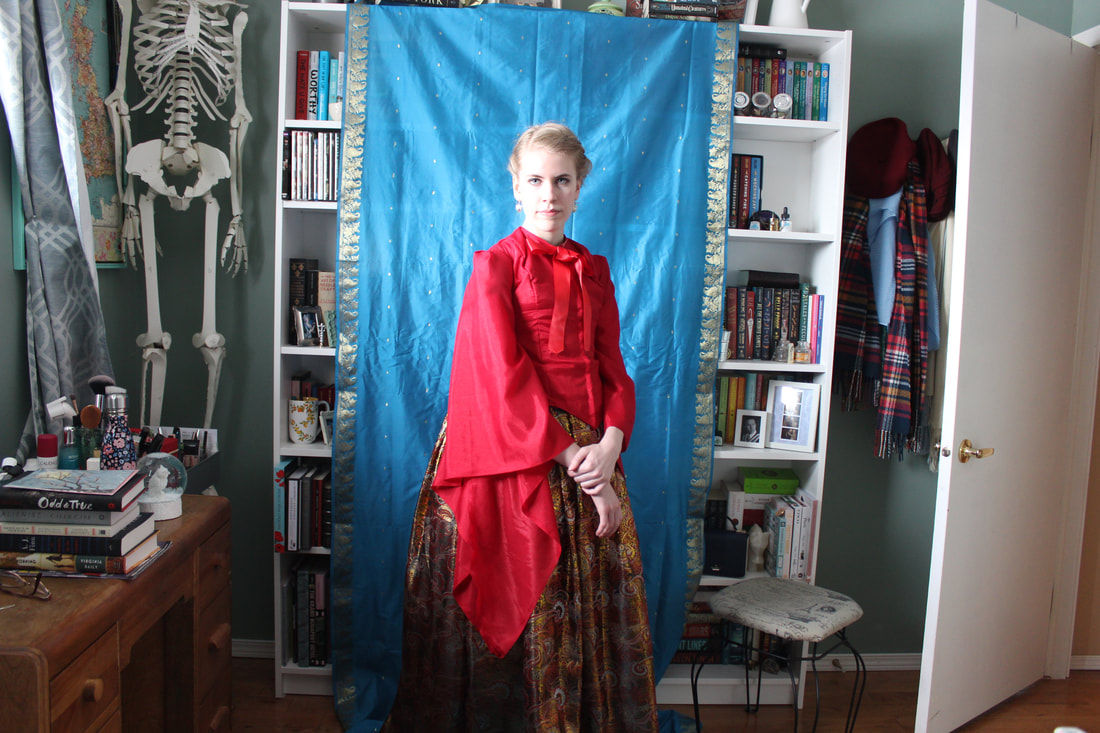 ~K
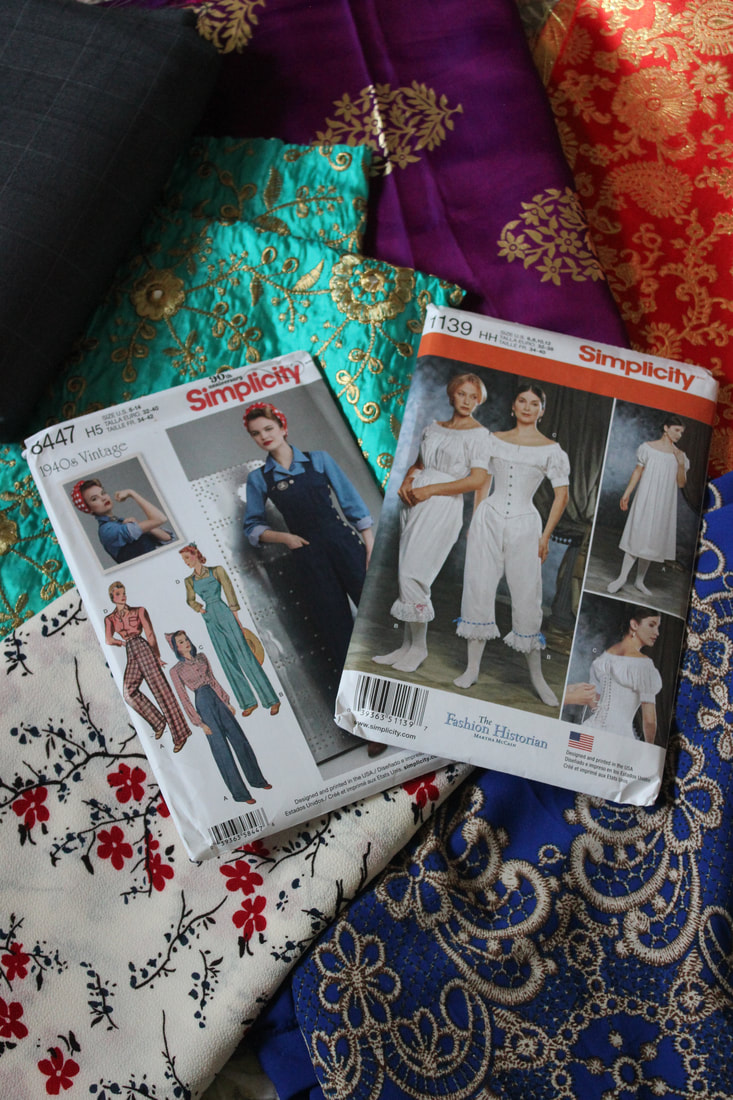 I made my way over to the Bhatia Cloth House for the first time last weekend, and I am so thrilled with the things that I found! 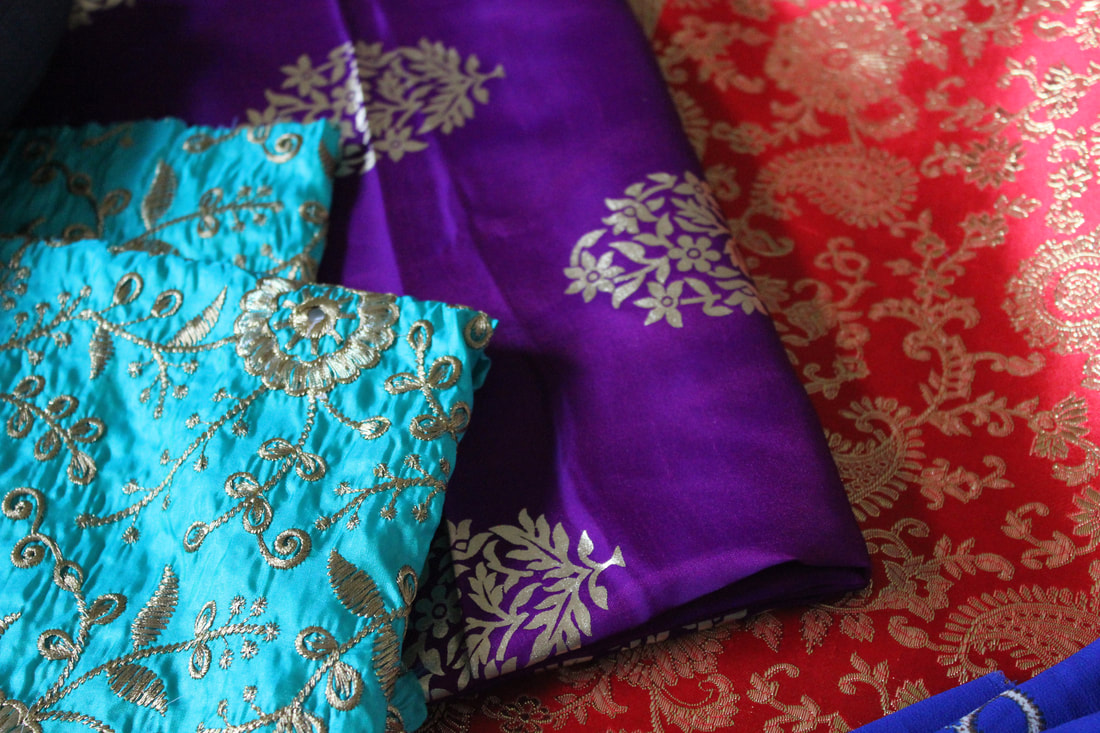 The Cloth House was really beautiful and they had tons of gorgeous fabrics, as well as sarees and other fancy dress. The costumer service was really lovely, and I can't wait to make my way over there again to pick up more fabric! 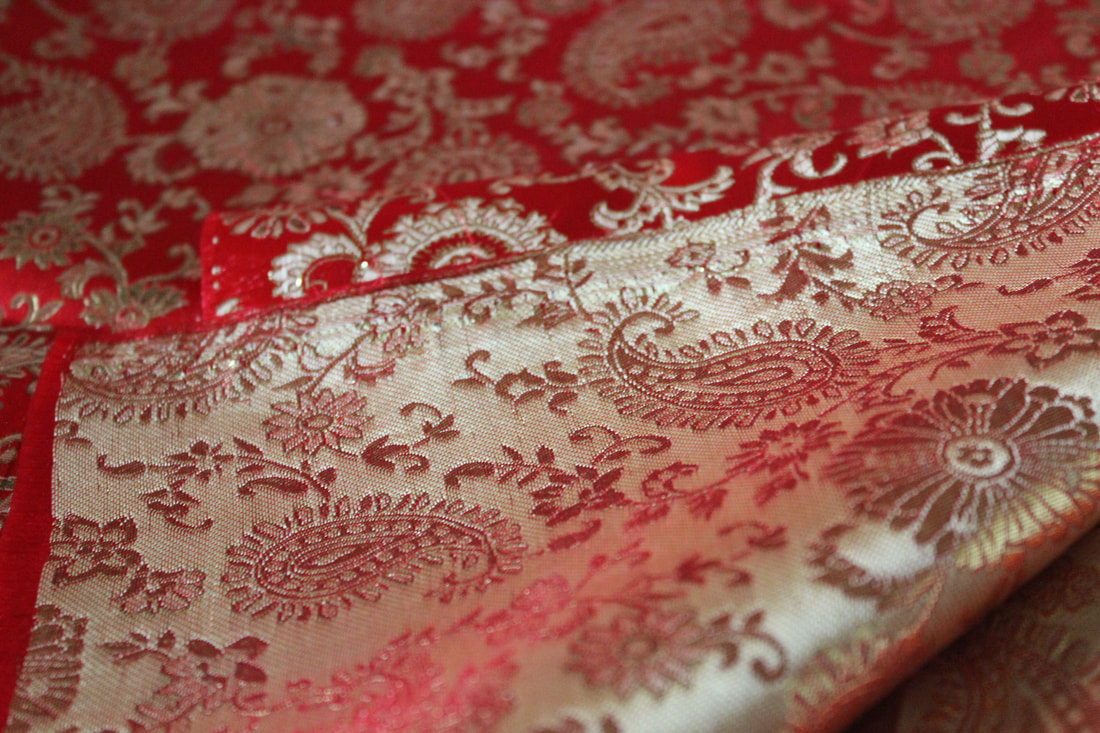 This red and gold brocade is stunning, and a bit darker than the photo shows 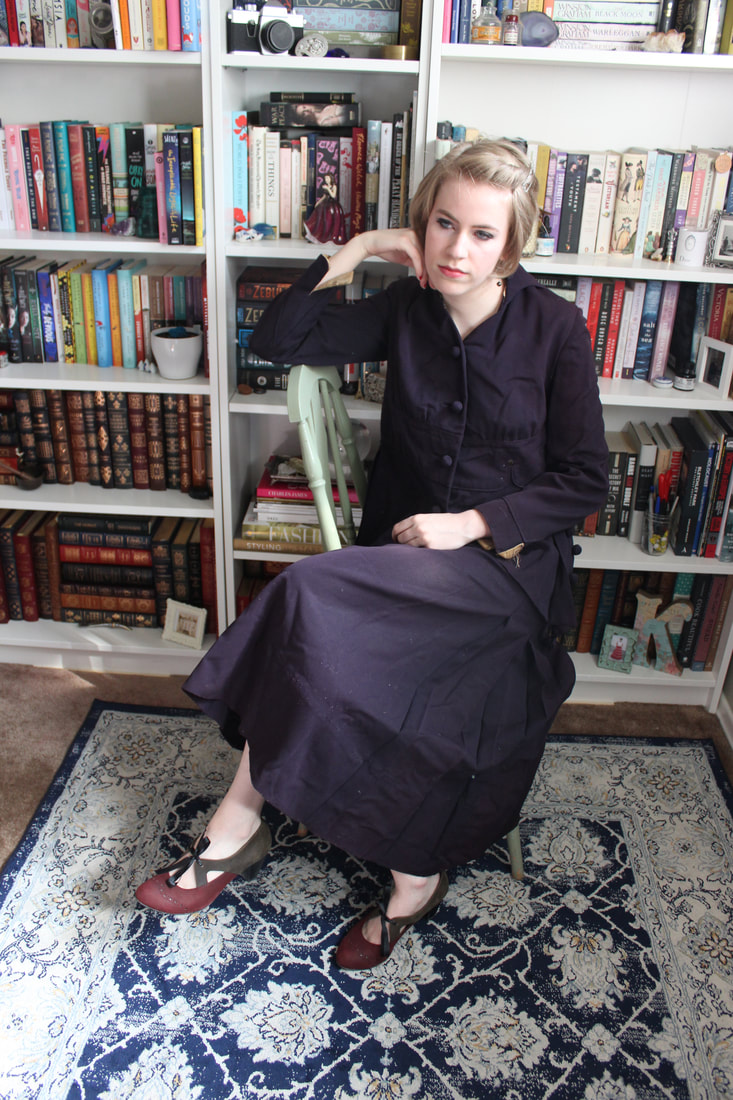 Silk is so difficult to take pictures of! This one is more of a turquoise than a pure blue 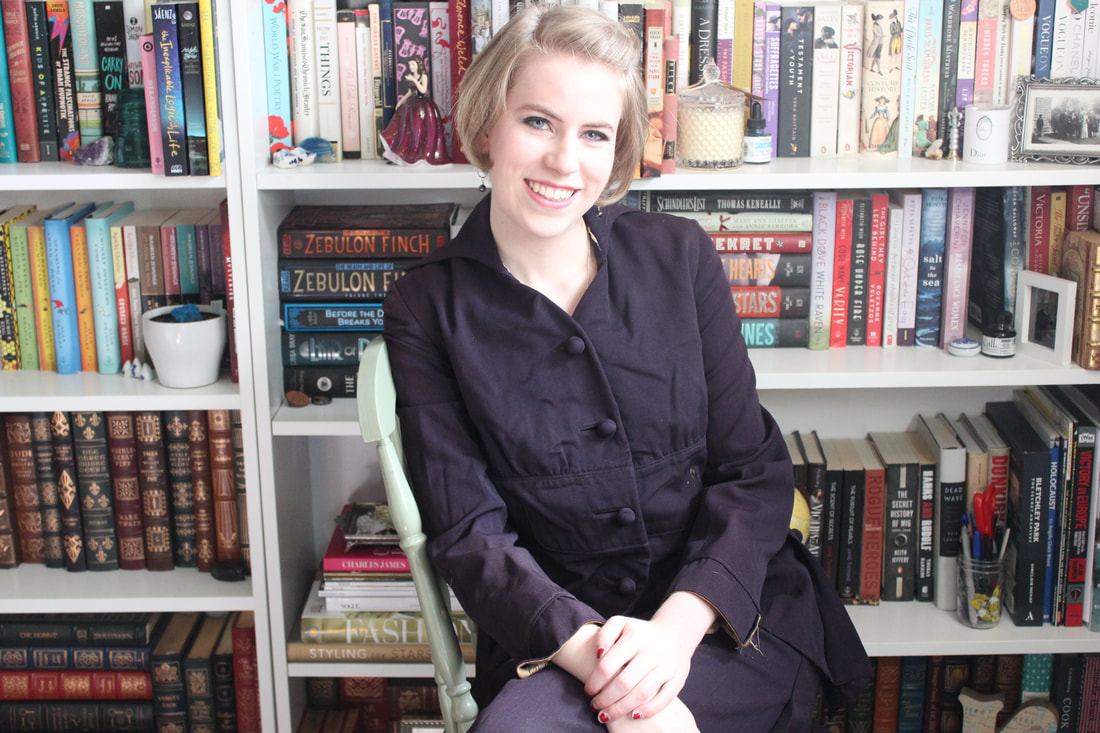 This photo is actually pretty close to the real thing! I love that it can look purple or pink in different spots I do have plans for all of the pieces that I picked up, but the only plan I will tell you about is for the mens suiting. 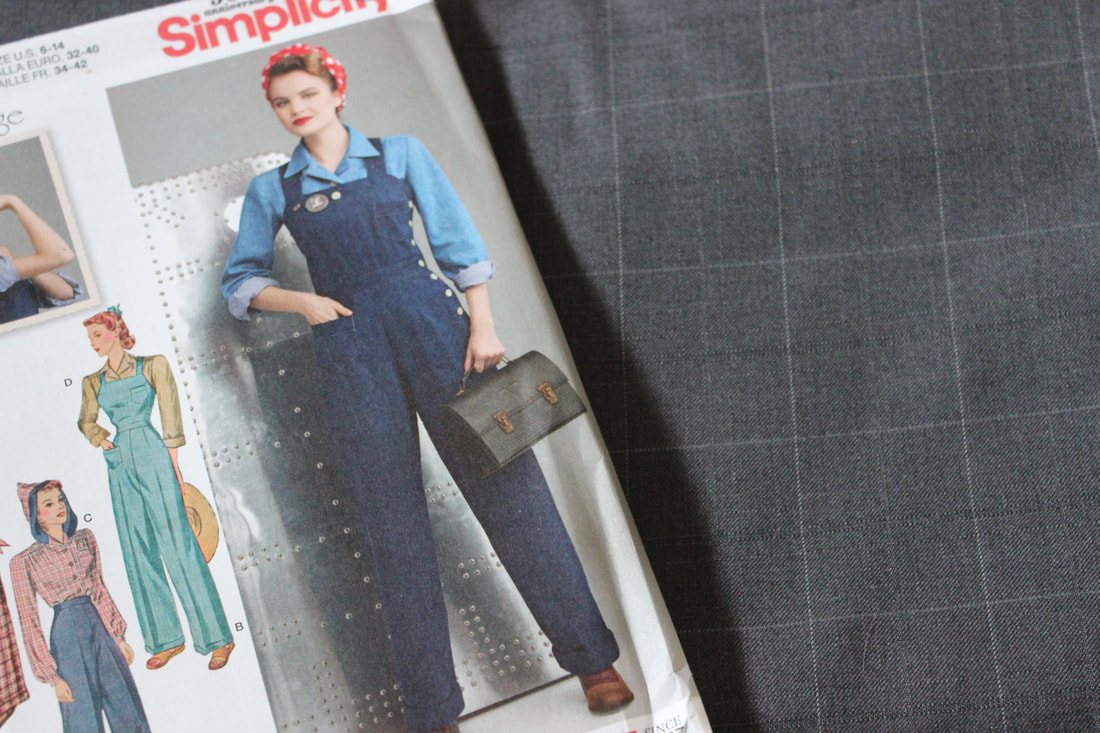 Not only did I pick up fabric from the Cloth House, but I also ordered a few patterns not long ago. The 1940s pants are what I will be making with the mens suiting wool, and there is so much of it that I am hoping to also get a pencil skirt or blazer out of it! 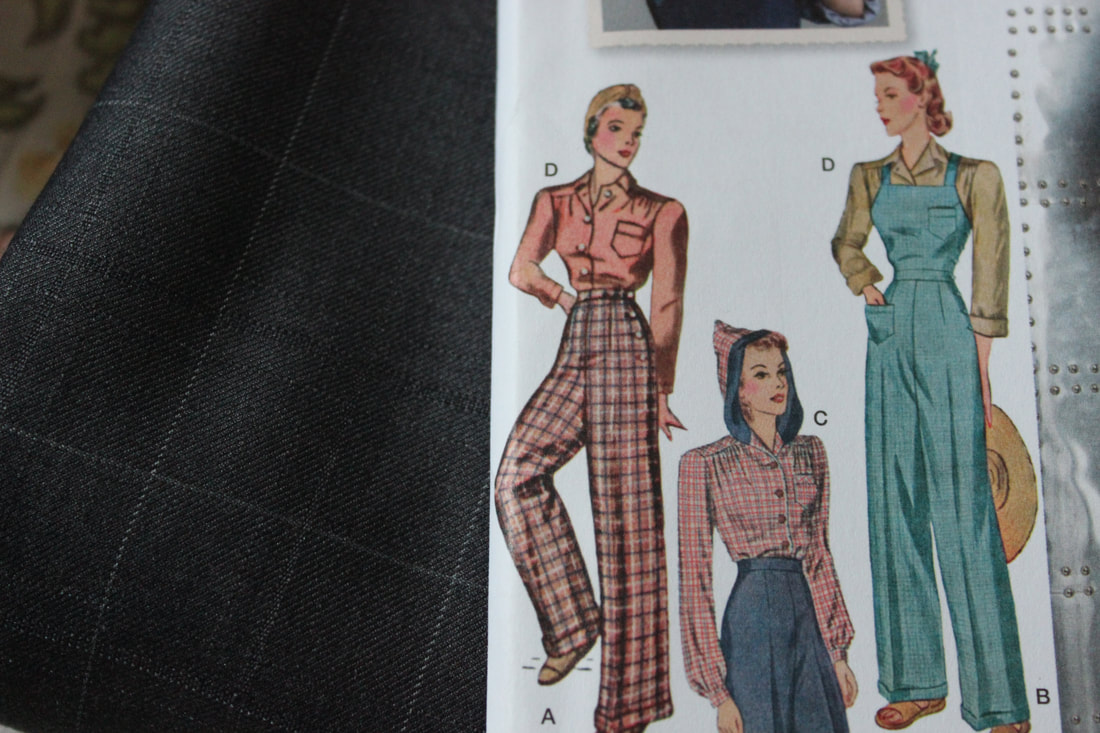 The drawing on the left are the pants that I am going to make with the mens suiting material Both of the patterns are from Simplicity. I have ordered a few patterns from Simplicity now, and they have always been great. The patterns have come quite quickly every time as well, which is very nice when ordering things online! 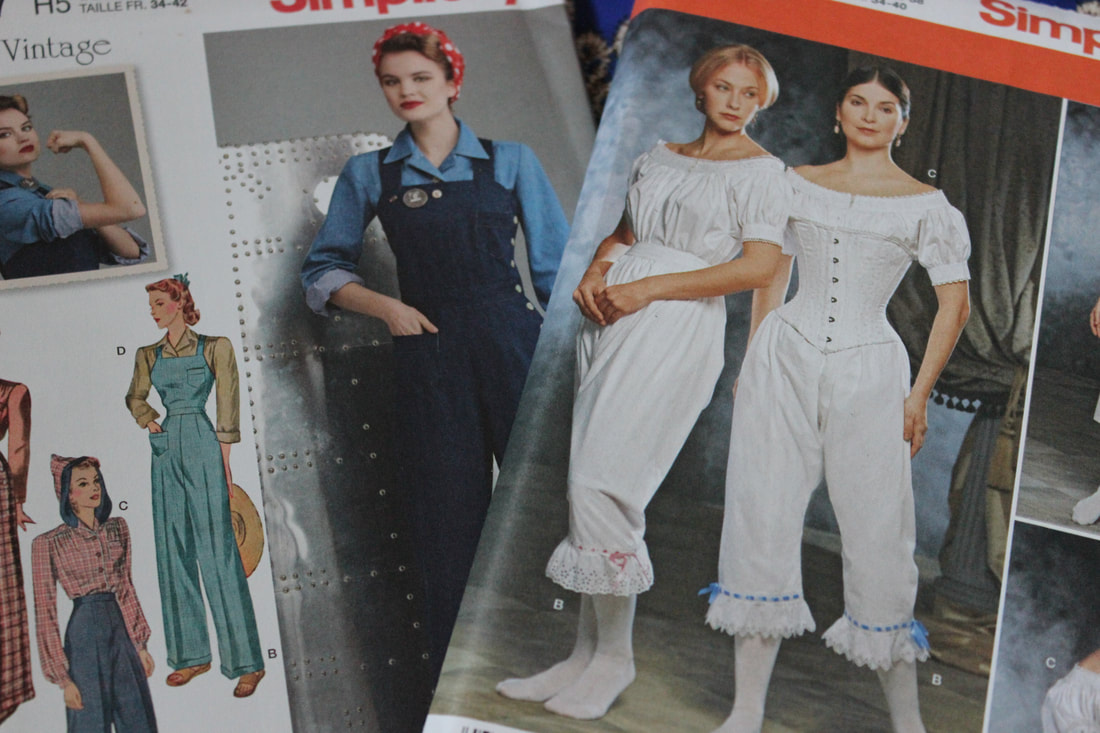 And there is more! My boyfriend just got back from Vietnam, and he brought me back such beautiful things! He had an Ao Dai (traditional clothing from Vietnam) made for me, and I was given the extra fabric left over from that along with another chunk of fabric!   And here is the ao dai! You can't see details here, but it is made of the red and white fabric in the photo above this, and it is paired with red pants Stay tuned for lots of exciting new projects!
~K  After a ton of work, and many learning curves, I have finally finished the whole project, including a chemise, a pair of stays, a bumpad, two petticoats, a gown, and a stomacher. Although there are things that I could adjust, or would do differently if I did it again, I am still proud of how it came out. The patterns that I used for this, the American Duchess patterns, were very good, but there were a few things that I wasn't thrilled with. I ended up drafting my own chemise pattern, since theirs was not very historically accurate. The patterns were easy to follow and understand, which was very important for such a large project. The instructions were simple and to the point, and I was never thrown for a loop about what to do. I loved the bodice pattern, and it looks very historically accurate to me according to dresses from the 1740s. If I made this pattern again, I would probably adjust the sleeves a bit. They were slightly more loose than I would have liked, and the darts were up quite high. The dart at the bottom of the sleeve is to fit the sleeve to your elbow, however they don't go down to my elbow, as you can see in some of the pictures. I also adjusted the stays quite a bit, but I was expecting to do that, since stays can be very tricky to get the fit right, and I was using cording and not boning, so I was not surprised when there were a few slight fit issues. Other than these unimportant little complaints, I loved the patterns and I would definitely use them again, just with a few 'improvements'.  This ensemble took me about four months, starting in late September, and finishing just a few days ago. I used Ikea fabric for the undergarments and gown (a muslin and a thick cotton), and a cotton sateen sheet for the over petticoat and stomacher. The lace on the stomacher is a gorgeous vintage lace that was given to me as a gift. The stomacher was finished off with a ribbon 'flower' that I made, and some hand crocheted lace at the top that I have had for a long time. I had an incredible time creating this, and I feel like my sewing skills have improved from before the project to now.  ~K
After a long slog, I have finally completed the the base of the project. This was the toughest part of the project, since it included many difficult pieces. The hardest part of the whole costume so far has been the stays. I am already pretty far in the process of creating the actual gown, and it has been much easier and quicker to put together than the parts that I have finished, mainly because I don't have to do any boning or boning channels. The cording on the stays was very difficult, since I have never done that much cording on something before, but I am pretty pleased with the final result. 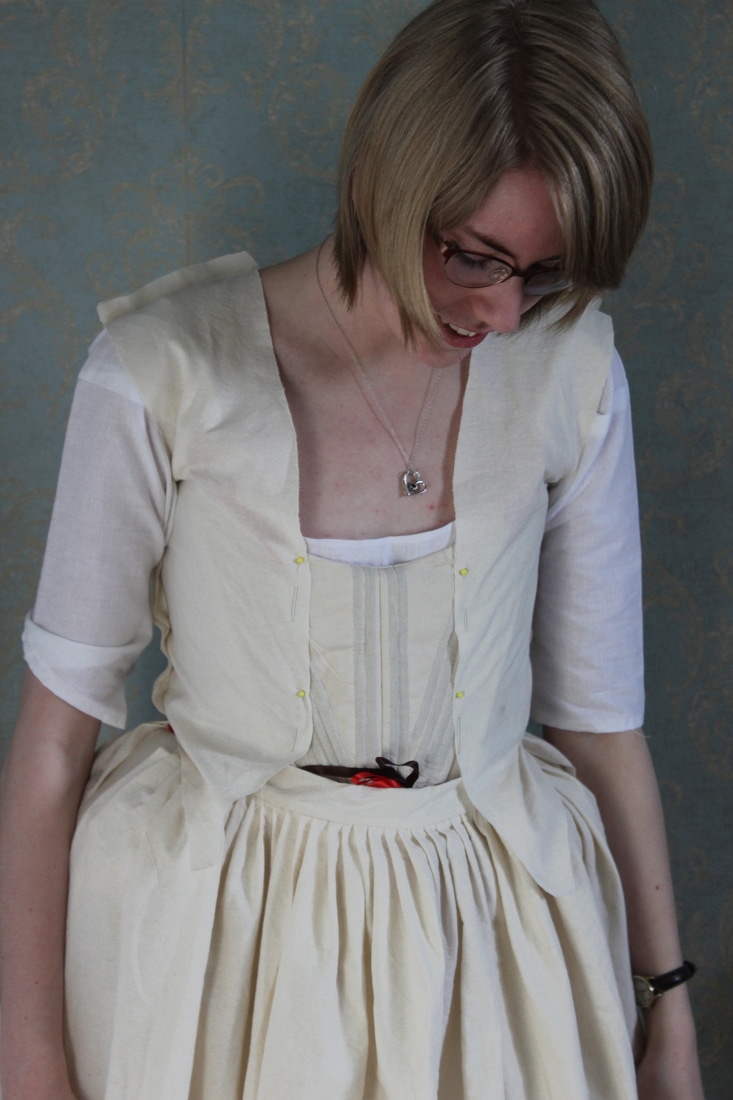 My apologies for the crooked pinning, and the visible ribbons. I wasn't planning on taking pictures at that time. 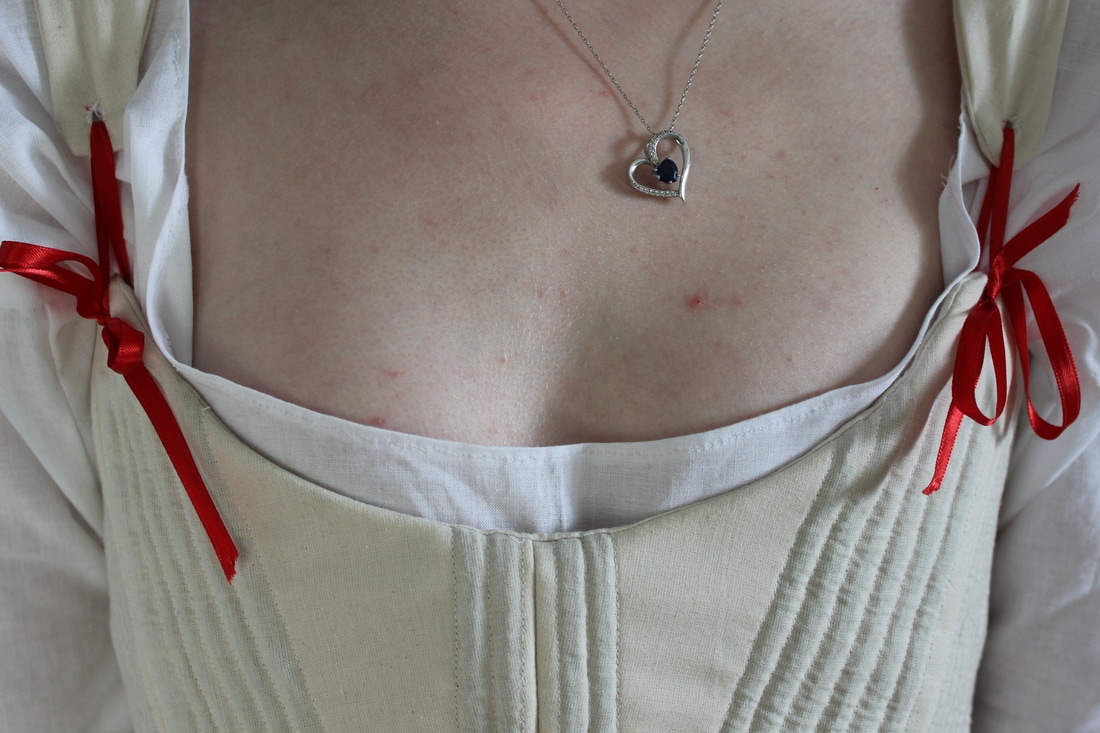 Here you can see the neckline of the chemise and how the straps are tied to the stays with ribbon. I didn't finish the chemise until after the stays, since I wanted to use them as a way to measure where to cut the neckline of the chemise. I wanted to make sure that the chemise was low enough that it wouldn't be visible from underneath the dress, but I also didn't want it to be too low and wide that it would slip off my shoulders. The neckline is a bit wider than I would have liked, but it works perfectly with the stays. 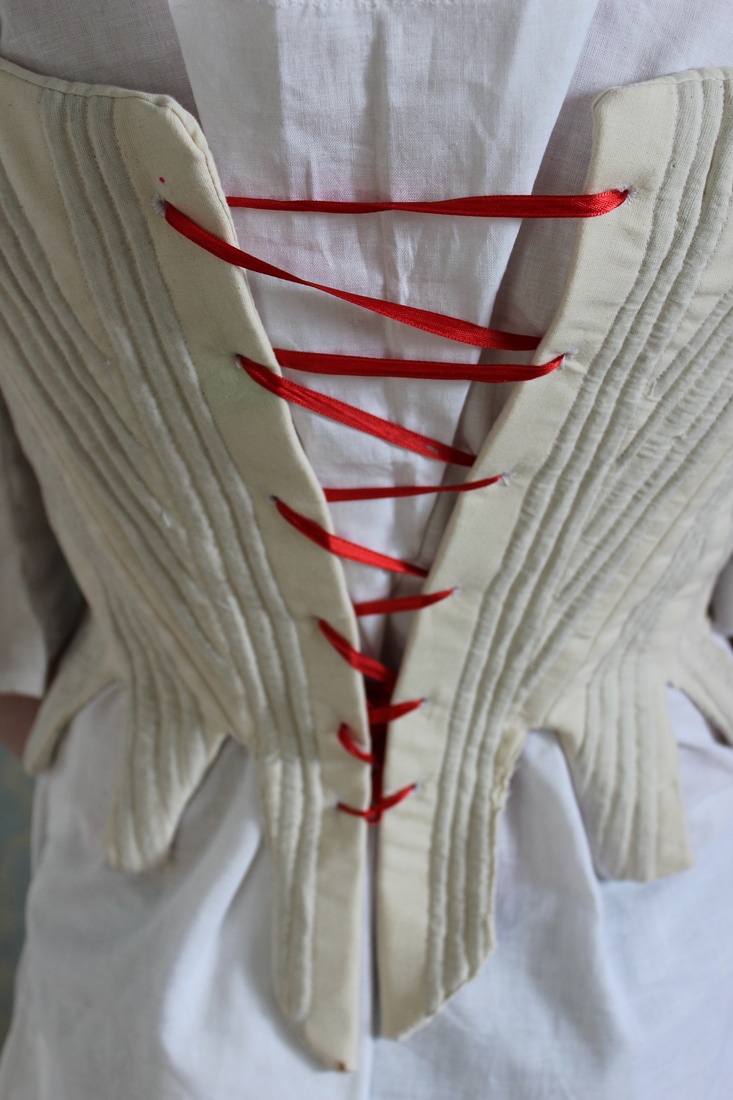 As I have mentioned before, I did not make the stays exactly as they would have been made in the 18th century. I made some adjustments to make it a bit easier for myself, since I have never made anything like this before. First of all, I used cording instead of boning. This made the garment less stiff, so it is much easier for me to get used to it. Wearing fully boned stays take a long time to get accustomed to, and I wanted to not only make it a bit easier for me to sew, but also easier for me to actually wear. 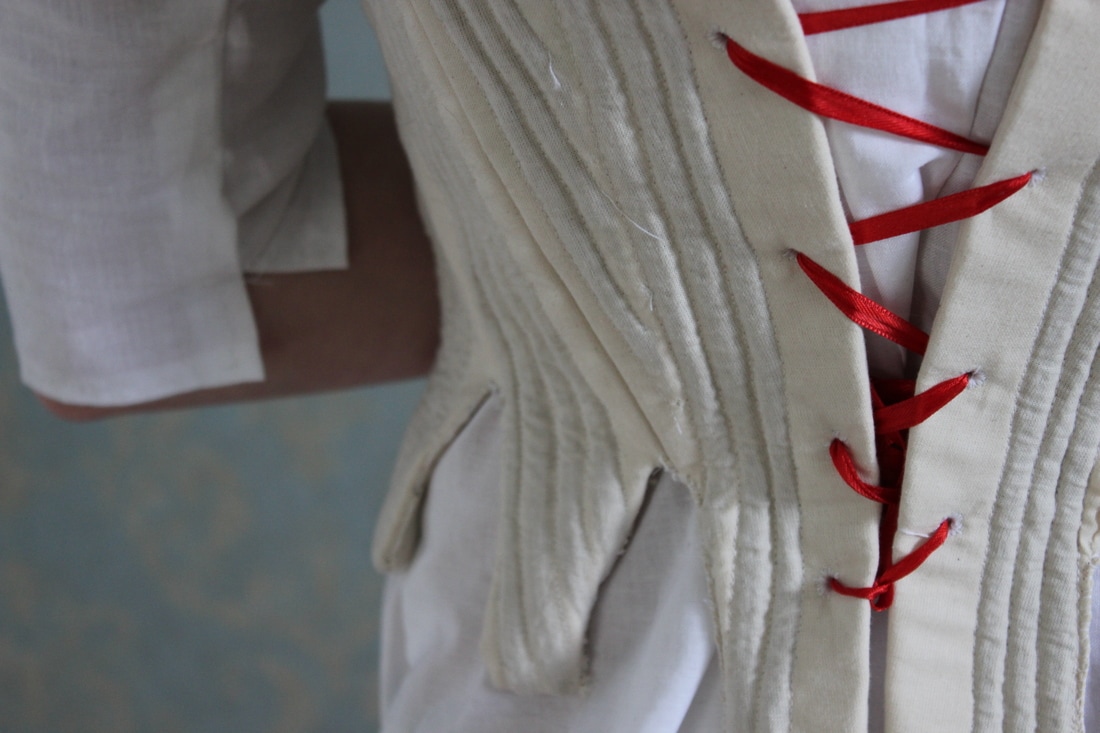 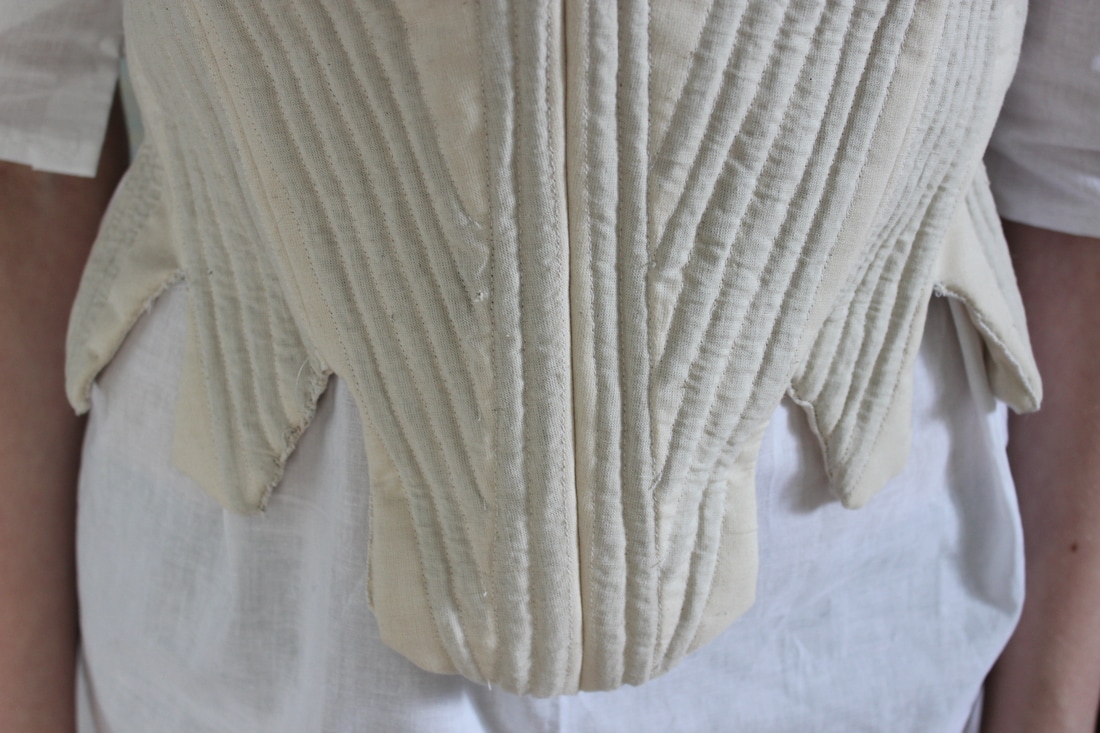 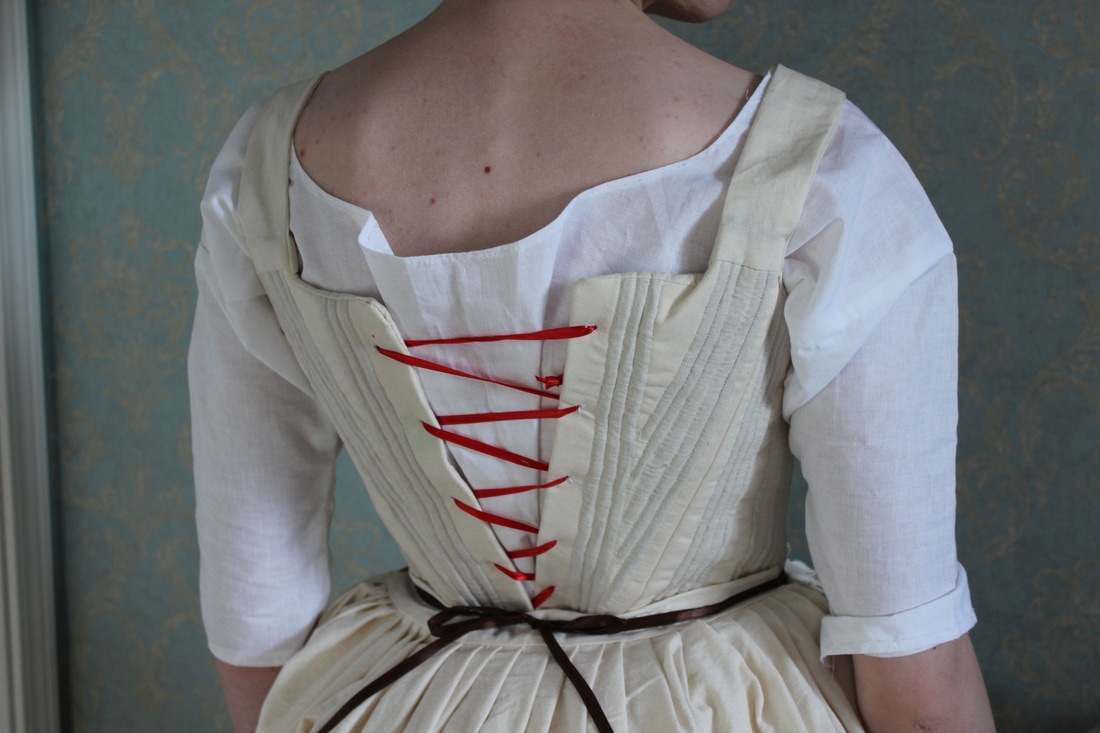 The petticoat is 8 pieces, overall. The front and back are just pleated on to the waistband. The top petticoat will be made the same way, just in a blue cotton. The skirt is made so that there are two slits in the side so that if I make pockets for myself, I can reach them. The gown and top petticoat will also have these slits, to make sure that I could easily reach anything in my pockets. I will not be making pockets for this project, but I may later on, and I would like to keep that option open. 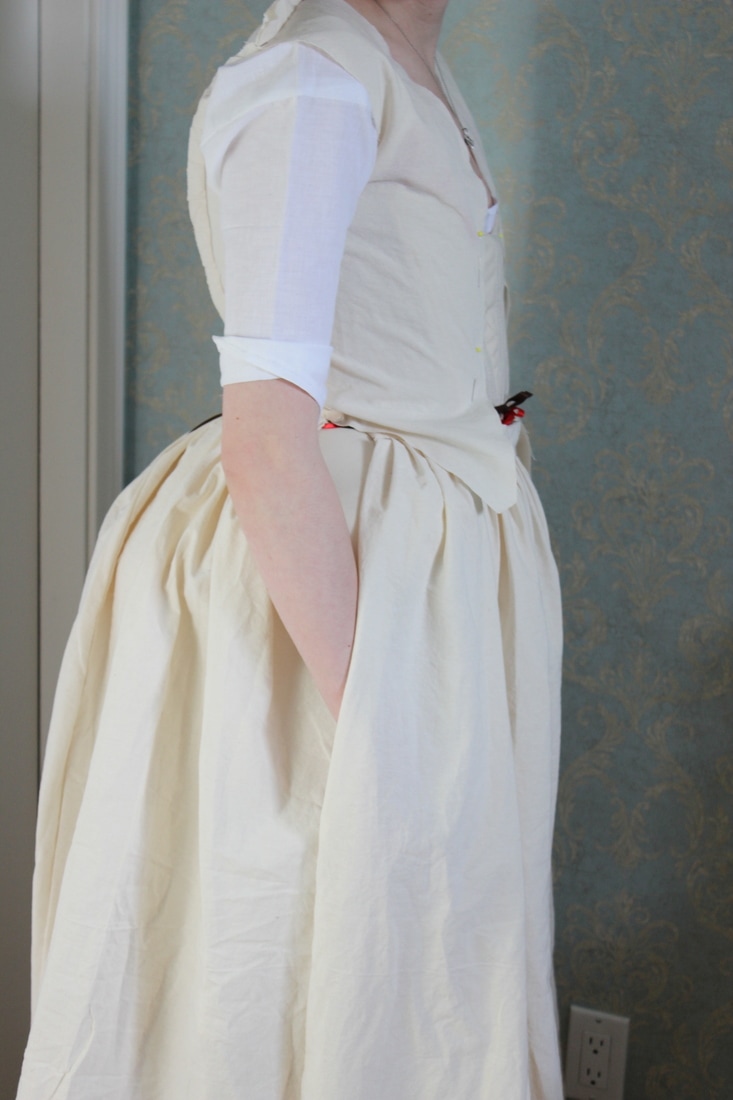 Next post I will show the details of the mock-up, and the finished bodice.
~K I have finished the under garments of my project, and am well on my way to being finished the bodice of the dress. Before I show you the final products that will be worn underneath the gown, here's the petticoat in progress.  The pattern pieces for the skirt and bodice.  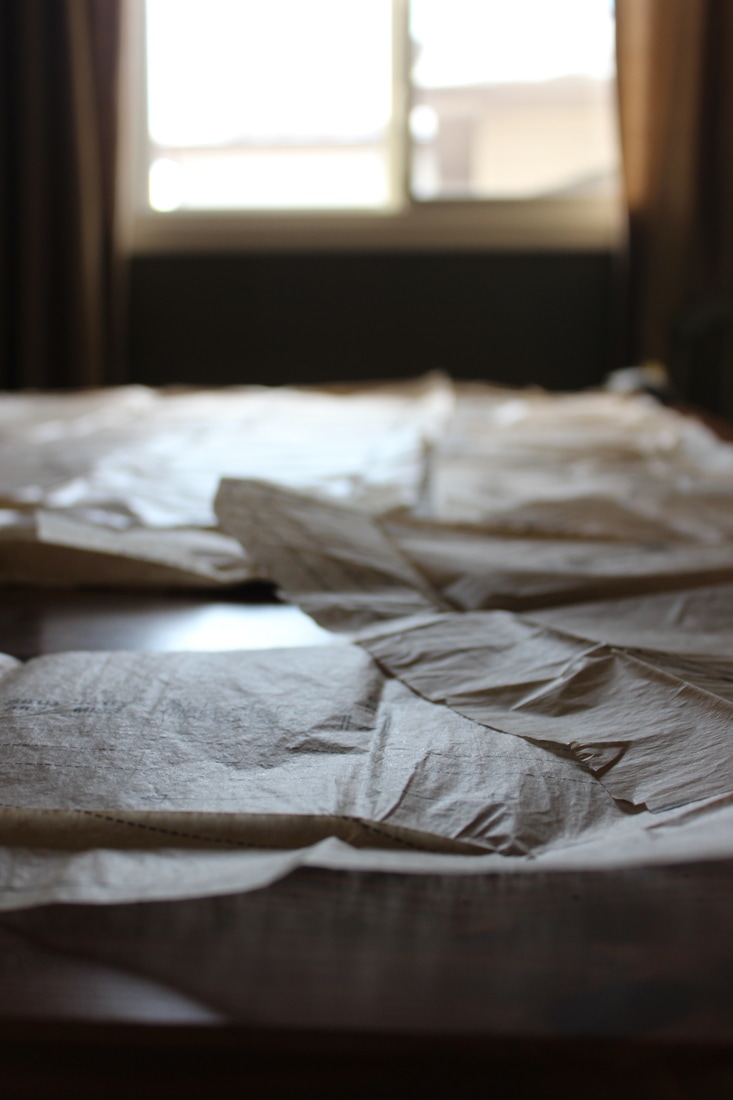 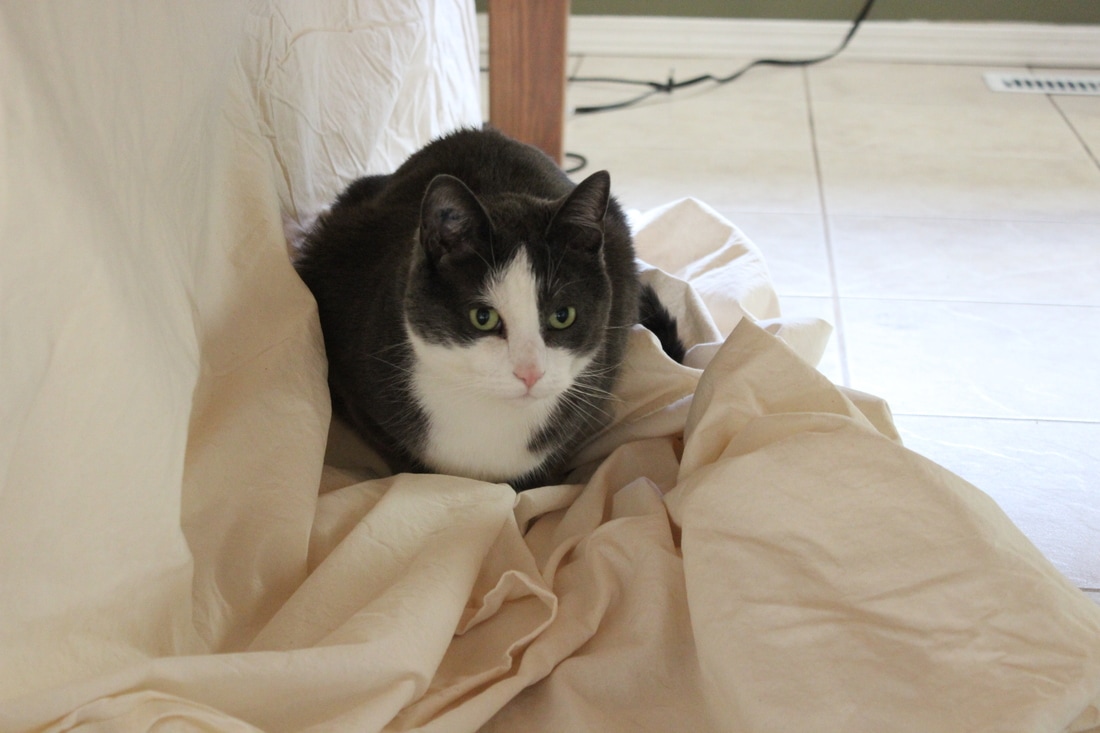 And my very helpful sewing room kitten And here is a sneak peak of all the undergarments on. This was taken before the skirt was hemmed. I am also wearing the mock-up of the bodice in this photo.  In this photo, I am wearing the completed shift, stays, and bumpad. On top I am wearing the un-hemmed petticoat and the mock-up of the bodice, without sleeves. I am so excited to work on the 18th century dress, but unfortunately, I have to make all of the undergarments first. All of the things that go under a period dress are just as important as the actual dress. Without the stays, bumpad, and petticoat(s), the dress would look very flat, and without the chemise, it would be very uncomfortable. Since this is the first time I have ever created a project like this, it has been a bit slow going, since I don't have anything already made. So far, I have finished the bumpad and chemise, and I am slowly but surely working on the stays. 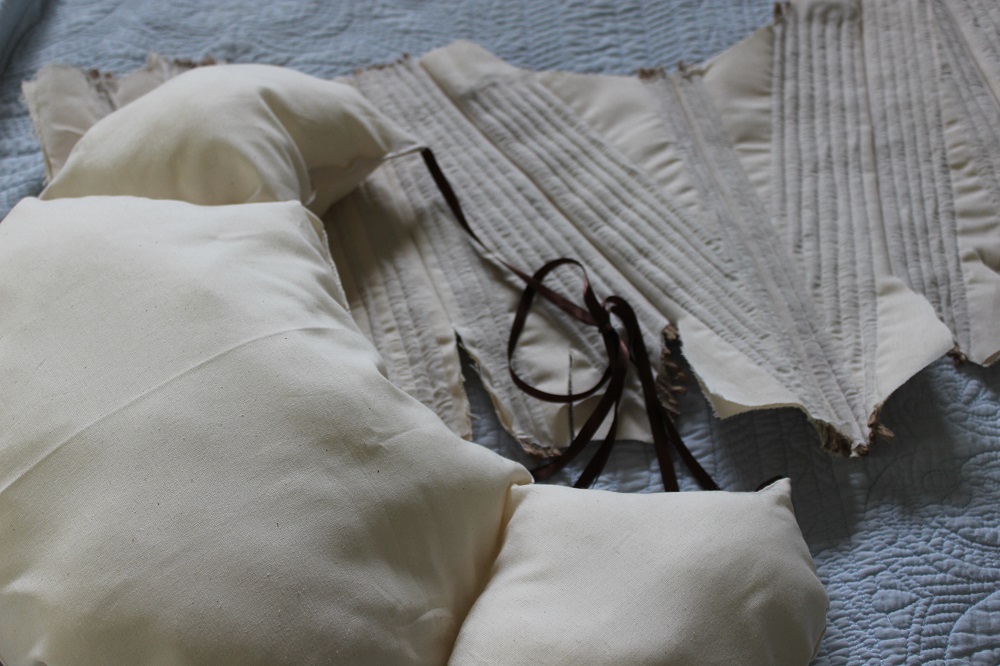 The half-finished stays and bumpad This has been a bit of a nerve-racking process, but my American Duchess* pattern has made it much easier. I was apprehensive to start on the stays since they are so different from anything I have ever made before. I decided to go with a different technique when it came to putting them together than what you would see in period garments, purely to make things a bit easier on myself. The biggest change being: I used cording rather than any type of boning. This is not accurate at all, as far as I have seen. Cording did not start in corsets or stays until the regency era. After that, it was quite popular throughout the 19th century, but before the early 1800s, I have not seen any examples of stays with cording in them in my research. 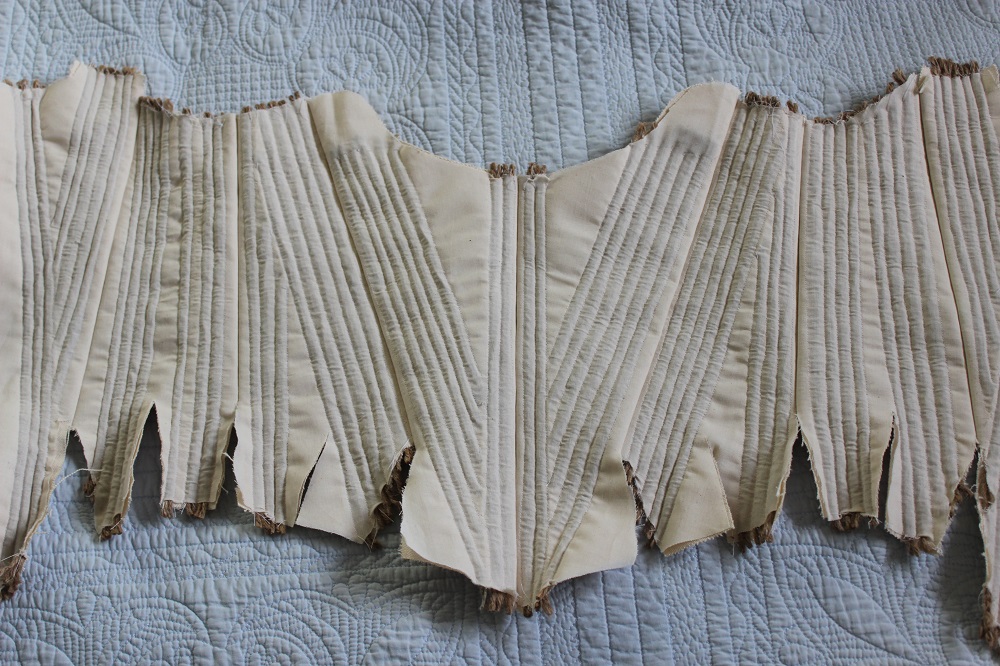 I went with cording for a few reasons. One, I have made corded garments before, so there was less chance of failing and having to start over. Also, I already had cording in the house, and I did not have to search or buy anything else. Lastly, I have never worn a corset or any heavily boned piece of clothing before, so I thought that this would be a better way of easing myself into that. Another thing that will be different and not at all period correct is that I will not be bias binding the stays. 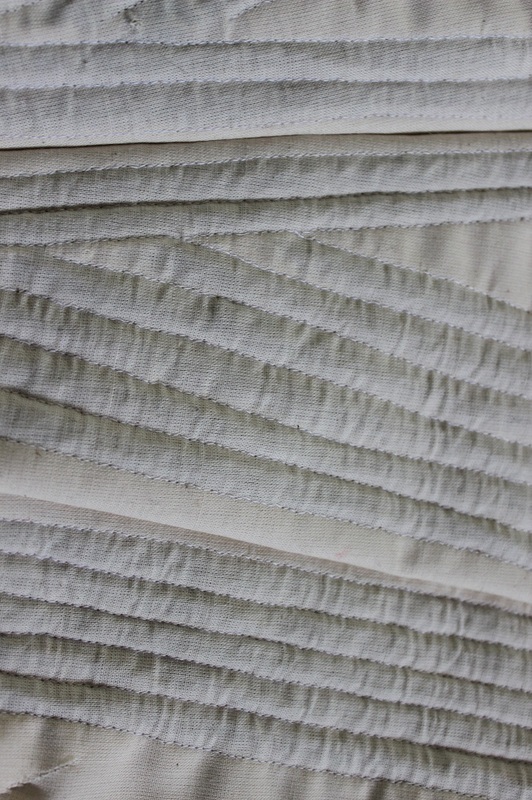 Close up of the historically inaccurate cording 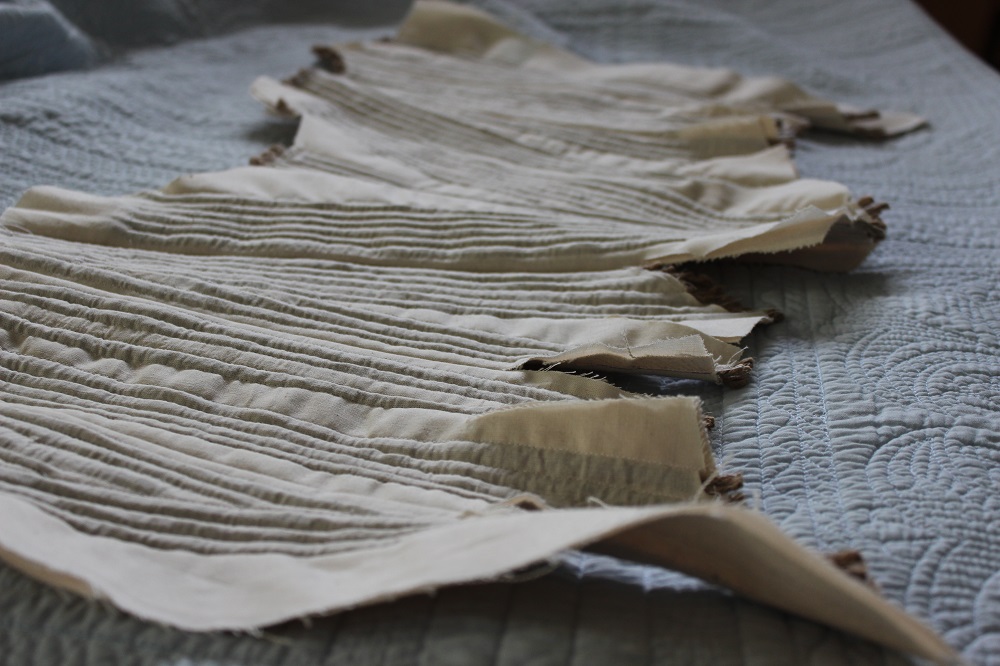 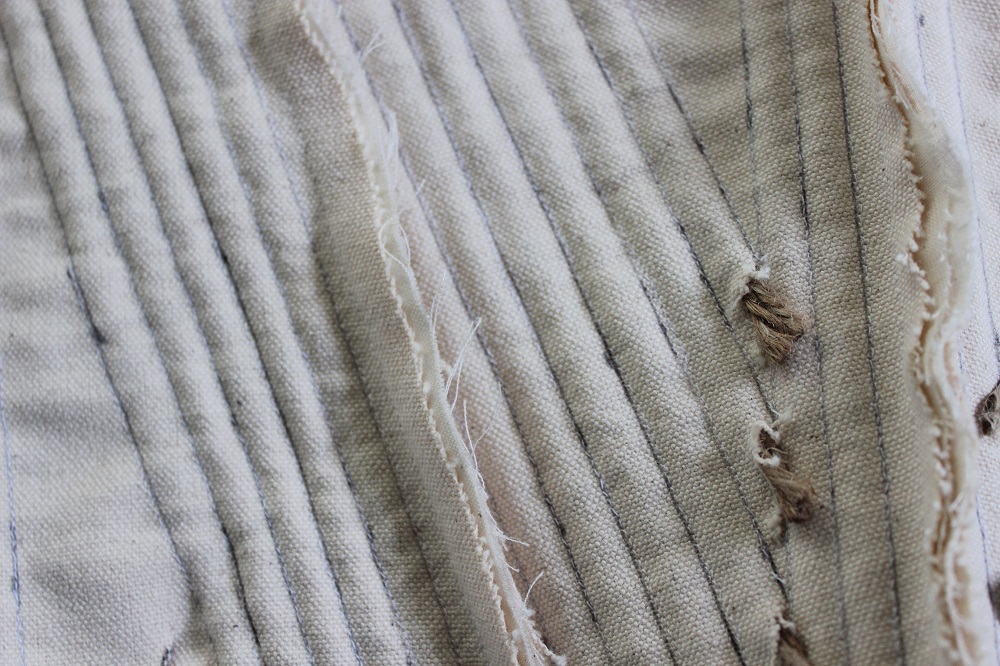 The inside of the stays. This will be covered with a lining Once the stays are finished, I just have a petticoat to make, then I'm on to the fun stuff!
~K *I am not an ambassador for American Duchess, any opinion I have about the company and their patterns are my own:) 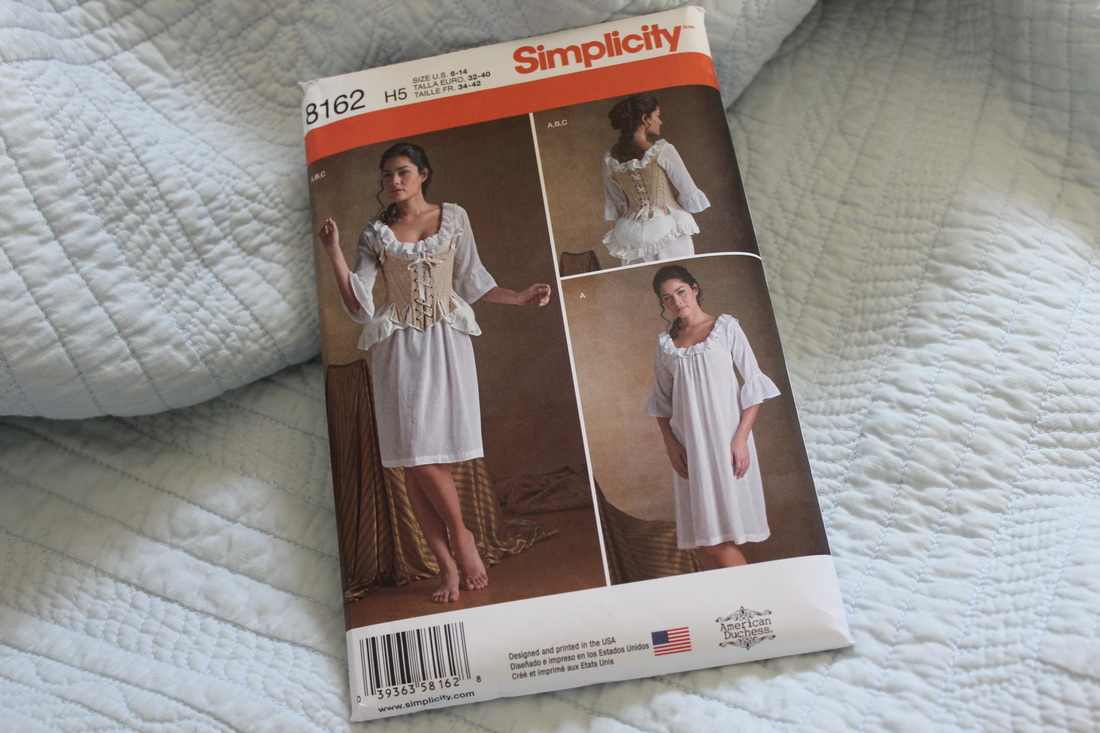 Here is the undergarments pattern. I also got the Italian Quarter-Backed gown pattern from American Duchess. 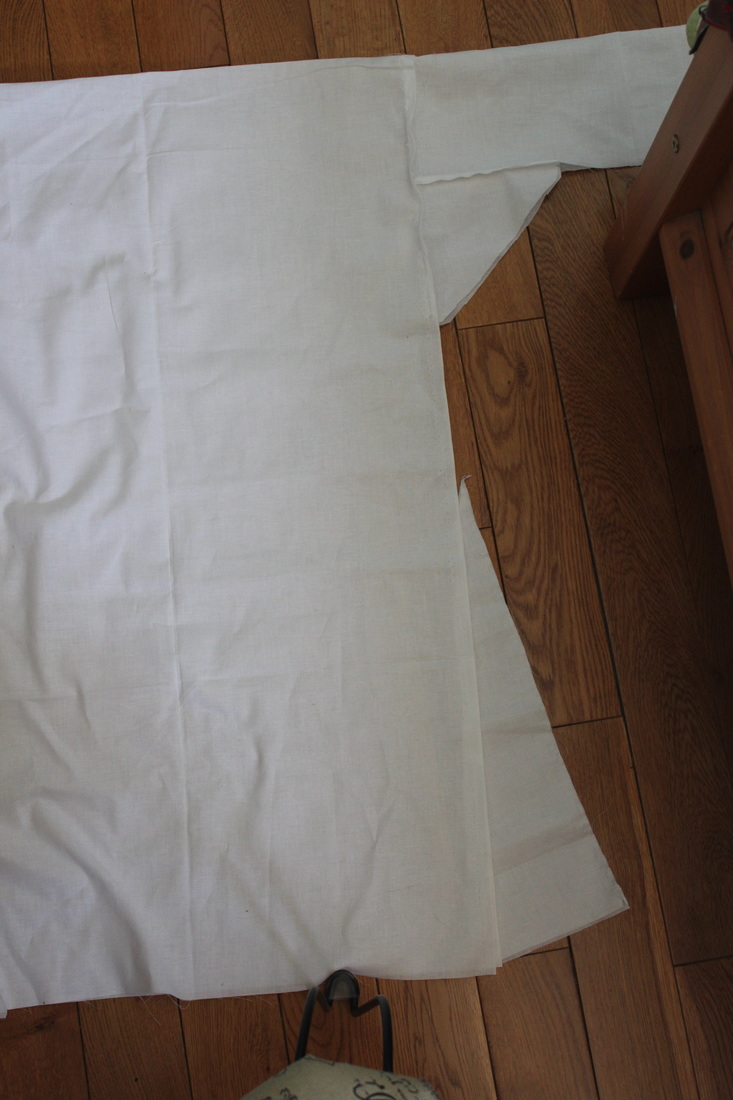 Here I have all my pieces roughly pinned together. As you can see, the main body is just a rectangle. Once everything is sewn together, I will cut the neckline. Here I have all my pieces roughly pinned together. As you can see, the main body is just a rectangle. Once everything is sewn together, I will cut the neckline. My new American Duchess patterns just recently arrived in the mail, and I am thrilled to finally be able to start my project officially. The day that I got the patterns, I started working on the chemise. I did adjust some of the pattern to make it a bit more historically accurate. Instead of using the main body pieces that were given in the pattern, I decided to just make a rectangle for the body with 2 triangular side gores, a method that was used for over a hundred years for chemises. Not including the main body for the chemise, the majority of the pattern pieces look very well done and pretty close to historically accurate. I understand the parts that are not, since the patterns were made for beginner sewers and for making costumes, not replicating the past. Another great thing about these patterns are how easy they are to follow, and it has been incredibly simple to adjust the pattern in any way that I need to for it to fit better and to look more like the examples I have seen from the 1740s. I can tell that a ton of research has been put into these patterns, and I am impressed by how well Lauren from American Duchess managed to balance simplicity and accuracy to the period. I would absolutely recommend these patterns, especially for anyone that is just beginning to create historical costumes. One thing that I would like to note, which seemed to be an issue for many people when I looked at the comments and feedback on the patterns, was the sizing. Sizes in sewing patterns versus sizing in ready made clothing are very different, and the only way to make sure that you are cutting out the correct size is by measuring constantly. I have noticed that I am much larger sizes in sewing patterns than I am in ready made clothing. I just wanted to touch on that since a few people complained that the sizes on the American Duchess patterns were too small. I would recommend you to be cautious when cutting out any sewing pattern and to measure yourself and the pattern before cutting your fabric.  I used the pattern for the sleeves and sleeve gores, and I am very pleased with the size and how historically accurate the pieces look. Overall, it has been a pleasure working with this pattern, and I cannot wait to keep working on this project!
~K Hello all! The start to anything is always a bit daunting, isn't it? After a lot of thought, I have decided to start with a plan, and some research. The late 18th century has always interested me, so I have been researching it for years. However, it wasn't until a few years ago that costuming and historical clothing started to appeal to me. An average woman in the late 1700s would wear many layers, starting with a chemise. A chemise is the main undergarment for any clothing from the 1500s until the early 1800s, and were a basic shift that went underneath the stays (corset). Mainly made from linen because of how white it could be bleached and how easily it breathed, chemises could also be made out of cotton. Cotton is not something that would be seen in clothing from Prussia, France, and England from the mid 18th century because it was illegal (more about that in later posts...). 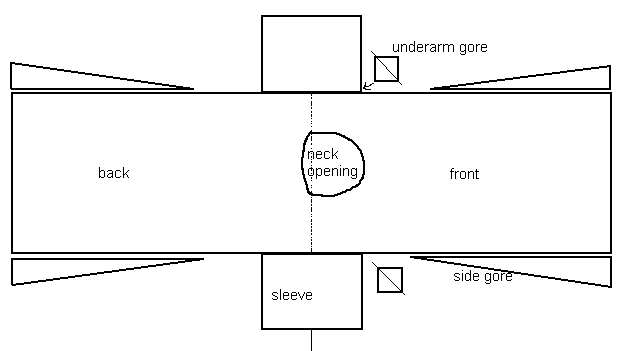 An example of the pieces of a simple 18th century chemise. Picture from http://www.marquise.de/en/index.html Over the chemise, a woman would wear stays, a stiff garment with boning in it to shape the body as well as support it. Stays often get a bit of a bad rap now because of the false information that is commonly believed. The amount of layers and weight of each made it so that it was more painful to not wear the stays than to wear them. After the stays come the petticoats. You can wear however many you want underneath an 18th century dress, but the more that were worn, the nicer shape one would get. On an everyday basis, a woman would wear at least two. Petticoats were just a simple linen or cotton skirt that was tied around the waist. They can be corded or quilted as well to add more fluff to the whole outfit. 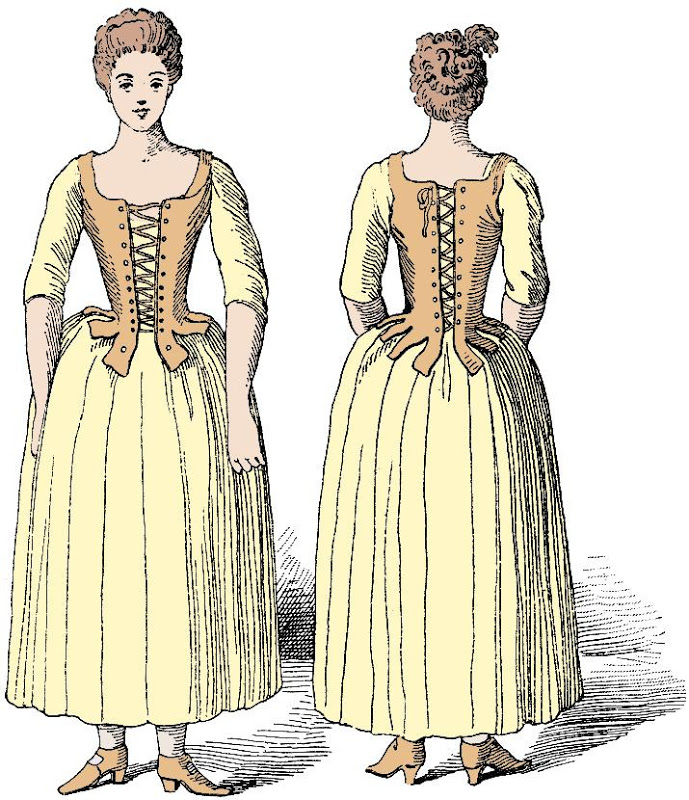 A working class woman wearing a chemise, stays, and petticoats, most likely over a stuffed bumpad. Image from Le Corset a Travers Les Ages, published in 1896. Next comes the main dress or skirt and jacket. The skirt would be made in the same way as a petticoat, just in the fabric chosen for the ensemble. A dress or jacket would normally be worn with a stomacher, a triangularly shaped piece of decorated fabric that was pinned to the front. All of the clothing worn during this time was made so that it could be worn for a very long time, meaning that it could change with your body. Stomachers allowed one to change the size of the bodice with a small amount of fabric. Skirts were tied around the waist so that they could change size easily. The outfit doesn't stop at these pieces- you need all of the accessories! This includes stockings, shoes, a carefully styled wig, a hat, gloves, fichu (a piece of fabric/lace to go around the neck), jewelry, etc. When it comes to the 18th century, the more the better.  A fashion plate from Sabatier and Durin. Notice all the accessories that have been added to the main dress- cloaks, hats, fichus, gloves, and more are all a part of the oufit. After all of that information, here are my plans for this project- I will need to make: One (1) chemise One (1) pair of half-boned stays Two (2) petticoats One (1) overskirt to go with a bodice One (1) bodice with stomacher I have decided to use the American Duchess patterns from simplicity. I am thrilled to be working with these patterns, being a long time follower of the American Duchess blog. I can't wait to get started! ~K |
EtsyArchives
April 2020
Categories
All
|
 RSS Feed
