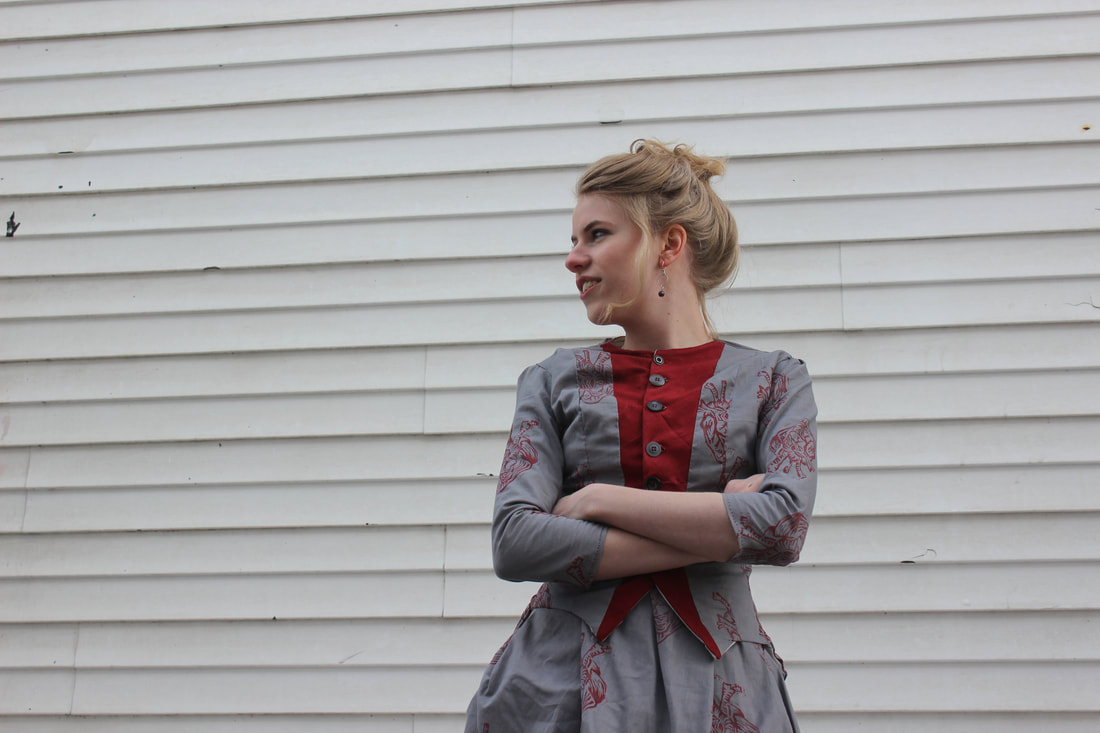
 I recently went through my sewing room and cleared it out, so I have a few costumes that I am selling! As much as I love how these ones turned out (they are actually some of my favourite costumes that I have made so far), I have lots of plans for new bustle era ensembles, and I need space for them! These big costumes take up space, and I actually only wear them for the photo shoot. I am not much of a Halloween person, so they don't see the light of day after I have finished and photographed them.   The first costume that I am selling is my Anatomical Heart bustle dress (the Frankenstein dress). This is a cotton dress that comes in 3 pieces - the bodice, the skirt, and the apron (the draping over the front and the bustle). It is hand printed with a anatomical heart stamp in red. Neither of these dresses come with the undergarments. Although they are worn over a corset and bum pad or bustle cage in the photos, they do not come with them. Find this bustle dress for sale here. You can also see more photos of this dress in my post here 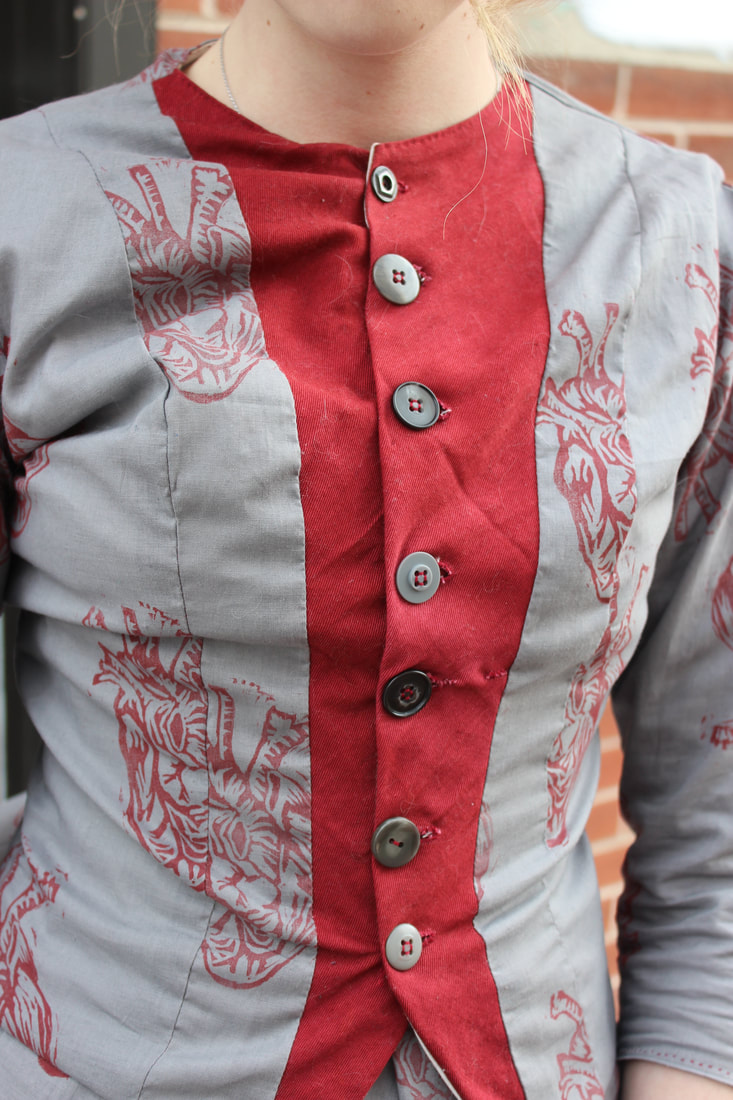 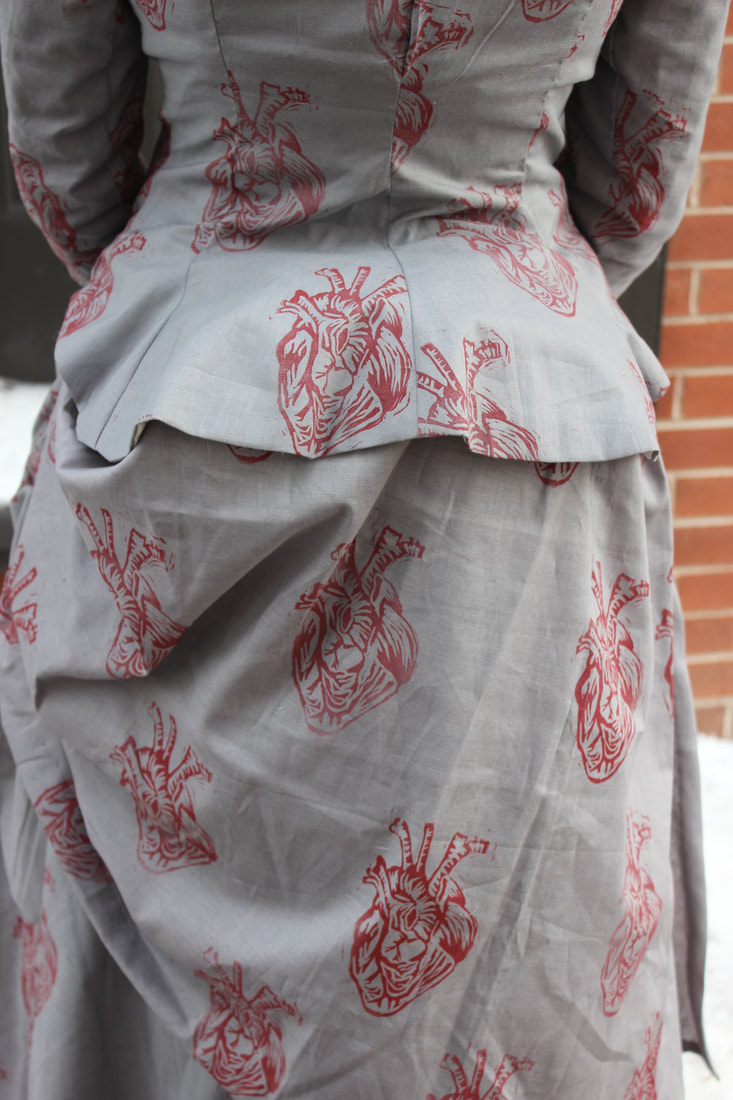 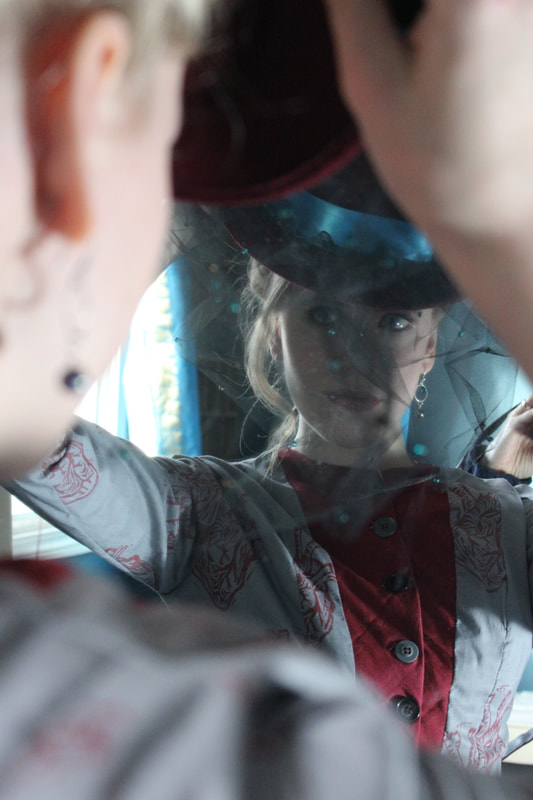 I am also selling the hat that I wore with the bustle dress! This is a felt fedora styled hat with a beaded veil, ribbon, and feathers. I wore this in the photo shoot for my Frankenstein dress. The hat will be listed shortly, so keep your eyes peeled! *Edit: The hat is now up! Check it out here 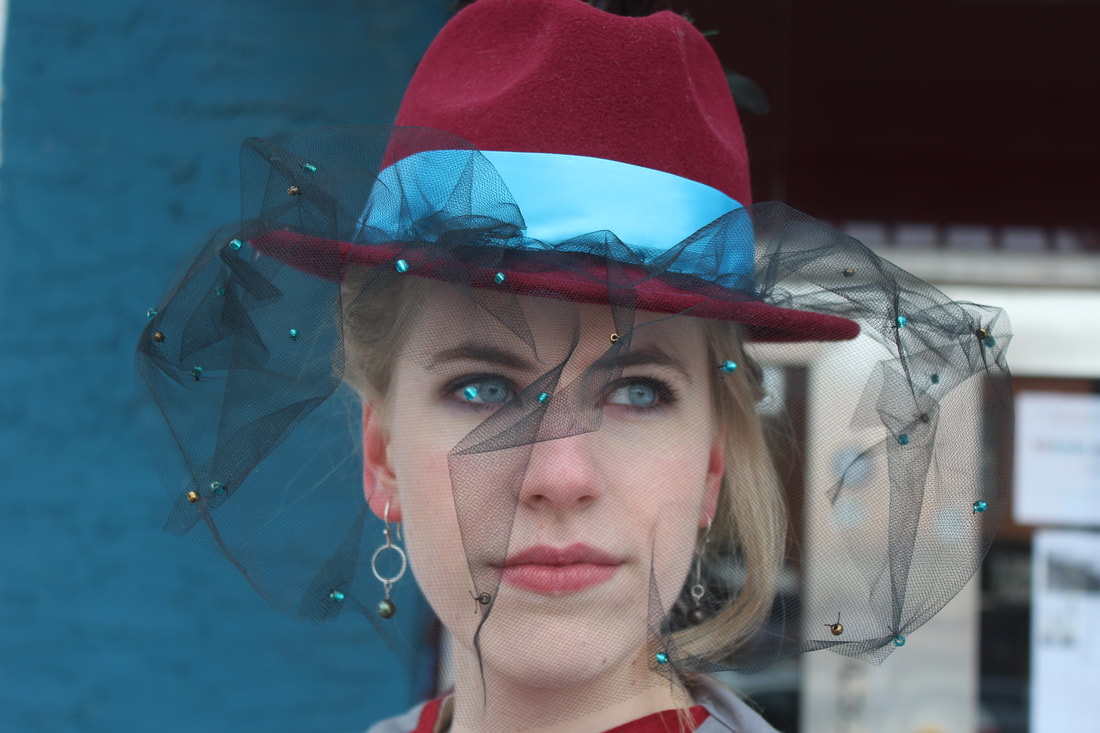 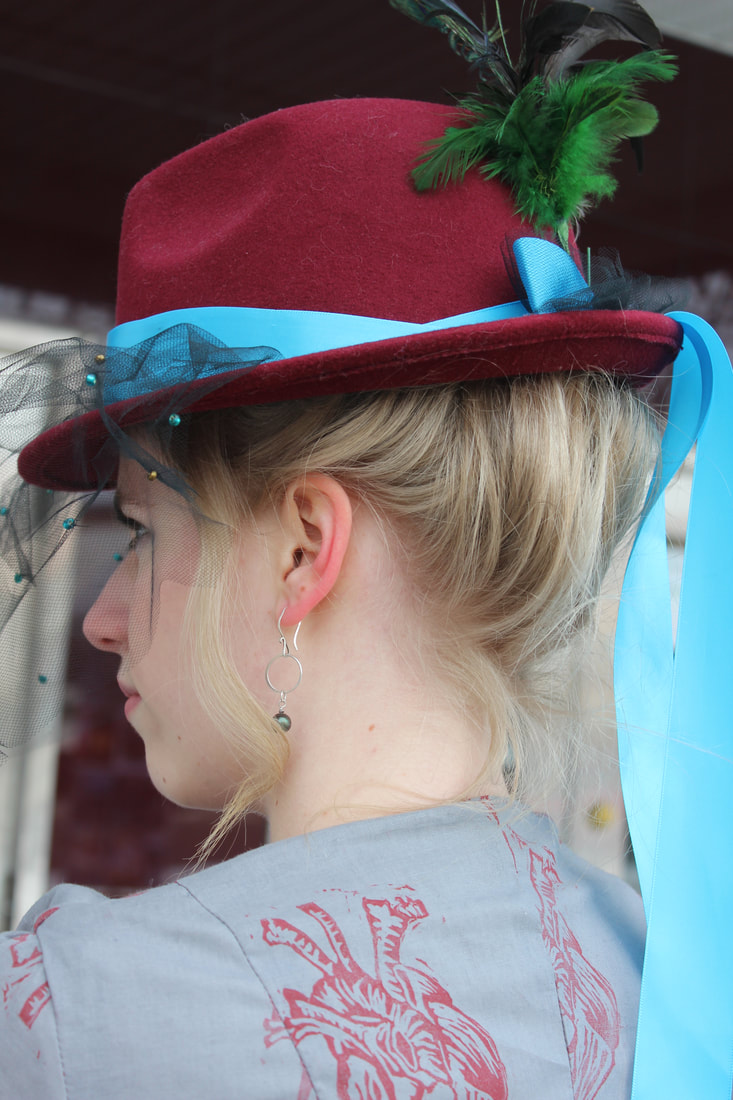 The third ensemble that I am selling is my Through the Looking glass dress. This is another bustle dress made of silk brocade and a bodice of a silk rayon mixture. This one also does not come with the under pinnings. It is a two piece dress, with a skirt with a train and plenty of room for a bustle cage to go underneath, and a bodice with long draped sleeves. To purchase this dress, click here, and to see more photos of the dress, check here 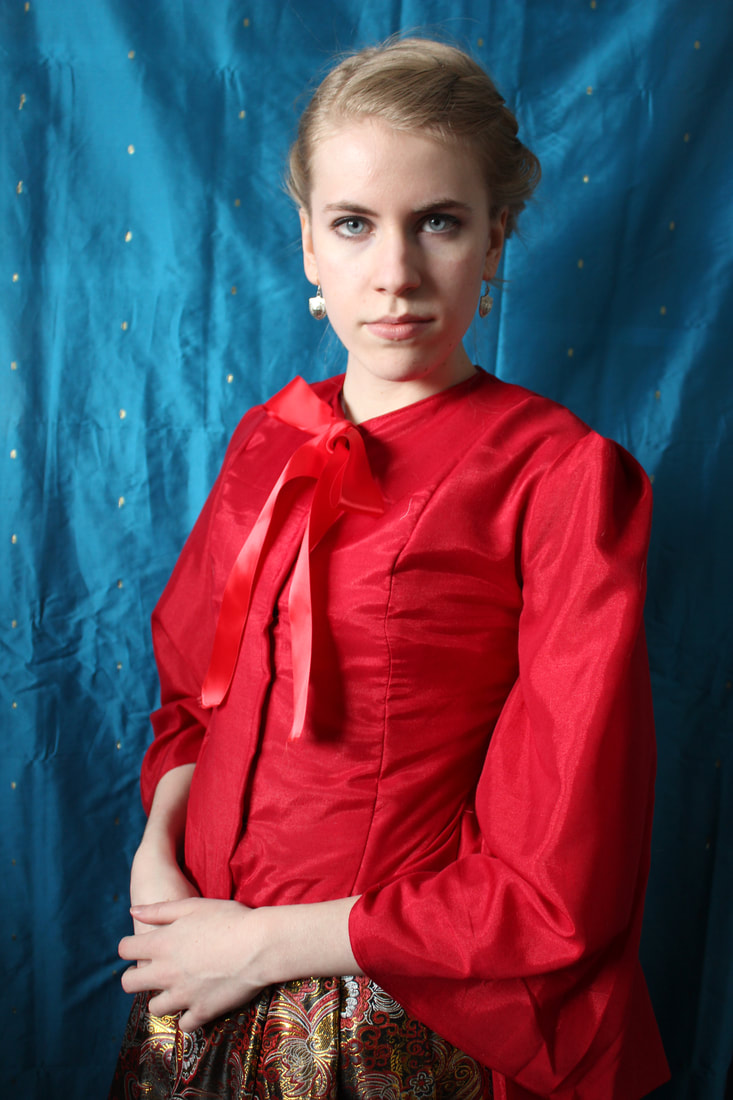 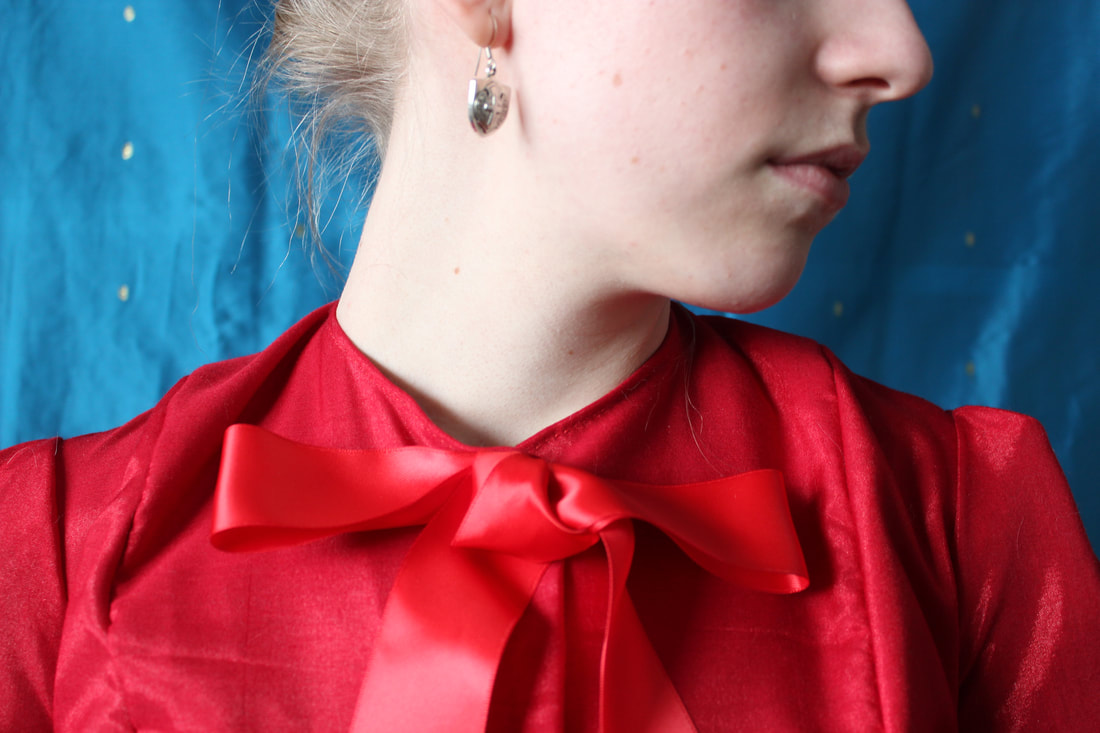 Both of these dresses are entirely hand made and draped by me, with the Frankenstein dress even printed by me. Check out my Etsy account if you are interested in purchasing any of these items! And just a reminder, I still have 2 1950's styled garments in my shop as well- my retro scissors skirt, a a pin-up styled white romper. 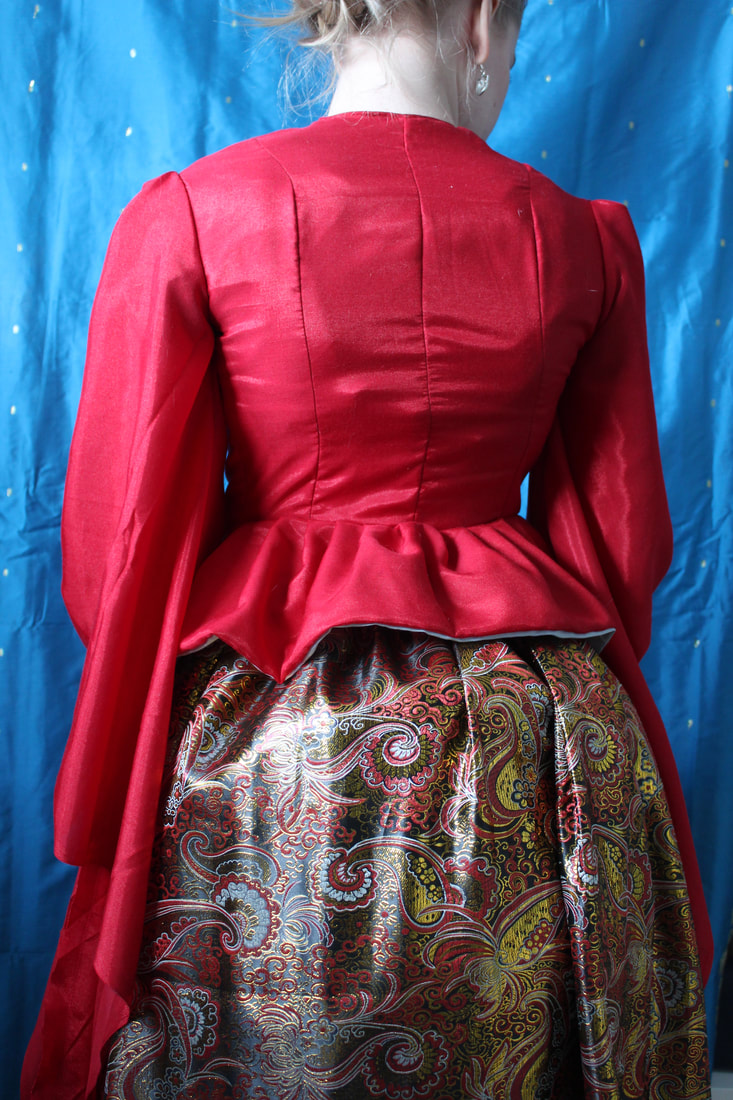 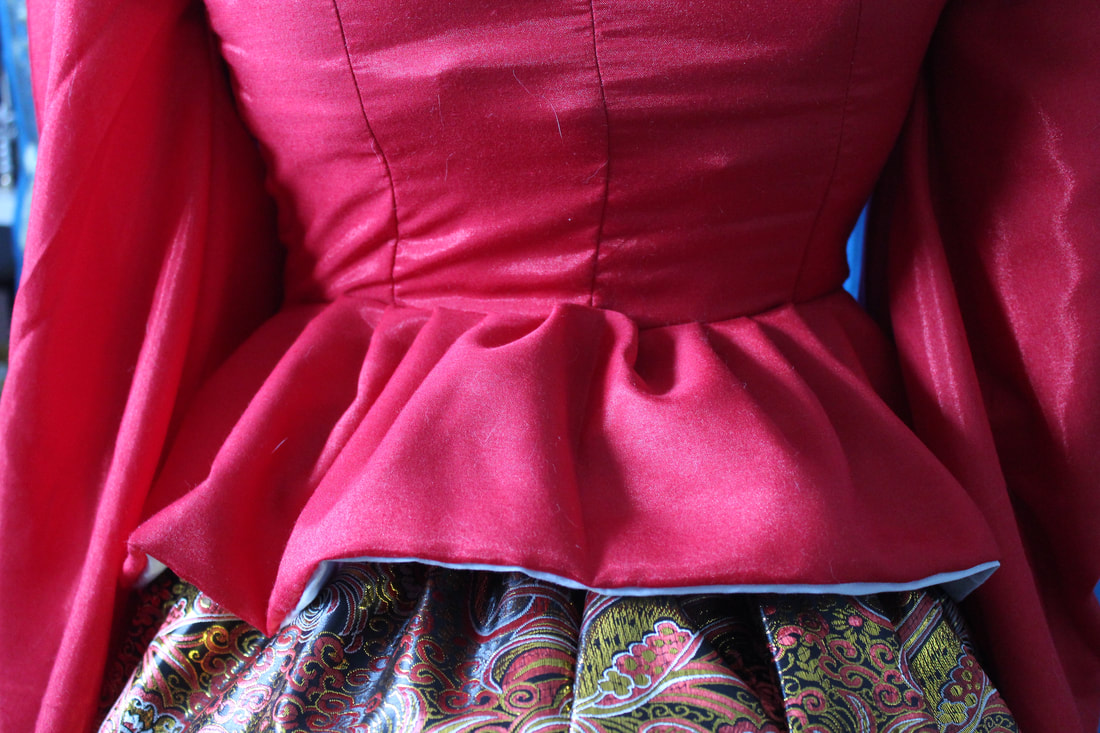 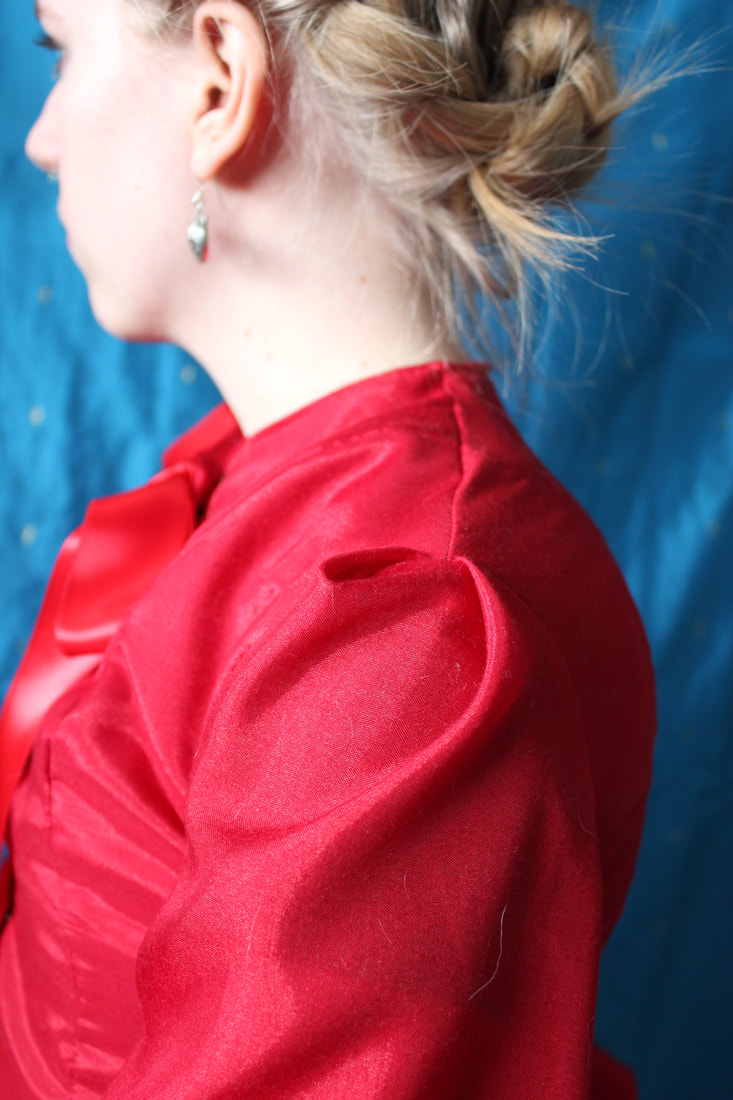 Thank you for reading, and stay tuned for new projects coming up! ~K 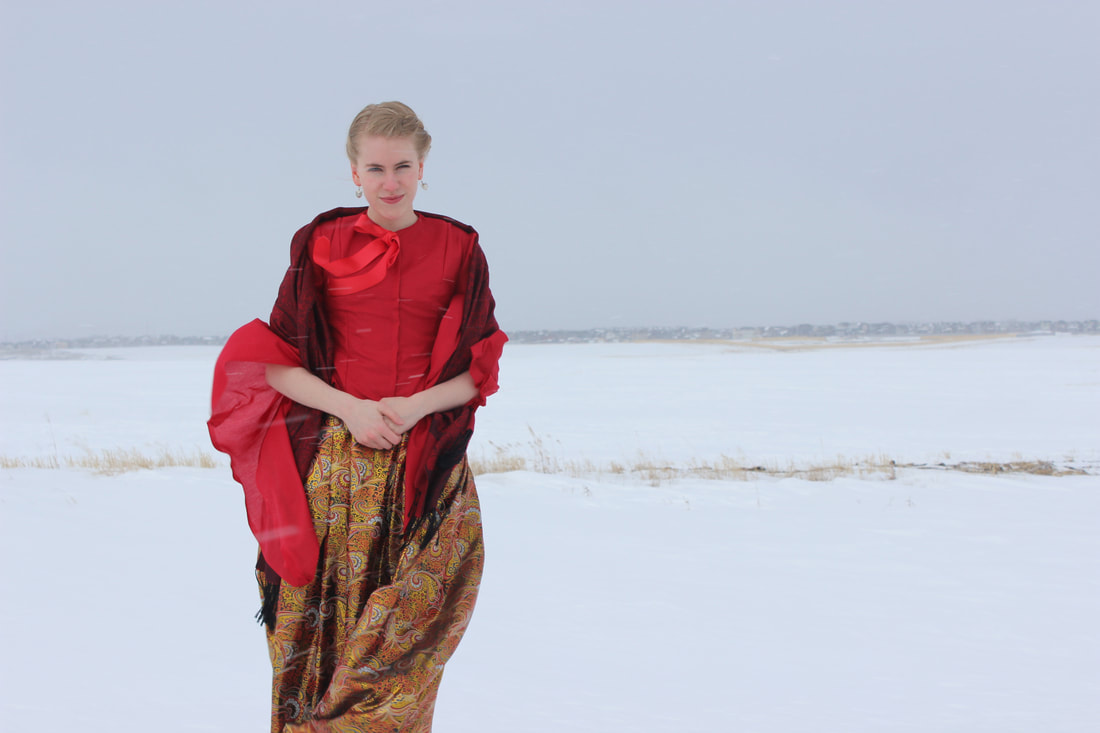
0 Comments
This year was a really huge one for me, especially when it comes to my sewing. I started this blog just a little over a year ago with my Special Project in school, and it has grown very quickly with all of the projects that I have been working on. I also started a makeup and skincare part of the blog (and an instagram here) after I started working at a beauty counter to share about some of the things I have learned through training sessions. When it comes to my sewing, I have grown quite a bit in the past year! I started the year with finishing my Special Project, which took me a semester to make. Not long after that, I started working with MakeFashion. I started out just helping, and ended up making a dress with the help of an engineer! It was hectic and crazy and I loved every minute of it. I also got to go to Mexico with my family this year, celebrated a one year anniversary with my boyfriend, graduated from high school, got accepted into Olds College Fashion Program, got a job, made a dress for a televison pilot, and finished 16 projects (some of which I haven't blogged about yet). I would say that was a pretty successful year! Here is my year in photos: 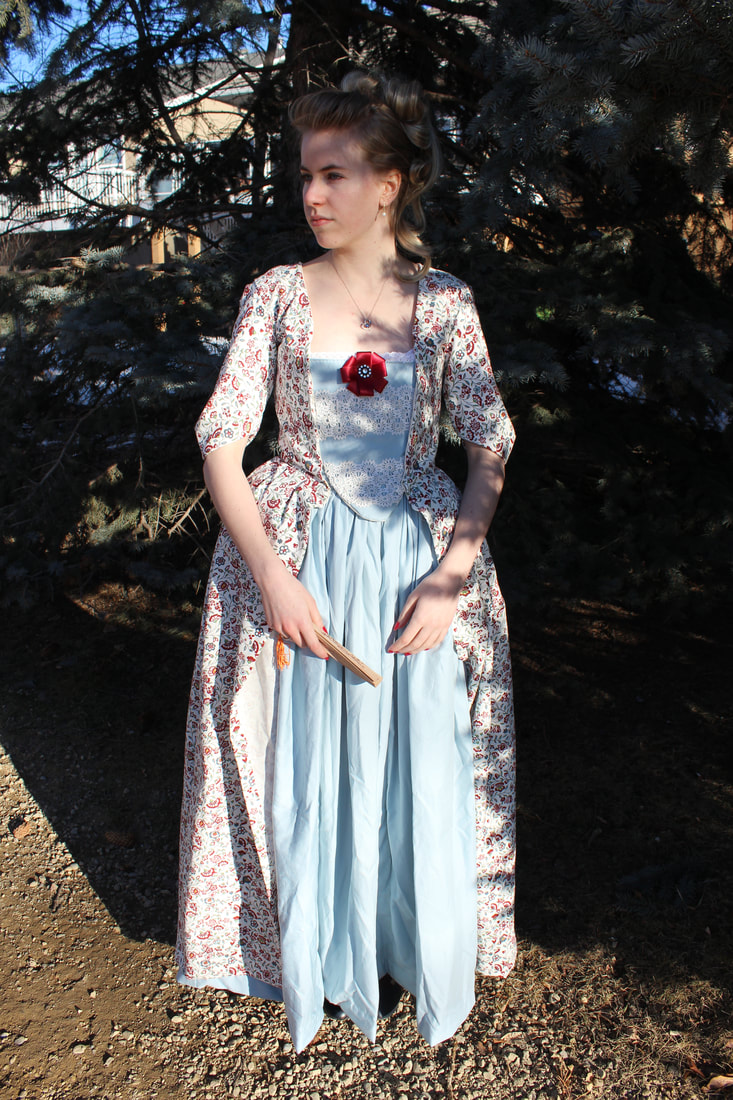 The finished Special Project  The Dream Dress that I made for MakeFashion with the help of the team lead, Catherine Larose, and an amazing engineer. This photo was taken before the lights were programmed 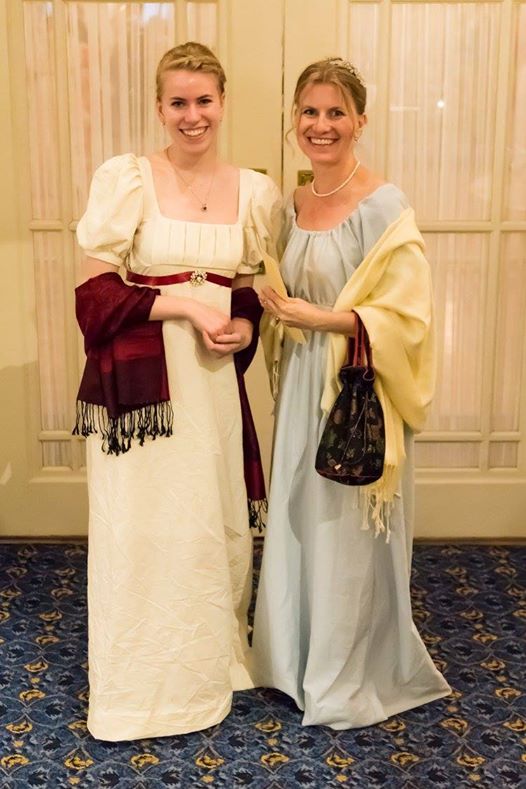 My mom and I at the Pride and Prejudice ball in my first ever Regency era gowns   The dress that I made for a TV pilot 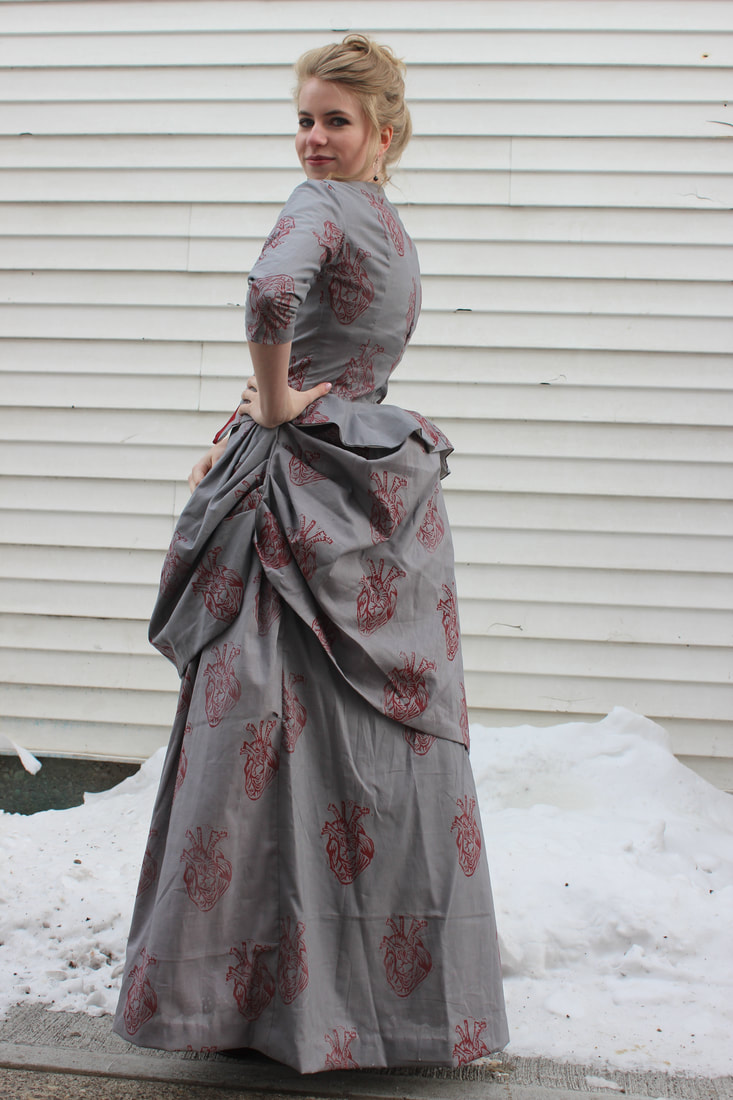 My favourite project that I finished this year    And a quick sneak peak of a project that I haven't posted about yet: 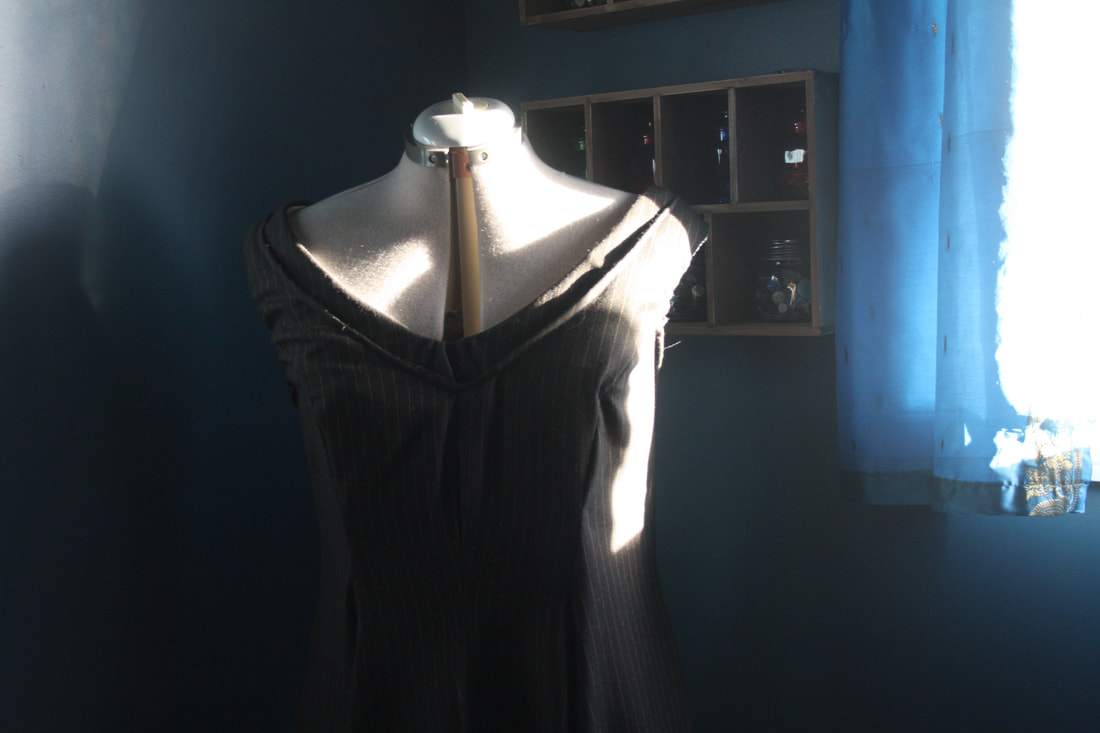 Heres to another great and productive year! I can't wait to see whats in store for me
~K  As I said in my last post, I wanted to talk about how they got dressed in the 1880's, which is the era that my last project was from. Many people ask me what is on under my costumes to give them their shape, so I thought it would be good to show you all of the layers as they are worn. 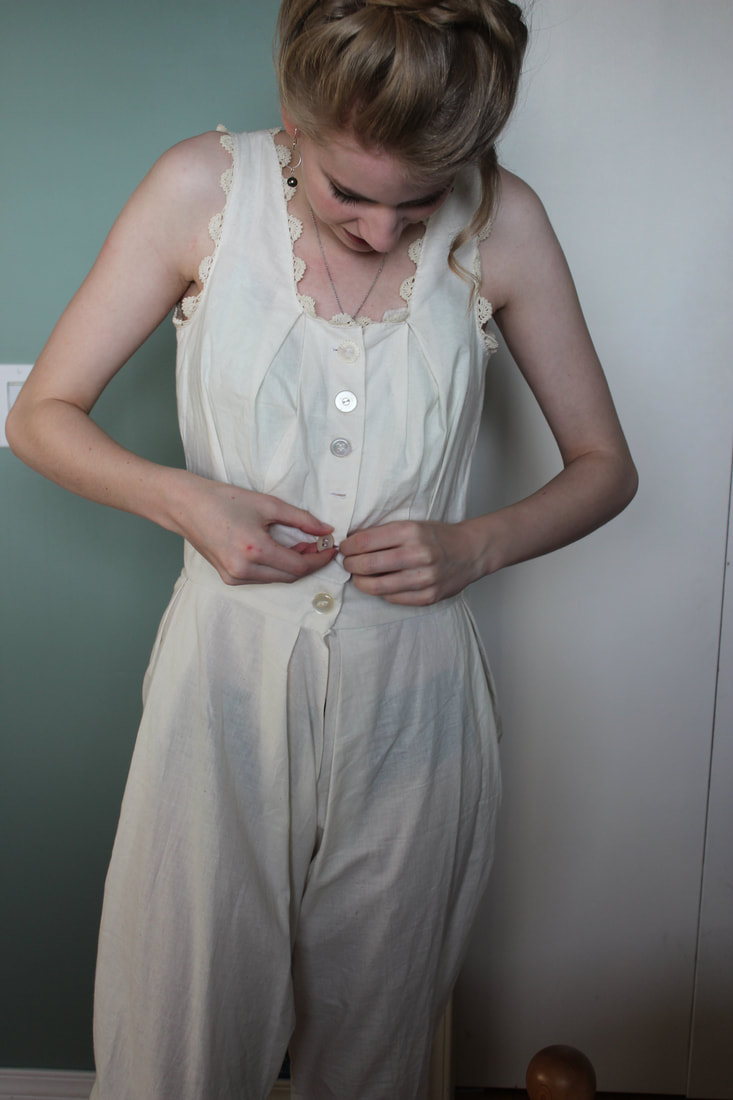 The first layer is called combinations. They are a top and bloomers sewn together, with a slit in the bloomers so you can use the washroom (with all of the layers worn at the time, this feature is pretty necessary). Mine are made of muslin and vintage buttons and lace. The garment was mostly hand drafted, and very loosely based on a Simplicity pattern to get an idea of the shape for the bloomers. 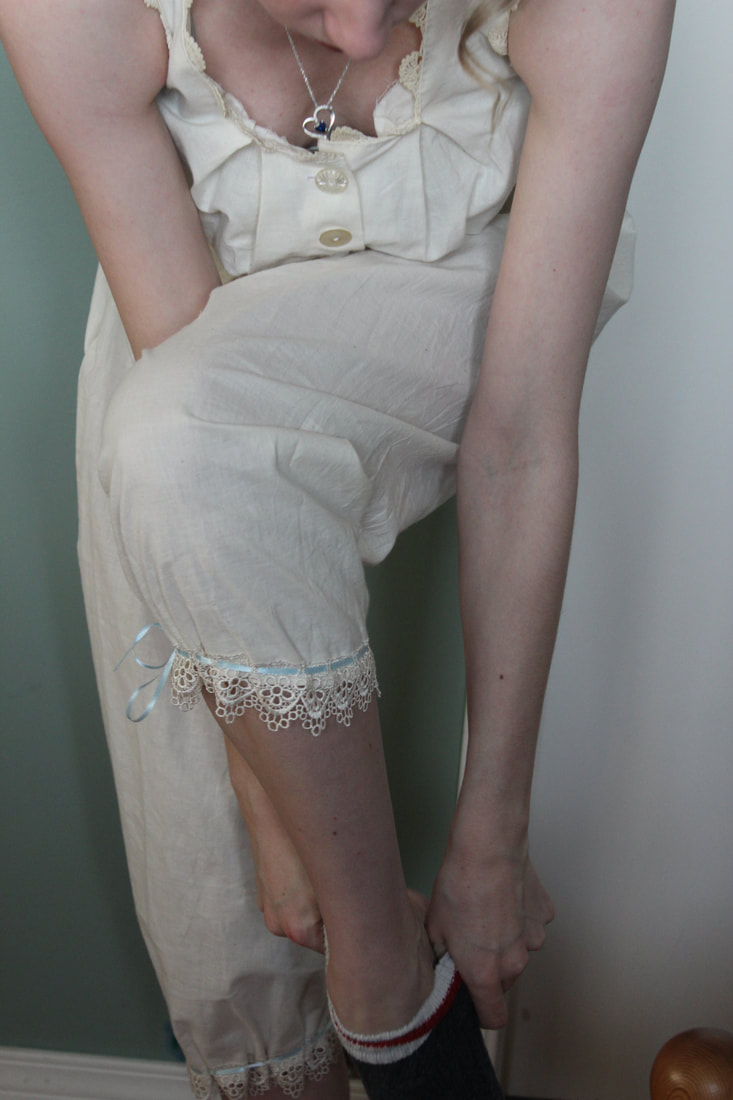 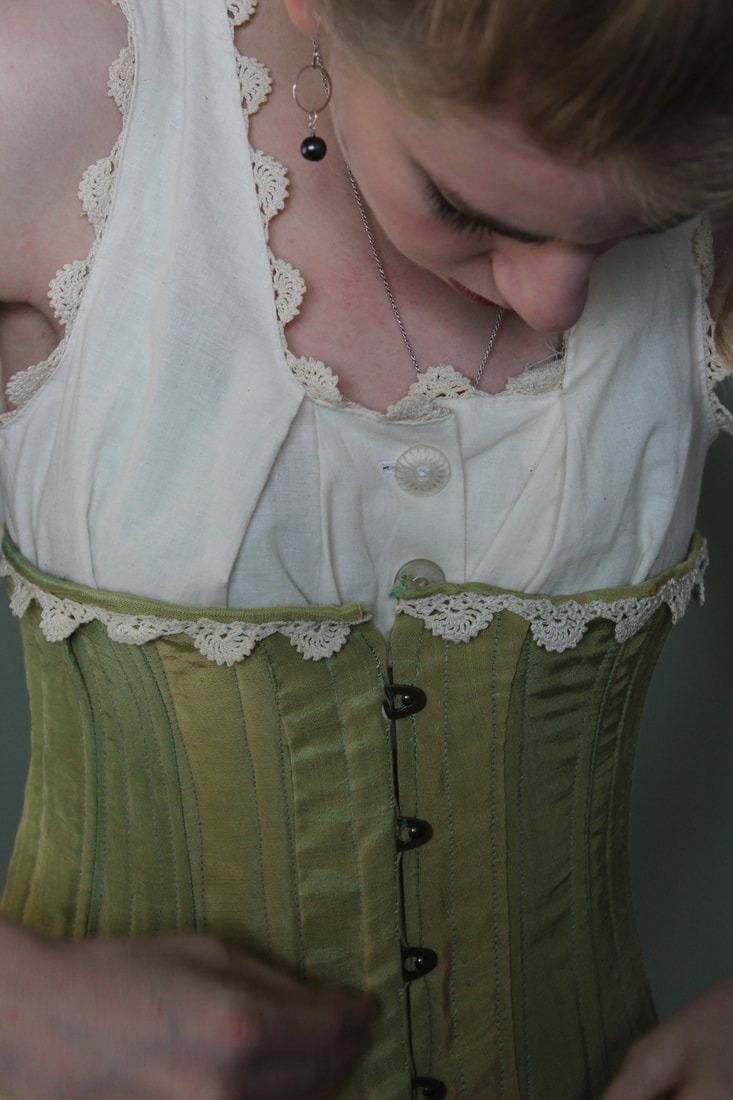 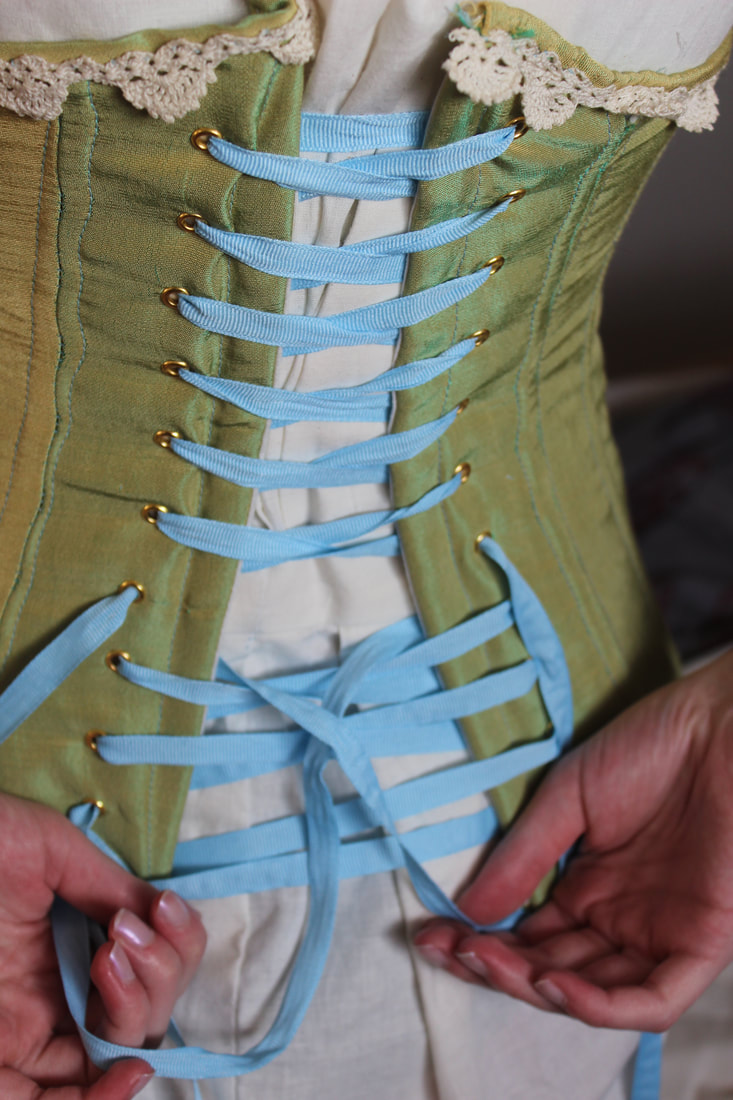 After the combinations, you would normally want to put on stockings (I just wore wool socks for warmth) and shoes, since it is a little difficult to put on shoes with a corset on, but I forgot to put on my shoes before the corset. The corset is next- mine is a silk taffeta in a green/mustard colour with vintage lace. The busk (the front closing) is from Farthingales, a Canadian company. 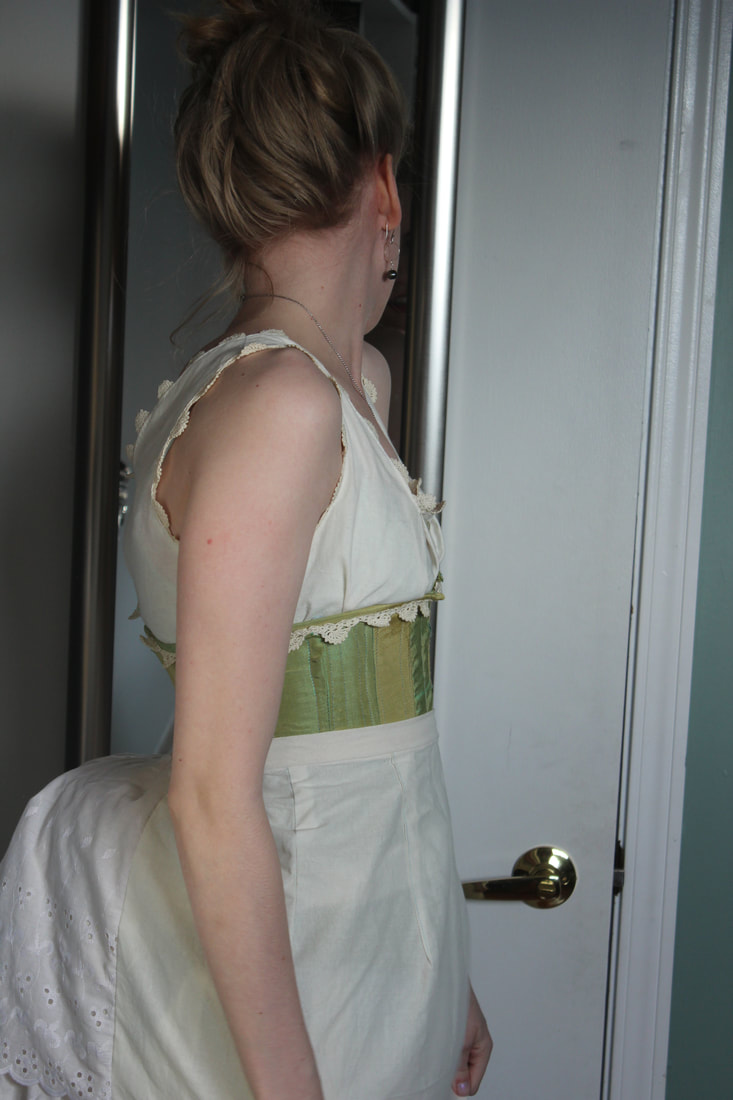 After the corset, there is more shaping- the bustle and the petticoat. Bustles came in many shapes and forms, and for this project I just made a bum pad out of two layers, to give it a 'perky' shape. The petticoat is made of muslin and ruffled lace, and is made to smooth the lines from the bustle. After making this dress, I will be making a boned bustle cage for some more projects in this era.  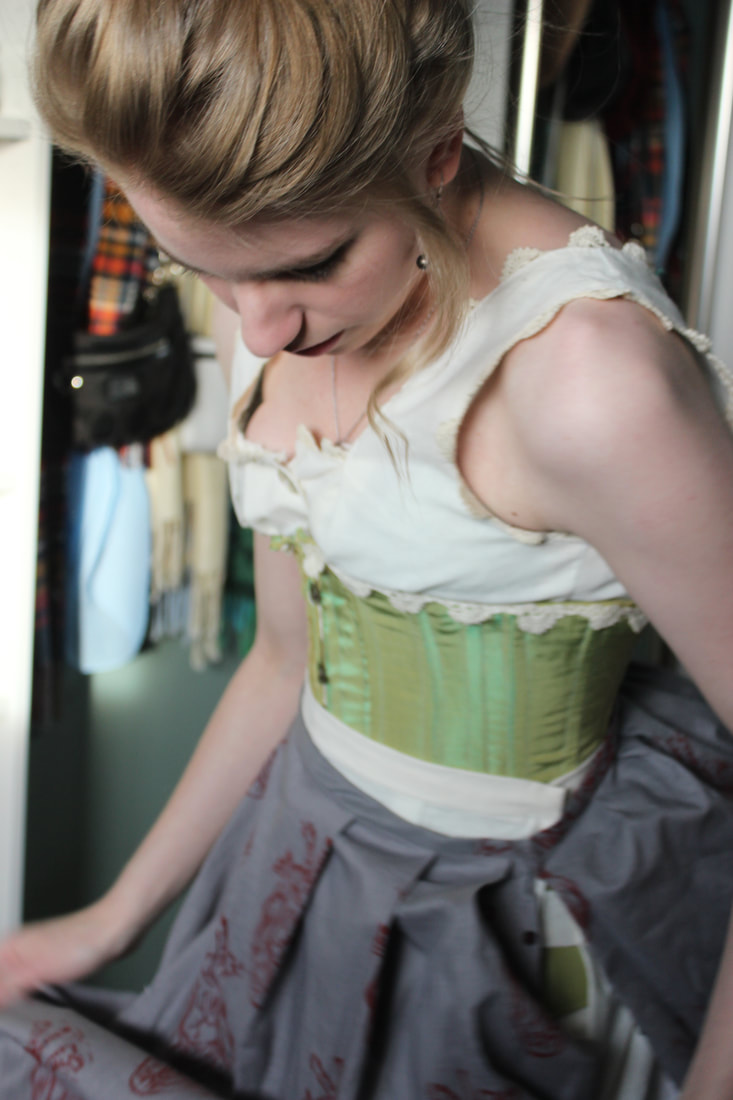 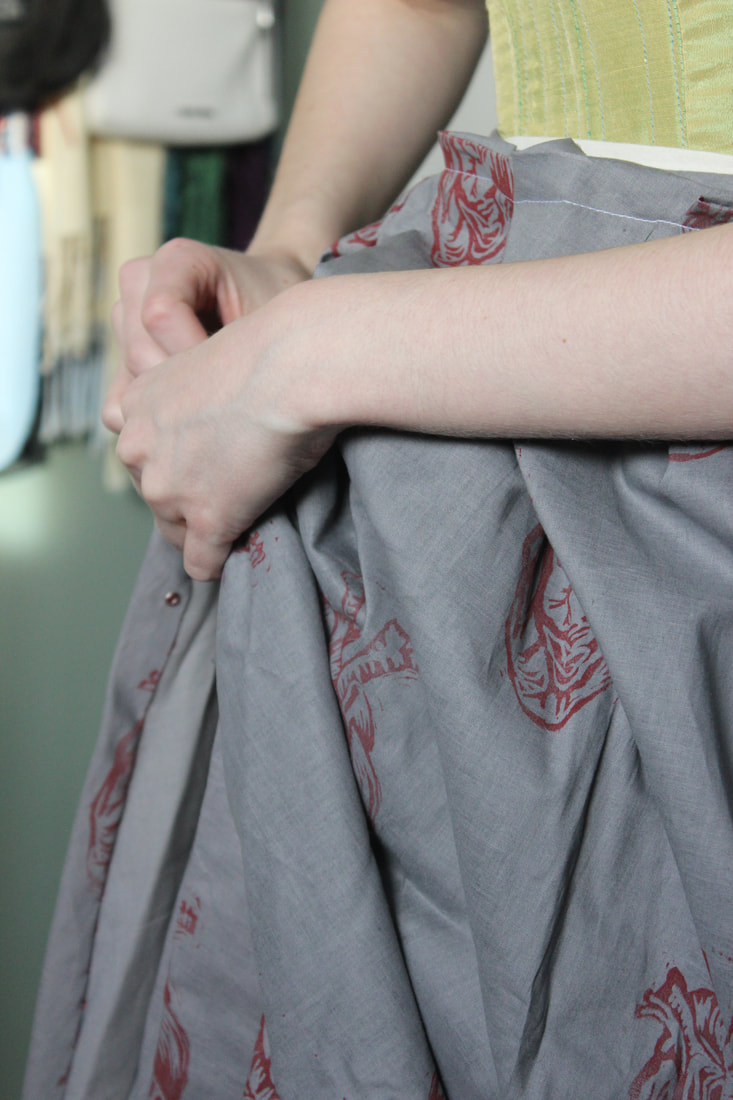 The apron and skirt both close with snaps 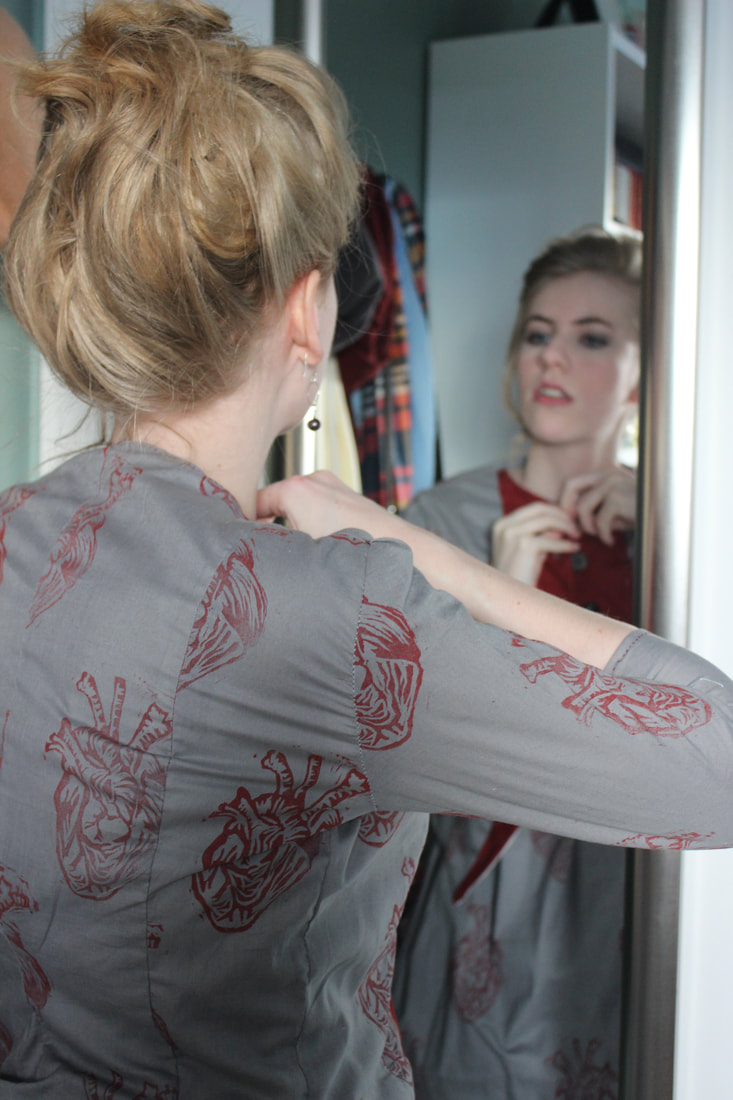 Finally we get to the outer dress! My dress is in three parts- bodice, skirt, and apron. The apron is the draped fabric that goes over top of the skirt. First I put on the skirt, then the apron, and the bodice last.  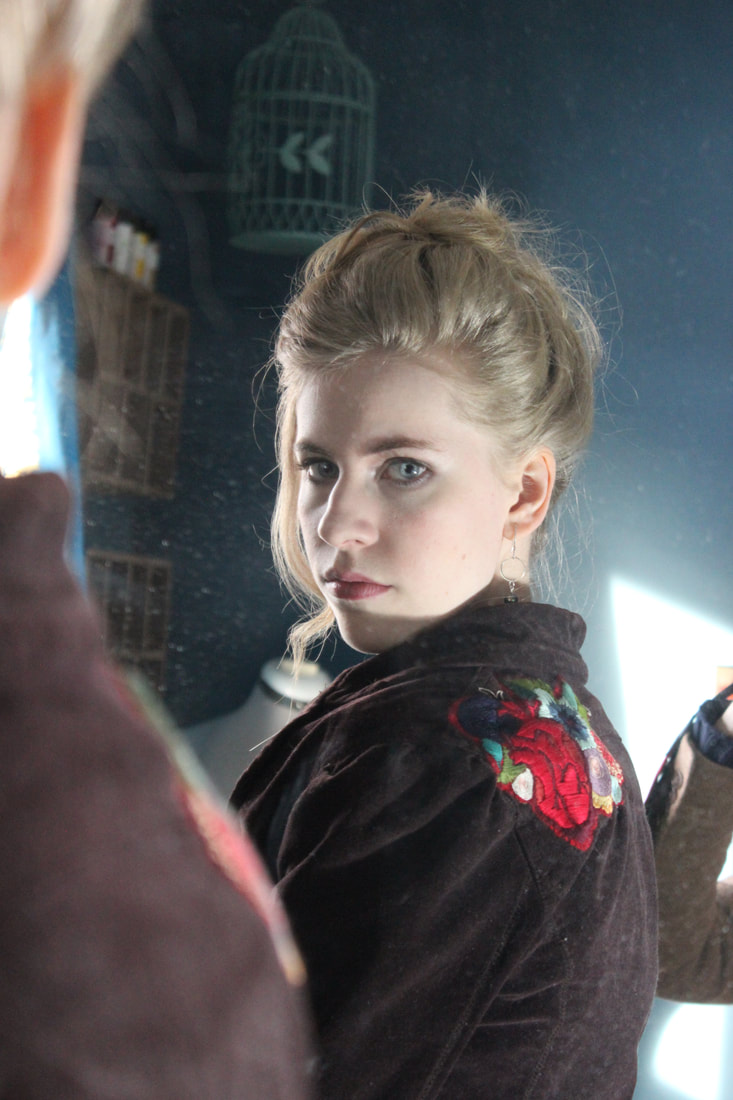 The velvet blazer we have had for years, and I added the heart embroidery on the shoulder The finishing touches to the ensemble is the jacket (which was not made by me. I just did the heart embroidery on the shoulder), the hat, and the shoes since I forgot to put them on earlier. A proper woman in the 1880's would also wear gloves to leave the house, but since I was going a little steampunk with this dress, I thought it was okay to be glove-less.  And the whole outfit together (except for the jacket) I hope this was informative and answered any of your questions about layers in the era and how to get the pretty extreme silhouette! Keep your eyes out for more steampunk styled outfits coming up! And also for a real bustle cage! ~K
I have finished editing the making of video for my bustle dress! I am thinking of doing more videos like this, so let me know if you like it!
~K 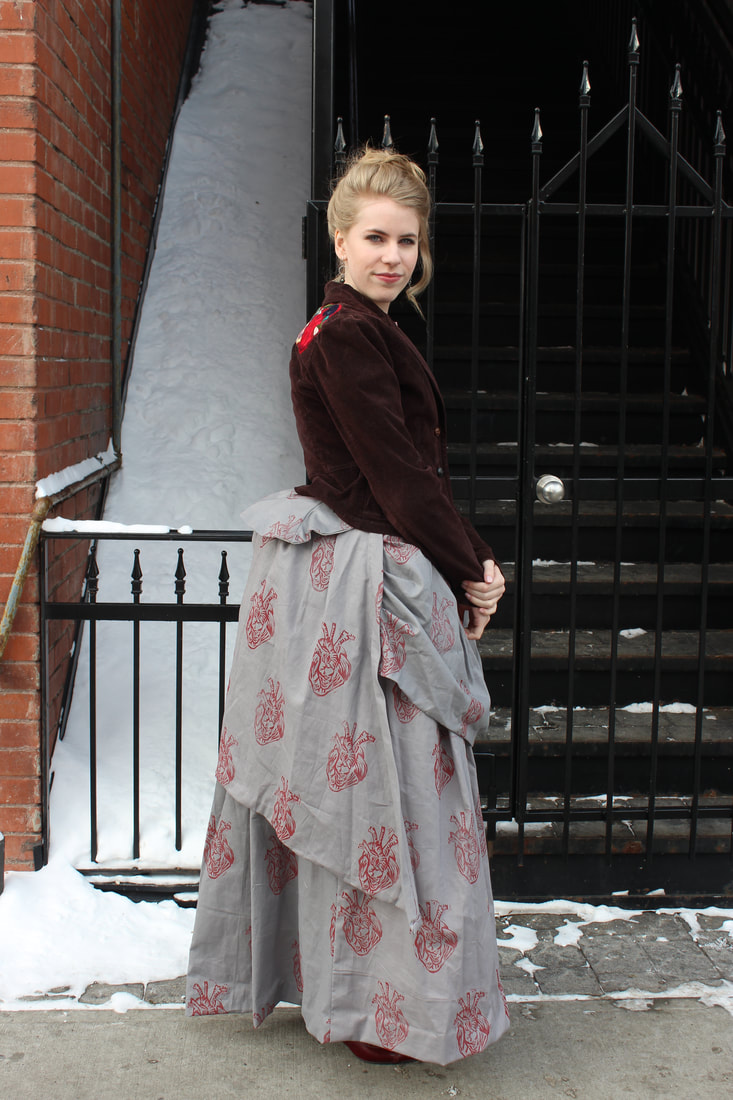 I finished my bustle dress a few weeks ago, but we were not able to make it into Calgary for photos until today. It ended up being freezing! I was completely frozen by the time we got all of the photos, but I think they turned out really well! I know that I have posted a ton about this dress, but I am going to make two posts for the finishing of this- the one today will be of the actual finished outfit in Calgary (we took the photos in Kensington since it is one of the oldest places in Calgary- unfortunately Calgary isn't a very old city, so it was a bit difficult to find something that I thought fit with the dress). The second post that I will make will be about getting dressed in the 1880s, and what all of the layers look like together (including the finishing touches- a jacket and a hat). 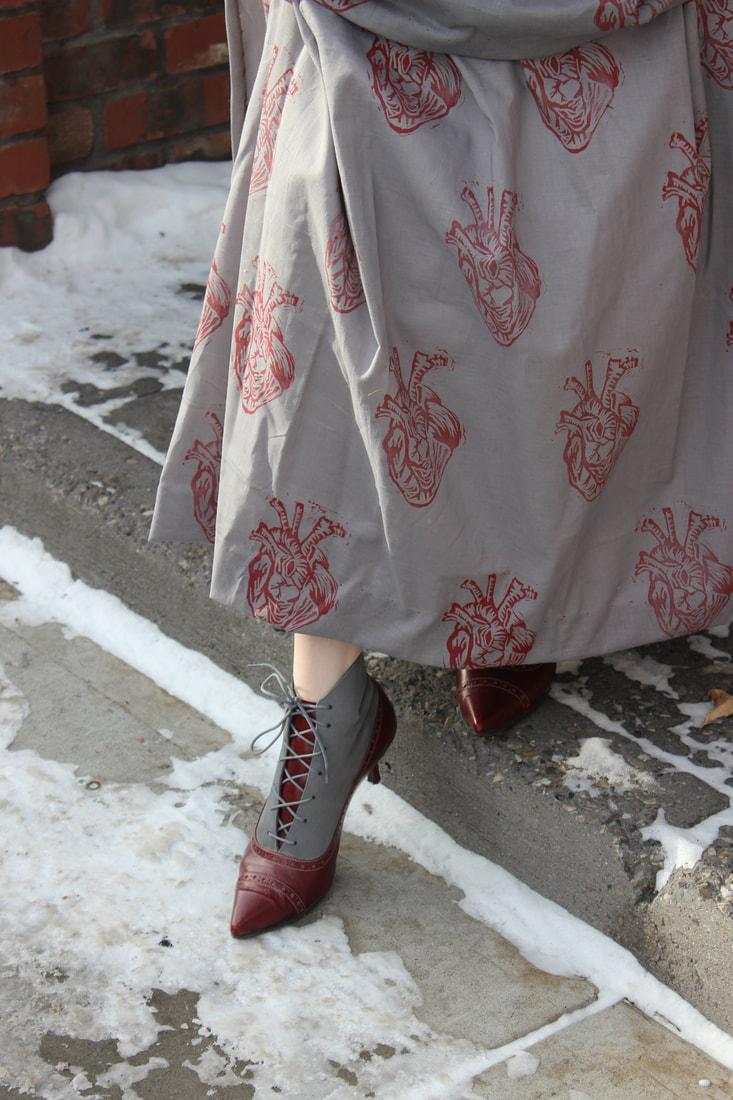 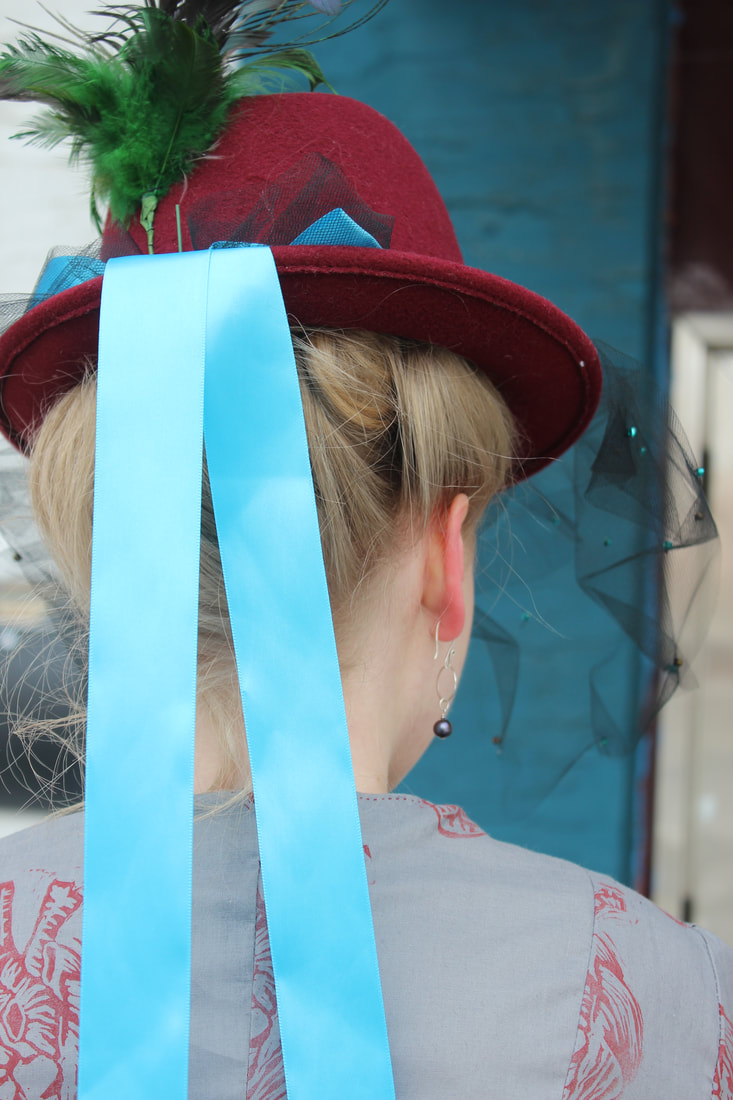 My biggest inspiration for this dress was from Ripper Street, a BBC show that was set not long after the Jack the Ripper murders. It focuses on the police station in Whitechapel that investigated at the time. I love the costumes from the show, especially Long Susan's, so that is where I got this idea from. The show is a little bit steampunk, and the dresses are more historically inspired rather than historically accurate, which I love. I enjoyed the freedom of the outfit not having to be perfectly historical, and I already have ideas for more steampunk-styled 1880's circus/showgirl ensembles (so keep your eyes out for jewel tone fabrics and bustles!). 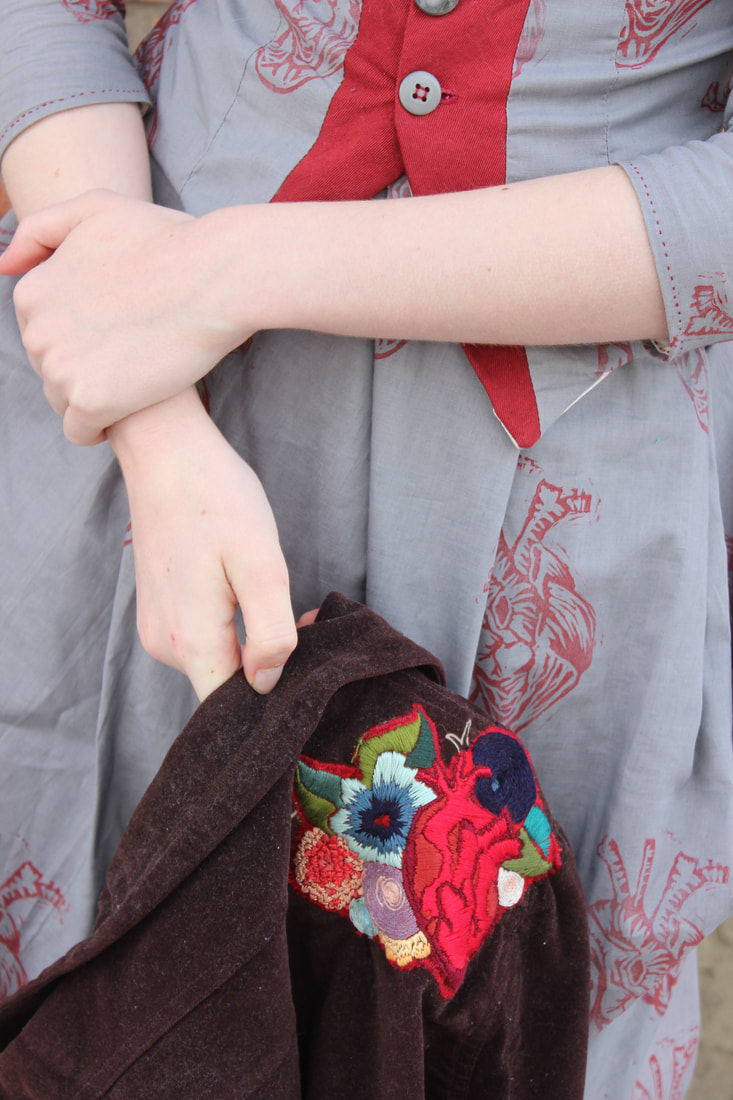  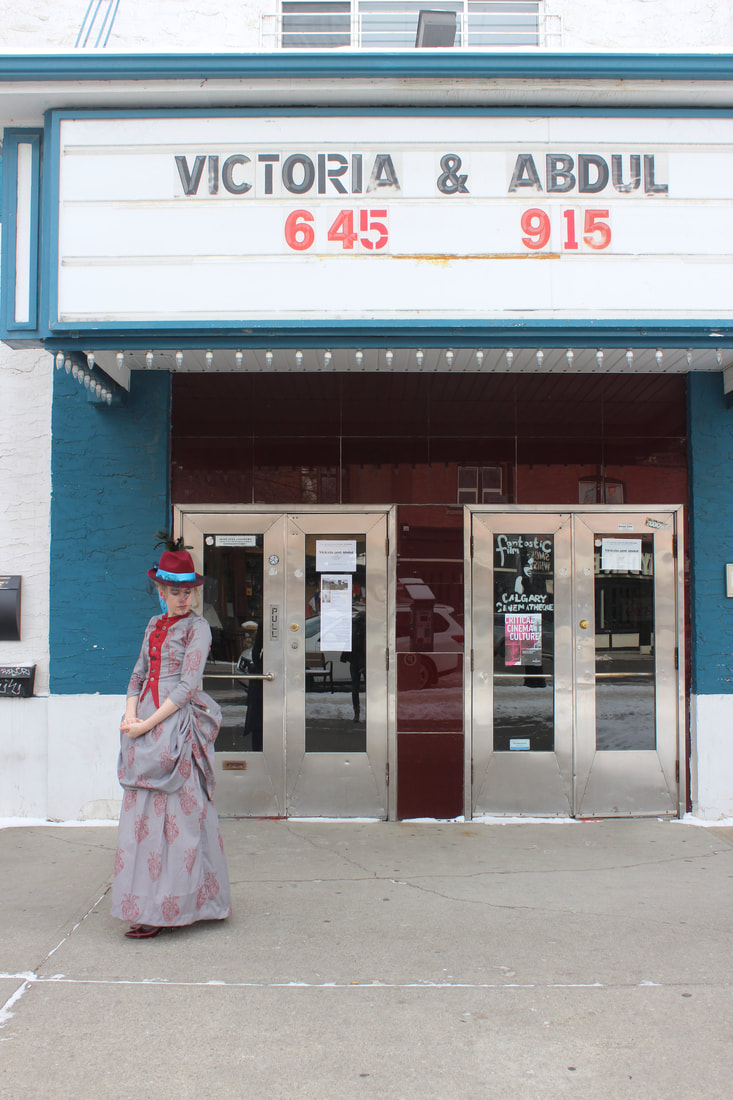 Because my inspiration was so dark, as was the dress itself when I finished it, I wanted a sort of grungy looking place to get photos. Calgary is a very lovely, clean place, which made it difficult to find something that looked anything like Whitechapel in the 1880s. We ended up just walking around Kensington to find the older brick buildings and any neat parts of the neighborhood. There are tons of gorgeous old houses in the area, but most of them look very high-class, which wasn't the goal for this outfit, so I guess I will have to make something more proper and go back for pictures! 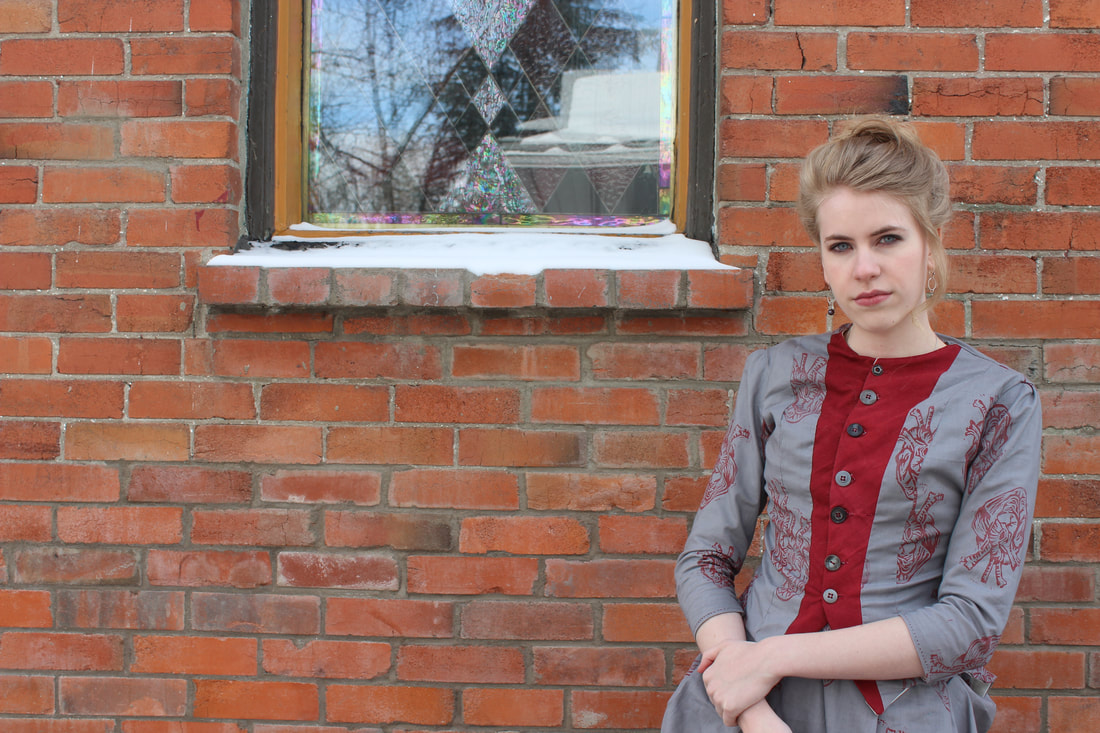 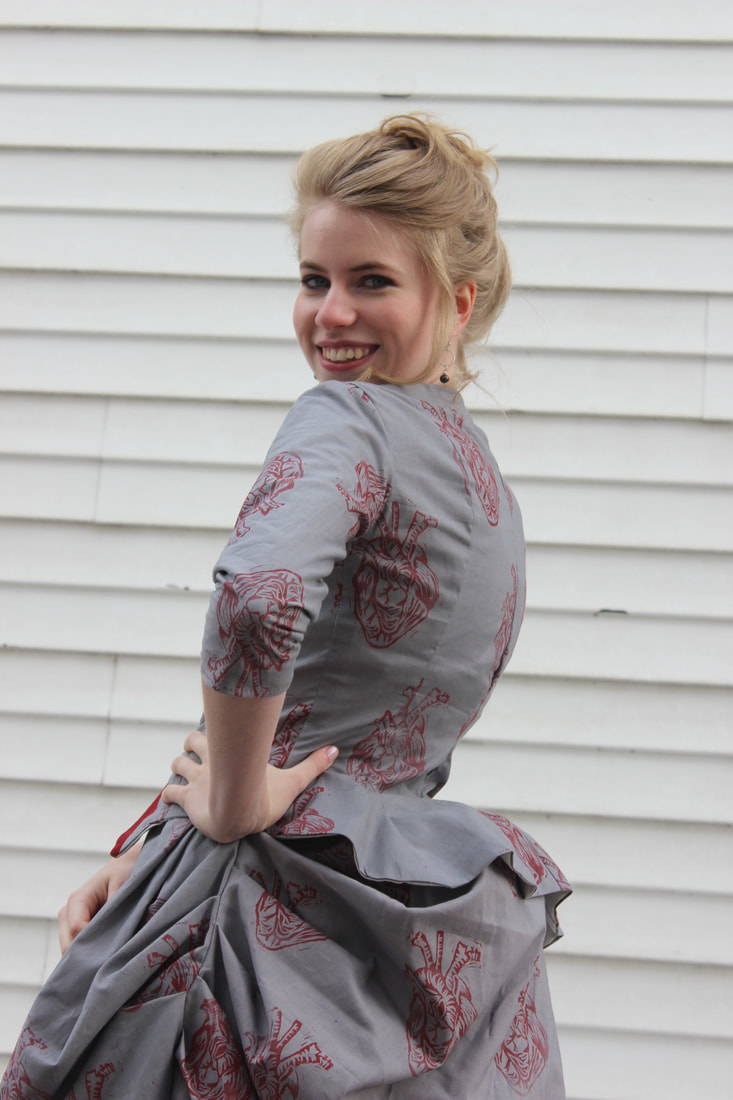 Once we were properly frozen, we made our way to Higher Ground Cafe to warm up and for me to change into something a little more appropriate for the weather. We had a lovely morning in Kensington, stopping by the Naked Leaf (who has the best earl grey vanilla tea), Crave Cupcakes, and Paiges Bookstore where I picked up a cloth bound Sherlock Holmes story. It was a perfect day, even though it was so cold! 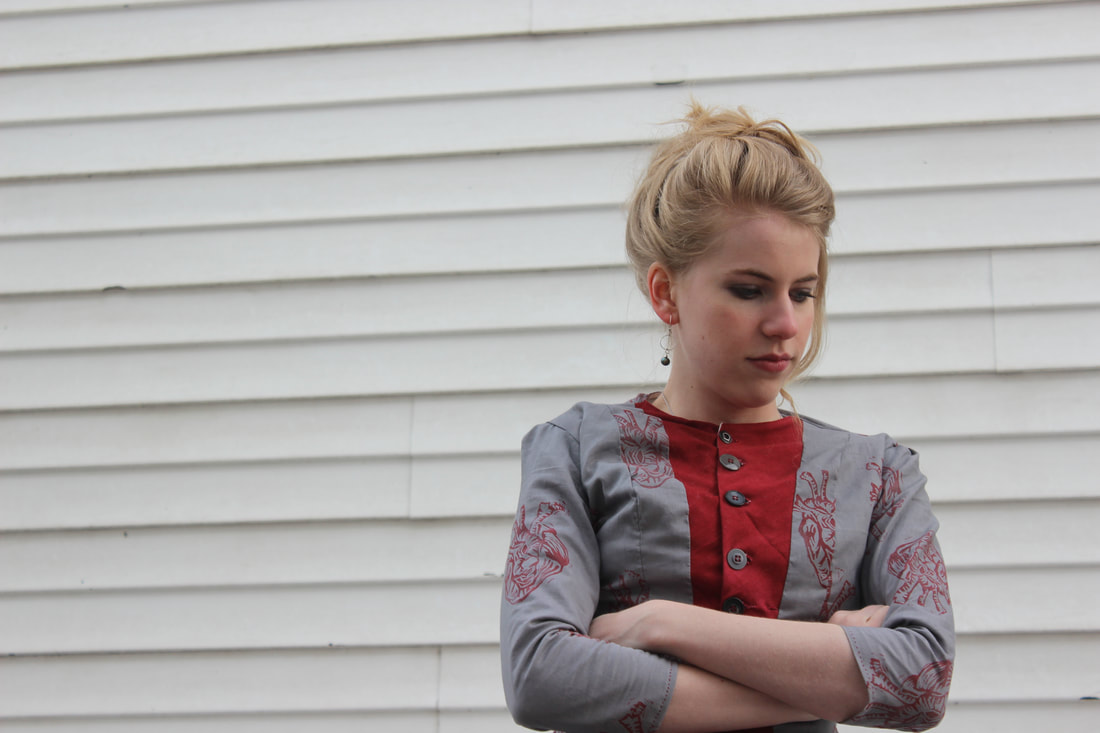 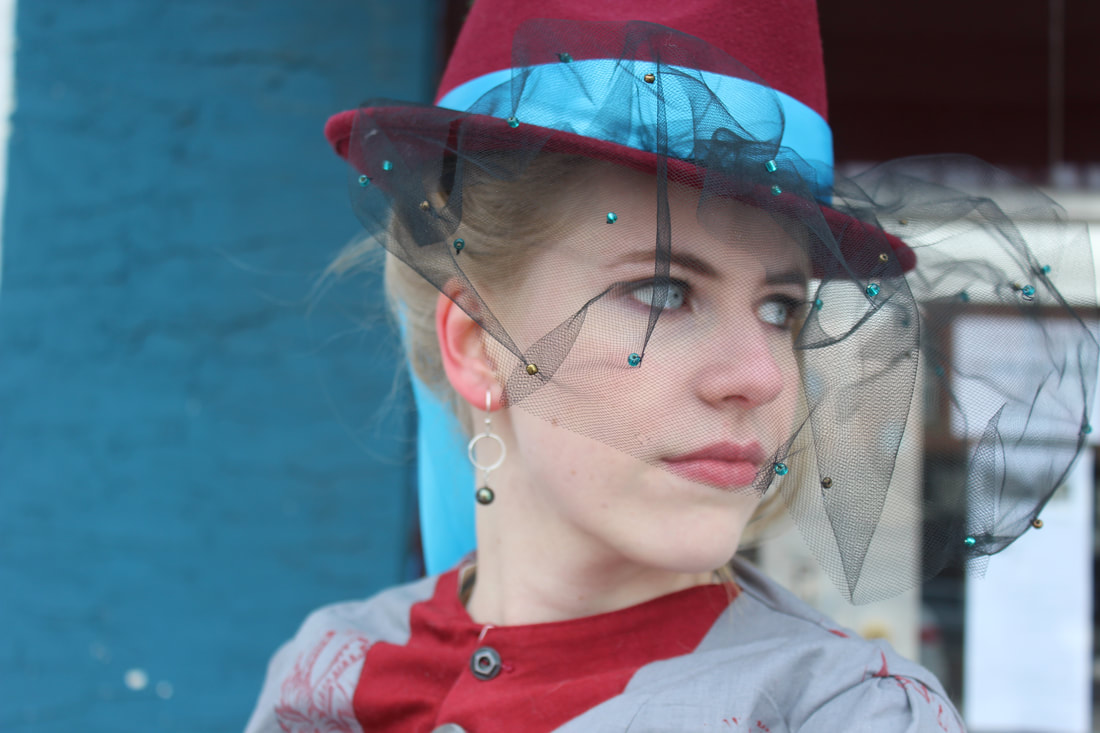 I will put up my next post soon where I will talk more about the history and how they got dressed in the 1880s (and also how long it took me to get ready in the morning). I hope you enjoyed my post, and how the dress turned out! If you want to see more of my making of posts for this dress, the links to all of them are in my portfolio, here 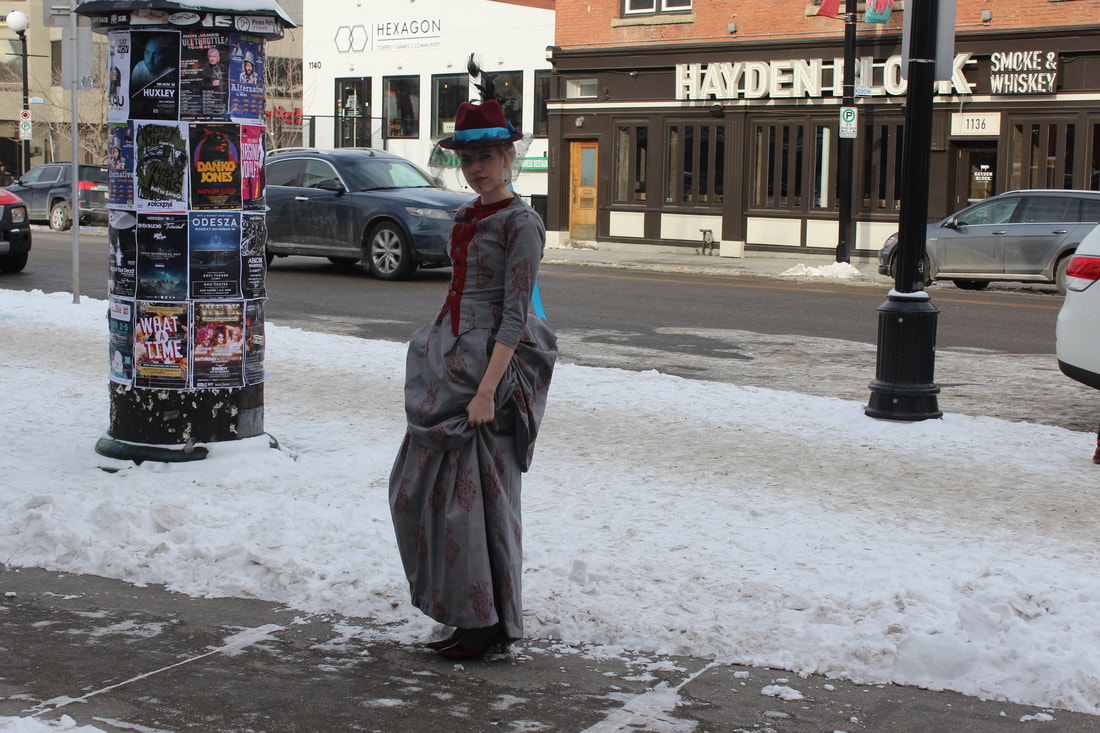 ~K
|
EtsyArchives
April 2020
Categories
All
|
 RSS Feed
