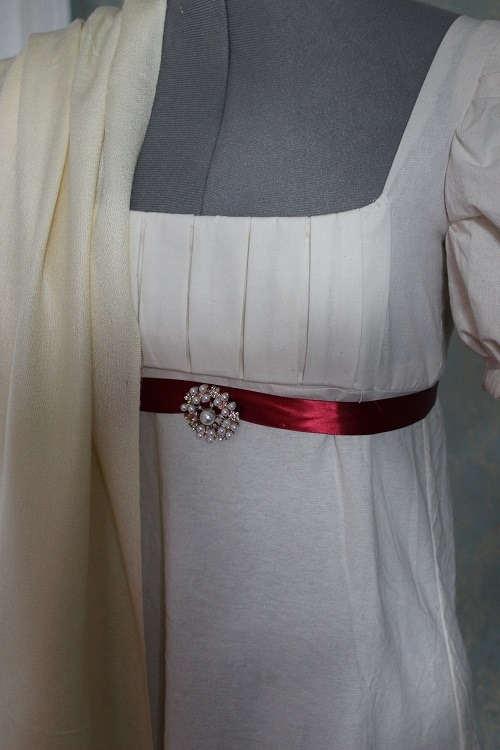
 There are a few things that I would like to change on this dress, such as adjusting the fit (it is slightly too big, something I can fix pretty easily), as well as adding another band about 2/3 of the way down the sleeve to make the sleeve have a double puff. Other than that, I am pretty pleased with how it turned out!  The front of the dress features a box-pleated panel, and I added a red ribbon along with a brooch. 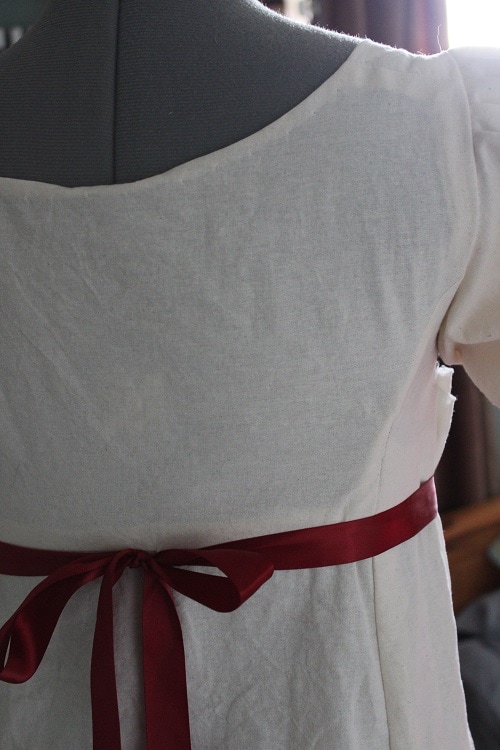 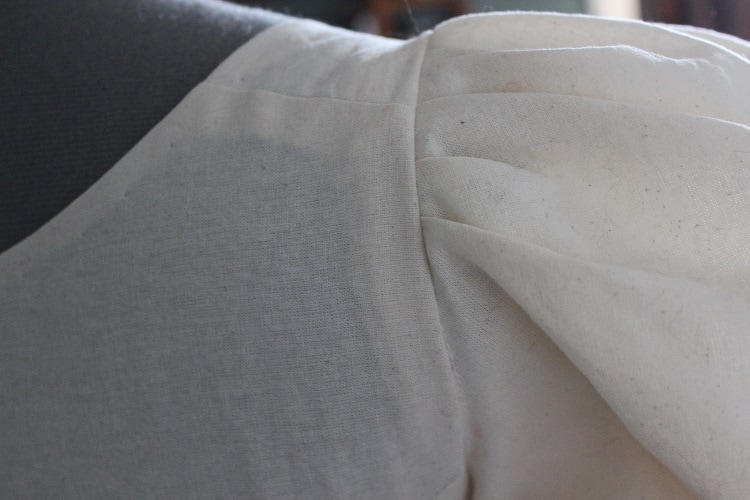  ~K
0 Comments
A few weeks ago I picked up a few things for new projects. I have had a gift card from my boyfriend and his family to Fabricland for months now, so I finally got to use it! The first thing that I grabbed, which I was originally planning for, was a wool blend for a 1940's pattern that I have been wanting to make since the beginning of the year. 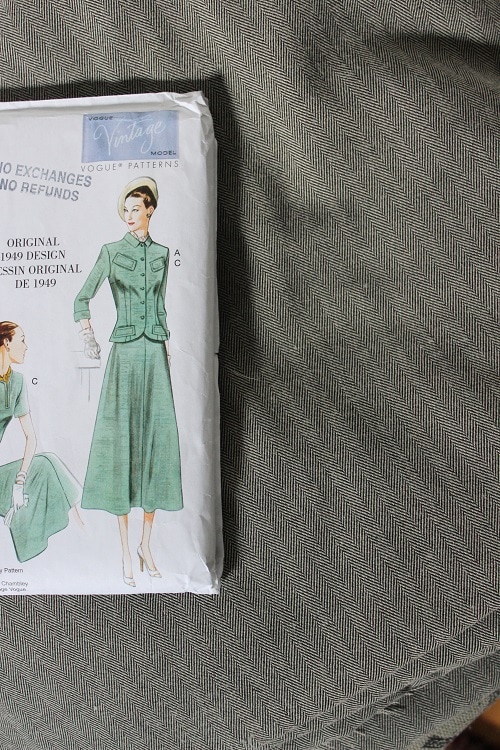 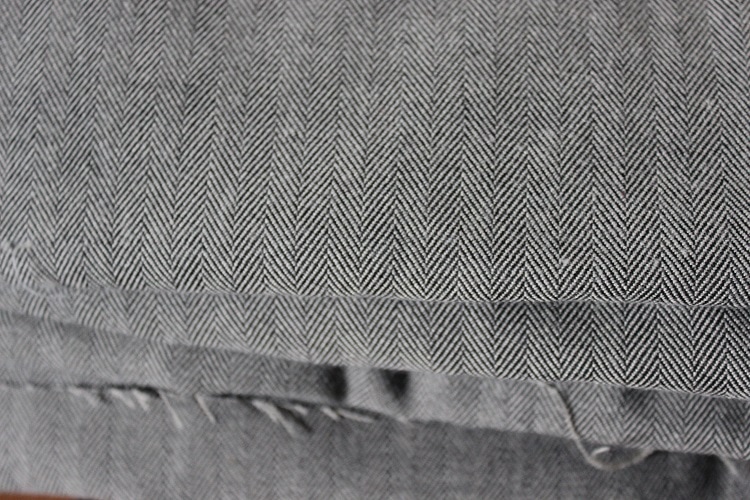 I am thrilled with the fabric that we found, so I will be making both the dress and the matching blazer with it some time in the near future. I also picked up all of the things that I will need to finish the dress: a zipper, belt buckle, and some buttons. 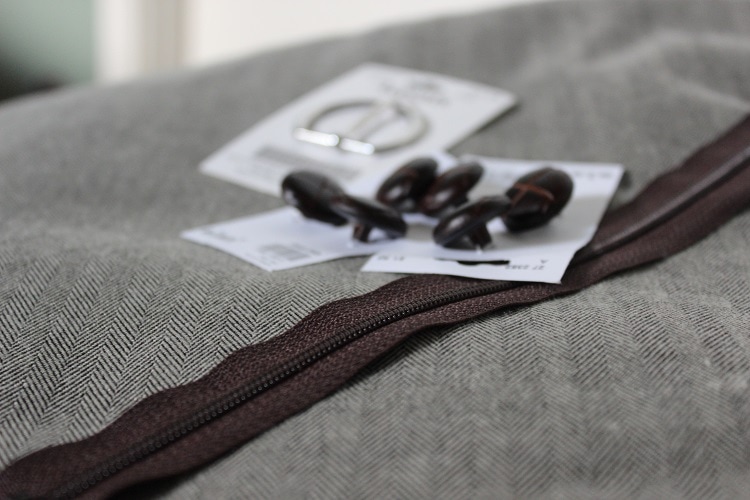 The next thing that I picked up I am very excited about! American Duchess just released their new pattern, inspired by the Red Dress from Outlander. I was impressed by their last patterns, so I didn't hesitate to grab this one.  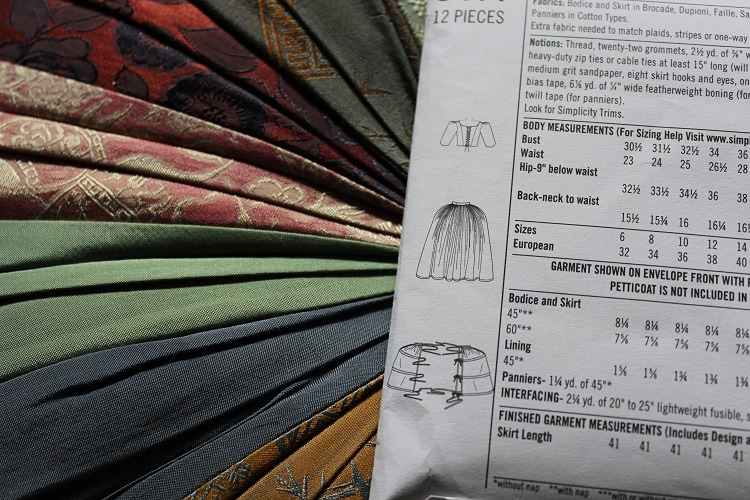 It comes with patterns for a separate top and skirt, along with a pannier pattern, which I will be putting to good use! Another thing that I am thrilled to have picked up was a dress form! I have wanted a dress form for ages, so I ended up choosing that for my grad gift. 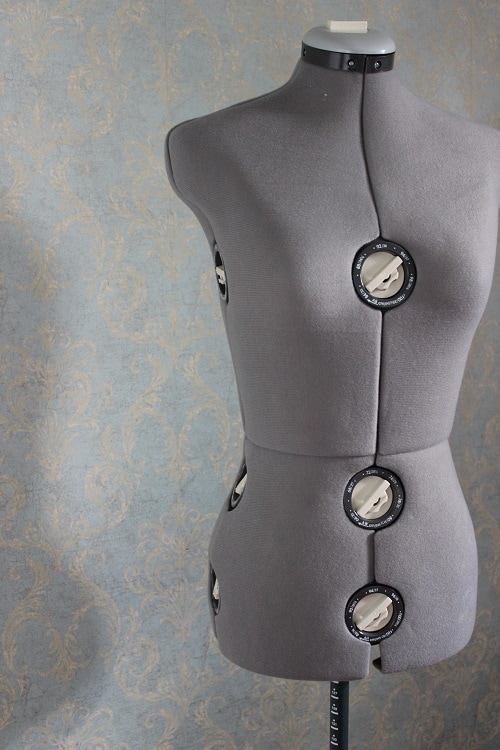 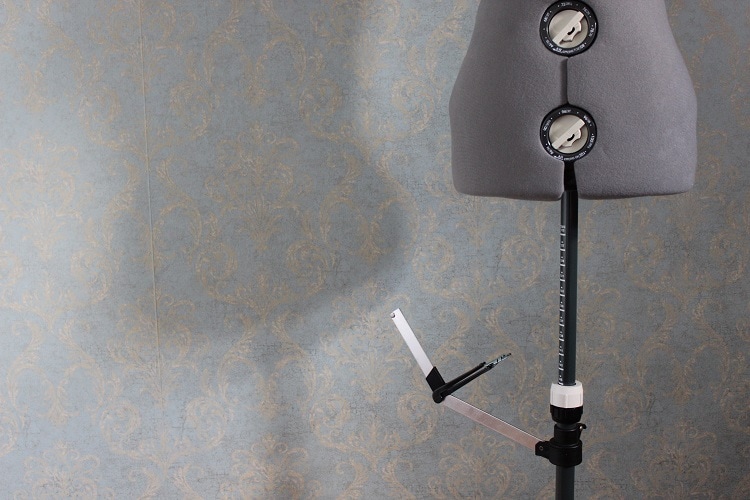 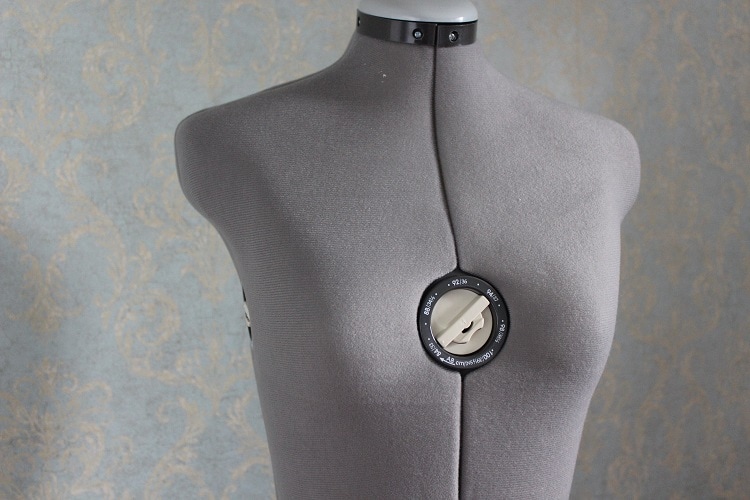 The last thing that I got was actually a gift. This is one of the most amazing gifts that I have gotten, and I love how it looks in my little sewing room. 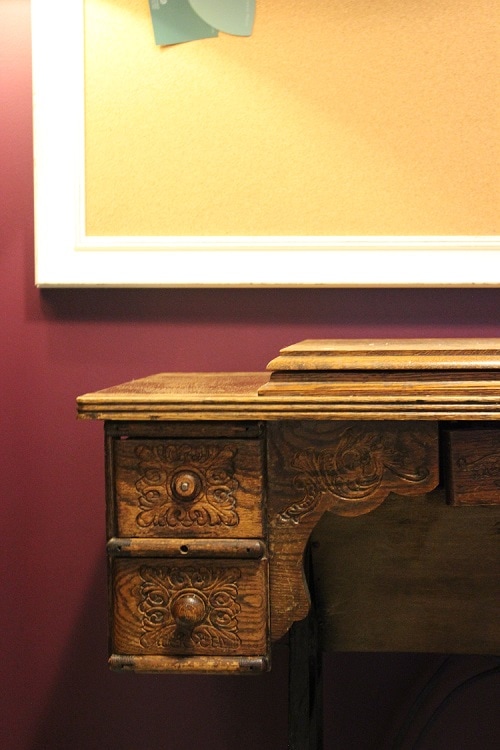 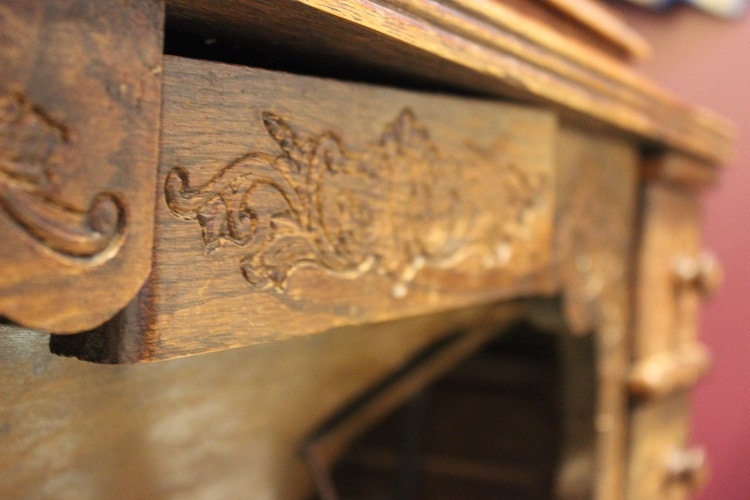 A family friend was getting rid of a few things, and she gave me this beautiful sewing machine! Since it came with all of its extra parts, I am hoping to be able to get it working so that I can sew with it.
I have been working on a few things to get ready for grad lately, but once grad is over, I will start working on some new projects that I have been planning. Also, we went to the Jane Austen ball last weekend, so stay tuned to see some photos from it! ~Kate 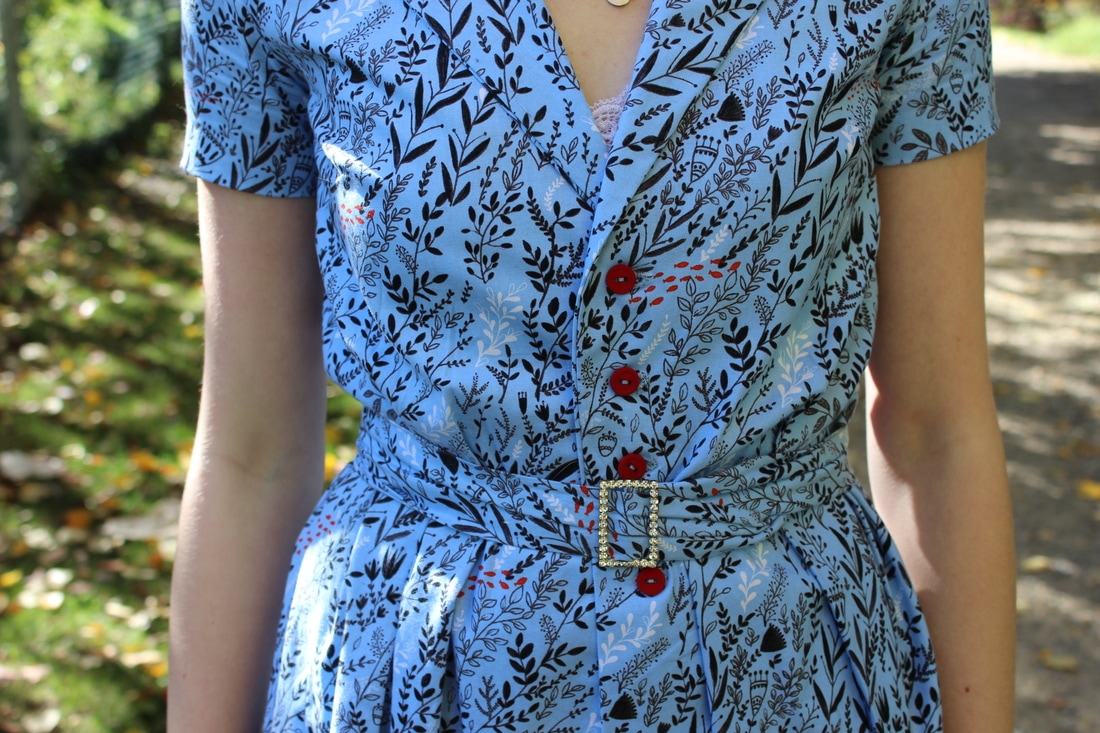 I made this dress using a vintage-inspired Burda pattern. I used a patterned cotton, and I would love to make this pattern again, just as a blouse with a peplum. 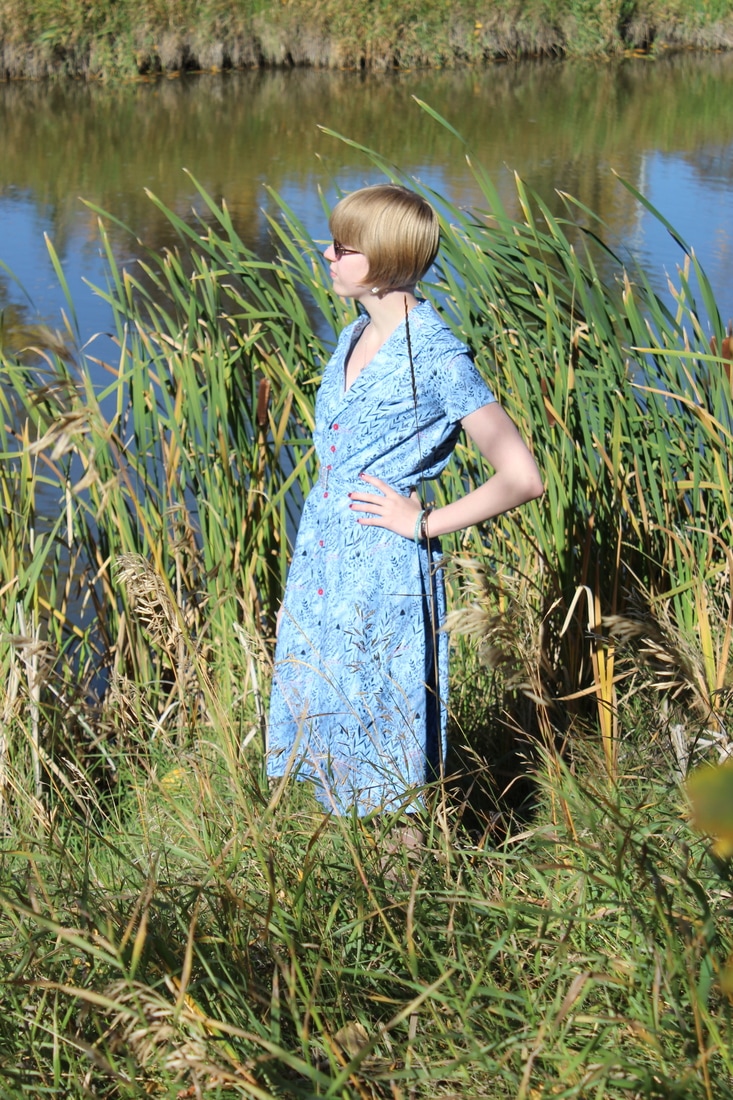 The pattern includes many different types of sleeves as well as collars and other additions to the dress, so you could make many variations of the dress, which I really appreciate. The collar of the dress was really difficult to figure out, but after doing it once, I think it will be easier next time. I would recommend the pattern, but be aware that the instructions aren't very clear all of the time, but with the drawings and some common sense, it is possible to figure it out. 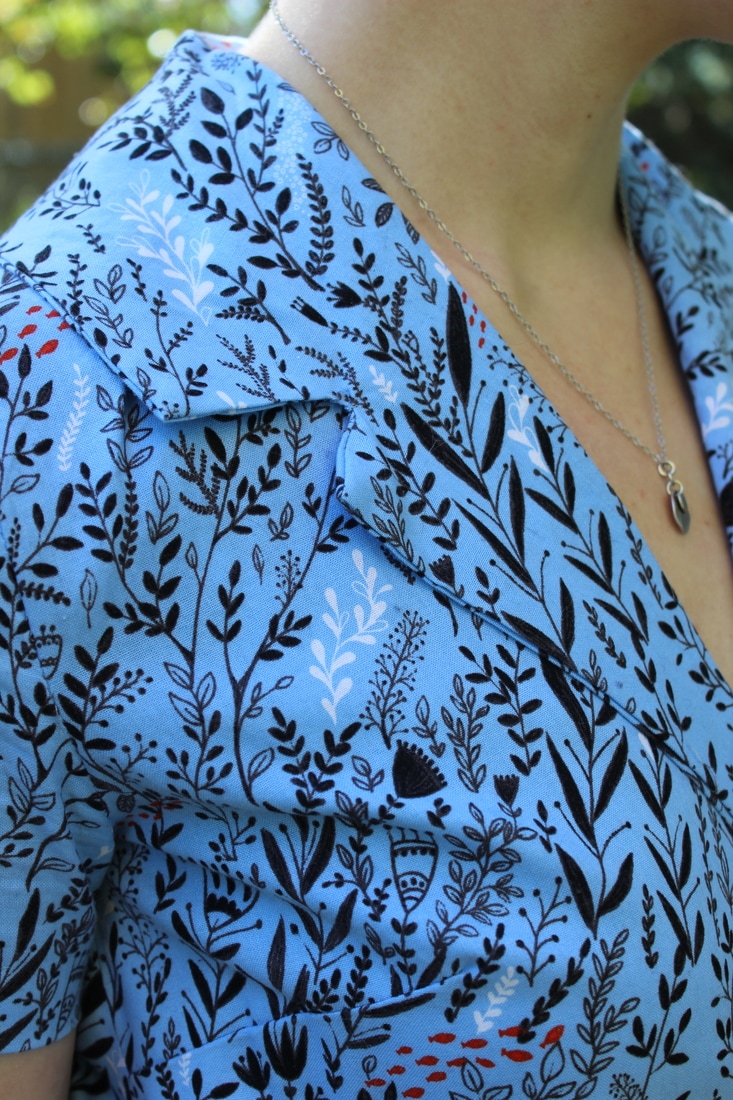 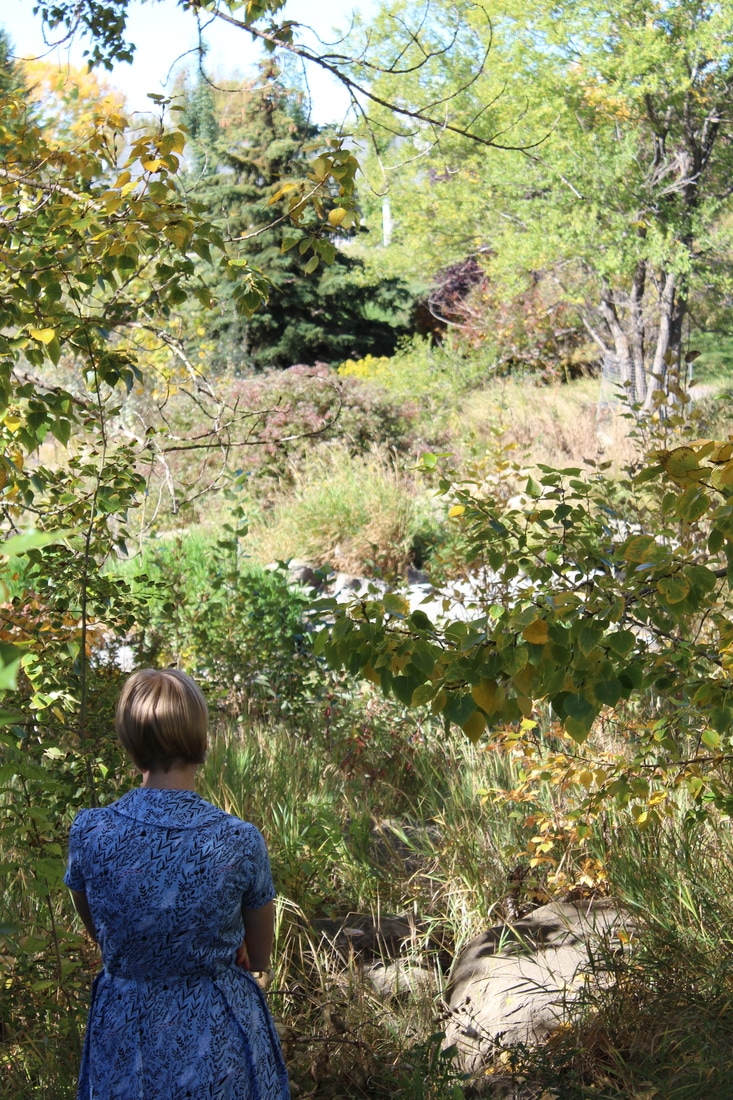 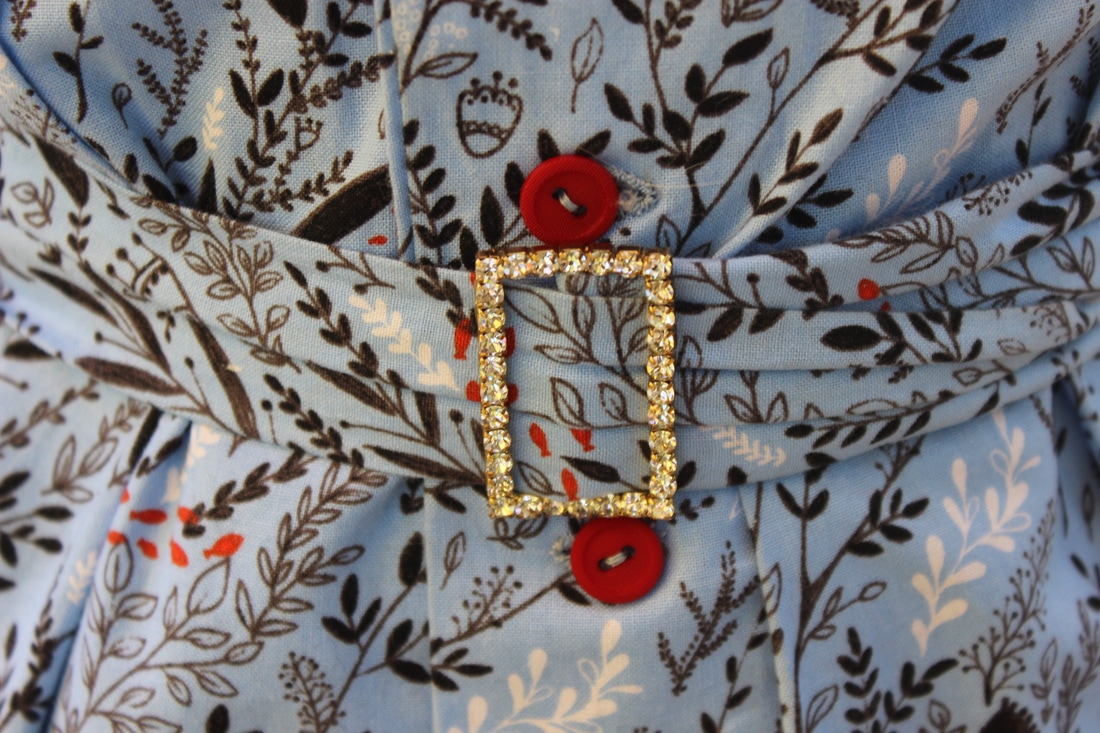  ~K
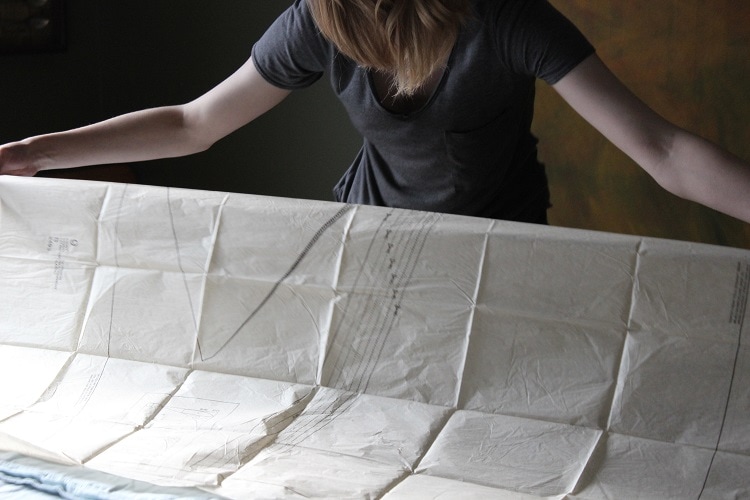 I have just started on the project that I mentioned in earlier posts- the Regency era dresses. I will be making two dresses: one will be a simple round gown in a blue cotton sateen, and the other will (hopefully) be a bib-front dress in cream muslin. Yesterday I cut out the pieces for the first dress out of a Burda pattern, one that I talked about in this post.  I will be pretty busy sewing-wise in the next few weeks. Along with this project, I will also be changing my grad dress, and this weekend I am picking up fabric and supplies for my next few projects. 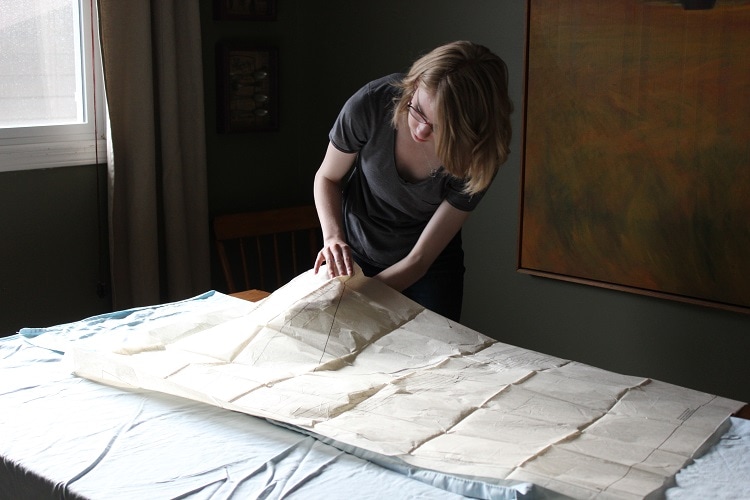 ~K
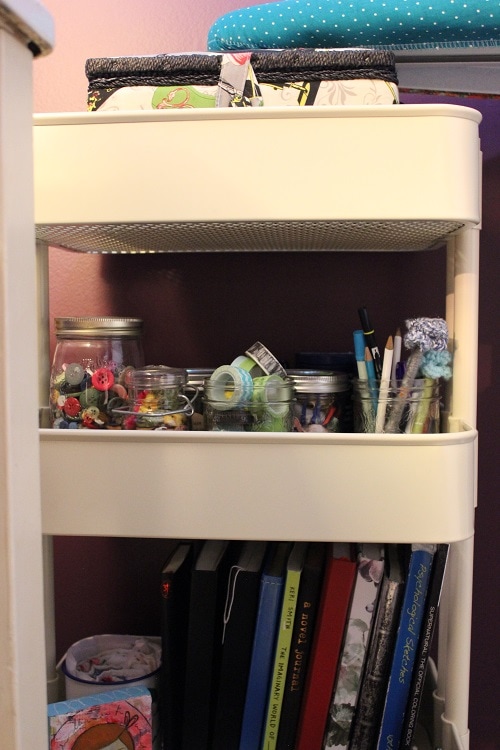
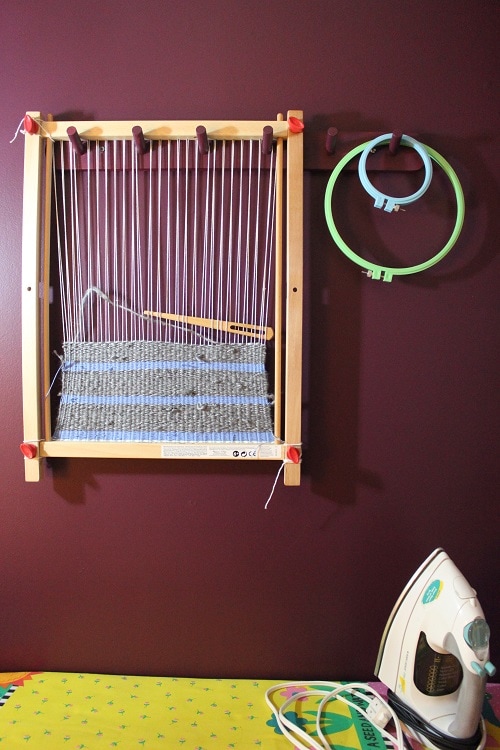
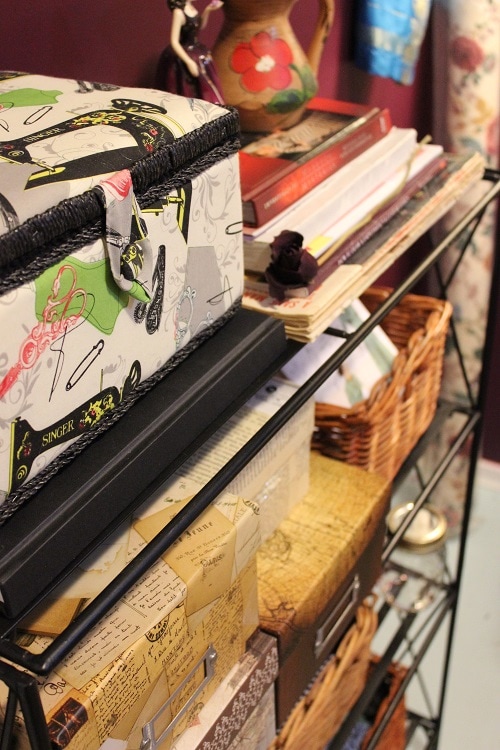 I have recently moved all of my sewing paraphernalia into my own little sewing room! Okay, it doesn't count as a real room, since its actually the storage closet, but its very cozy and cute! Its nice to have my own space to sew in, and its great to be able to close a door and leave out whatever I am currently working on. Since my cat has a habit of eating fabric, this works perfectly to be able to shut him out while I am working. 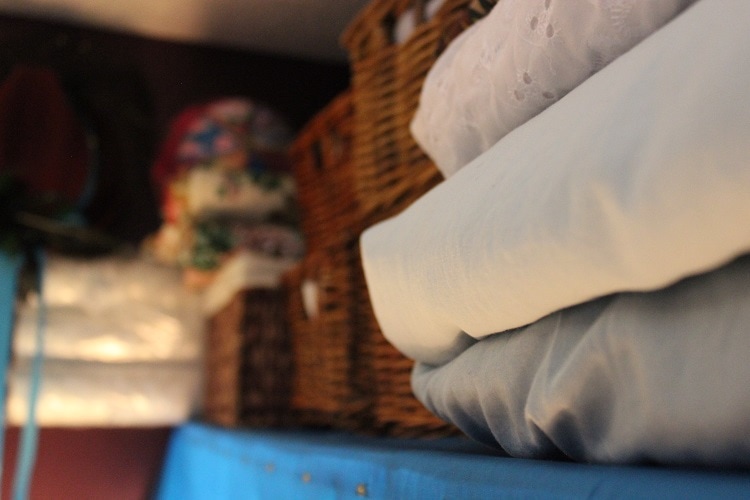 The room has a lot of shelving and hanging space, so I have a ton of storage for all of the little things that I hoard. 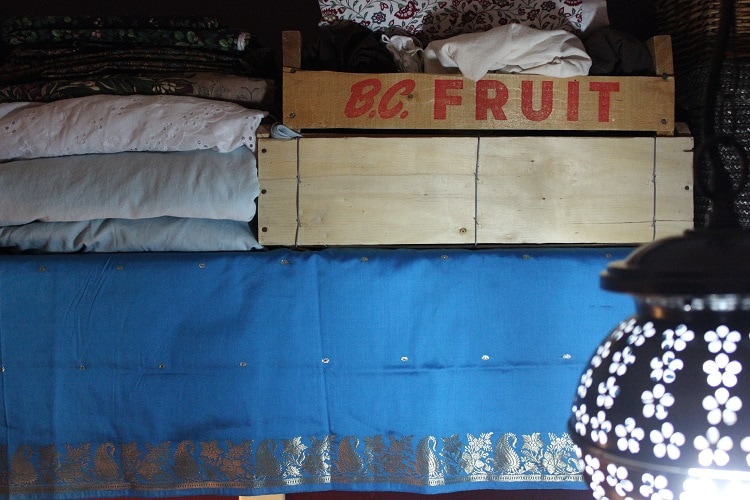 We found this beautiful light that looks stunning in the little space and gives me more light by the sewing machine. I was given the sari a few years ago, so I used it to cover the shelf, which was pretty ugly. I have always been too scared to cut into the sari to make something out of it, so its nice to be able to use it and see it every day.
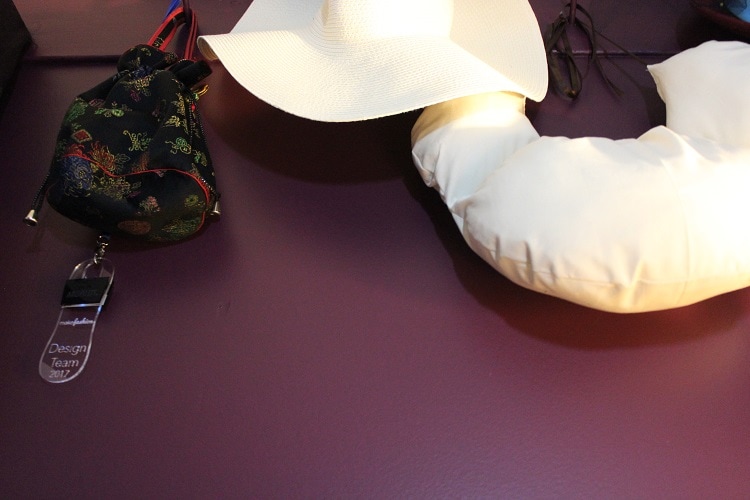
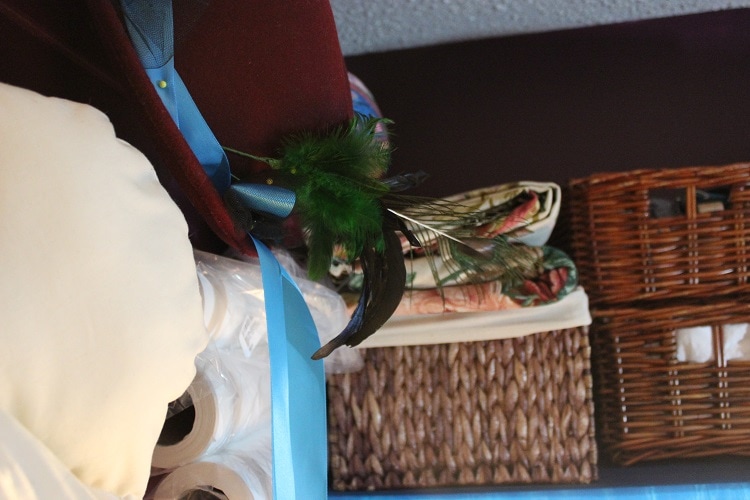 The hooks near the ceiling on the wall are perfect for all of my hats  I love this cart from Ikea. Its perfect for all of my jars and books. These jars are filled with buttons, decorative tapes, fabric bags, ribbons, pencils, and LEDs 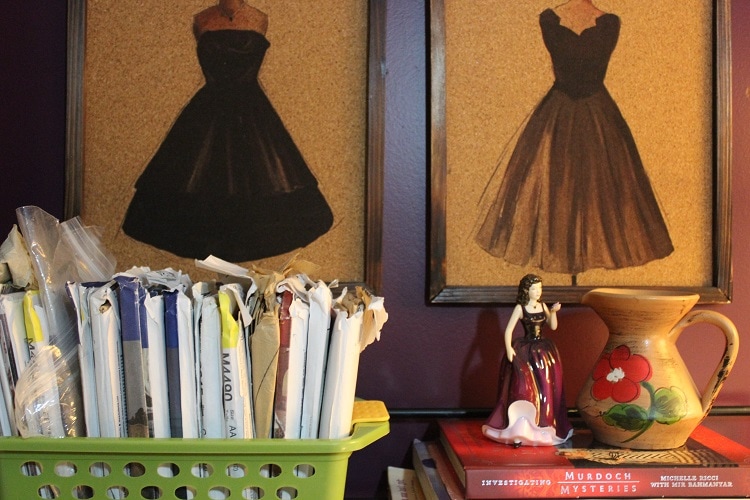 This shelf holds all of my patterns and some fabric  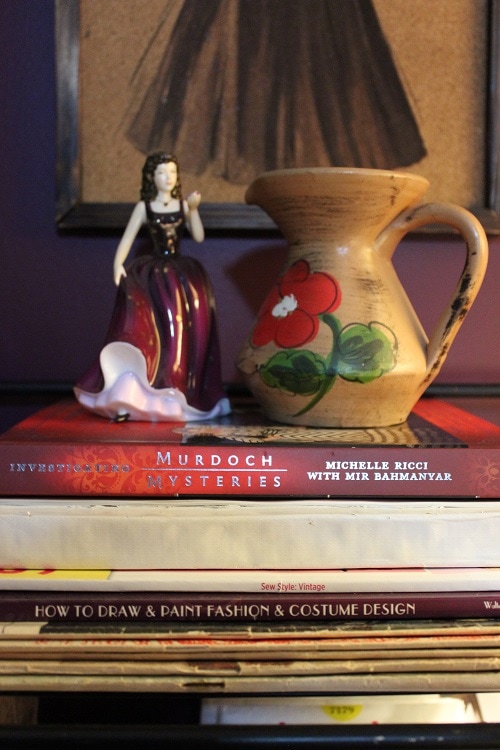 On the bottom of my pile of books here are some Sears catalogs from the 1950s. I love looking at them for inspiration 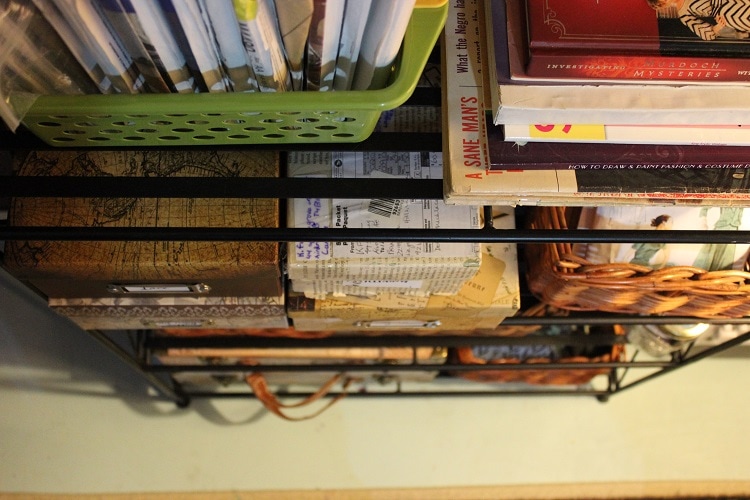 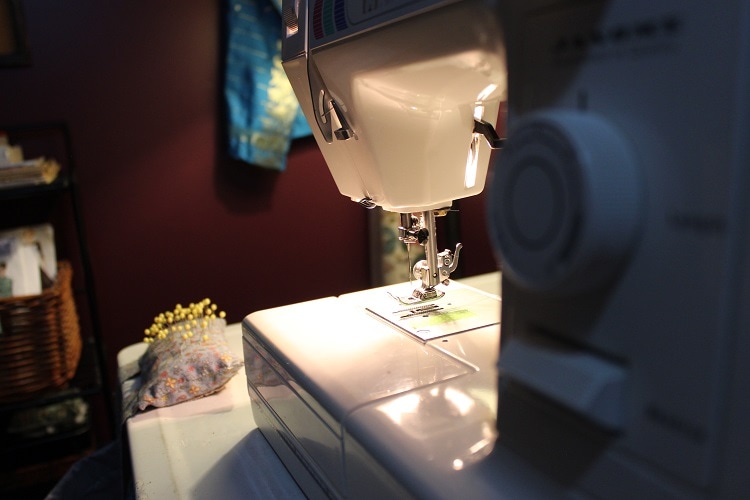 ~K
So the fashion show was on the weekend, and it went almost without a glitch. The show turned out beautifully, and even though there were some things that didn't quite work out on my dress like I wanted it to, I still love how it worked out. I had an incredible technician who helped me, and it made the whole process so much less stressful, even when things went wrong. Everyone who worked on this project was amazing, and I am in awe of their efficiency and how calm everyone was, even during the most fast pace moments before the show. I was working in the team Virtually Vogue, and I had the privileged of working at ARCHEloft in Calgary, a maker space that is open to pretty much everyone. Every single part of this project and the people that I was working with was incredible, and I hope that I will be able to be a part of the event again next year! Okay, enough gushing... here are some photos from the show on Saturday: 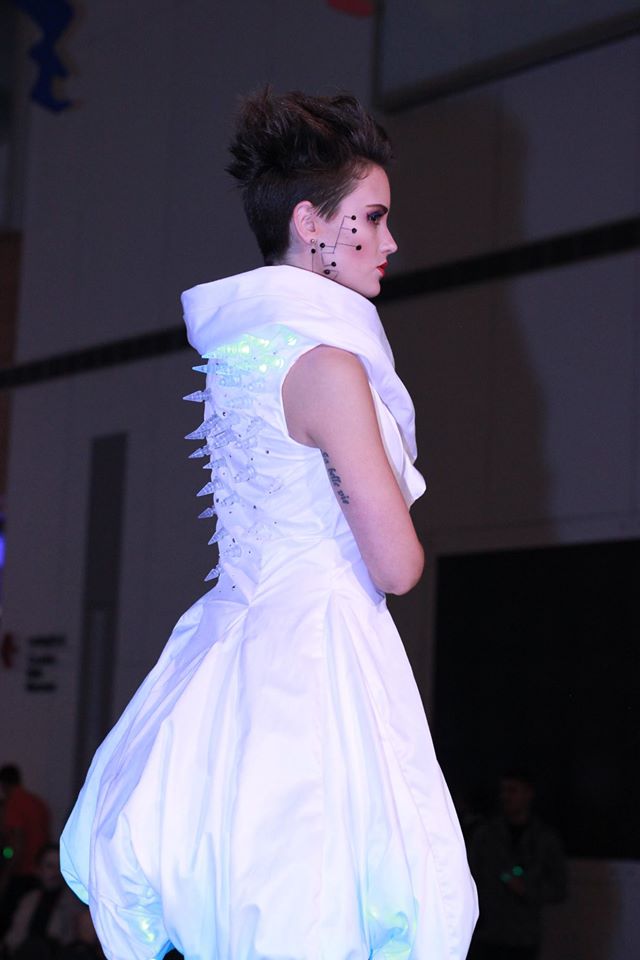 This is my dress, the Dream Dress, that I worked on with Catherine Larose and Kathryn Blair They were incredible to work with, and I love how the dress turned out! You can also watch a video from the show here. If you would like to see more photos from the evening, let me know! Tons more will be showing up on the MakeFashion website as well as their facebook page, so keep your eyes peeled if you are interested in seeing all of the other gowns from the event. Check out their instagram, too, since they have been posting photos of every gown at the show.
~K Photos by Kenneth Fung I have been quiet around here for the past few weeks, but I do have an excuse! I have been recently working with the MakeFashion team for the fashion show at Telus Spark in Calgary that is happening tomorrow (!!). MakeFashion is wearable tech, meaning that not only are the dresses stunning and completely unique, but they also include lights, motors, and other technology. I am so excited for the show, it is going to look incredible!  I have been lucky enough to sew an entire dress for one of the collections, so I will be posting lots of photos once the show is over. It has all gone so quickly, and I can't wait to show you what I've been working on! The show will be on this Saturday at 7, you can check out their website here to check out some of the amazing work from past years and find some more information about this years. I will be posting more behind the scenes looks and progress pictures on my instagram, which you can check out here ~K
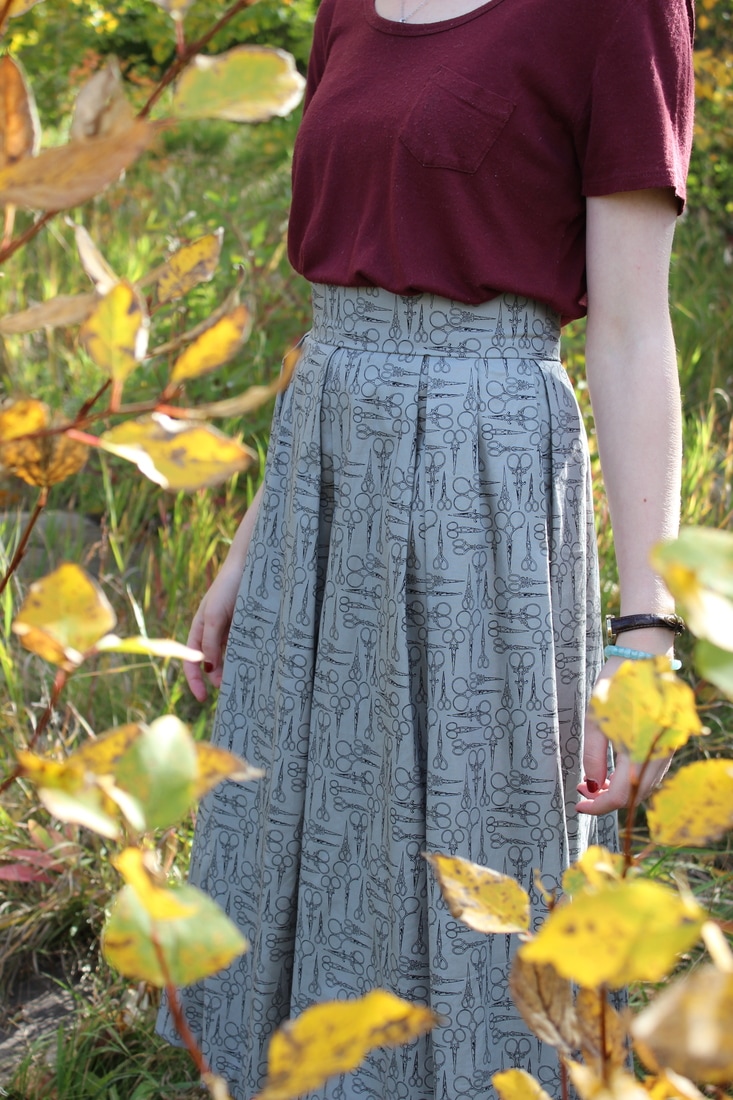 For this skirt I used a McCalls pattern. The pattern came with a few different variations for the skirt, and a petticoat pattern. I added 5 inches to the pattern to give it more of a vintage feel, and used a cotton sateen. The pattern was very easy to cut out, since it was entirely made out of rectangles, and quick to put together. I will definitely be using this pattern again. 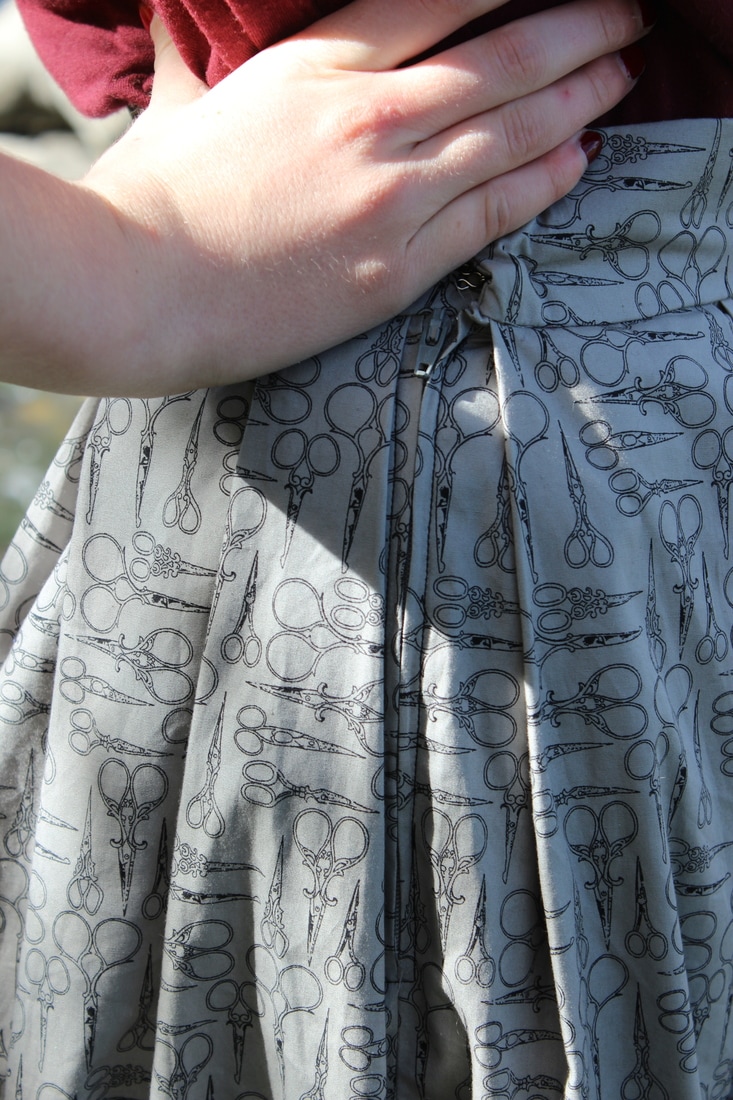 As you can see, this pattern features a side zipper. I love side zippers, and I think they add a special touch to a piece of clothing. 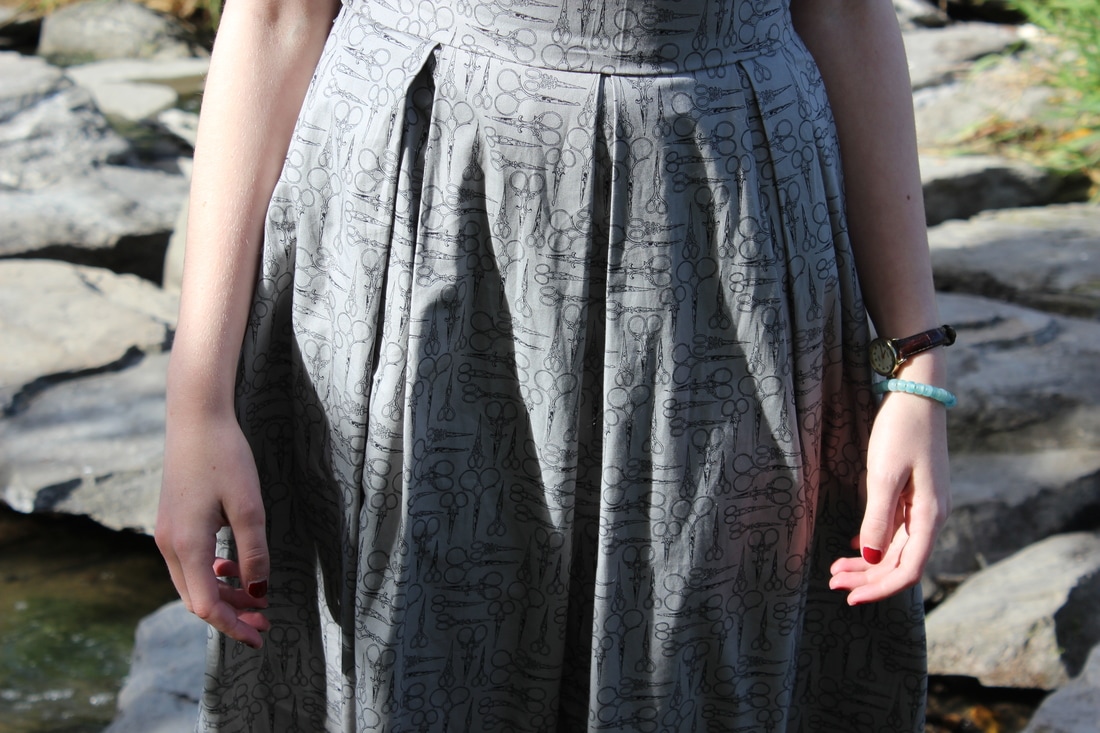 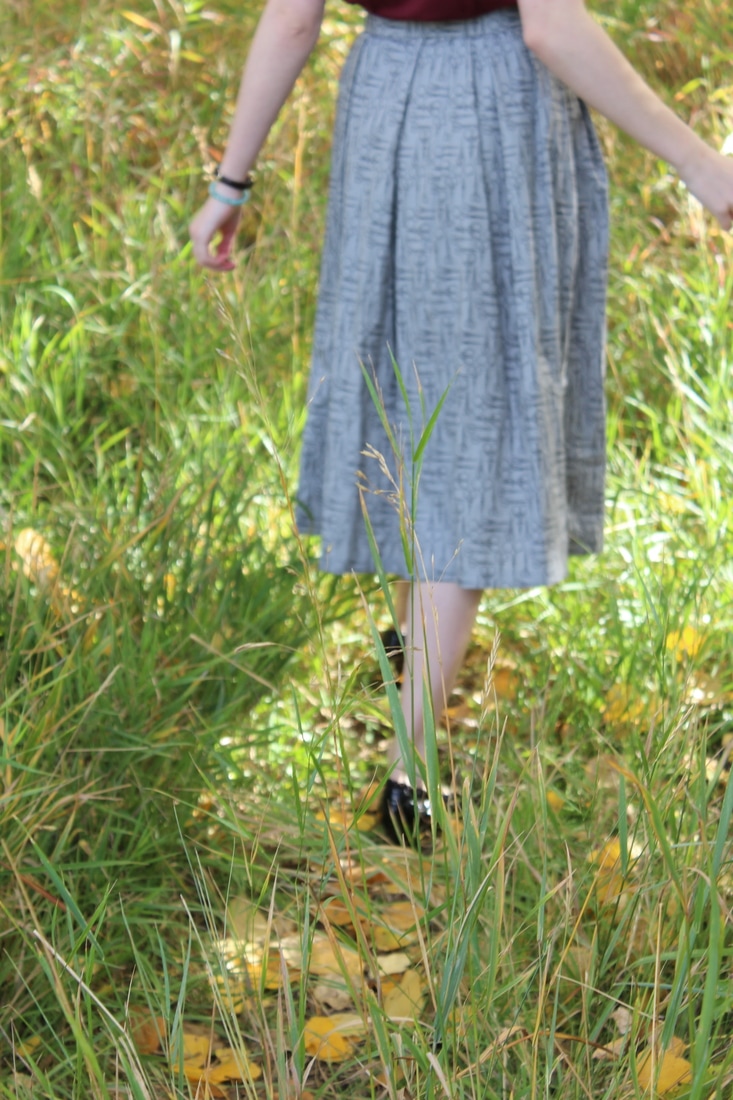 The next time that I make something with this pattern, I would like to play around with pleating or gathering. For my first time using it, I went with the markings that are given on the pattern pieces for the box pleats, but one thing that I really enjoy with this skirt is how easy it would be to make some slight adjustments to how the skirt is gathered onto the waistband. It would be an easy change, and it would make the next skirt look quite different. 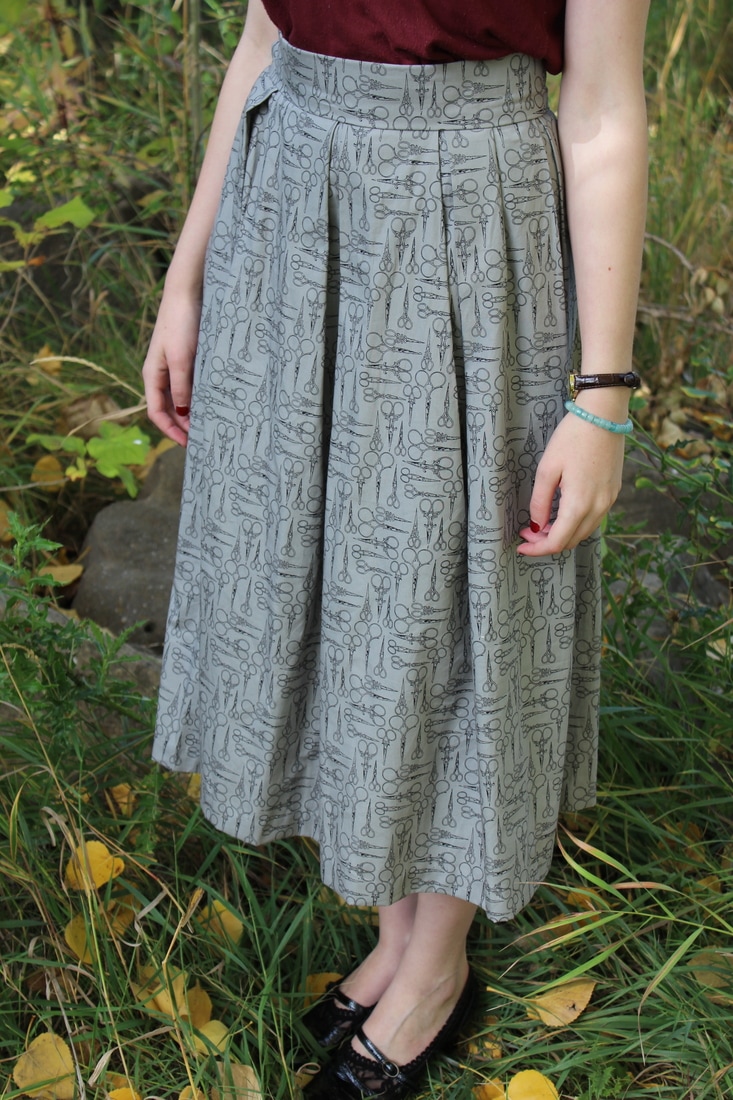 ~K
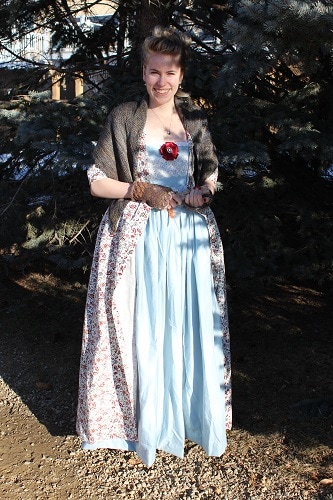 After a ton of work, and many learning curves, I have finally finished the whole project, including a chemise, a pair of stays, a bumpad, two petticoats, a gown, and a stomacher. Although there are things that I could adjust, or would do differently if I did it again, I am still proud of how it came out. The patterns that I used for this, the American Duchess patterns, were very good, but there were a few things that I wasn't thrilled with. I ended up drafting my own chemise pattern, since theirs was not very historically accurate. The patterns were easy to follow and understand, which was very important for such a large project. The instructions were simple and to the point, and I was never thrown for a loop about what to do. I loved the bodice pattern, and it looks very historically accurate to me according to dresses from the 1740s. If I made this pattern again, I would probably adjust the sleeves a bit. They were slightly more loose than I would have liked, and the darts were up quite high. The dart at the bottom of the sleeve is to fit the sleeve to your elbow, however they don't go down to my elbow, as you can see in some of the pictures. I also adjusted the stays quite a bit, but I was expecting to do that, since stays can be very tricky to get the fit right, and I was using cording and not boning, so I was not surprised when there were a few slight fit issues. Other than these unimportant little complaints, I loved the patterns and I would definitely use them again, just with a few 'improvements'. 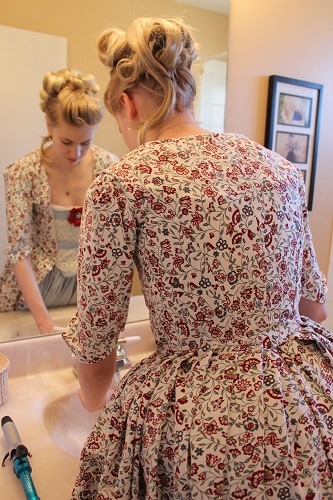 This ensemble took me about four months, starting in late September, and finishing just a few days ago. I used Ikea fabric for the undergarments and gown (a muslin and a thick cotton), and a cotton sateen sheet for the over petticoat and stomacher. The lace on the stomacher is a gorgeous vintage lace that was given to me as a gift. The stomacher was finished off with a ribbon 'flower' that I made, and some hand crocheted lace at the top that I have had for a long time. I had an incredible time creating this, and I feel like my sewing skills have improved from before the project to now. 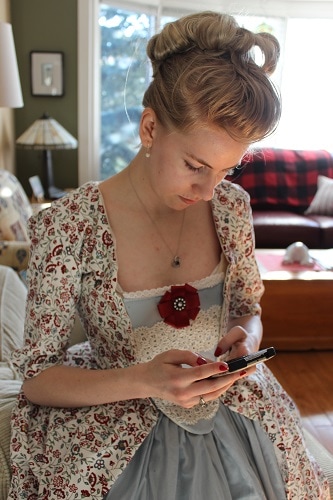 ~K
Now for the fun part. I’m going to focus on two specific parts of 18th century fashion; the 1740s, since that is the time that my gown is based off of, and the late 1700s. I find the late 1700s and the early 1800s fascinating fashion-wise, since so much changes in such a short amount of time. A large amount of that change is thanks to Marie Antoinette. By the 1740s, fashion had changed quite a bit from the beginning of the century, but the basics were the same. Court dress did not change in most countries for a long time. An everyday outfit for a woman would include a chemise and stays, bum pad or small panniers (boned ‘baskets’ that were tied around the waist to create the popular shape), multiple petticoats, and then the top gown or skirt and top worn. A state of ‘undress’ in the 18th century is not what undress is now. Undress was just a more casual outfit that was worn during the day. It was an everyday look, versus an outfit for a formal occasion. It normally included a short jacket with a skirt. Outfits were often finished with stockings and shoes (Louis heels were very popular at the time), an apron, and a hat and gloves to leave the house. Fashion in the 1740s was more about adding width to the hips. This look was achieved with panniers of various sizes. For court dress, or full dress, panniers were much larger than any other event. Court dress in the 1740s consisted of a mantua, which was a stiff bodice. A mantua changed with the times later and became a more loose bodice. Sack-back gowns started in this era. A sack-back gown is a bodice with pleats in the back, making it very loose and flowy. This started as a undress fashion, but as the fashion changed through the century and became more casual, the sack-back became part of full dress fashion. Another more casual look that was created around this time was the sacque. This had the loose pleats of the sack-back with a unfitted front, and was a welcome change from the stiff court gowns that used to be in fashion. Sleeves were quite wide during the 40s, 50s, and 60s. Fabrics that were used more often were velvets, silks, damasks, and other heavy textiles for formal garments, and linens and cottons for informal and undergarments. 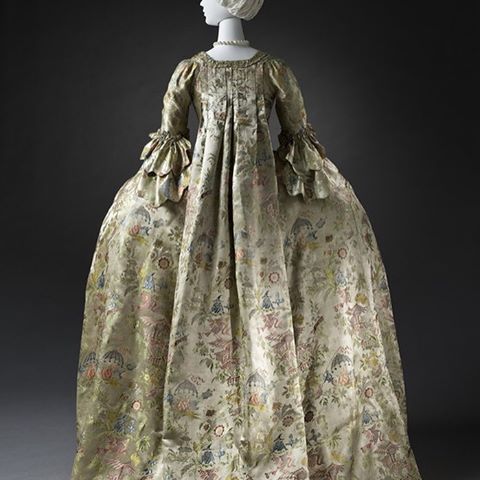 An example of a sack-back 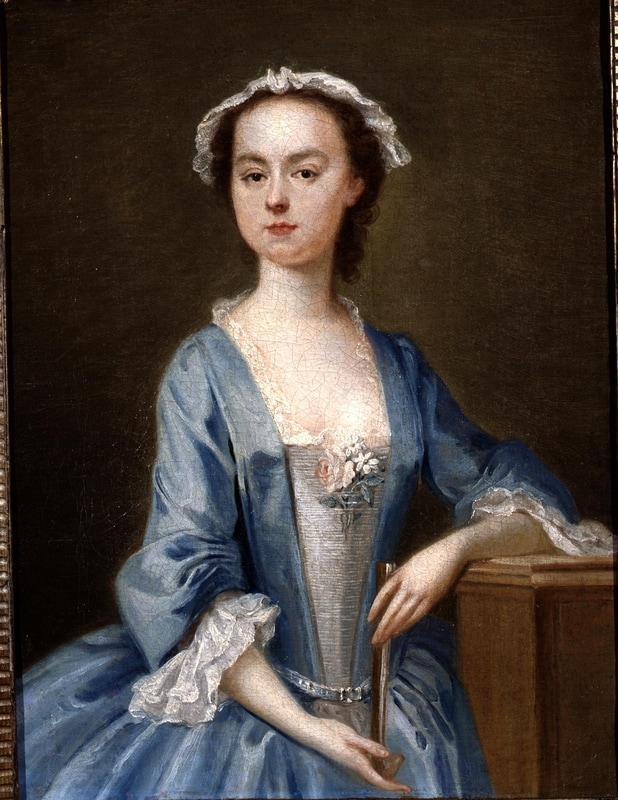 1740s fashion favoured darker colours and wide sleeves 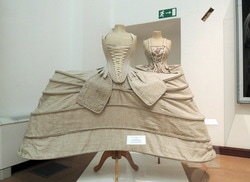 A pair of wide panniers with pockets and stays As the times changed and more wars were fought, the style became more relaxed. Lighter fabrics were used, such as Indian cotton and silks, and the colours that were popular were pastels. The gowns were less formal during the late 18th century. Sleeves more more fitted, and bum pads were used more than panniers, shifting the weight more to the back than to the side. Decorations became more light and frothy versus the heavy beading and embroidery that was popular in the first half of the century. Another change that came near the end of the century was different textiles from other countries (such as silk from China and cotton from India and the colonies), as well as changes in how the fabric was made. Marie Antoinette had a huge hand in changing the styles from very formal to more relaxed. Since the European countries often looked to France for style advice, any changes in French gowns moved throughout Europe. Marie Antoinette was said to have hated the stiff styles of the court at the time. The most well known change in fashion that came directly from Marie Antoinette is the Chemise a la Reine. It was a big deal when she started wearing this at the time since it mirrored undergarments, since it was normally made out of a light linen or muslin, and it was quite unstructured compared to earlier styles. The Chemise a la Reine is related to the styles of the early 19th century (think Jane Austen), and it is said that her clothes were the inspiration to the new, simple style that came in after the French Revolution. This is actually very ironic because the whole reason that the fashion changed so drastically, so quickly, is because everyone was trying to follow the extreme ideas that the French Revolution was based on. The ideas were fully against the luxurious and wasteful way that the monarchy was living, however the clean style was created by the woman who was hated for her lavish spending. The style of the late 1700s was quite a bit different from the early 1700s, and much of that adjustment was because of the Queen of France. Hemlines raised to about the ankles, and the gowns were more classic and uncluttered. The Round Gown became popular, as well as the Robe a l’Anglaise, which was worn either the English way (with the skirt down), or retrousse (with the over skirt drawn up to create a more fluffy look). The colours that were used were lighter, closer to our vision of Rococo today, with the pastels and elaborate hair styles. Although Marie Antoinette made the gowns themselves simpler, she also created the crazy 18th century hair, which huge hats, ships, and birdcages, as well as anything else you feel like putting in your hair. 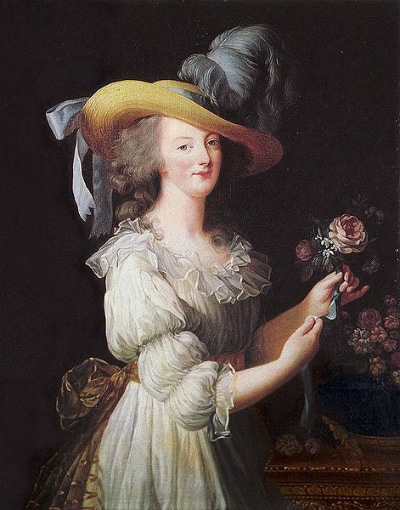 A Chemise a la Reine, modeled by Marie Antoinette herself 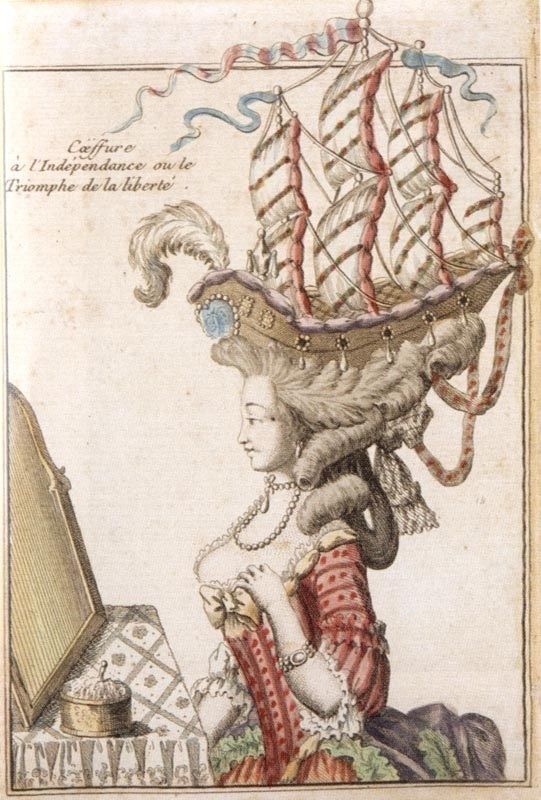 Marie Antoinettes famous ship hairstyle ~K
After a long slog, I have finally completed the the base of the project. This was the toughest part of the project, since it included many difficult pieces. The hardest part of the whole costume so far has been the stays. I am already pretty far in the process of creating the actual gown, and it has been much easier and quicker to put together than the parts that I have finished, mainly because I don't have to do any boning or boning channels. The cording on the stays was very difficult, since I have never done that much cording on something before, but I am pretty pleased with the final result. 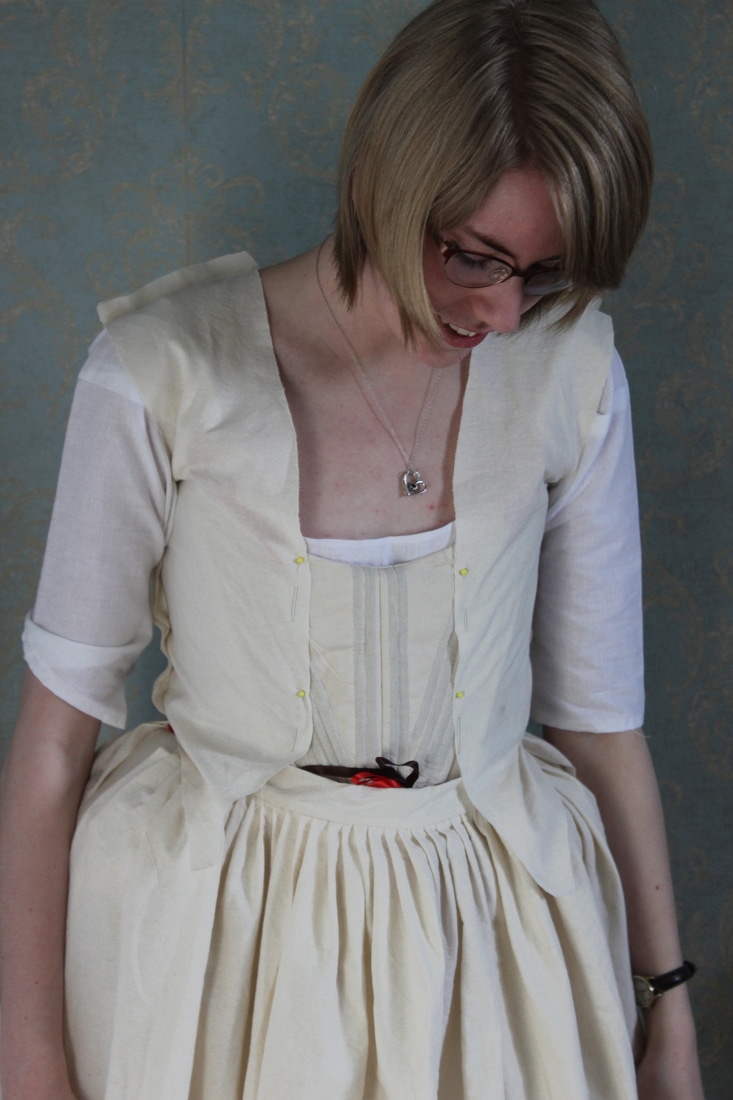 My apologies for the crooked pinning, and the visible ribbons. I wasn't planning on taking pictures at that time. 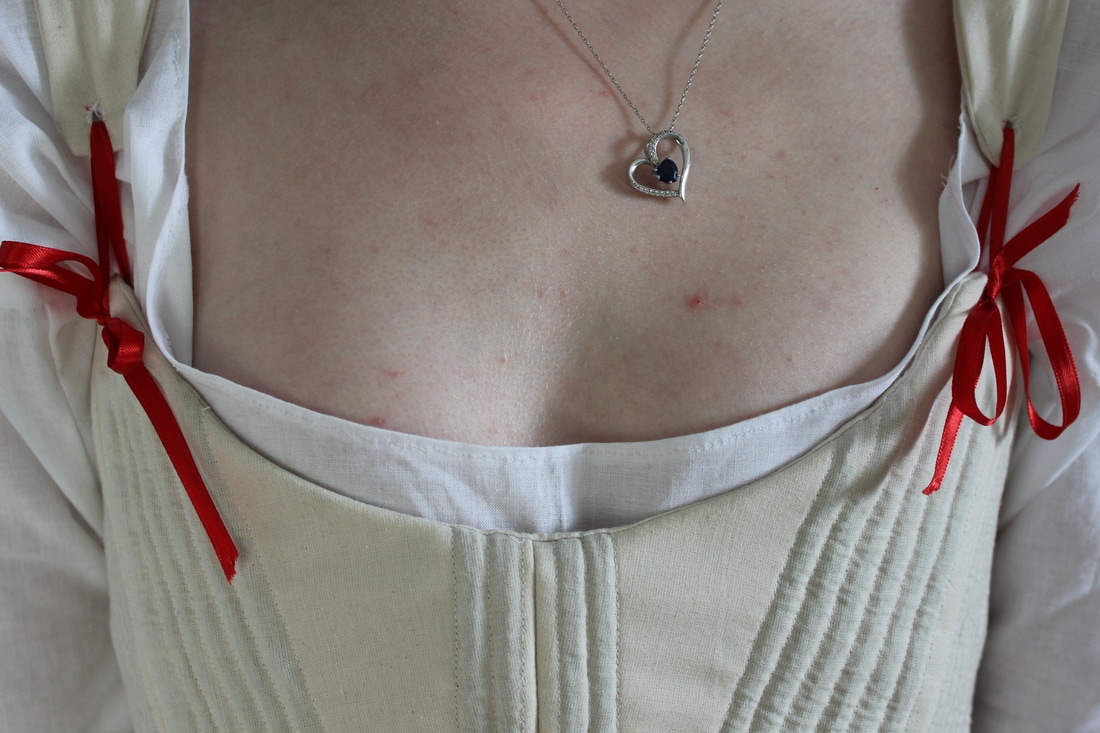 Here you can see the neckline of the chemise and how the straps are tied to the stays with ribbon. I didn't finish the chemise until after the stays, since I wanted to use them as a way to measure where to cut the neckline of the chemise. I wanted to make sure that the chemise was low enough that it wouldn't be visible from underneath the dress, but I also didn't want it to be too low and wide that it would slip off my shoulders. The neckline is a bit wider than I would have liked, but it works perfectly with the stays. 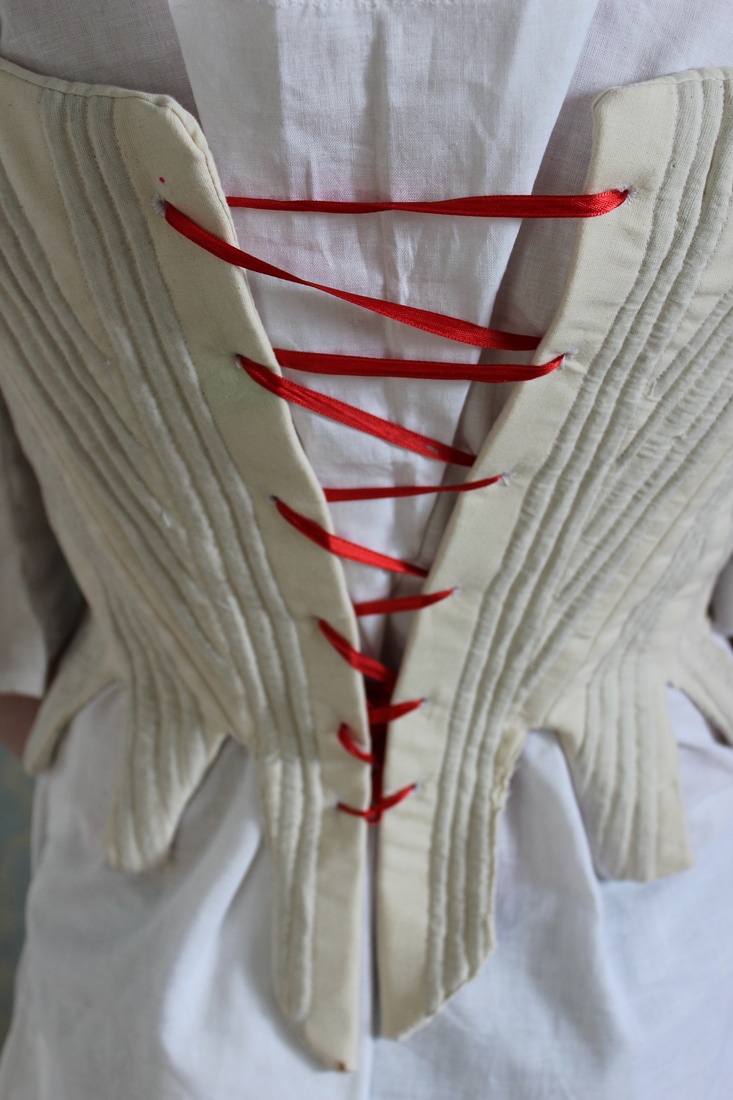 As I have mentioned before, I did not make the stays exactly as they would have been made in the 18th century. I made some adjustments to make it a bit easier for myself, since I have never made anything like this before. First of all, I used cording instead of boning. This made the garment less stiff, so it is much easier for me to get used to it. Wearing fully boned stays take a long time to get accustomed to, and I wanted to not only make it a bit easier for me to sew, but also easier for me to actually wear. 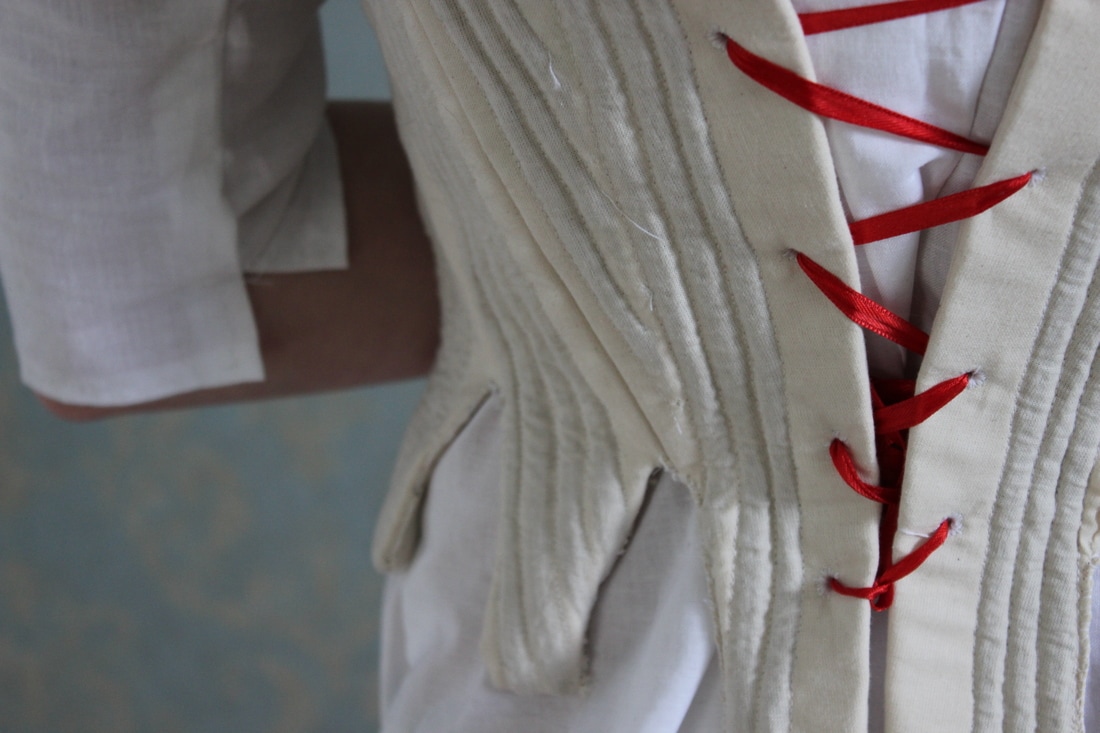 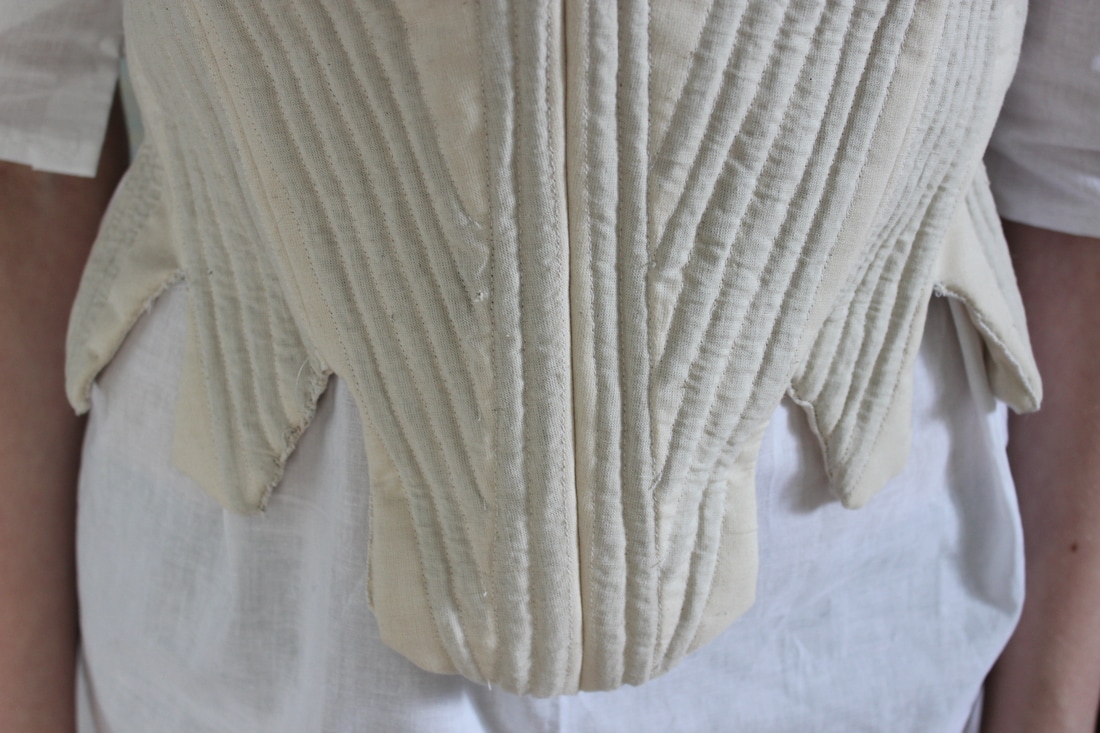 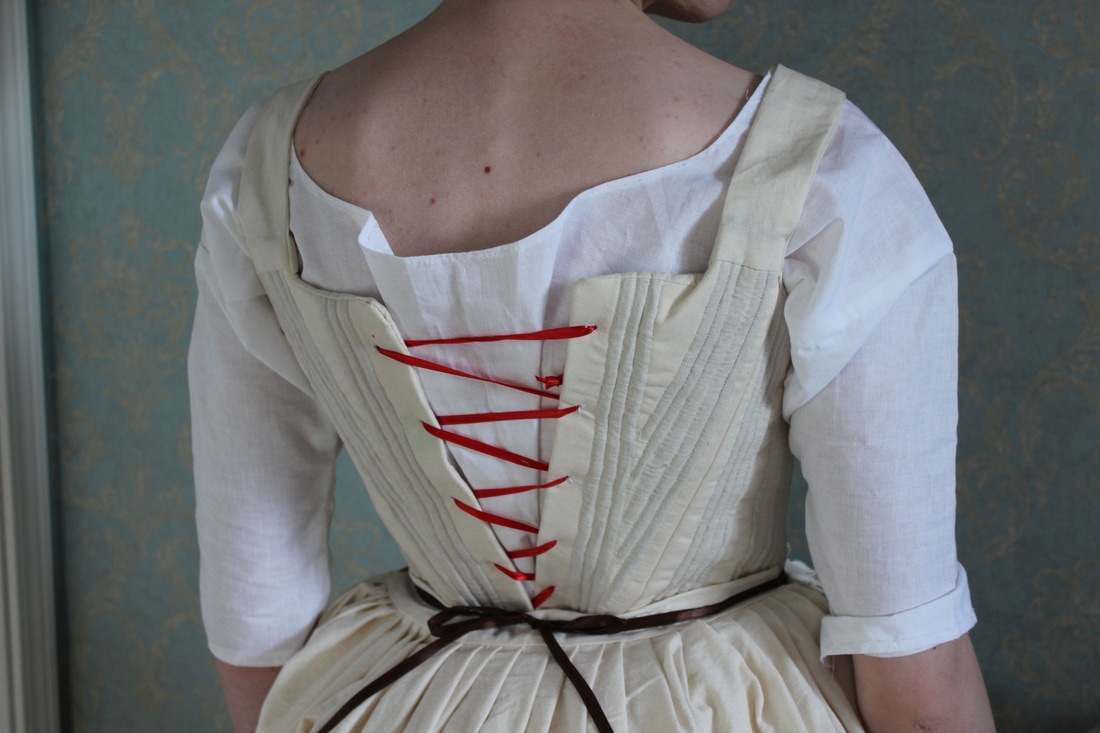 The petticoat is 8 pieces, overall. The front and back are just pleated on to the waistband. The top petticoat will be made the same way, just in a blue cotton. The skirt is made so that there are two slits in the side so that if I make pockets for myself, I can reach them. The gown and top petticoat will also have these slits, to make sure that I could easily reach anything in my pockets. I will not be making pockets for this project, but I may later on, and I would like to keep that option open. 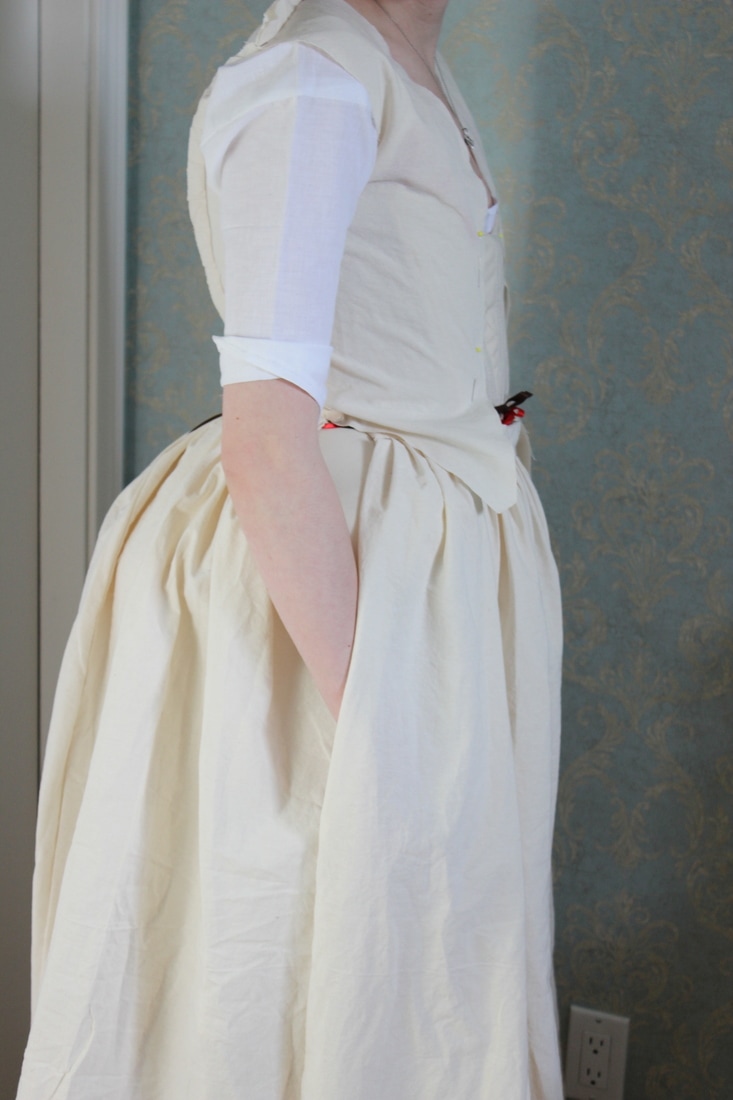 Next post I will show the details of the mock-up, and the finished bodice.
~K I have finished the under garments of my project, and am well on my way to being finished the bodice of the dress. Before I show you the final products that will be worn underneath the gown, here's the petticoat in progress.  The pattern pieces for the skirt and bodice.  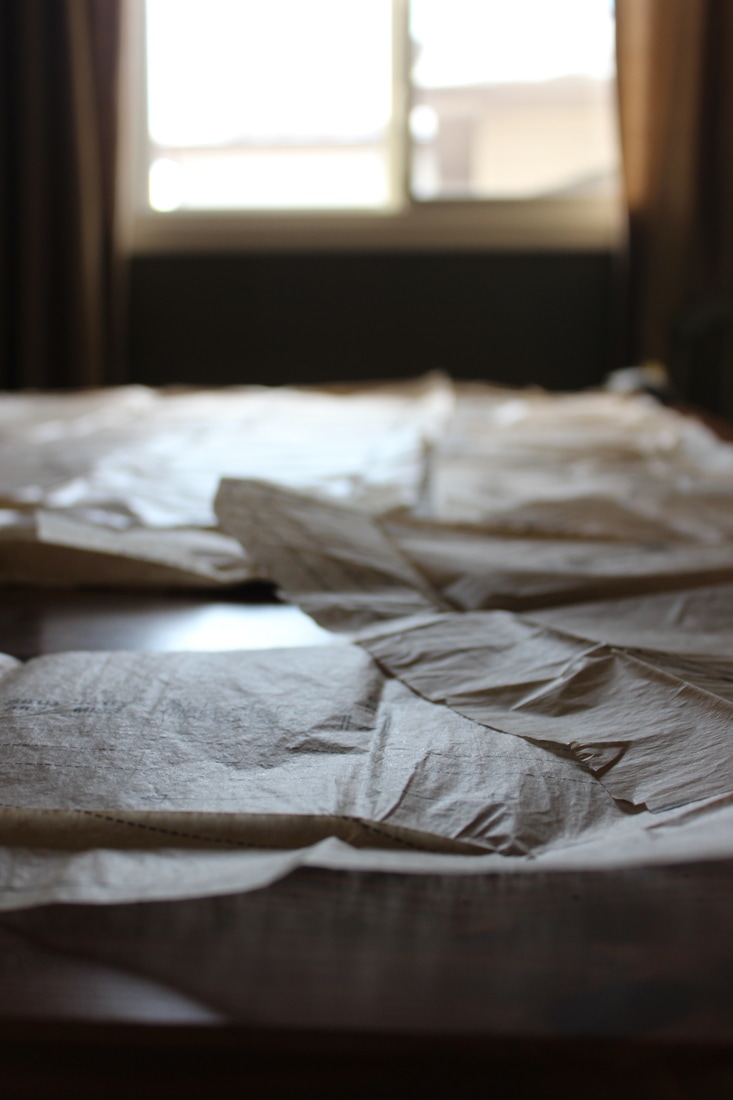 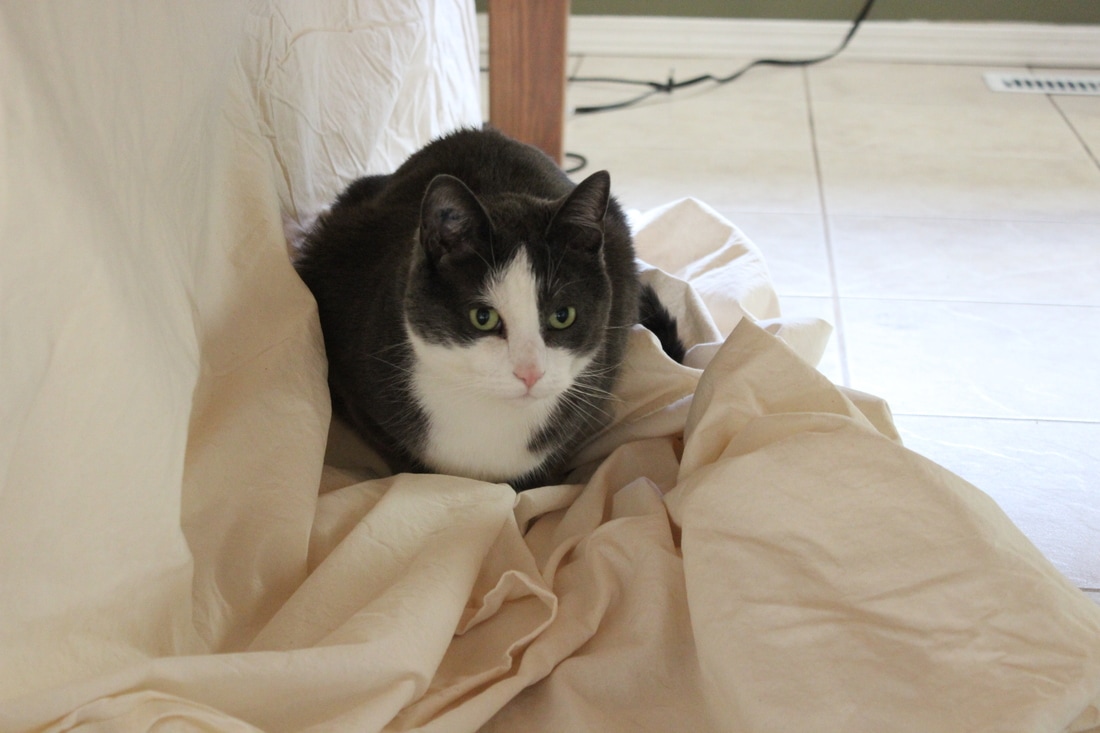 And my very helpful sewing room kitten And here is a sneak peak of all the undergarments on. This was taken before the skirt was hemmed. I am also wearing the mock-up of the bodice in this photo.  In this photo, I am wearing the completed shift, stays, and bumpad. On top I am wearing the un-hemmed petticoat and the mock-up of the bodice, without sleeves. As I mentioned in my last post, not all fabrics are suited for historical gowns. For example, polyester was not around in the 18th century, so if you are trying to be as historically correct as possible, a lot of thought has to be put into the fabric used. I am going to be using cotton for my entire project. This isn't the most historically accurate thing to use for the gown, however the cotton is kinder on my budget than wool or linen would be. The reason that cotton isn't always the most historically accurate is because of the fact that it was actually illegal through much of the 18th century in Prussia, France, and England. This seems like a weird thing to be illegal, but the governments did have a reason. Before cotton got so popular, it was very expensive and not super common, but in the 1600s, it's popularity started to grow. Linen was originally the fabric used for undergarments, etc, because it breathed easily, was tough enough to be washed often, and could be bleached to be quite white, which was a symbol of wealth. However, linen could get clammy during winter as it holds moisture very well, plus it could not hold colours very easily. To dye it something other than white took a long time, which meant that it was pretty expensive to do. This is where cotton came in- cotton holds colour much more easily, and the colour stays through washing better. Chintz became very popular. Chintz was from India, and it was a flower pattern in blues, reds, yellows, and sometimes green. England, Prussia, and France did not like the popularity of cotton, because the money from the cotton did not go to them, but to India and America. At first, the governments just added taxes to the fabrics, but by 1701, the parliament of England banned the import of imported calicoes and Chintzes. In 1721 in England, they made it illegal to wear printed cottons from India, America, and basically any place that was not Britain. People took this law very seriously, and there are accounts of people wearing cotton being molested on the street and having the clothing torn off of their body's, or in an extreme case, having acid thrown on their clothing. 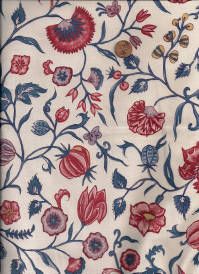 An example of Chintz from the 1700s In America, it was a different story. Cotton was very popular for it's ability to breath well, how easily it is dyed and also the fact that it grew so well there. Near the end of the 18th century, England finally decided to get rid of the law making it illegal to buy and wear cotton. By the early 19th century, cotton was widely popular everywhere. Muslin is very commonly seen in gowns from the early 1800s. Because of its hardy nature and easily dyeable fibers, cotton was a popular choice, and still is. I recently picked up my fabric from Ikea, of all places. Out of all of the fabric stores that I had access to, Ikea had the nicest prints that looked like they could have been block printed. In the 18th century, the colours that were normally used on Chintzes were red, blue, and yellow. The yellow was not often seen, but it would be added to the blue to create a green colour. This green would not be the same as the greens that we see today, since artificial dyes did not come into the fashion industry until the mid 1800s. Chintzes were expensive to make, since it was a lengthy process, involving many steps to create the final look. If you are interested in the process of woodblock printing and learning more about Chintz, the Met has some great videos and essays about it here and here. The second link is a great video that describes the dyeing process through the 17th and 18th centuries. 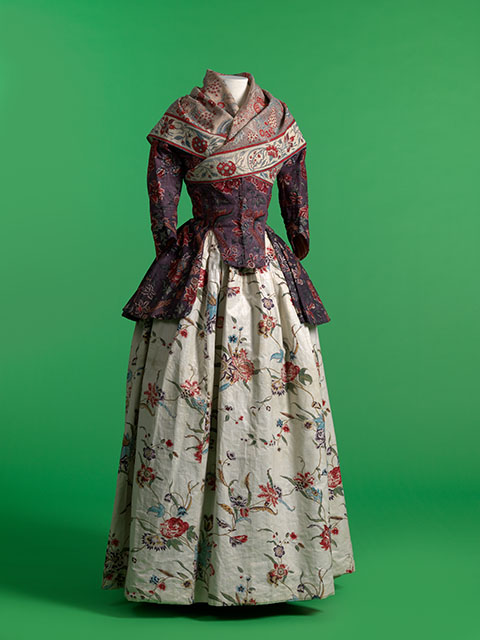 A jacket and petticoat made from chintz, 1770s Next week I will talk about events that occurred in the mid 18th century, and talk about creating the correct silhouette for the time period through proper undergarments.
~K |
EtsyArchives
April 2020
Categories
All
|
 RSS Feed
